
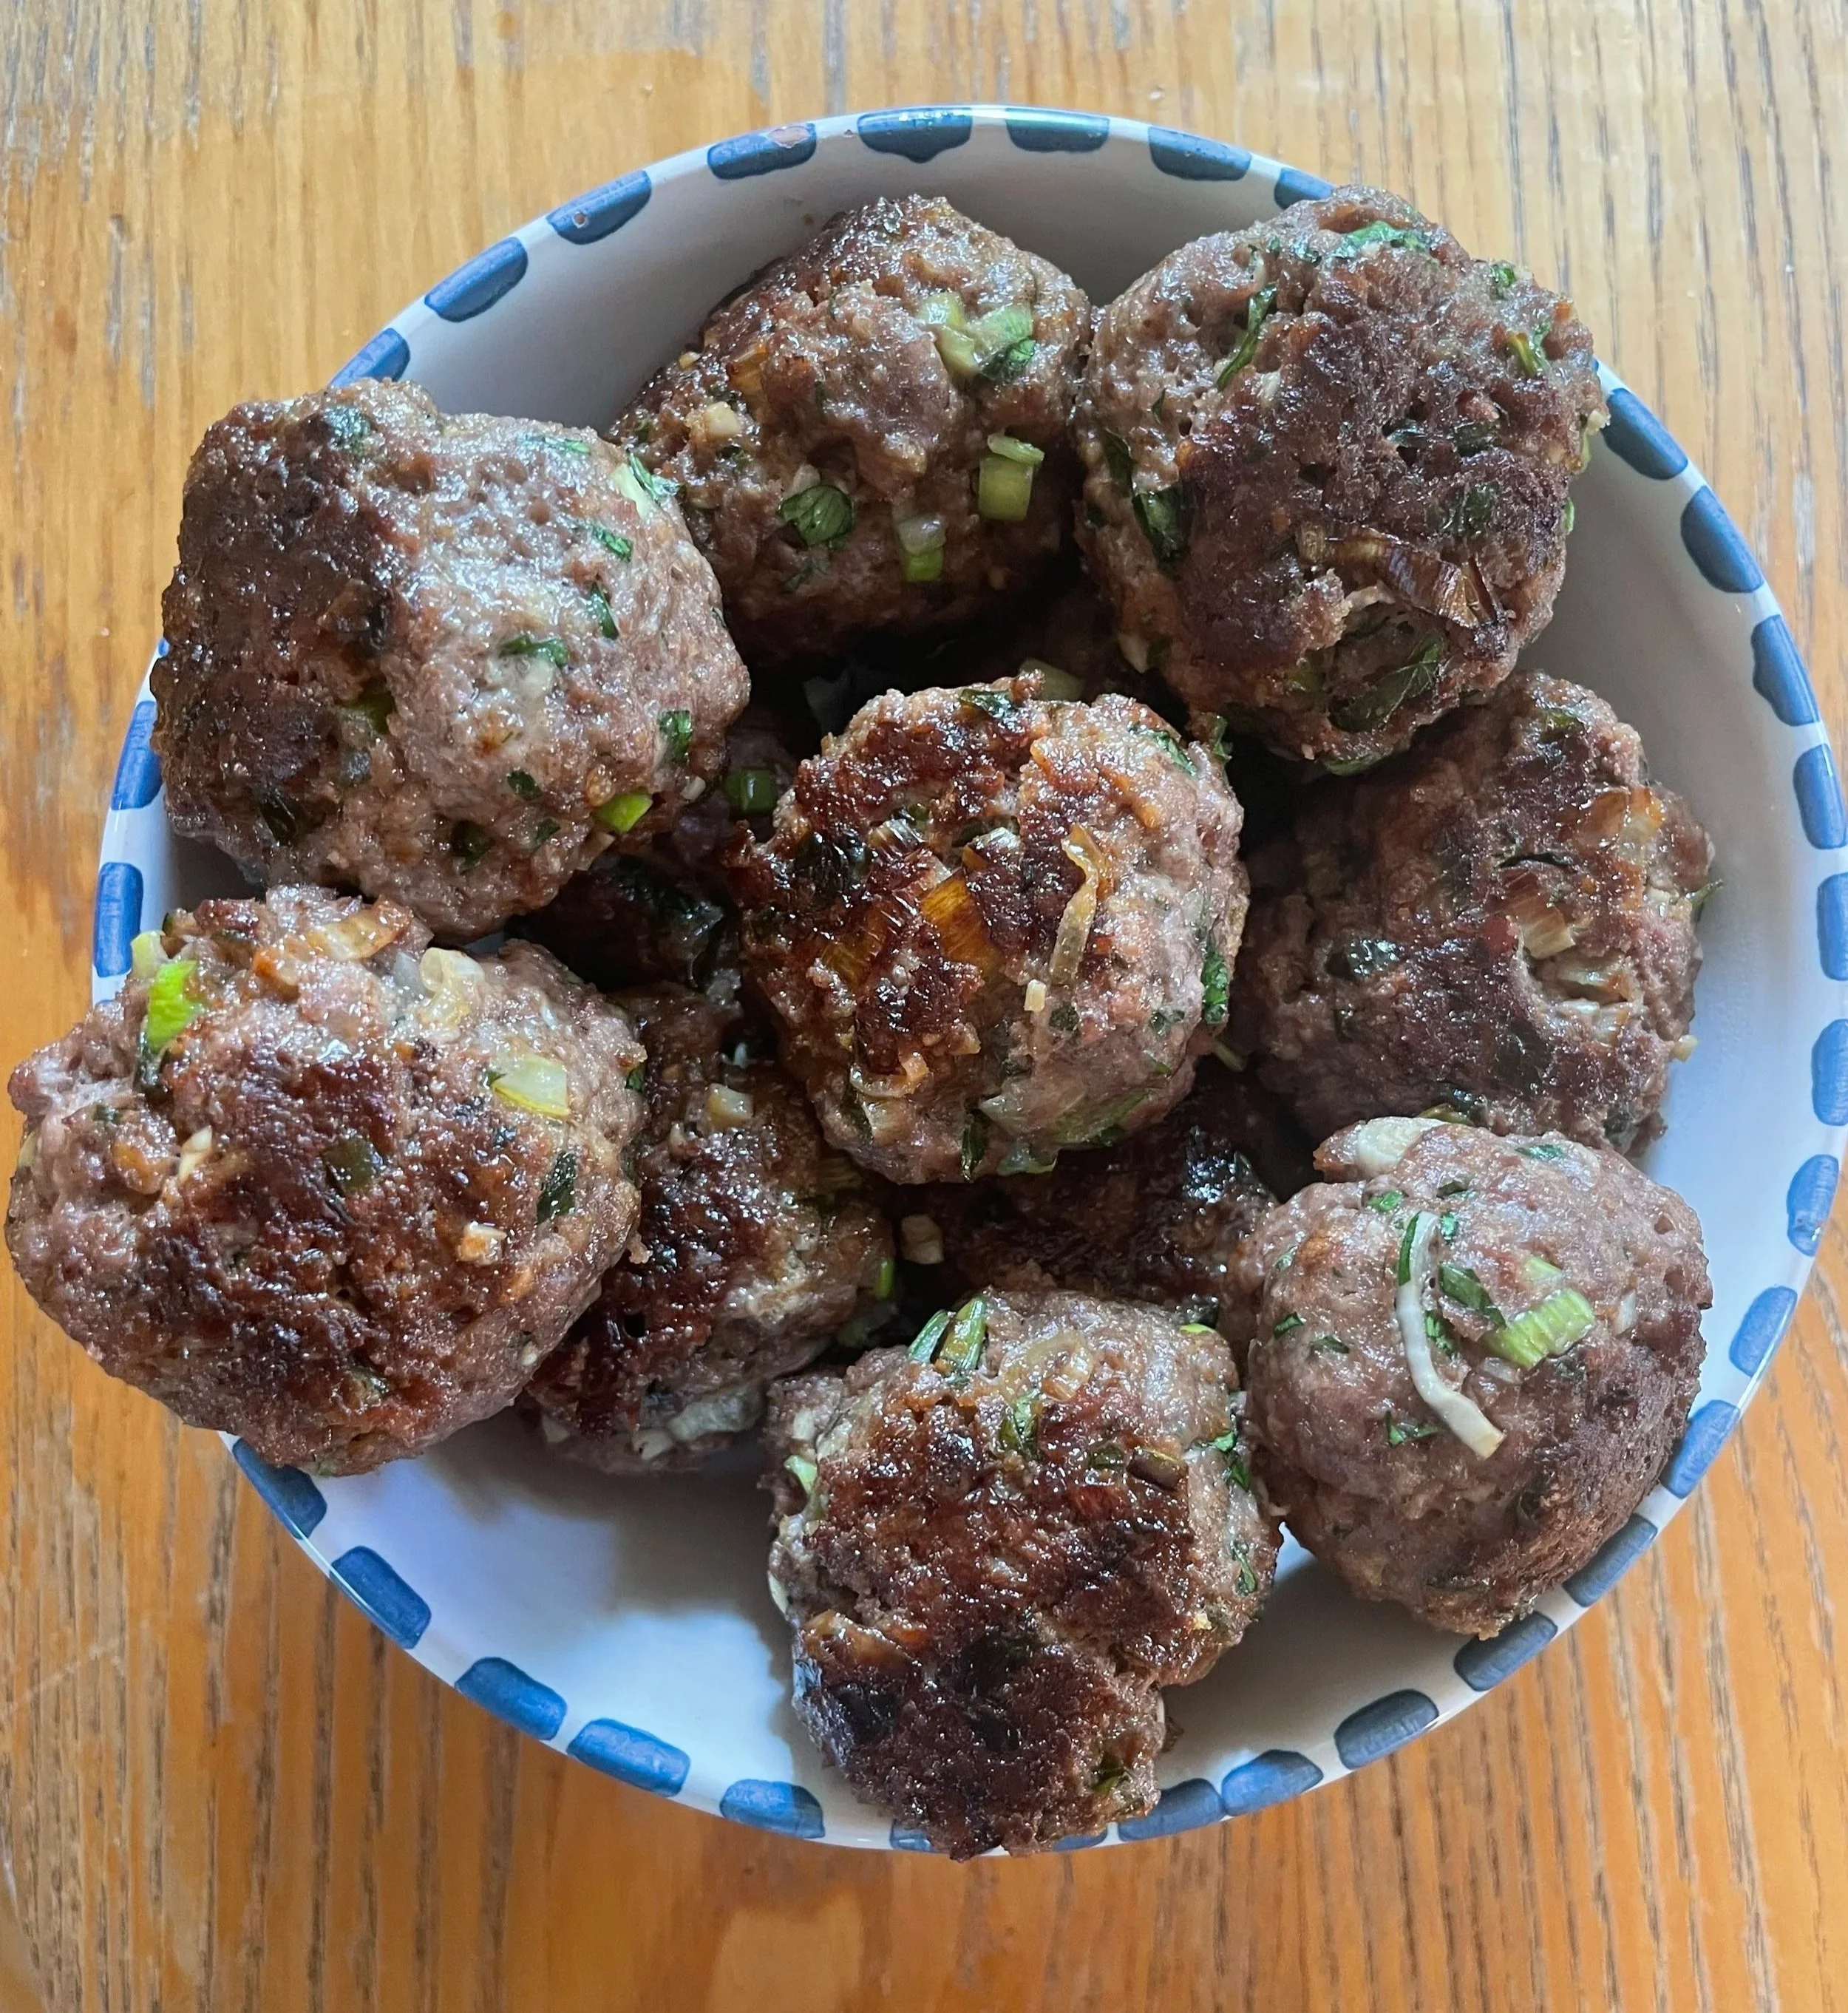
A sneaky way to gain all the nutritional benefits of liver.
Read moreBeef Stew with Cheddar Green Onion Dumplings

Ingredients
For Stew
2 lbs stewing beef
Salt
Pepper
3 tablespoons cooking oil
1 onion, diced
2 stalks celery, diced
3 cloves garlic, minced
1 teaspoon dried thyme
1 cup red wine (or an additional cup of broth)
4 cups beef broth
3 large carrots, diced
2 potatoes, cubed
2 tablespoons tomato paste
2 teaspoons Worcestershire sauce
1 bay leaf
2 tablespoons flour
For Dumplings
1 ¾ cups flour
1 tablespoon baking powder
½ teaspoon salt
2 green onions, diced
1 cup shredded cheddar cheese
¾ cup milk
Instructions
Season the cubes of stewing beef with salt and pepper. Heat 2 tablespoons of the oil in a large, heavy pot over medium-high heat. Brown the beef in batches until all sides are nicely seared. Remove the browned beef from the pot and set aside for later use.
In the same pot, add the remaining oil. Next add onion and celery, and cook for 5 minutes or so, until soft. Add garlic and thyme and cook for 1 additional minute. Finally, add tomato paste and cook for another minute, stirring frequently.
Pour red wine into the pot and scrape up any browned bits on the bottom. Return the beef to the pot followed by the beef broth, Worcestershire sauce, bay leaf, carrots, and potatoes.
Transfer entire contents of the pot to a slow cooker, and cook on low for 7 – 8 hours or high for 4 – 5 hours.
After the slow cooking time has completed, return the stew back to the original pot and place over medium heat. Whisk together the flour with some water until a thickened liquid has formed, then stir that into the contents of the pot.
Now, prepare to add the dumplings!
To make the dumpling batter, whisk together flour, baking powder, salt, and herbs in a bowl. Stir in milk and melted butter, followed by shredded cheese and diced green onion. Mix until just combined.
Drop spoonfuls of dumpling batter over the simmering stew. Cover and cook without lifting the lid for 15-20 minutes, until dumplings are puffed up and cooked through. If you’d like to add more colour, and if your pot is oven-safe, place under the broiler for 2 – 3 minutes.
Remove bay leaf and serve the stew in bowls topped with a dumpling.
Recipe modified from eatwithtenderness.com by Alex Chesney, RD
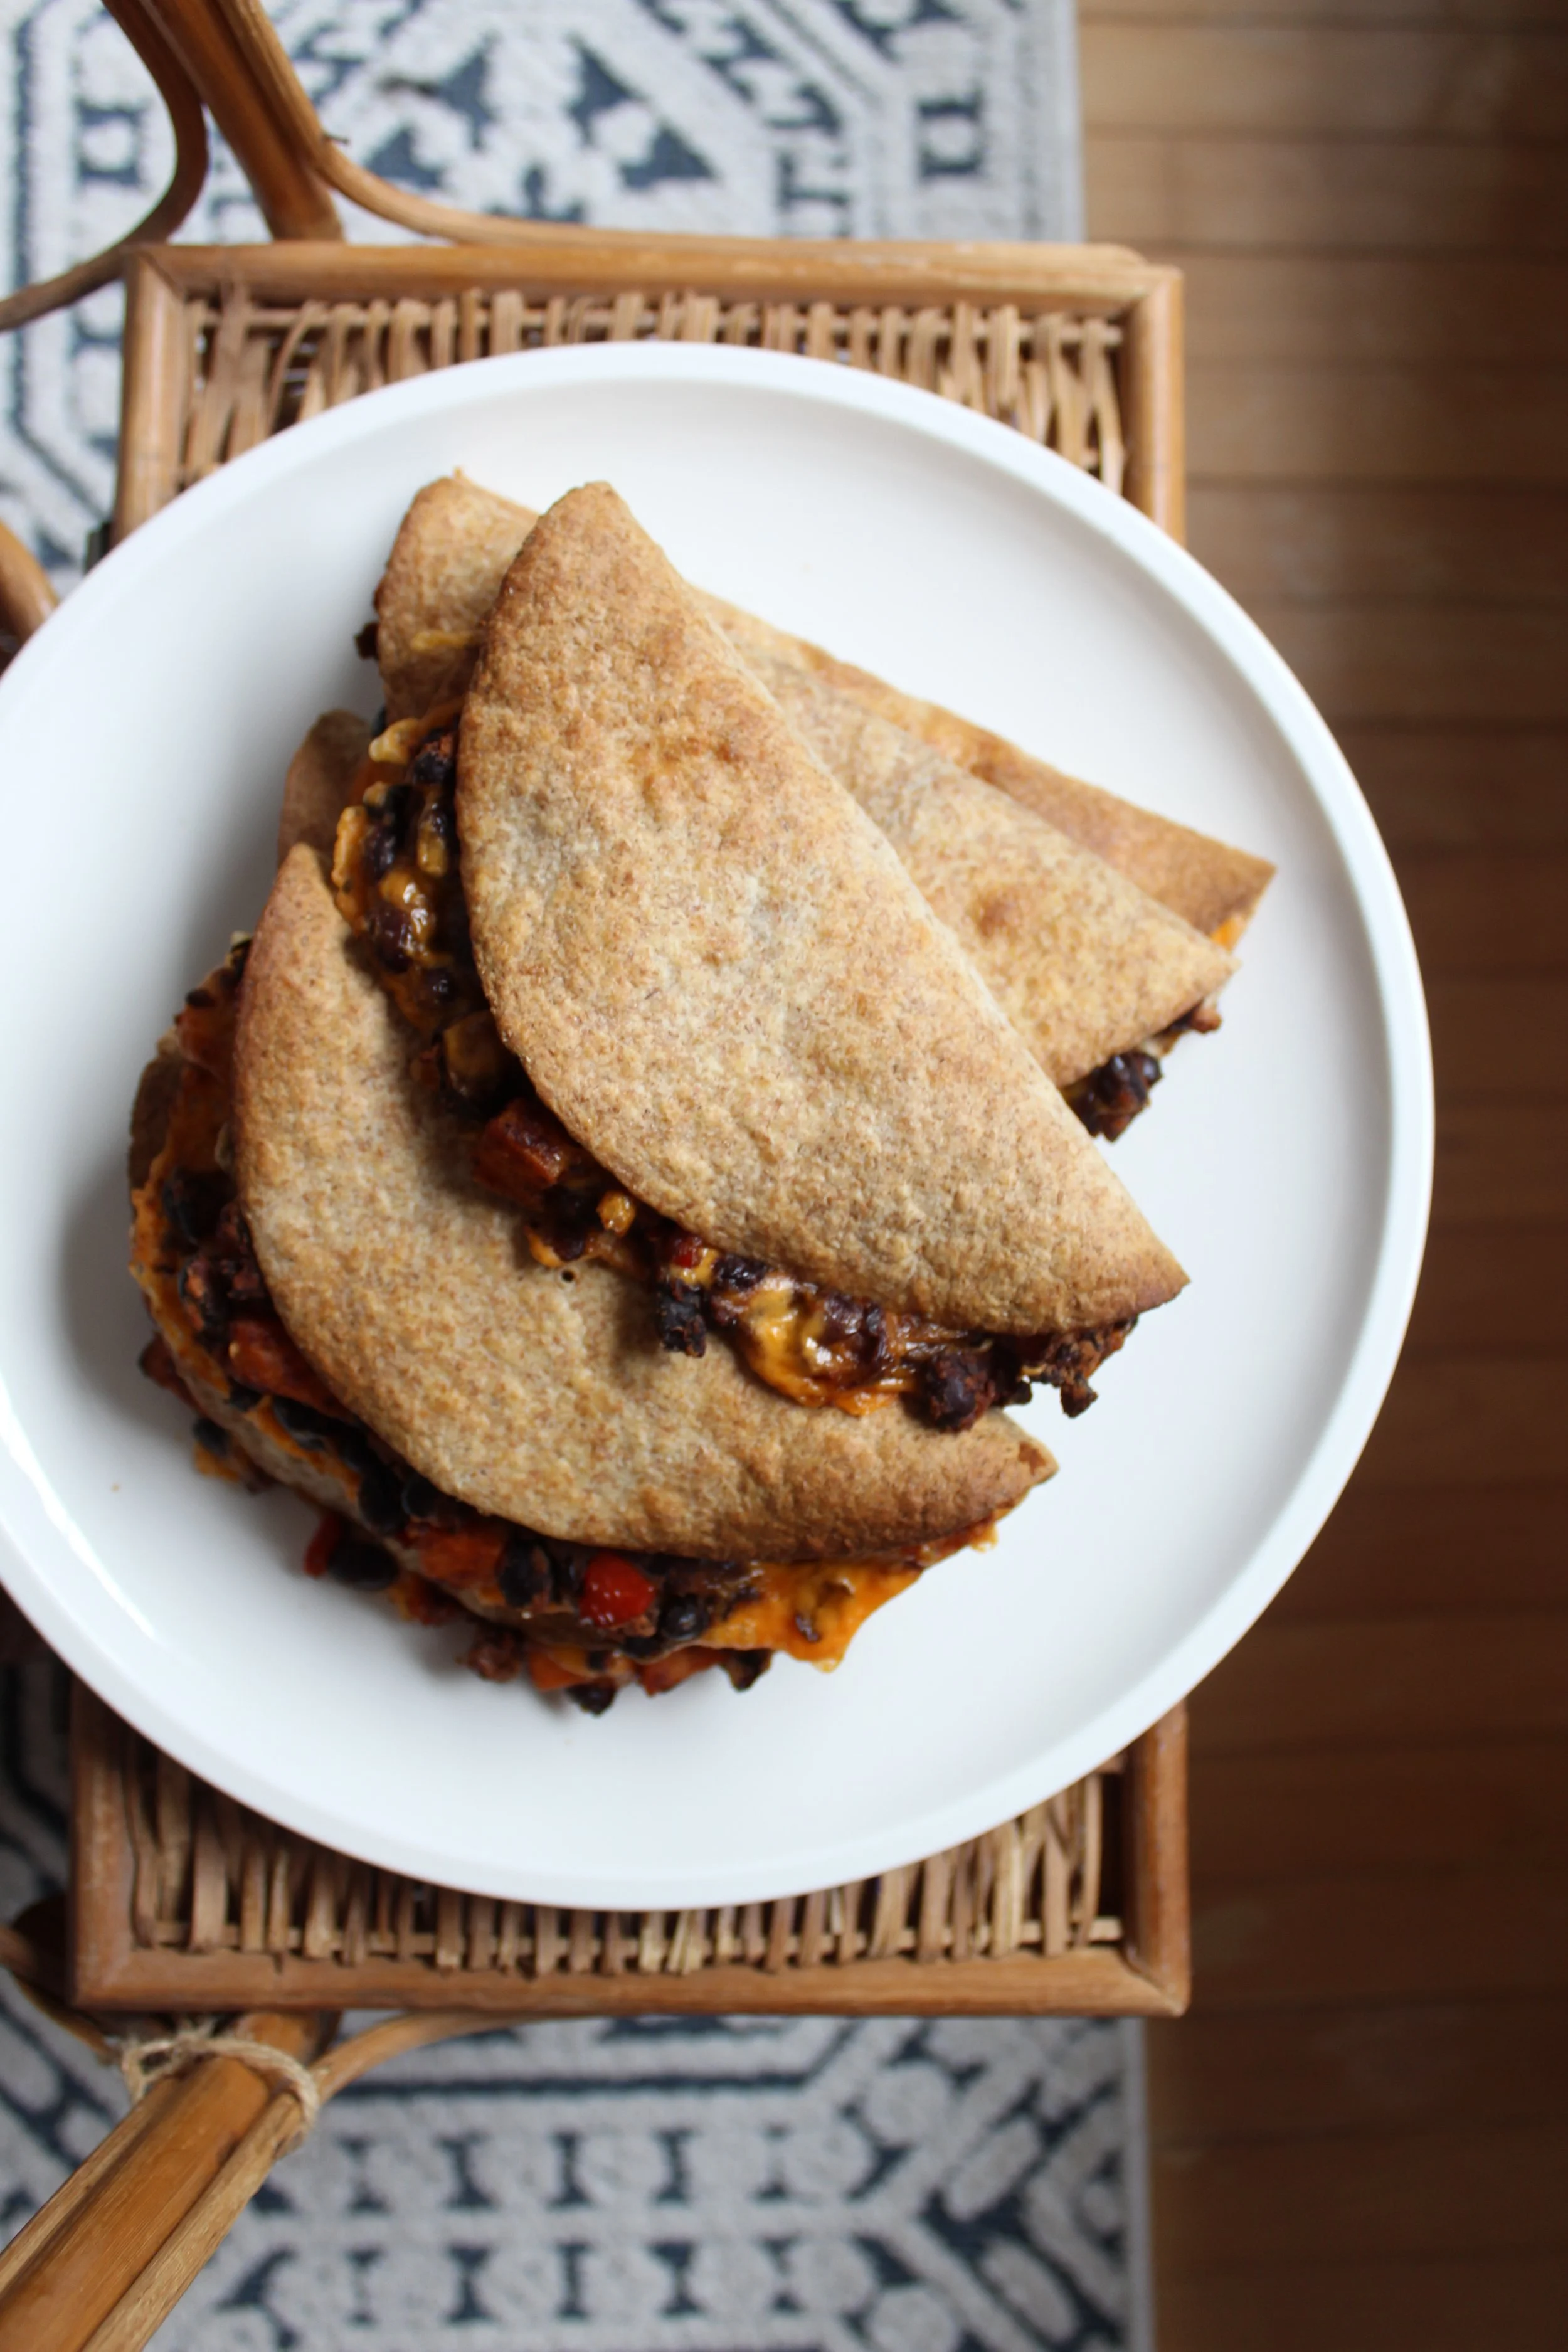
Black Bean and Sweet Potato Quesadillas
Ingredients
½ large sweet potato, washed, peeled, and diced
½ bell pepper, diced
1 can black beans, drained and rinsed
1 ½ cups cheddar cheese, shredded
1 teaspoon chili powder
1 teaspoon paprika
1 teaspoon Tajin
1 teaspoon onion powder
½ teaspoon oregano
1 clove garlic, minced
6 x 7-inch tortillas
Cooking oil
Cooking spray
Instructions
Preheat oven to 375°F. Line a baking sheet with parchment paper and set with aside.
Heat ~1 tablespoon cooking oil in a large pan over medium heat.
Sauté sweet potato and bell pepper for 8 – 10 minutes until soft.
Add seasonings and garlic and continue to stir and cook for an additional 2 minutes or so.
While the seasoned vegetables cook, transfer the black beans to a medium-sized bowl and partially mash – some beans should remain whole while others are mushed up completely.
By now, the vegetables should be thoroughly coated in spices and softened. Add remaining ingredients to the bowl and mix until completely combined.
Lay tortillas out on prepared baking sheet. Sprinkle each one with some cheddar cheese.
Add ½ cup of filling to the top of each tortilla and then top with more cheddar cheese.
Fold in half, spray the top with cooking spray and transfer to the preheated oven.
Bake for 15 minutes, until tops of tortillas are golden brown and cheese in filling is nicely melted.
Recipe developed and photographed by Alex Chesney, RD
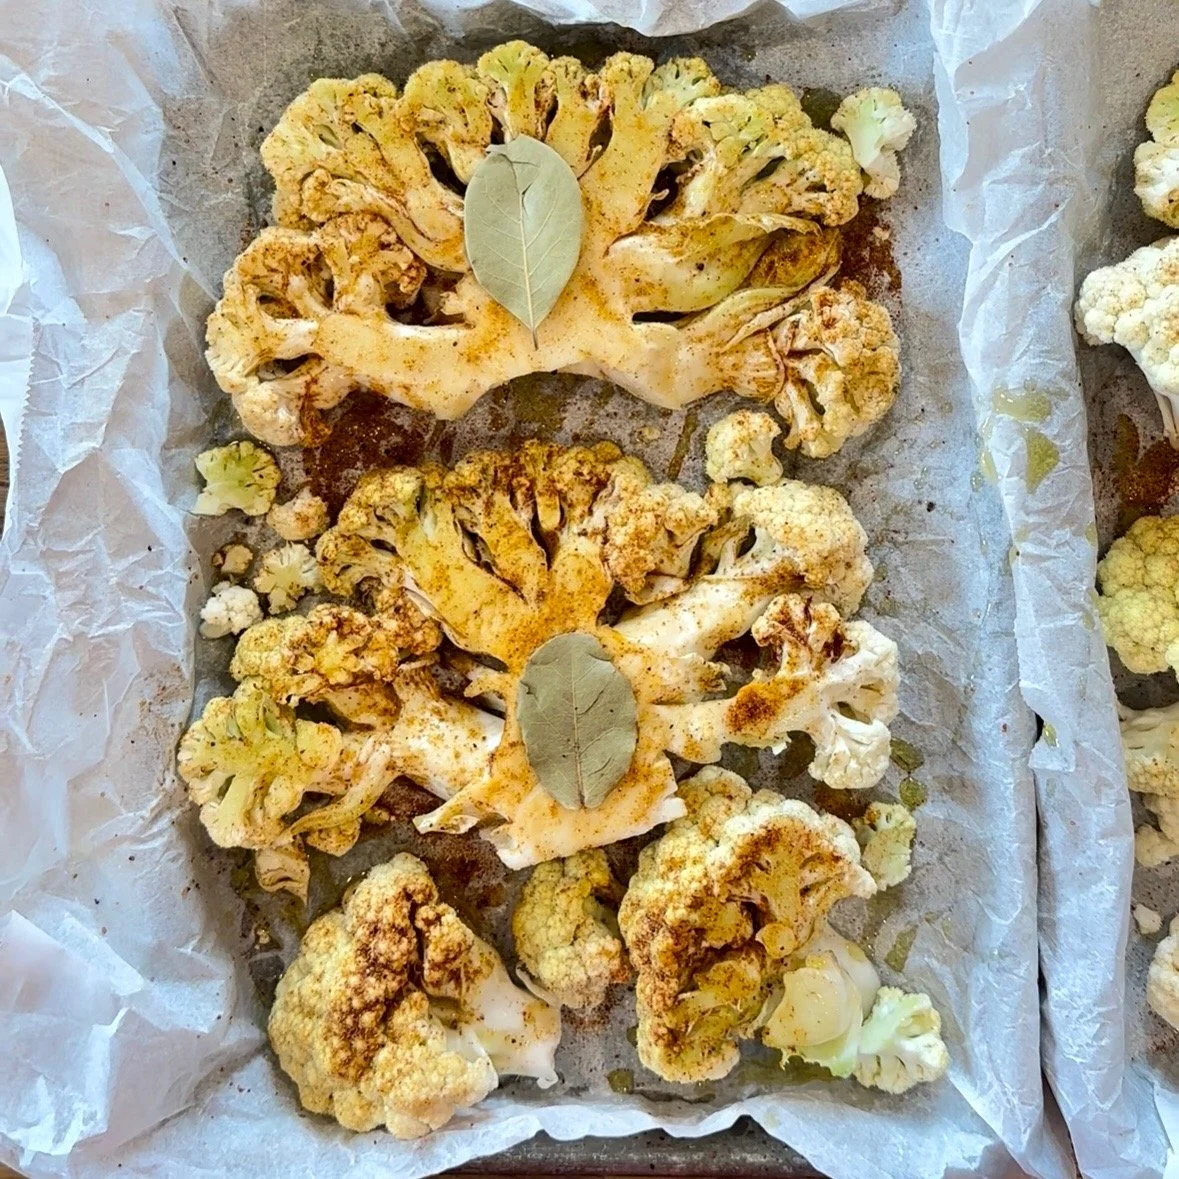
Roasted Cauliflower Steaks
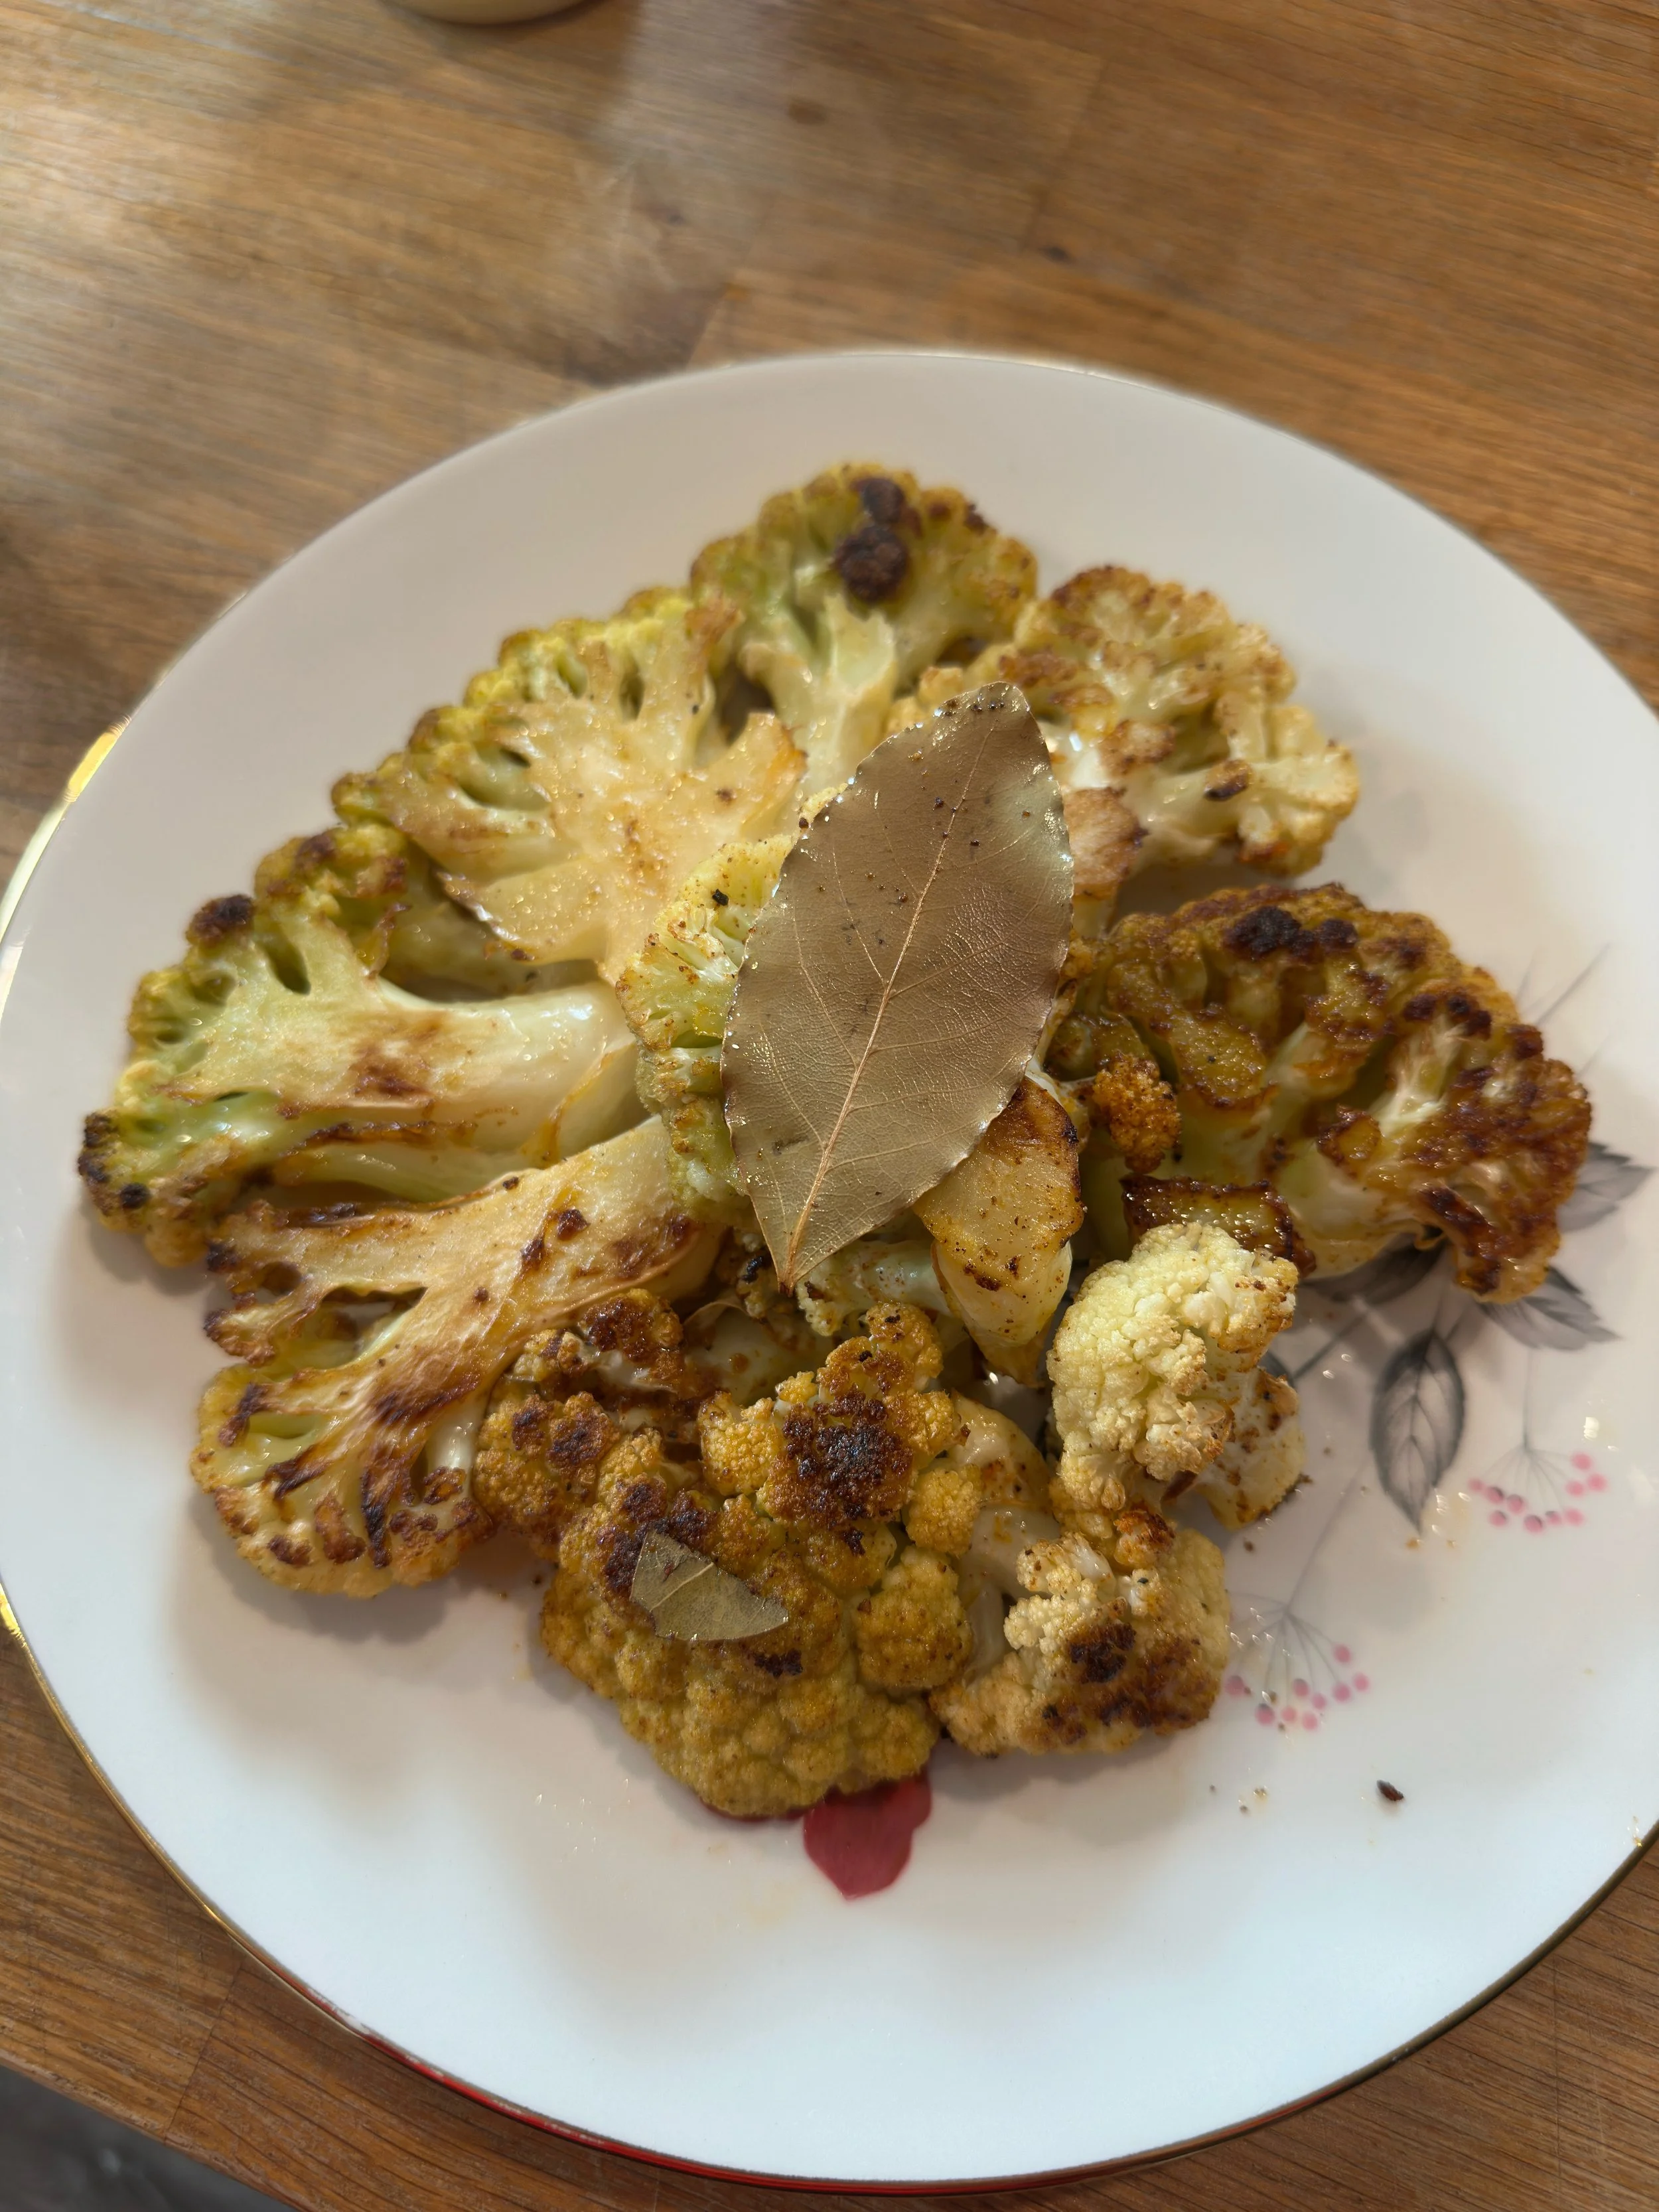
With only a few ingredients, these roasted cauliflower steaks are full of flavour and are easy to make!
Prep time: 10 minutes
Cook time: 25 minutes
Yield: Makes 2 steaks, plus other extra pieces that can be used for leftovers
Ingredients
1 head of Thames River Melons cauliflower
1 teaspoon paprika
1 teaspoon garlic powder
½ teaspoon salt
½ teaspoon pepper
1 tablespoon olive oil
8 bay leaves (optional)
Instructions
1. Preheat your oven to 425℉ and line a baking sheet with parchment paper.
2. Rinse the cauliflower under cold water and pat dry. Remove the outer leaves and carefully use a knife to trim the stem. Tip: cauliflower leaves are edible! Try using them in stir-fries, salads, or soups!
3. Slice the cauliflower into steaks about 1 inch thick. One head of cauliflower will make 2 steaks, but smaller pieces of cauliflower will fall off when you are cutting—this is normal! Keep all the pieces and place them on the prepared baking sheet.
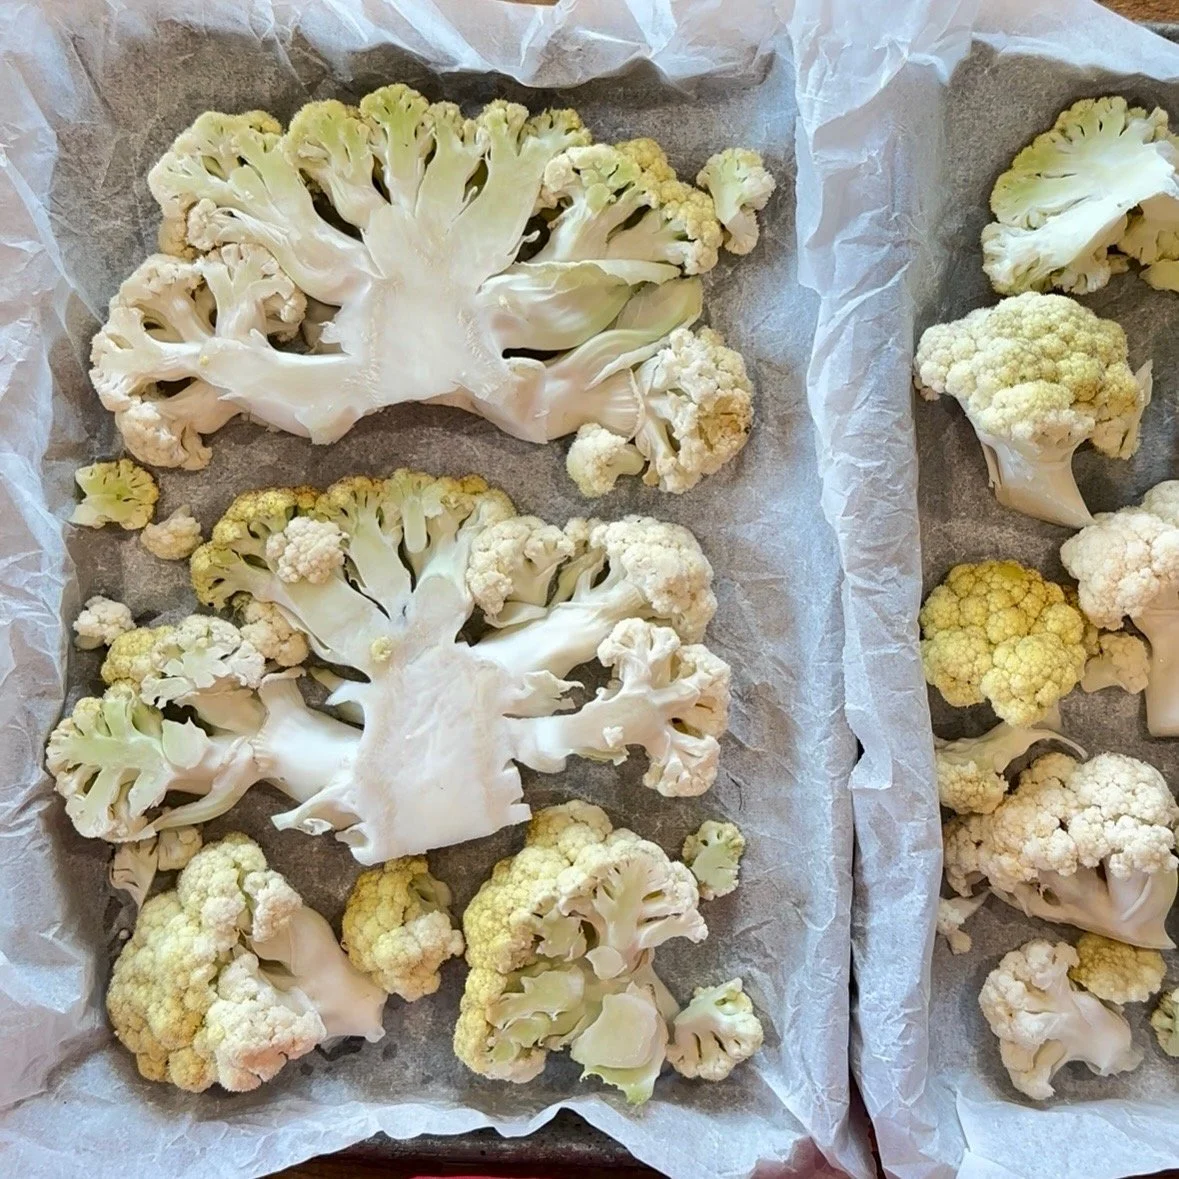
4. In a small bowl, mix together the paprika, garlic powder, salt, and pepper. Drizzle olive oil over the cauliflower steaks, then sprinkle the seasoning mixture on top. Use a brush to evenly coat both sides of each steak. Top with bay leaves.
5. Bake the cauliflower for 25 minutes or until golden brown and tender, flipping halfway through.
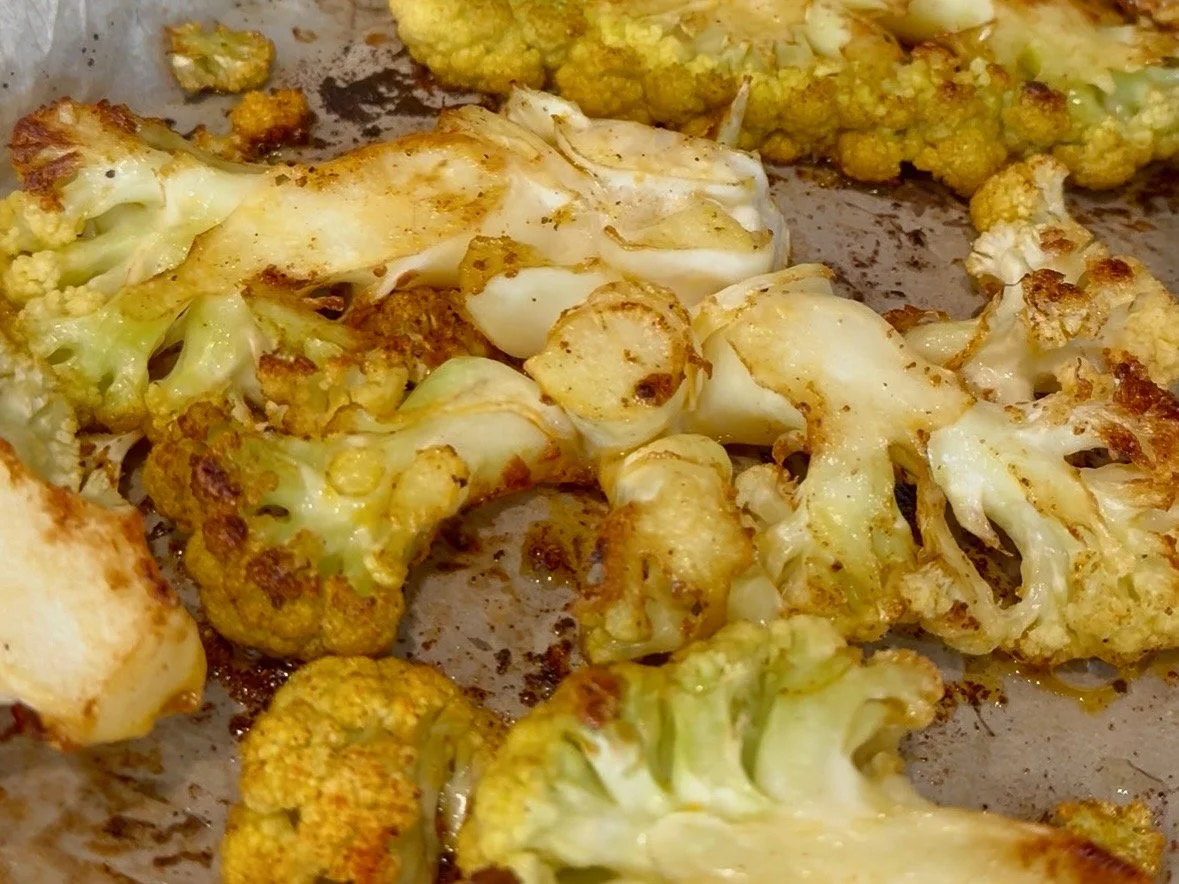
6. Let them cool for 5 minutes before serving.
Cost
PYO cauliflower is $2.00/head. Therefore, the cost of each cauliflower steak is $1.00.
Nutrient Profile
Each cauliflower steak provides 4 grams of fibre and contains important nutrients like vitamin C and vitamin K! Vitamin C supports your immune function and protects your cells, and vitamin K plays a role in blood clotting and blood health.
Storage
Store in an airtight container in the refrigerator for up to 4 days. For best results, reheat in the air fryer or oven–this will help the cauliflower stay crispy!
References:
Unlock Food [Internet]. Canada: Dietitians of Canada; [updated 2019 Mar 21; cited 2025 Aug 13]. What you need to know about vitamin C; [about 3 screens]. Available from: https://www.unlockfood.ca/en/Articles/Vitamins-and-Minerals/What-you-need-to-know-about-vitamin-C.aspx.
Unlock Food [Internet]. Canada: Dietitians of Canada; [updated 2019 Mar 21; cited 2025 Aug 13]. What you need to know about vitamin C; [about 3 screens]. Available from: https://www.unlockfood.ca/en/Articles/Vitamins-and-Minerals/What-You-Need-to-Know-About-Vitamin-K.aspx.
Fresh Corn Salsa
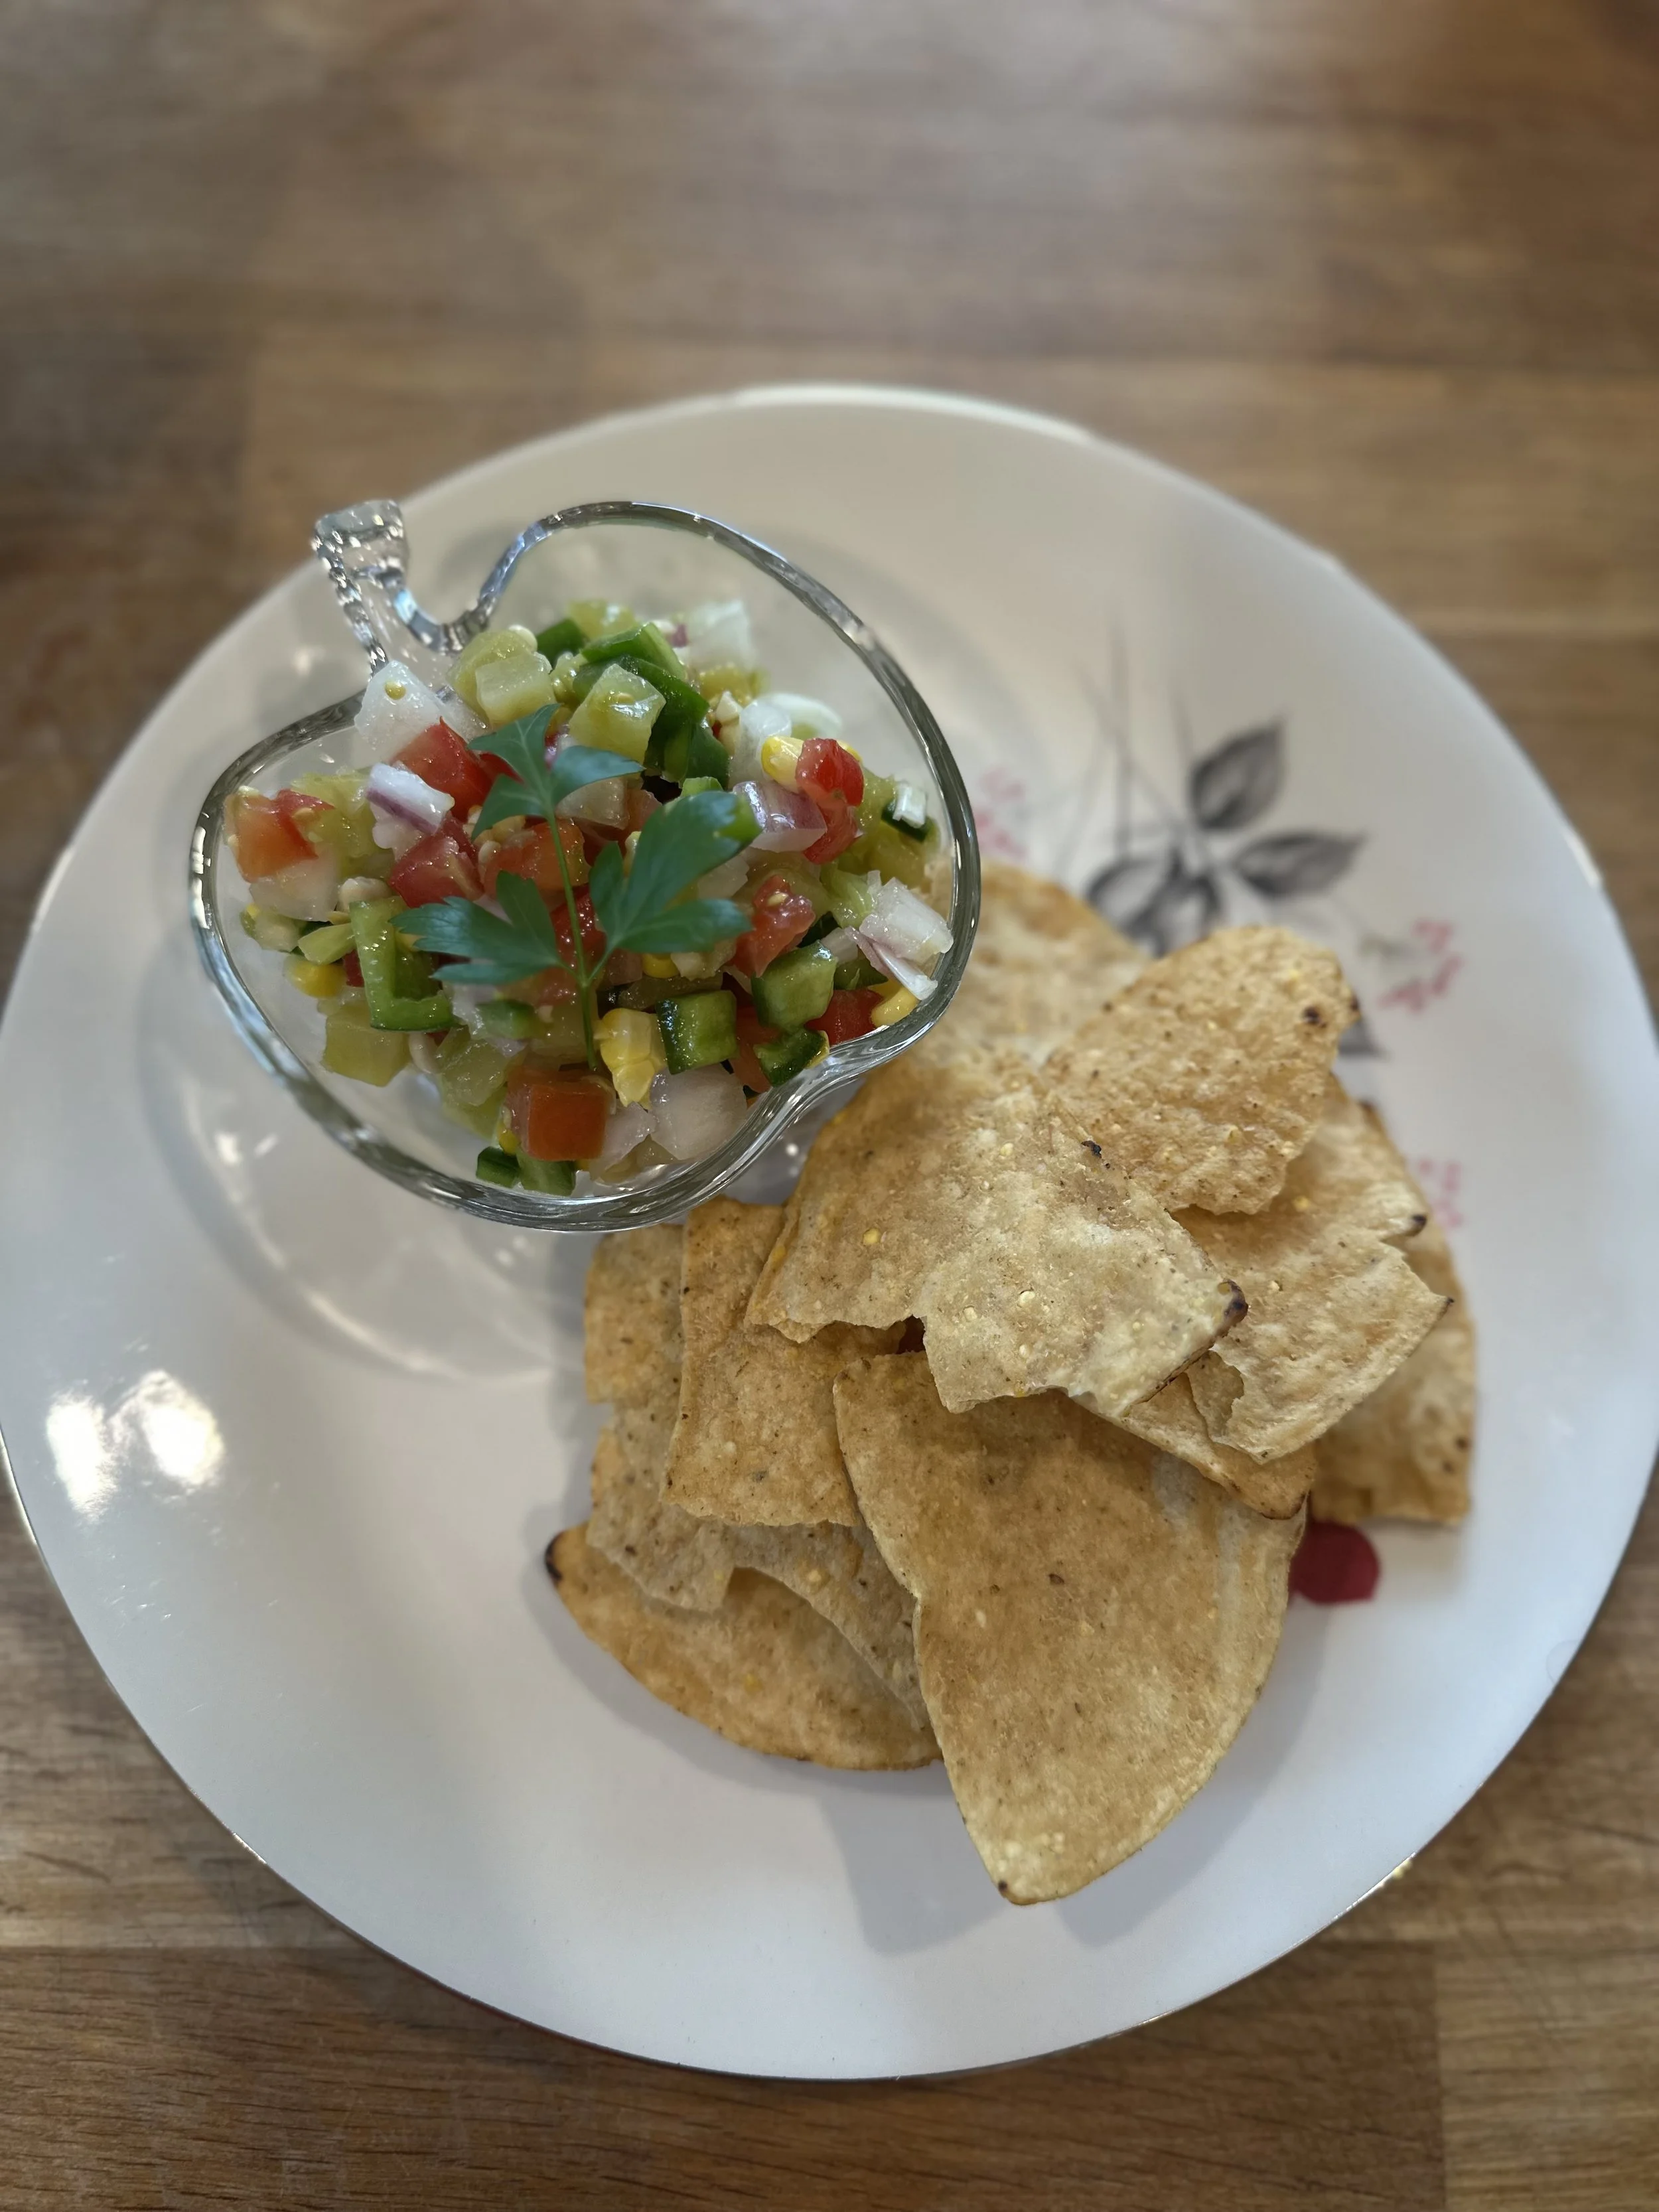
This recipe is perfect for a summer BBQ or as a great addition to include with your meals throughout the week.
Prep time: 20 minutes
Cook time: 11 minutes
Yield: Serves 8
Ingredients
3 cloves Thames River Melons garlic, minced
1 cob Thames River Melons sweet corn, kernels removed from cob
2 lbs Thames River Melons tomatoes; we used a combination of green tomatoes and grape tomatoes, diced
1 medium Thames River Melons red onion, diced
1.5 lbs Thames River Melons peppers; we used a combination of jalapeno peppers, green bell peppers, and sweet banana peppers, diced
¼ cup lime juice
1 teaspoon salt
Instructions
Thoroughly wash corn, tomatoes, onion, and peppers under cool water.
Bring a pot of water to a boil. Add in cob of corn, cover, and cook for 5 minutes. Drain and let it cool. Once cooled, cut the kernels off the corn.
Mince the garlic. Dice tomatoes, onions, and peppers.
In a large bowl, add all of the ingredients and stir well.
Cover the bowl and refrigerate for at least 30 minutes before serving.
When serving, stir the salsa to mix any ingredients that may have settled to the bottom during storage.
Note: We used green tomatoes, which means they aren’t ripe yet! So if you are using these, you will want to pan-fry them in a small amount of oil on medium heat for about 6 minutes, stirring frequently. This will soften them up to become a perfect addition to your salsa!
Cost
Corn is $1.00 a cob.
PYO costs include:
Garlic is $3.00/lb
Tomatoes are $0.25/lb
Grape tomatoes are $2.00/lb
Peppers are $2.00/lb
Onions are $1.00/lb.
In total, the cost of the corn and PYO produce is $0.85/serving.
Nutrient Profile
This fresh corn salsa contains 2 grams of fibre/serving! Did you know fibre plays a role in helping your digestion? The daily recommended intake of fibre is 38 grams for men ages 19-50, 30 grams for men over 50, 25 grams for women ages 19-50, and 21 grams for women over 50. Adding this salsa to your meals is an easy and tasty way to help you increase your fibre intake!
Storage
Store the salsa in the refrigerator in an airtight container for up to 4 days.
Reference:
Health Canada [Internet]. Ottawa: Government of Canada; c2025; [updated 2023 Dec 18; cited 2025 Aug 11]. Dietary reference intakes tables: Reference values for macronutrients; [about 7 screens]. Available from: https://www.canada.ca/en/health-canada/services/food-nutrition/healthy-eating/dietary-reference-intakes/tables/reference-values-macronutrients.html.
Blueberry Lemon Scones
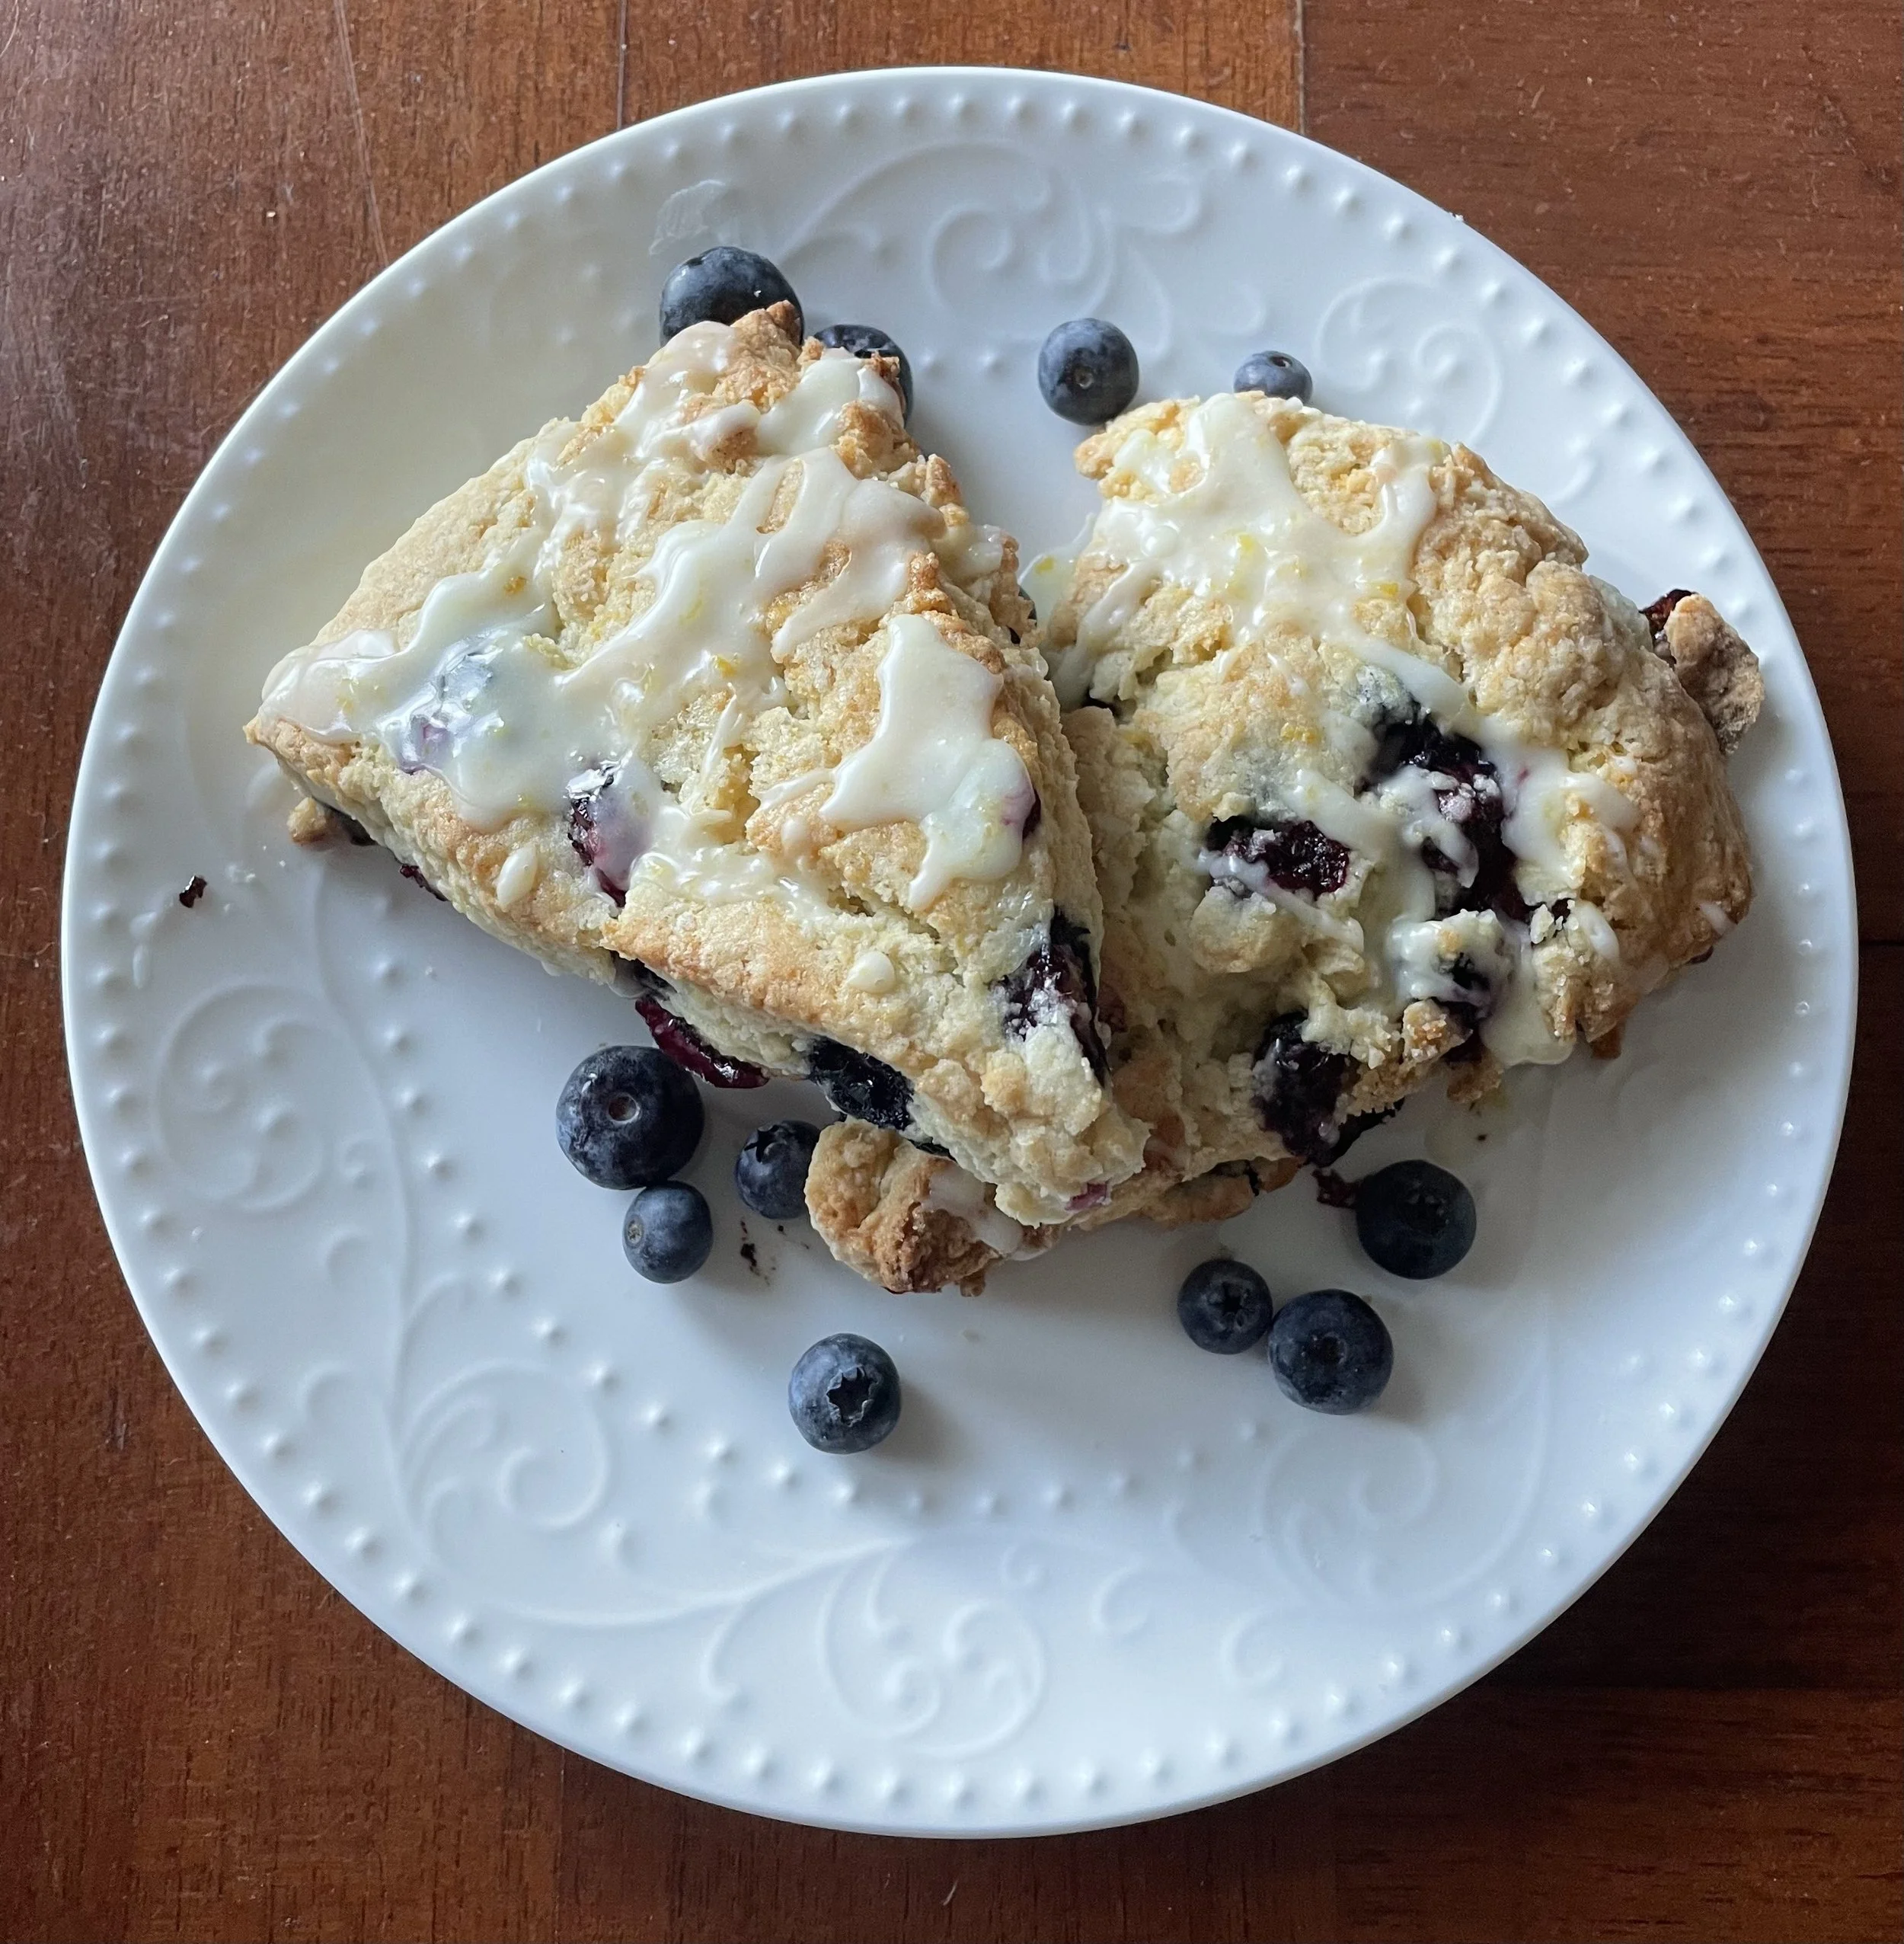
These blueberry lemon scones are soft, buttery, and bursting with flavour!
Prep time: 20 minutes
Cook time: 20 minutes
Yield: Serves 8
Ingredients
Blueberry Lemon Scones
½ cup granulated sugar
1 tablespoon lemon zest
2 cups all-purpose flour
1 tablespoon baking powder
½ teaspoon salt
½ cup cold unsalted butter, grated or 1 cm cubes
1 egg, beaten
½ cup heavy whipping cream
1 cup Thames River Melons blueberries
Zesty Lemon Glaze
1 cup powdered sugar
3 tablespoons lemon juice
1 teaspoon lemon zest
Instructions
Blueberry Lemon Scones
1. Preheat the oven to 400℉ and line a baking sheet with parchment paper.
2. In a bowl, mix together the granulated sugar and lemon zest to make lemon sugar.
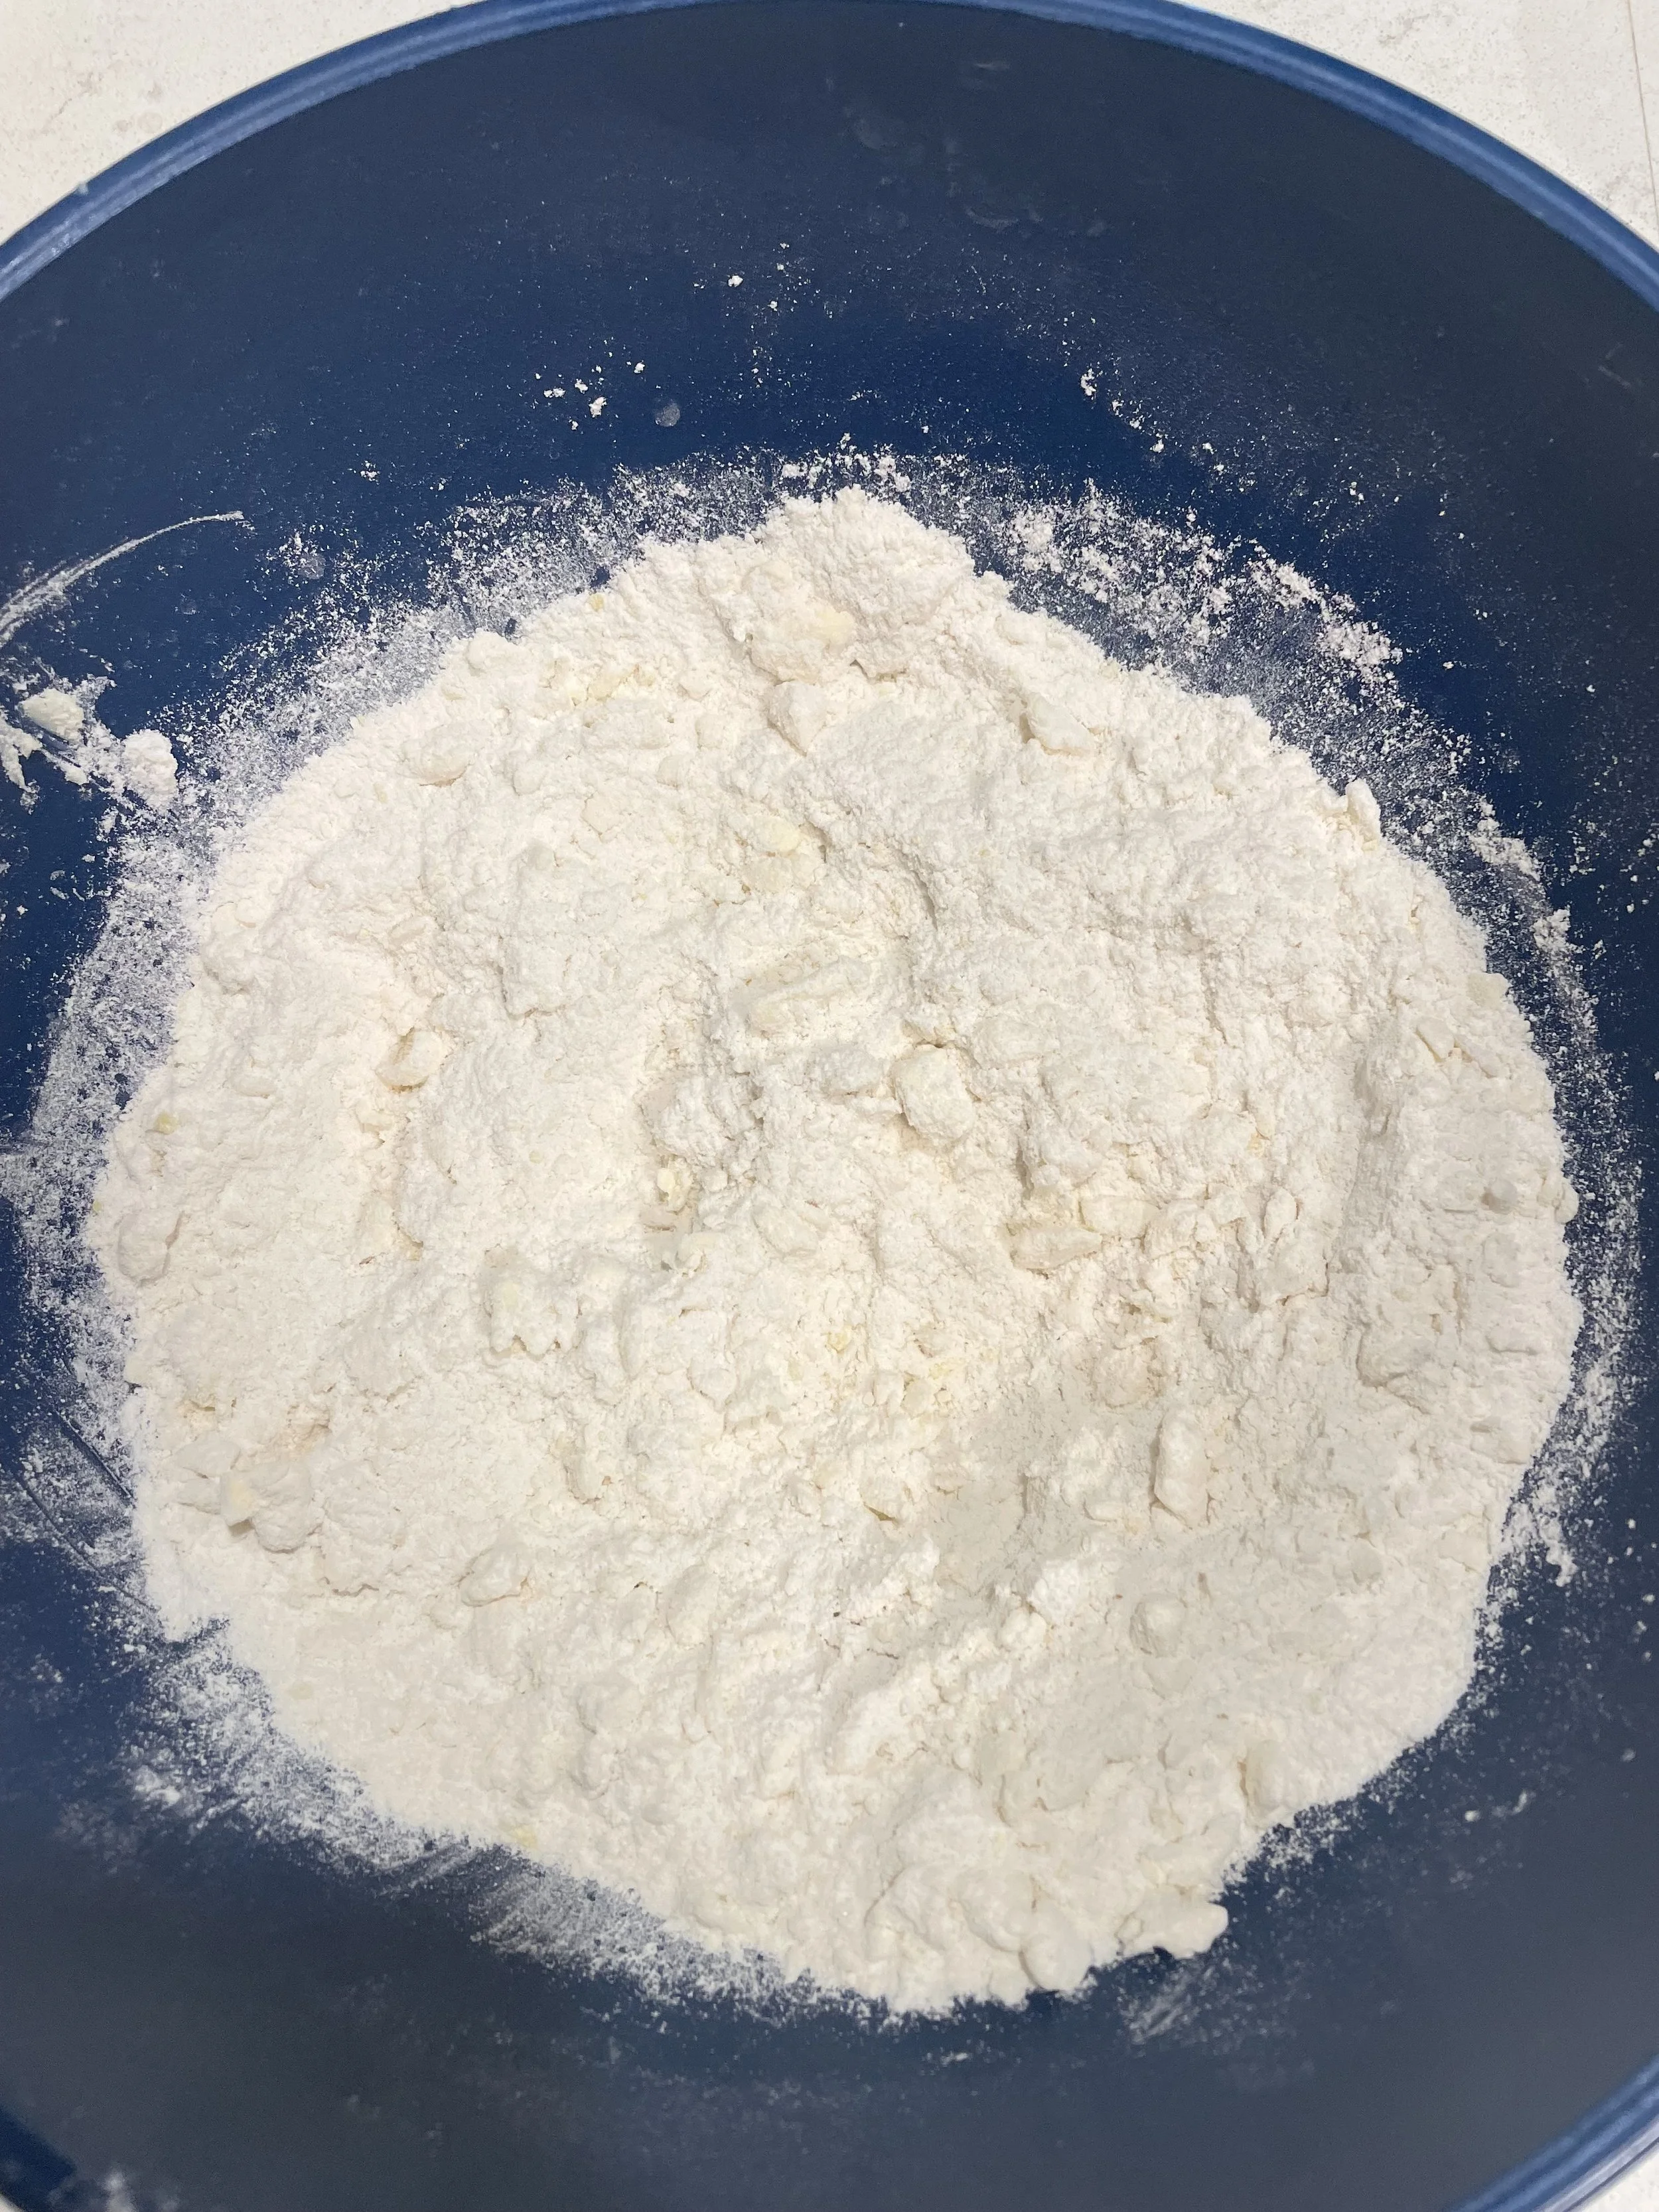
3. In a large bowl, combine flour, baking powder, and salt. Next, stir in the lemon sugar.
4. Slowly add in the cold butter while stirring the mixture. Having cold butter is important because this is what gives your scones a light, flaky texture! We grated our butter, which mixes in easily, but if you choose to cube your butter, you may need to cut it into the flour. To do this, you can use a pastry cutter, forks, or your fingers. At this stage, you will see clumps starting to form.
5. In a separate bowl, stir together the heavy whipping cream and egg until combined. Slowly add this to the flour mixture, stirring the flour mixture as you pour. Mix just until a dough forms.
6. Gently fold the blueberries into the dough. Note: if you are using frozen blueberries, some colour might bleed into the mixture – this is normal!
7. Add flour to a clean surface and place the dough onto it. Pat the dough down to 1 inch and shape it into a circle. Cut into 8 triangles.
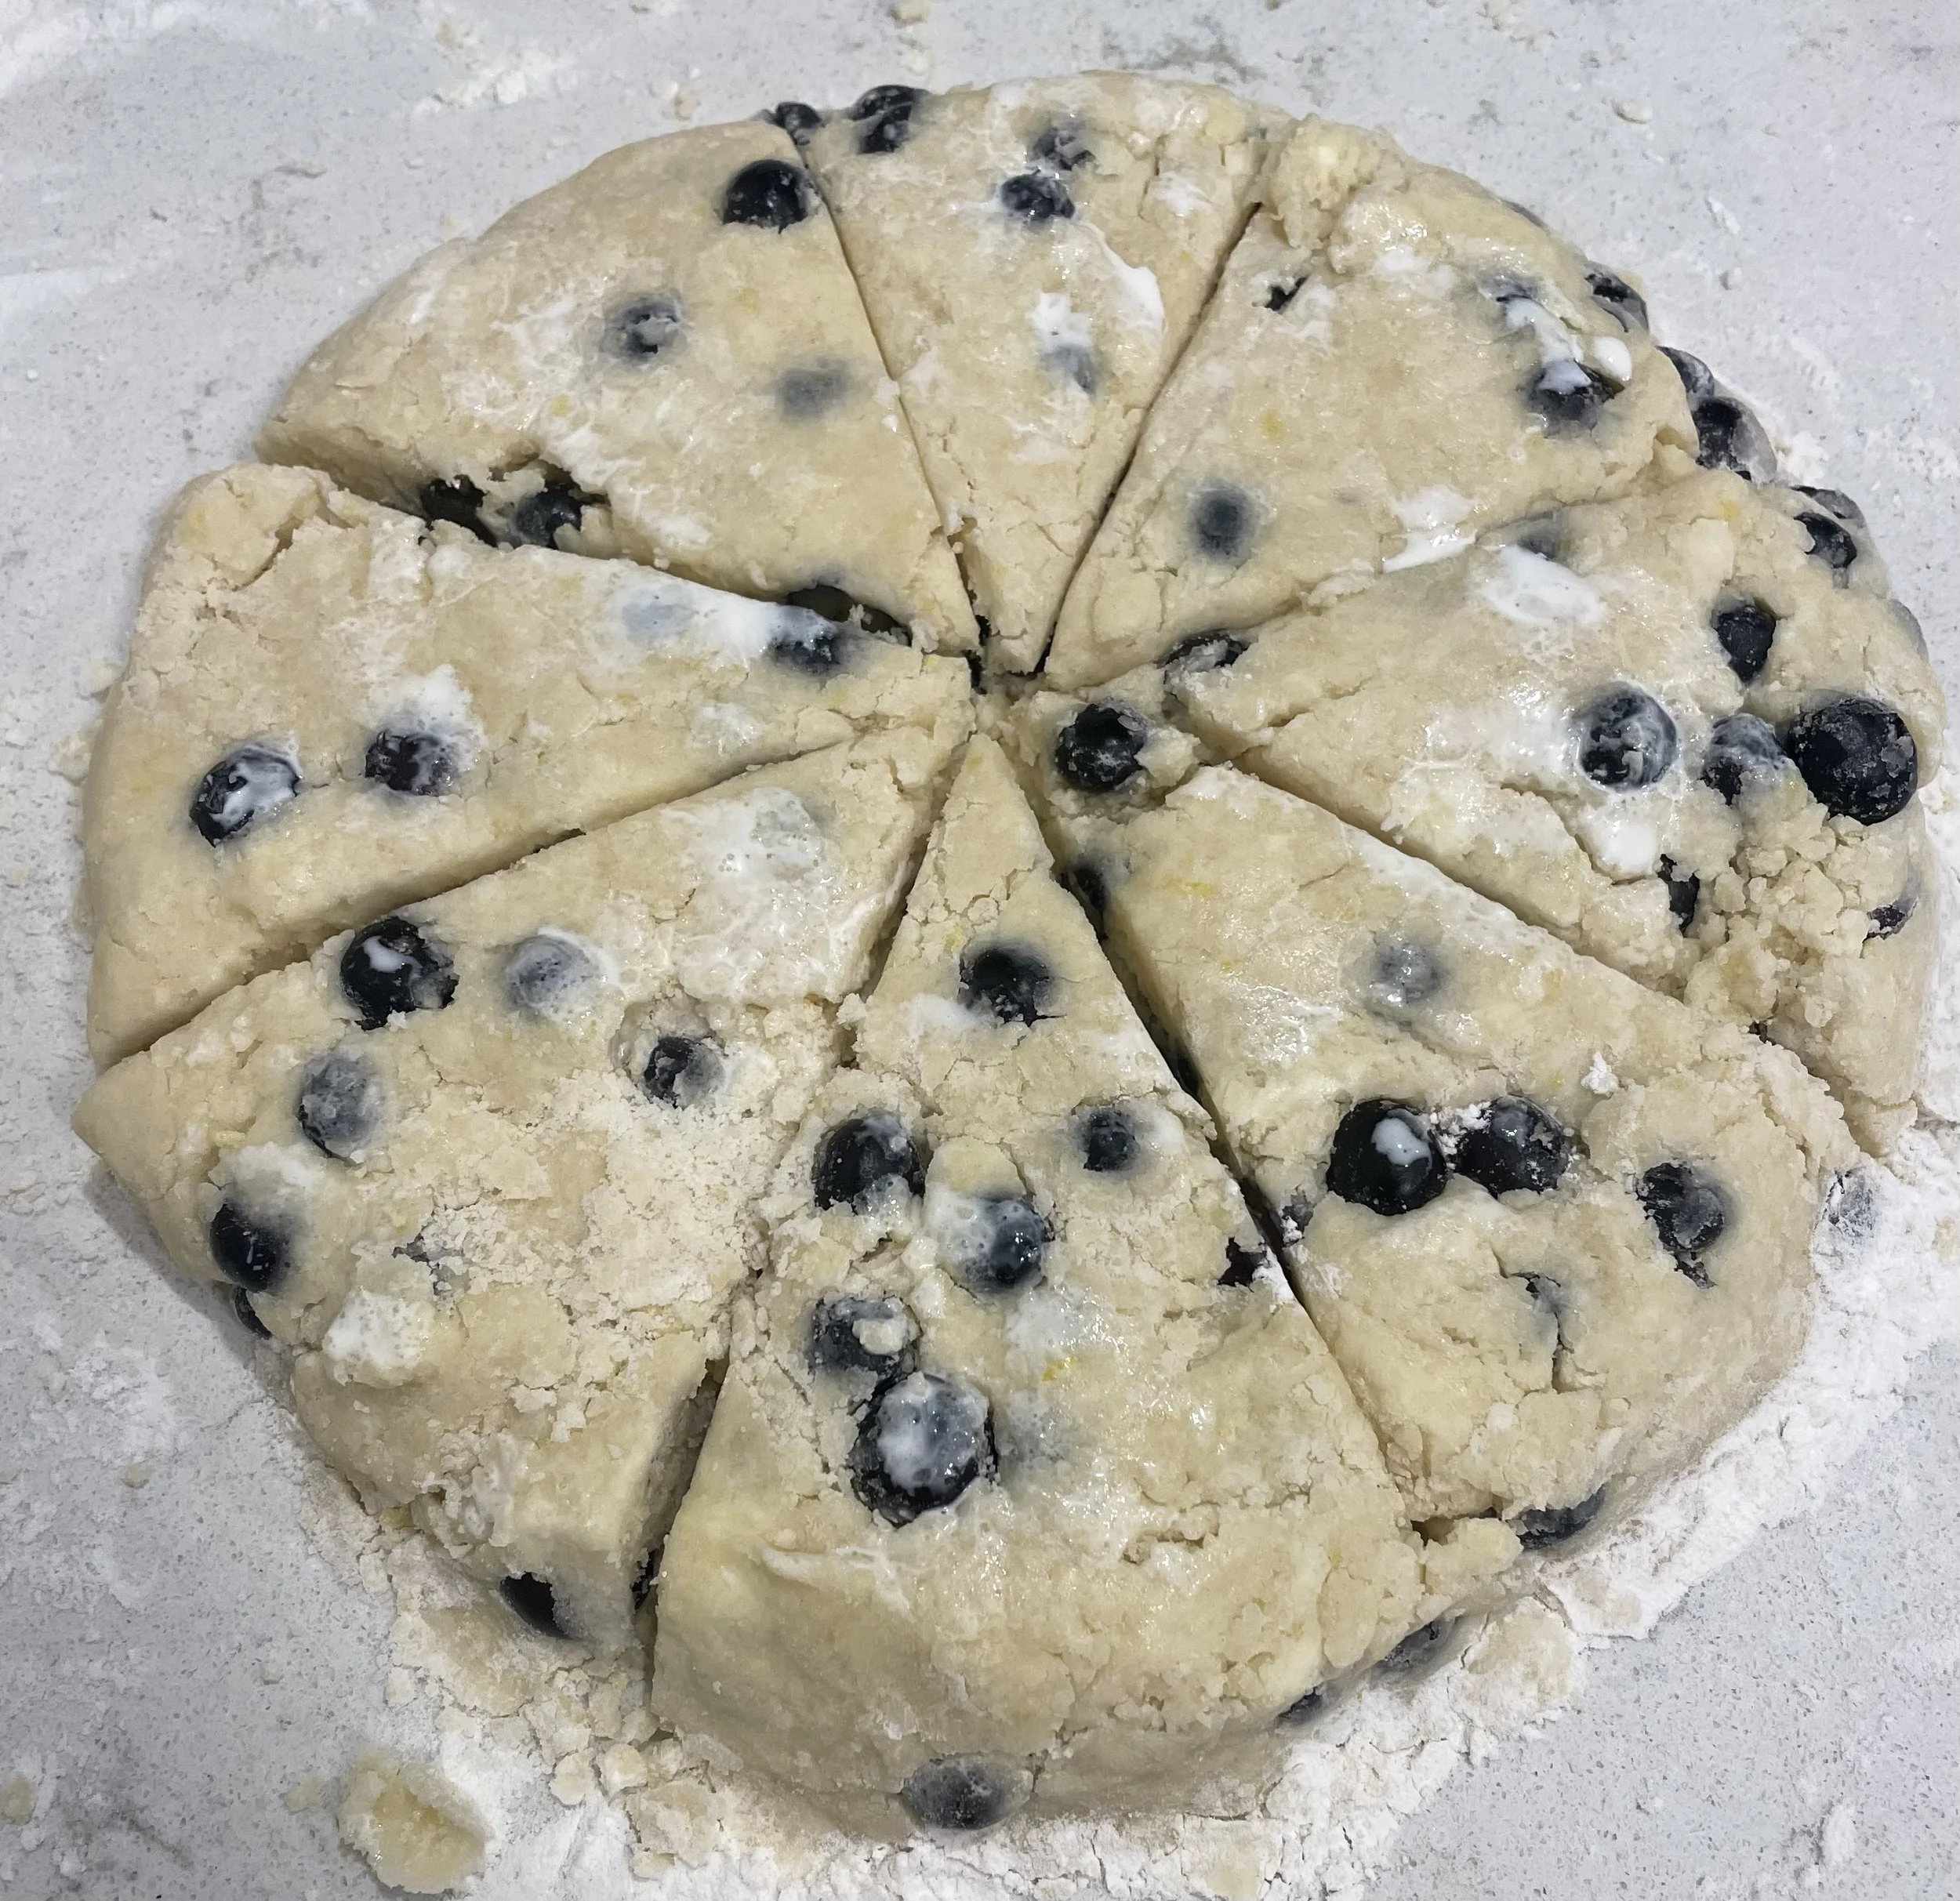
8. Place each scone onto the parchment-lined baking sheet.
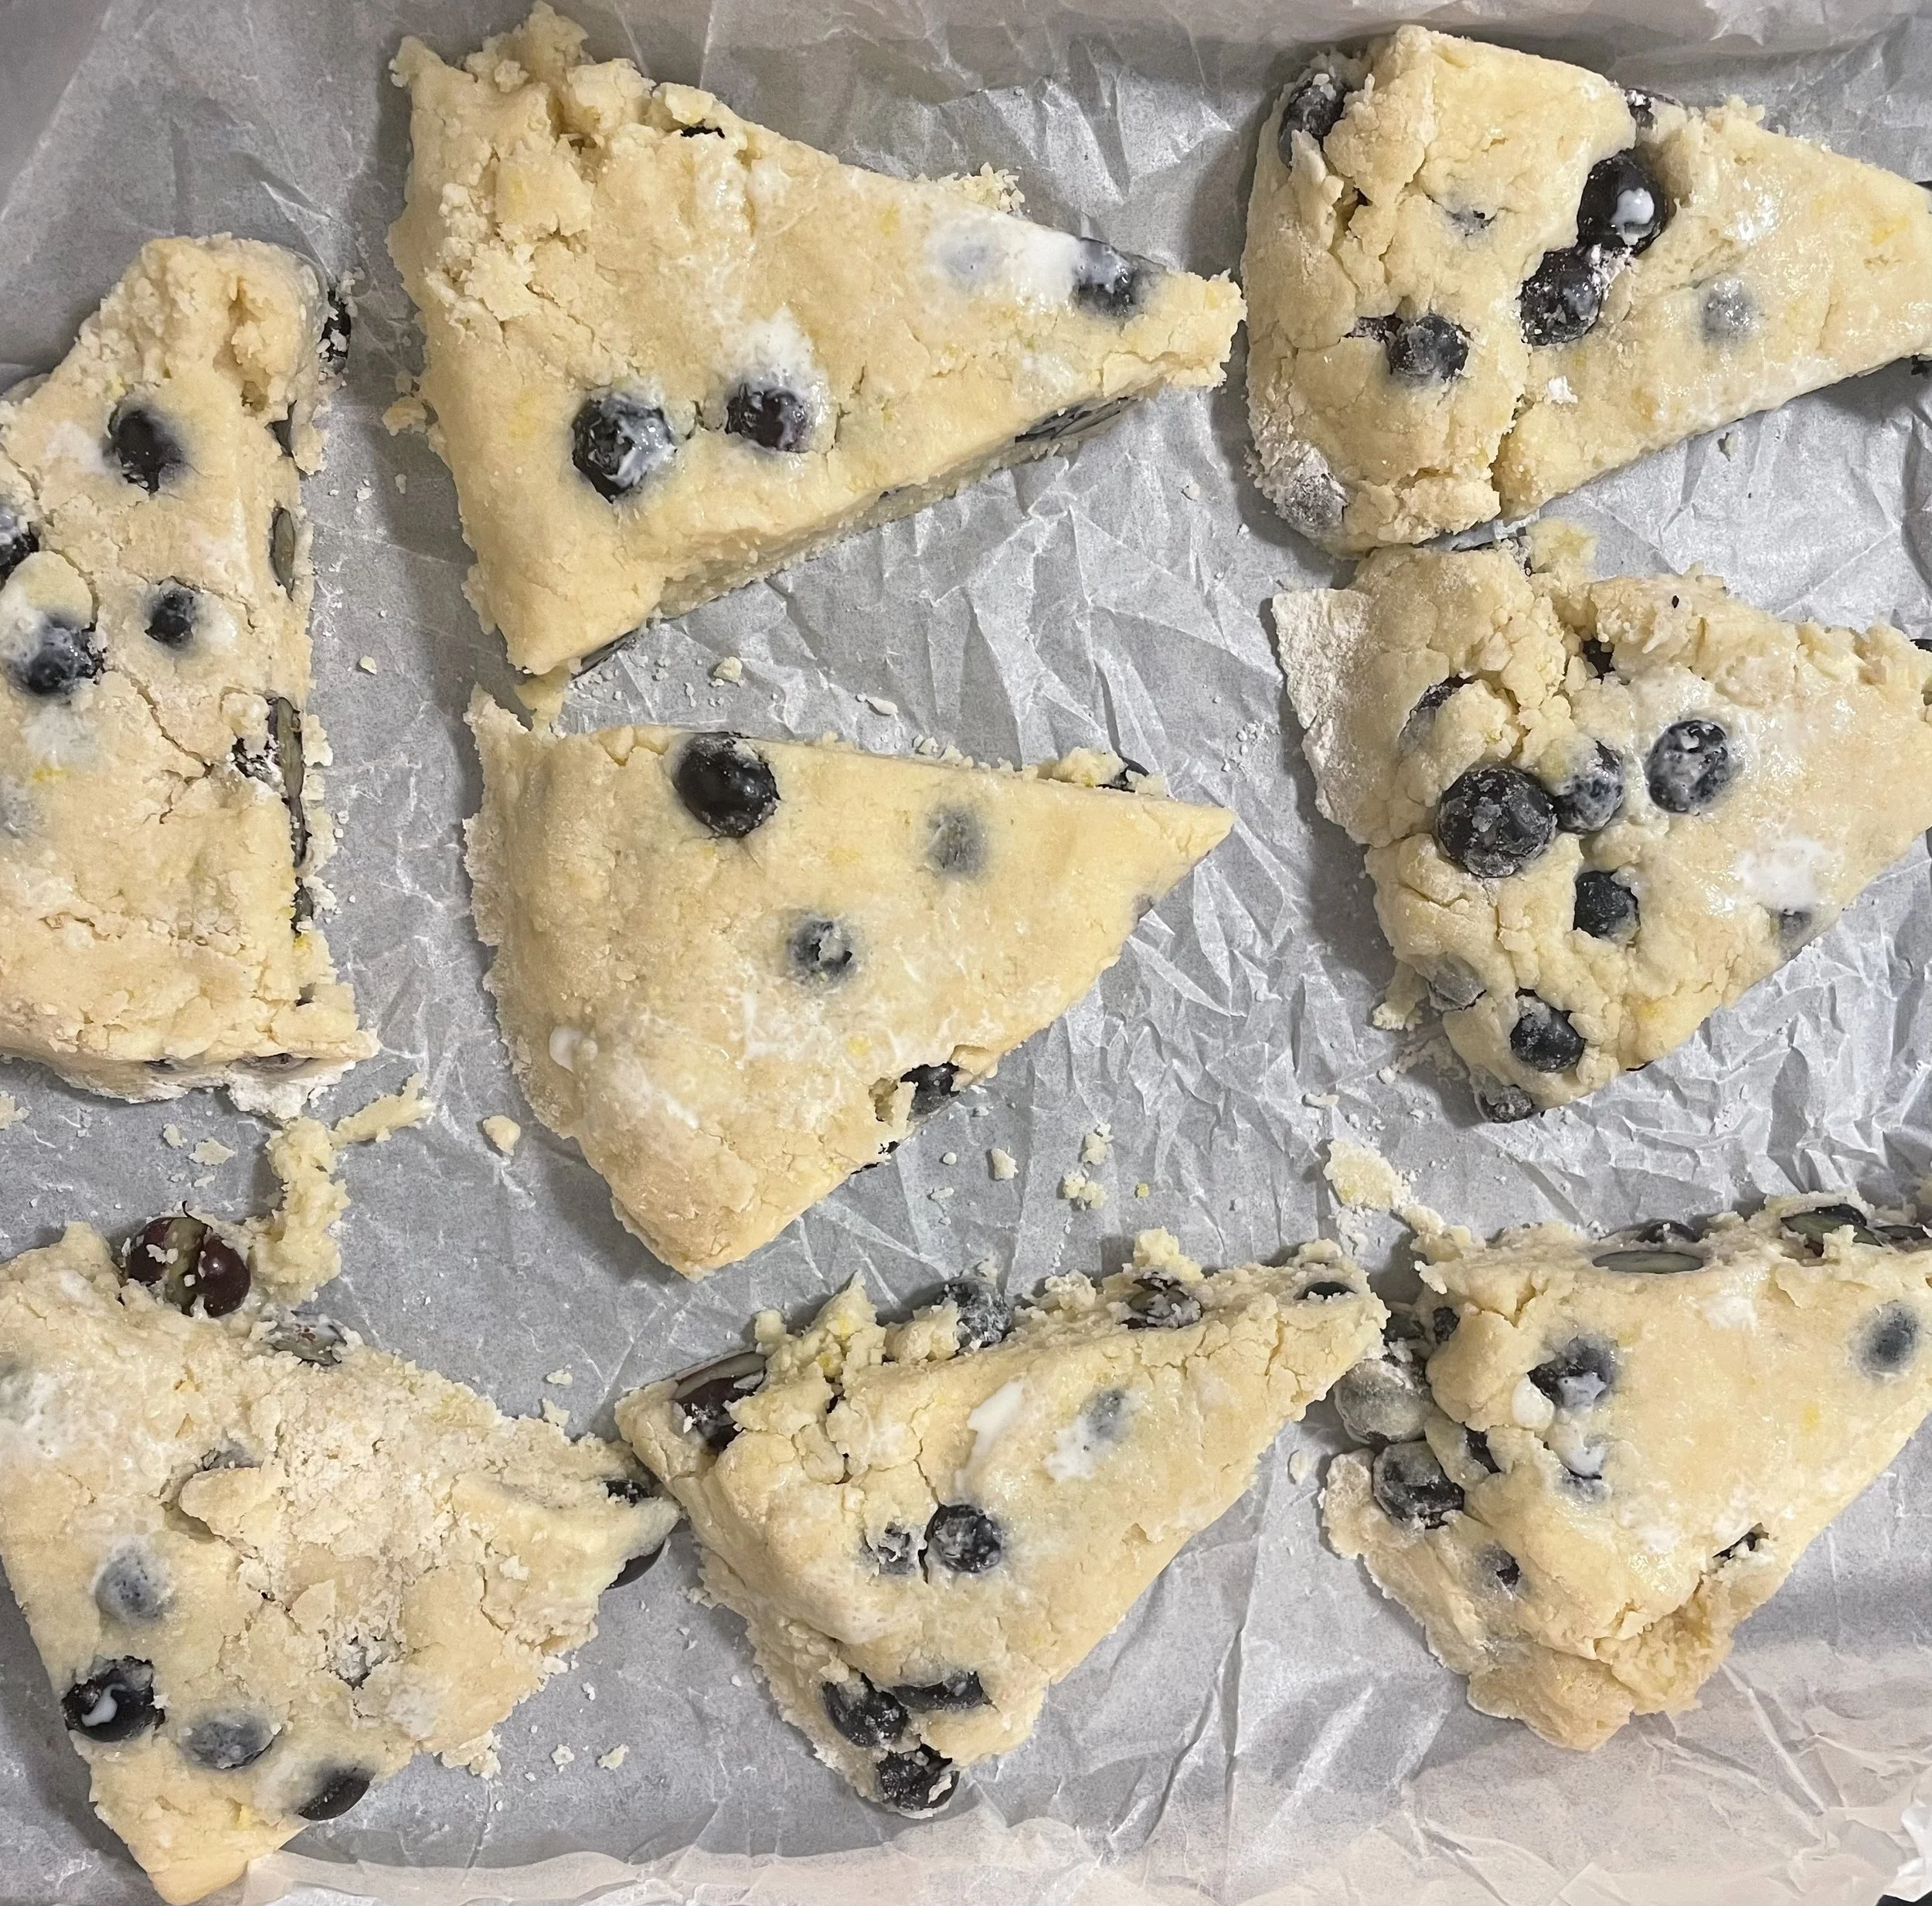
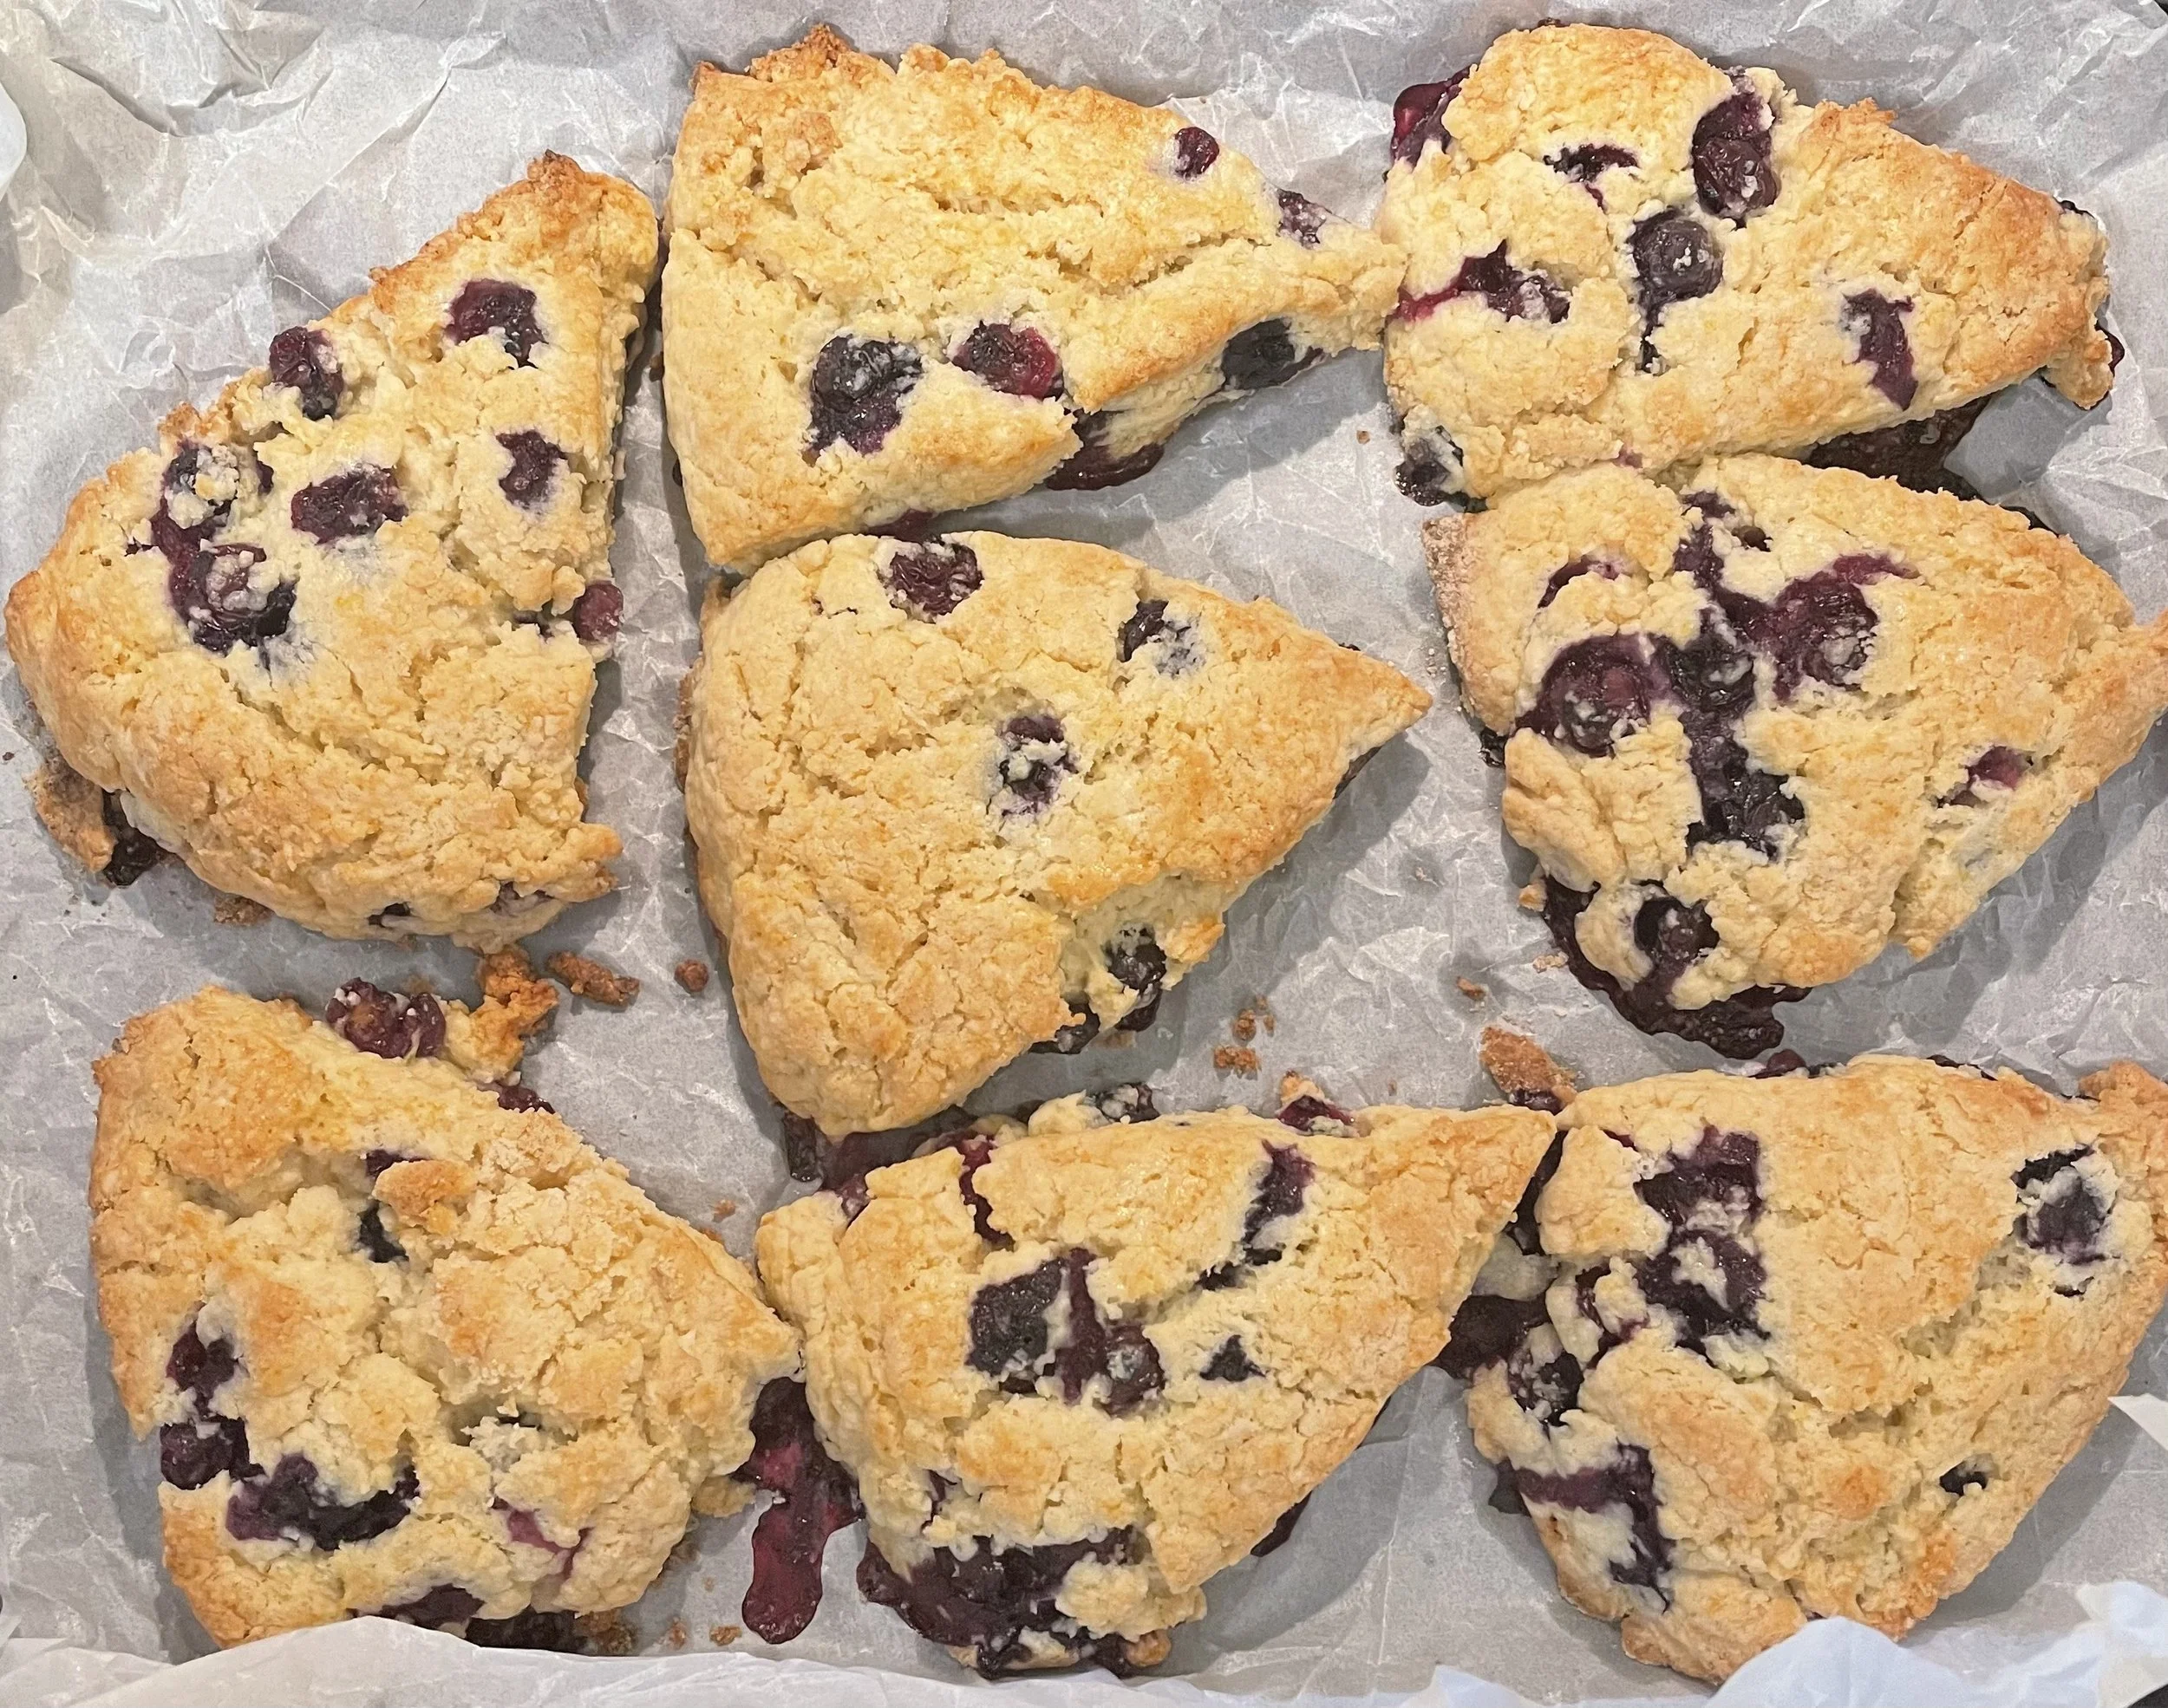
9. Bake in the oven for 20 minutes, or until the edges start to become golden brown.
Zesty Lemon Glaze
1. In a bowl, combine powdered sugar, lemon zest, and lemon juice.
2. Drizzle over blueberry lemon scones about 10 minutes after they come out of the oven.

Cost
PYO blueberries are $4.50/lb. In total, the cost of the PYO blueberries is $0.28/scone.
Nutrient Profile
These scones contain blueberries and lemons, both of which are sources of antioxidants, such as vitamin C. Vitamin C is important to our health because it supports wound healing, protects our cells from damage, and helps our bodies absorb iron from plant foods.
Storage
Store these scones in the refrigerator in an airtight container for up to 5 days.
For longer storage, freeze them in a single layer on a baking sheet until solid, then transfer to a freezer-safe bag or container. They can be frozen for up to 3 months. When ready to enjoy, warm in the oven or airfryer for a few minutes.
Reference:
Unlock Food [Internet]. Canada: Dietitians of Canada; [updated 2019 Mar 21; cited 2025 Aug 14]. What you need to know about vitamin C; [about 3 screens]. Available from: https://www.unlockfood.ca/en/Articles/Vitamins-and-Minerals/What-you-need-to-know-about-vitamin-C.aspx.
Red Velvet Beetroot Brownies

These rich, fudgy brownies are packed with fibre and antioxidants thanks to the sweet beetroot and dark chocolate. They’re a delicious and nourishing twist on the classic brownie.
Prep time: 15 minutes
Cook time: 25–30 minutes
Yield: 9–12 brownies, depending on size
Ingredients
1 heaping cup of dark chocolate. Can be semi sweet chocolate chips, or a dark chocolate bar chopped up. For best results use something that is at least 70% cocoa.
¾ cup canola oil
2 tablespoons water
1 cup light brown sugar, packed
1½ cups cooked, peeled Thames River Melons beetroot, roughly chopped
3 large eggs
2 tablespoons cocoa powder
Pinch of salt
⅓ cup all-purpose flour
1 cup ground almonds (100g)
Instructions
1. Preheat the oven
Set the oven to 350°F (175°C). Lightly grease or line an 8x8-inch square pan with parchment paper.
2. Cook the beets
Cut the tops, and bottom skinny roots off of the beets. Wash them thoroughly under cold water to remove any dirt and debris from the PYO fields.
We like to then cut the beets into ¼ sections for faster cooking.
Add the beets to a sauce pan and cover with water.
Boil the beets until they are fork tender, strain, and then chill in the fridge or an ice bath before blending so they do not cook the eggs.
3. Melt the chocolate
Gently melt the dark chocolate in a double boiler or in short bursts in the microwave (stirring every 30 seconds). Set aside to cool slightly.
You can set up a double boiler by filling a pot with ~2 inches of water and bringing it to a boil.
Nest a stainless steel bowl in the pot with the chocolate inside to melt it down gently.
Be mindful to stir the chocolate as it melts to keep it from burning on the sides, we find a silicone spatula works well.
4. Blend the wet ingredients
In a food processor or blender, combine the cooked beetroot, canola oil, water, brown sugar, and eggs.
Blend until smooth and well combined.
5. Mix in the chocolate
Pour the beet mixture into a large bowl.
Stir in the melted chocolate until evenly incorporated.
6. Add dry ingredients
Sprinkle in the dry ingredients: Cocoa powder, salt, flour, and ground almonds (See notes for substitution).
Fold everything together just until combined. Try not to overmix.
7. Bake
Pour the batter into your prepared pan and smooth the top. Bake for 25–30 minutes, or until a toothpick comes out dry.
8. Cool and slice
Let brownies cool fully in the pan.
For cleaner cuts, chill them in the fridge for 30–60 minutes before slicing.

Modifications:
Nut Allergy: The ground almonds provide structure and texture benefits to the brownies. However, if you have an allergy, you can remove the ground almonds and substitute with one of the following two options:
An additional ½ cup all-purpose flour
¾ cup oat flour
Optional, but I topped mine off with a little chocolate icing and flakes of dark chocolate to make them perfect.
Cost:
In total, the PYO beets cost about $1.70.
From the PYO field, the beets are $1/pound. This recipe calls for about 1.7lbs of beets, but try not to get caught up on the exact weight!
Beets are a versatile crop that can be used in a wide variety of recipes, both savoury and sweet.
Nutritional Density:
Thanks to the beetroot, ground almonds, and cocoa, each brownie provides about 2–3g of dietary fibre, supporting digestion and blood sugar balance.
The dark chocolate, cocoa powder, beets, and ground almonds add a variety of antioxidants into this recipe. These ingredients are rich in flavonoids, betalains, and vitamin E.
Antioxidants work within your body to protect your cells from damage caused by the regular activities of everyday life such as: Exercise, breathing, eating, and being exposed to air pollution and other toxins.
Waste Less Notes:
Try taking the whole beet plant home and enjoy the leafy green beet tops in a salad or stir fry.
Storage:
These brownies will store up to 4 days in an air-tight container.
You can also freeze them in an air tight container lined with parchment to then reheat in the oven, microwave, or air fryer as you want to enjoy them.
If you choose to freeze them, we recommend eating them within a month for the best quality.
3 Blueberry Smoothies to Blend This Season
Each smoothie serves 1
Ingredients
Smoothie 1: Bright and Tangy Berry Blend Smoothie
½ cup Thames River Melons blueberries
½ cup Thames River Melons raspberries
¾ cup cold water or liquid of choice
1 tablespoon chia seeds
1 tablespoon Greek yogurt
1 tablespoon lemon or lime juice

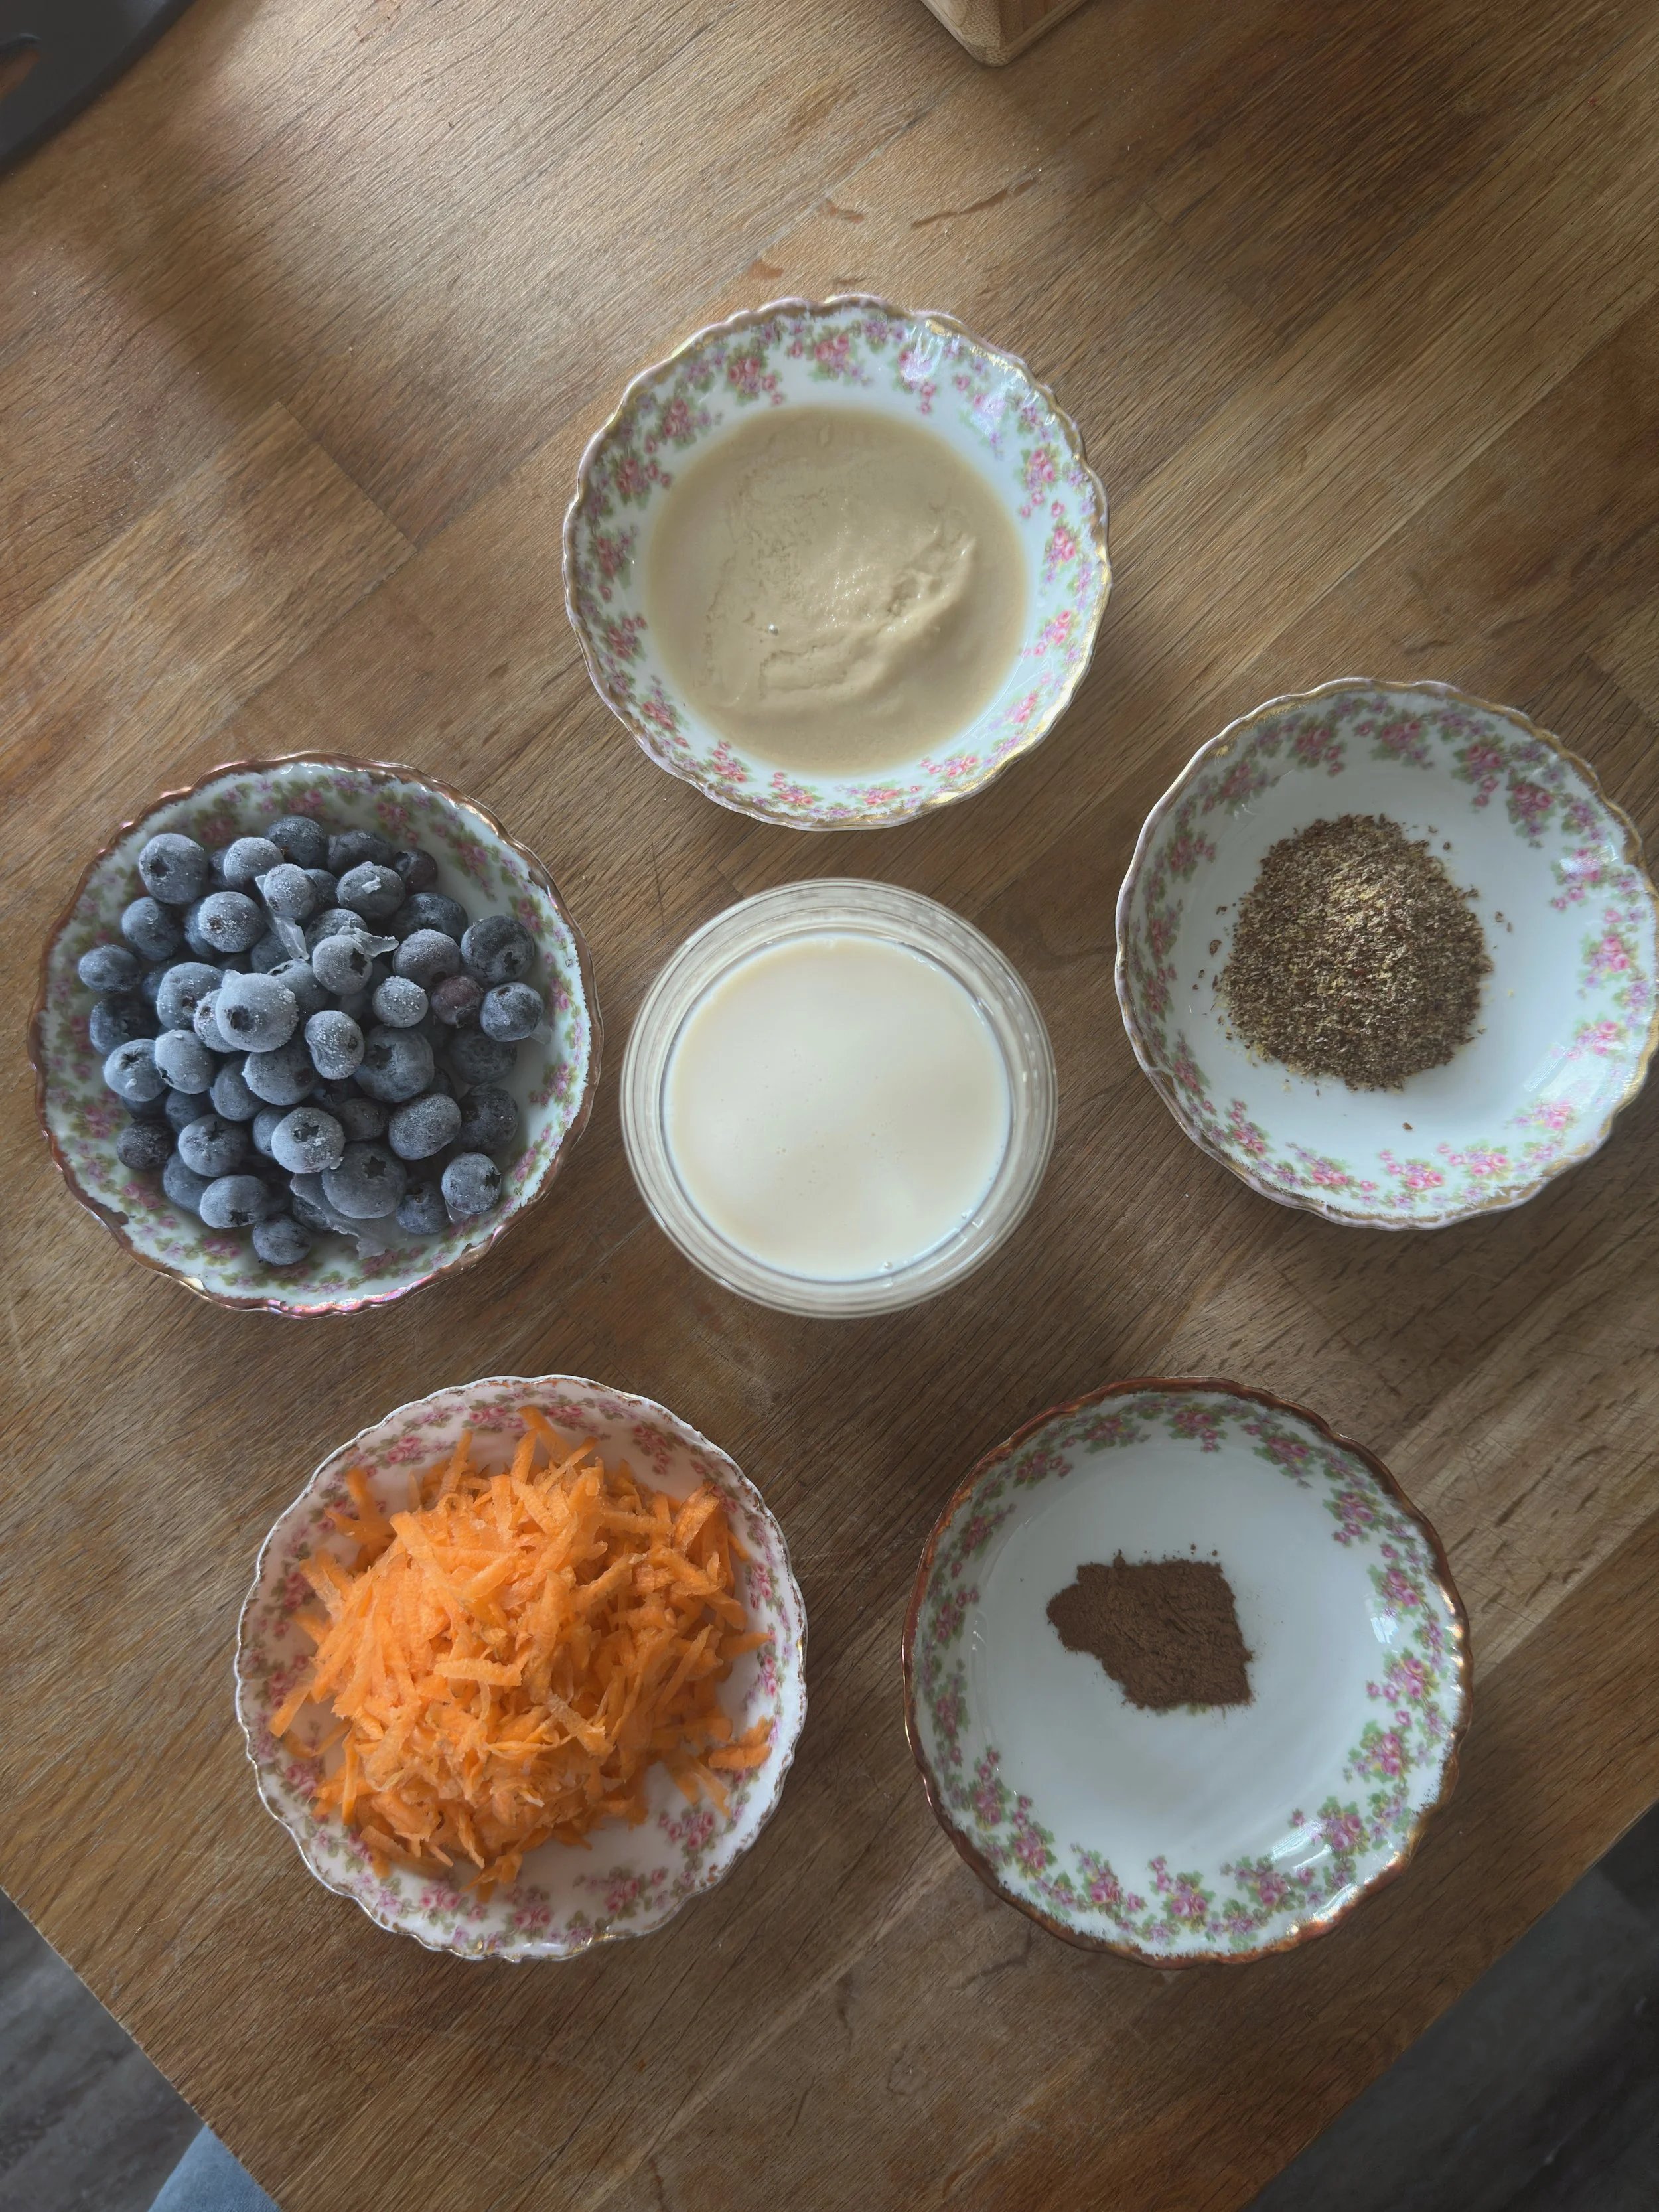
Smoothie 2: Blueberry & Carrot Smoothie
1 cup Thames River Melons blueberries
½ cup shredded carrot
¾ cup soy milk or liquid of choice
1 tablespoon ground flaxseed
1 tablespoon tahini
¼ teaspoon cinnamon
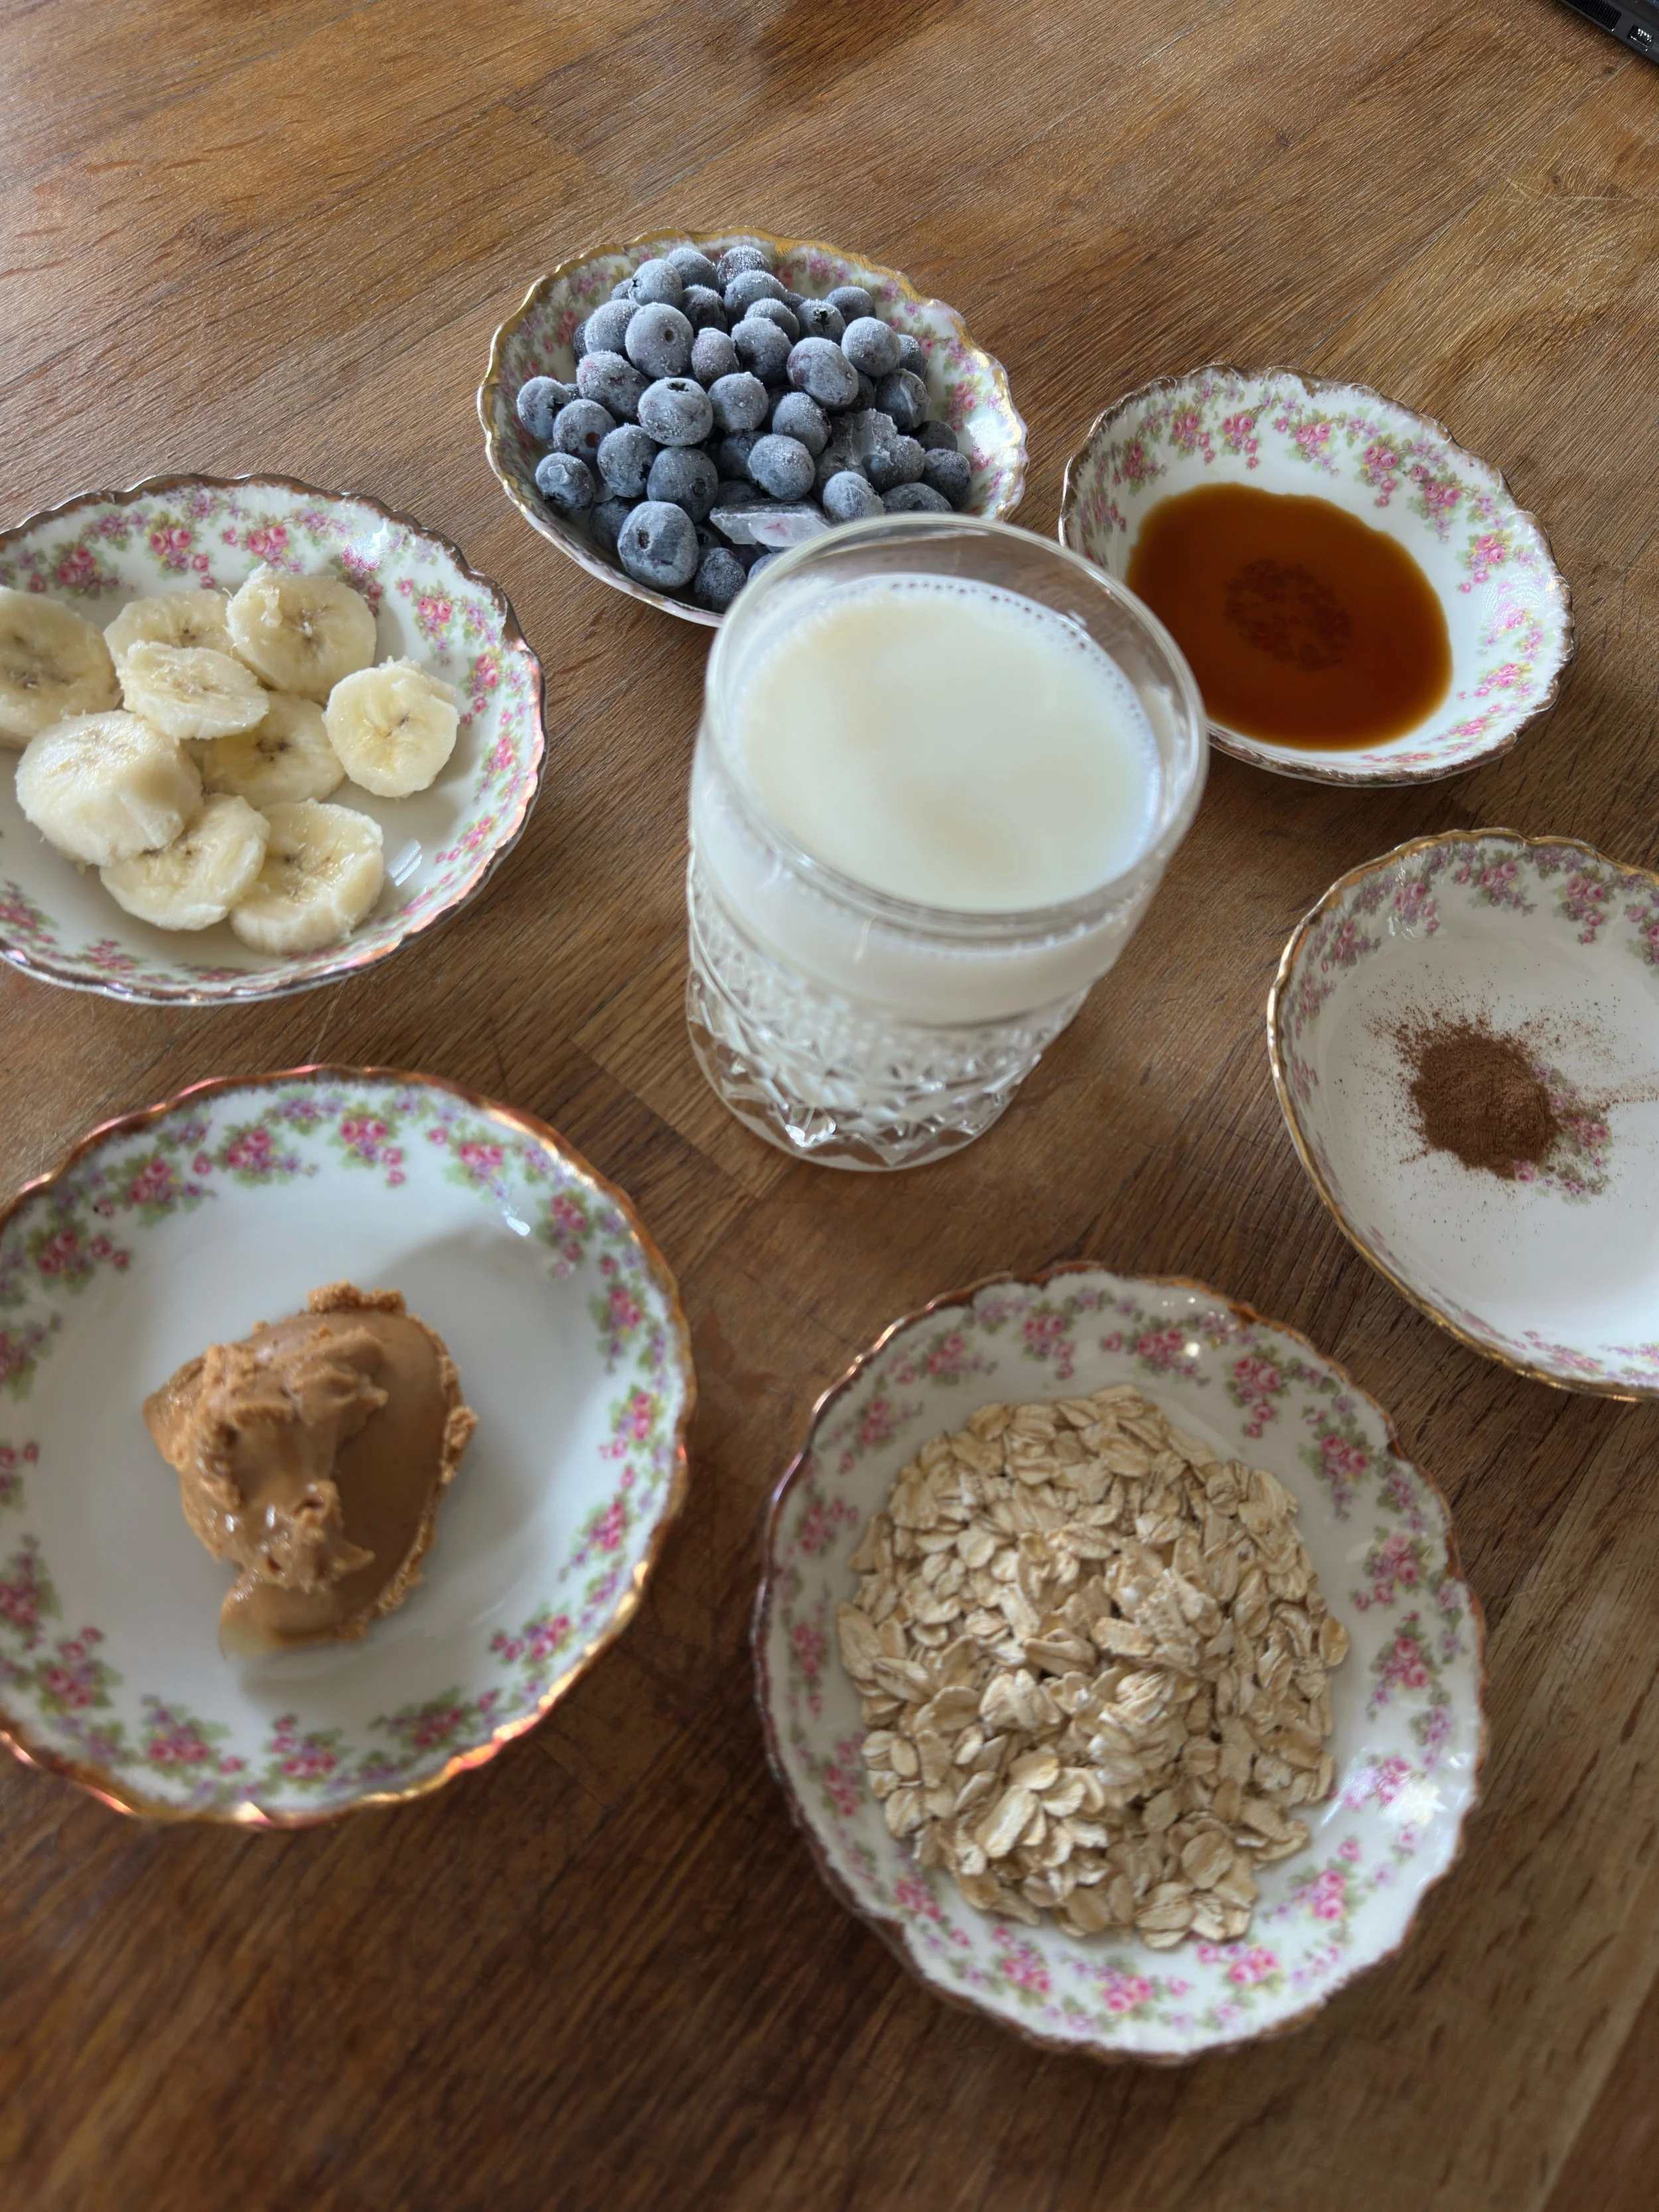
Smoothie 3: Blueberry Banana Pie Smoothie
1 cup Thames River Melons blueberries
½ banana
¾ cup milk or liquid of choice
2 tablespoons rolled oats
1 tablespoon almond or peanut butter or Wow Butter for anyone with a nut allergy
¼ teaspoon cinnamon
½ teaspoon vanilla extract
Notes:
When making our smoothies, we decided to use frozen fruit to make them have a thicker consistency. If you like your smoothie sweeter, add in a date, or a teaspoon of maple syrup or Thames River Melons honey.
Instructions
Add all ingredients to blender.
Blend for approximately 30 seconds or until all ingredients are mixed.
Helpful tip: Place your liquid and softer ingredients closer to the blades and the harder ingredients (like frozen blueberries) away from the blades. This will make your smoothie blend a lot easier!
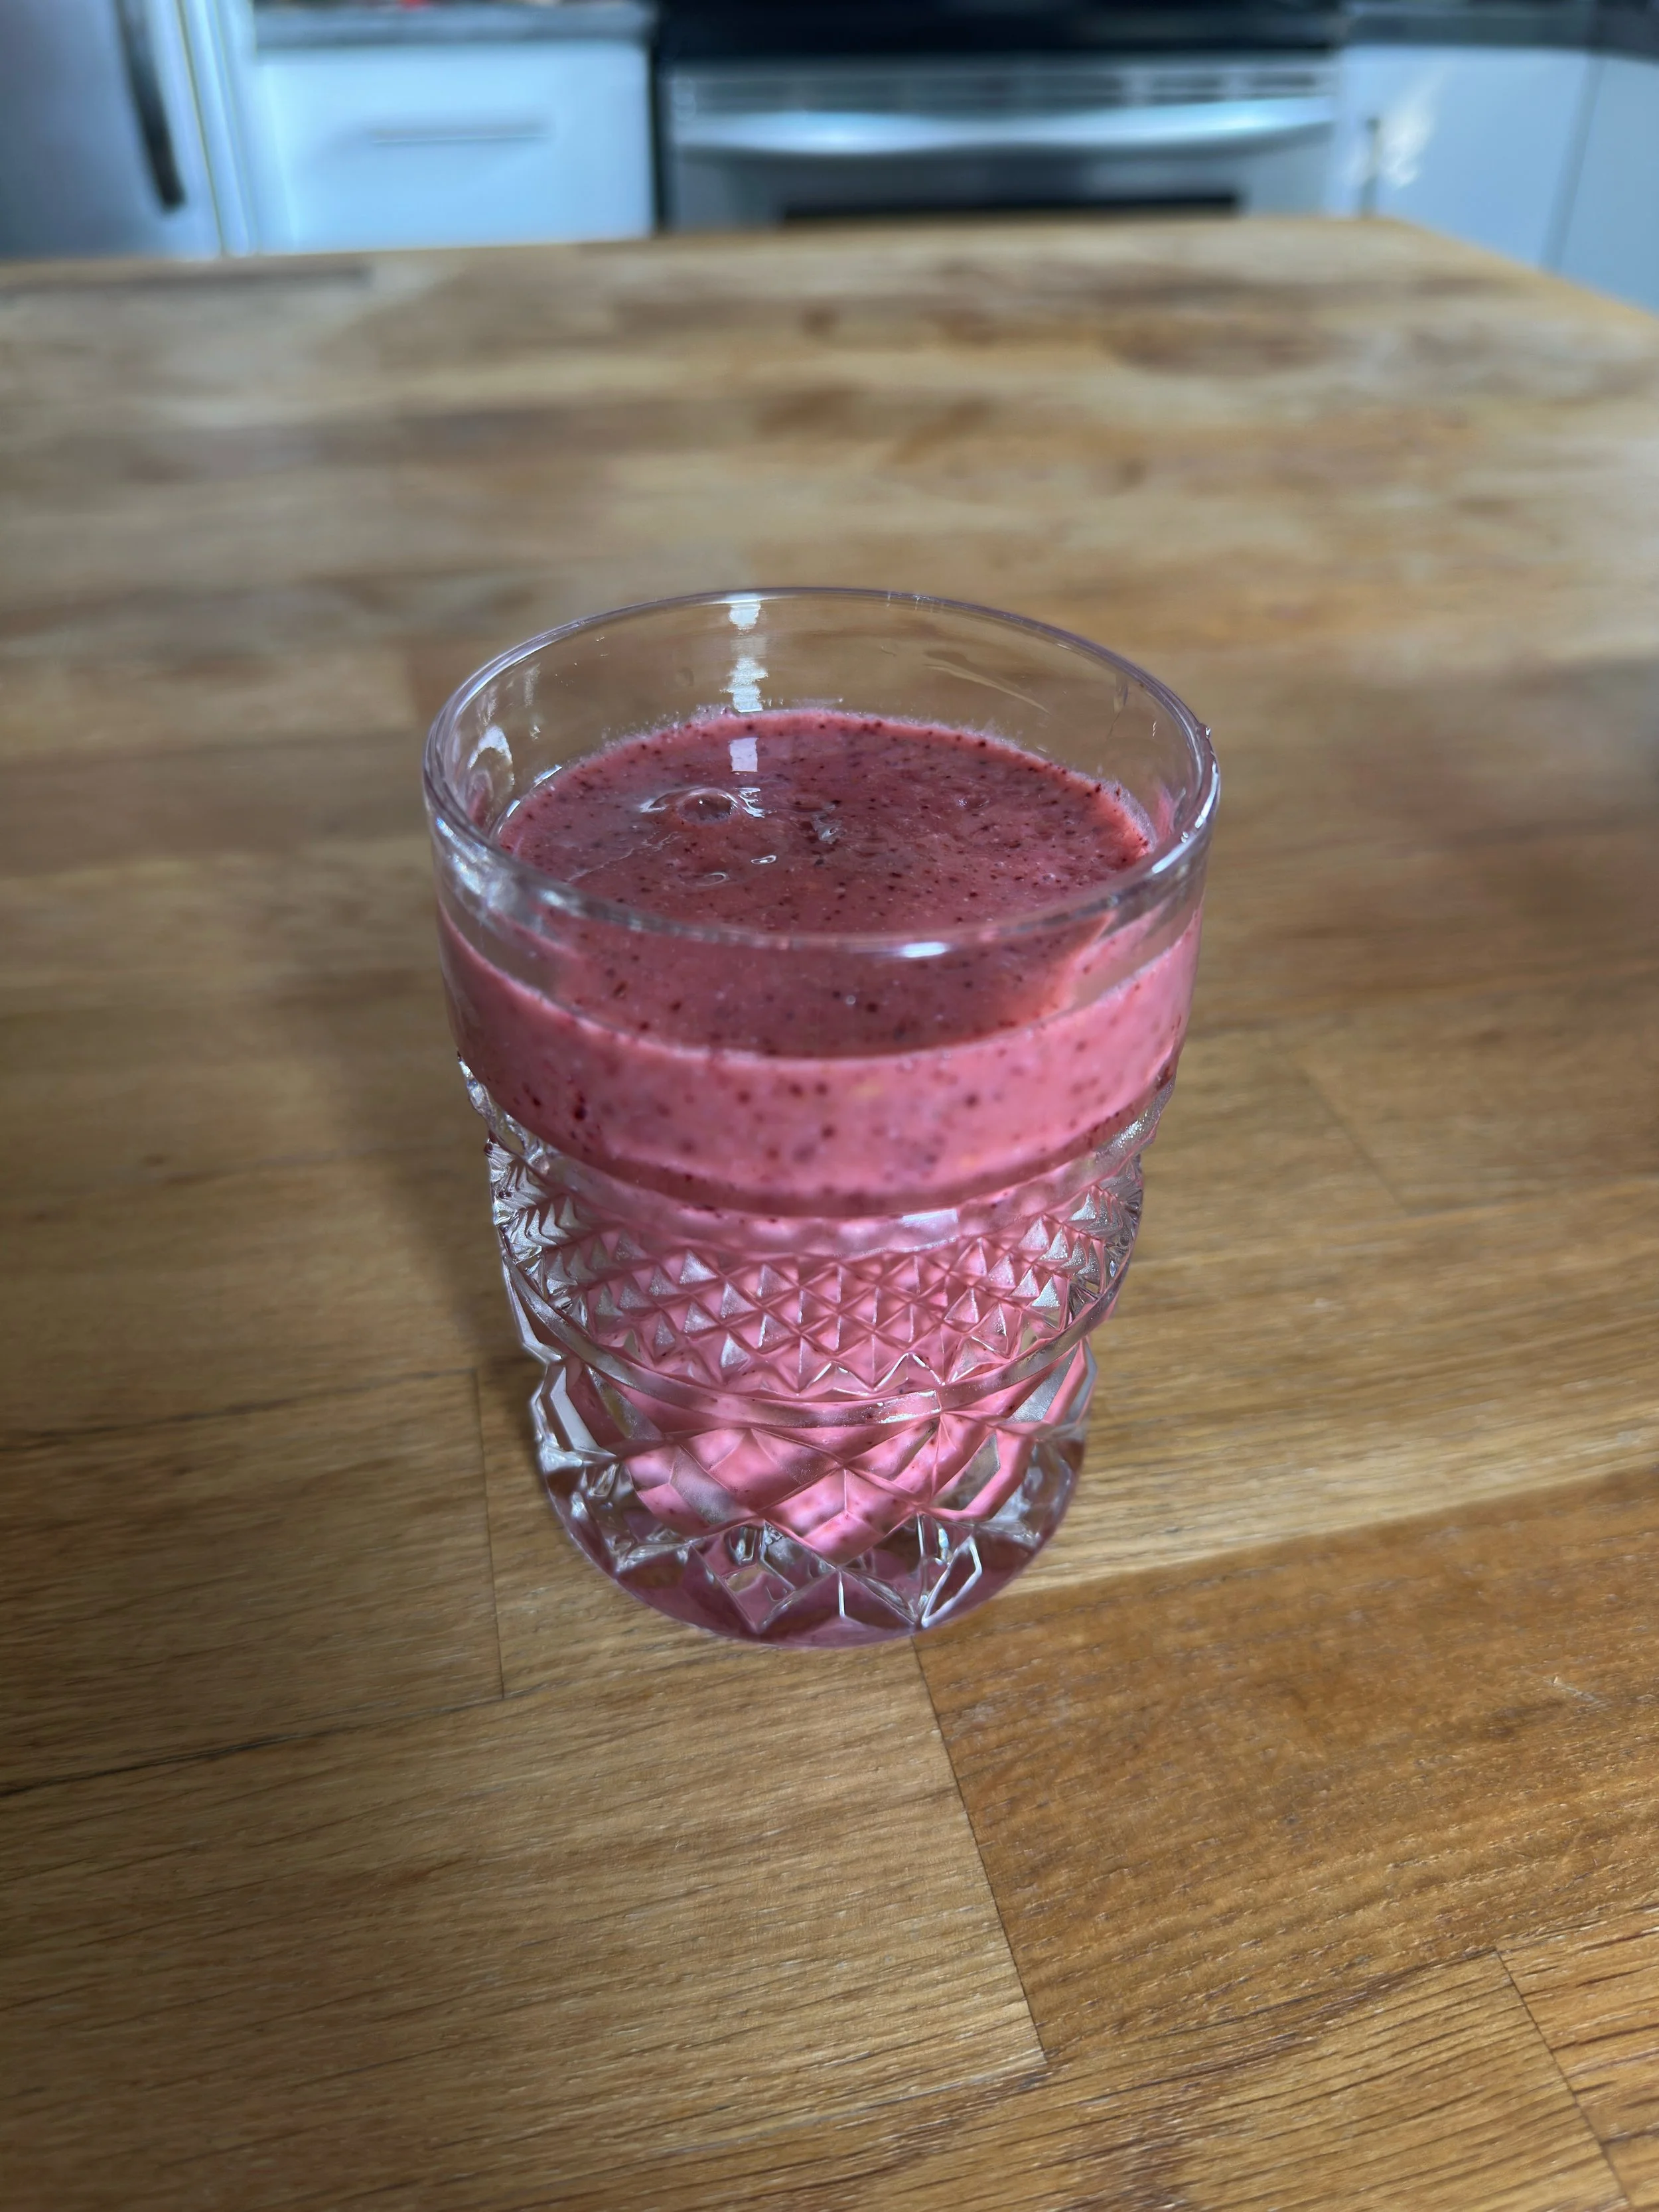
Bright and Tangy Berry Blend Smoothie
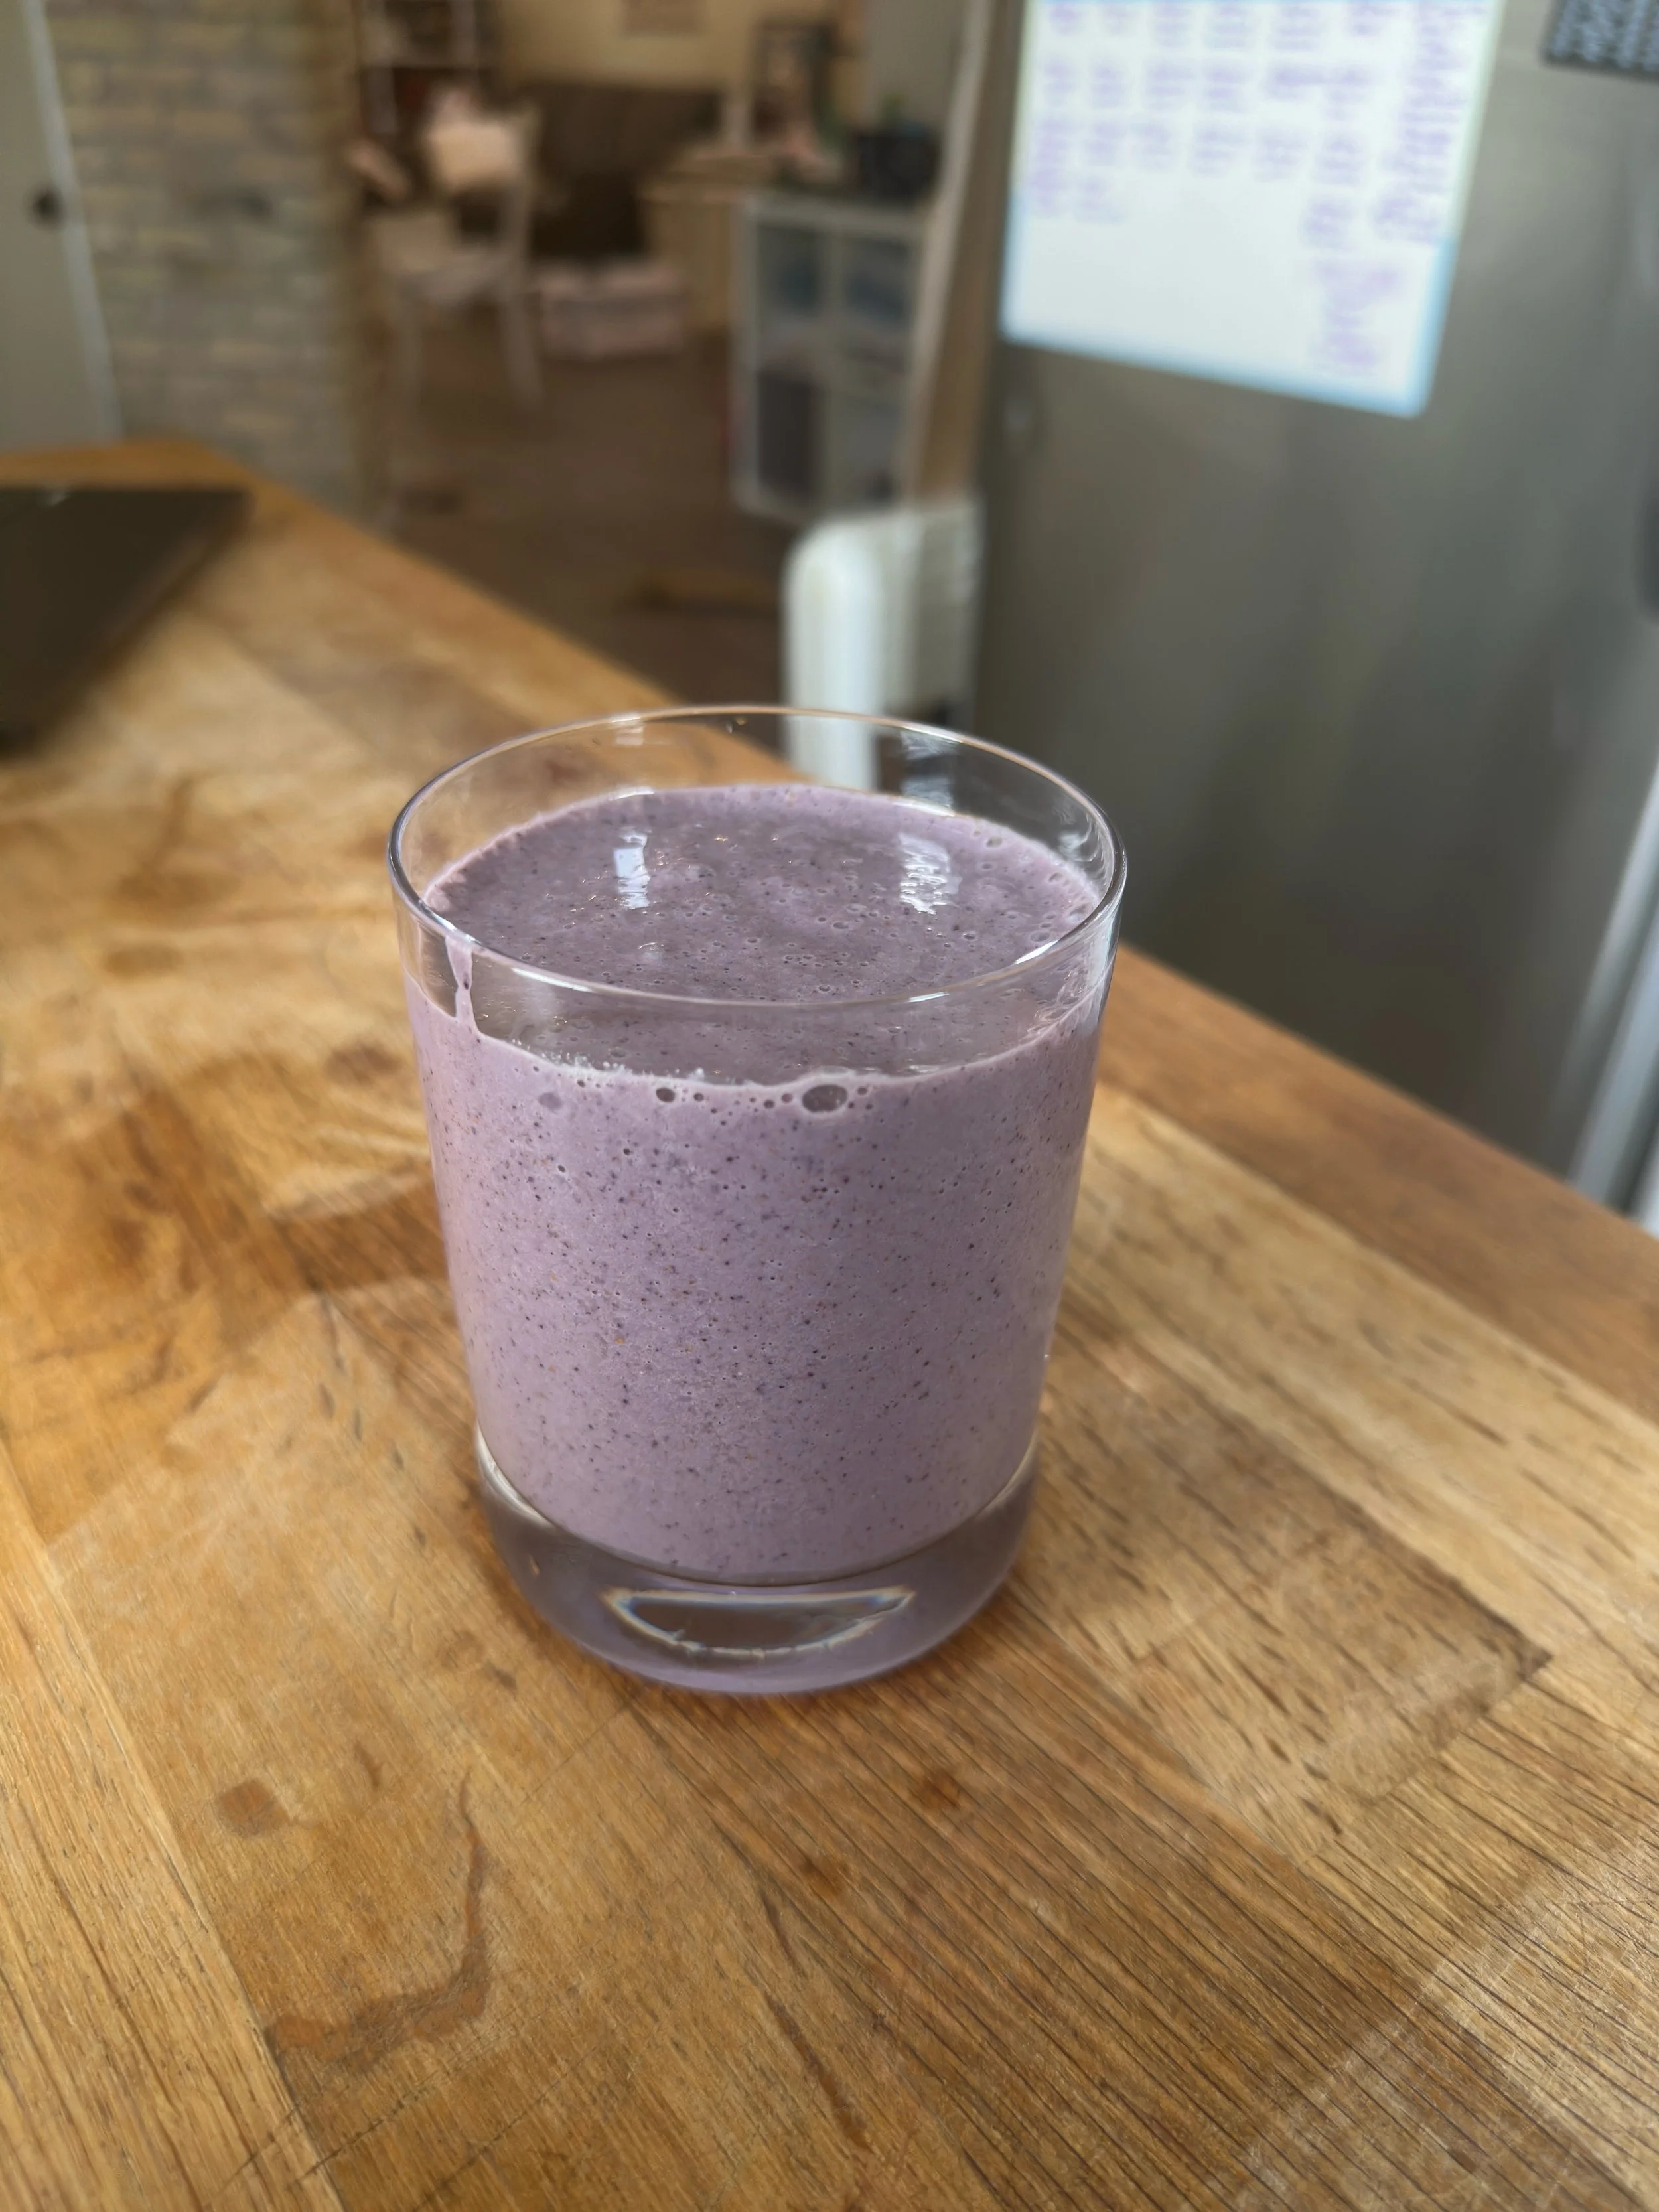
Blueberry and Carrot Smoothie

Blueberry Banana Pie Smoothie
Cost
PYO blueberries and raspberries are $4.50/lb. In total, the cost of the PYO berries for each smoothie is $1.40.
Nutritional Density

Blueberries are also a great source of antioxidants!
Final Note:
Smoothies are meant to be customizable! We love using whatever we have on hand when creating our recipes. Check out our smoothie formula to help you when crafting your own!
From Berry Patch to Blender
Blueberry season is in full swing at the farm, and we’re celebrating with a closer look at what makes these tiny berries such a big deal—and how you can incorporate them into our easy to remember smoothie formula! Whether you're picking your own or grabbing a pre-picked basket at the farm(ers’) market, there's no better time than now to blend them into something delicious.

Blueberries aren’t just sweet and juicy—they’re also full of antioxidants!
Antioxidants are molecules that help fight harmful substances in your body called free radicals. Free radicals are tiny molecules that are missing one of their parts (called an electron). As a result, these free radicals try to steal this missing part from other molecules in your body. When free radicals build up, they can damage your cells over time—a process linked to aging and many chronic diseases. These free radicals are naturally formed when you breathe, eat, and exercise, but their levels can rise due to things like air pollution, cigarette smoke, and stress.
The good news? Antioxidants help protect your cells by giving free radicals their missing part. Research has shown that eating antioxidant-rich foods like blueberries may help reduce the risk of developing conditions like heart disease, cancer, stroke, and diabetes.
Blueberries are especially high in a group of antioxidants called anthocyanins—the same molecules that give them their deep-blue colour and contribute to many of their health benefits.
Want to learn more about antioxidants? Head over to our nutrition hub!
One of our favourite ways to enjoy this antioxidant-rich berry is by using them in our smoothies.
Build Your Smoothie Using Our Easy Formula!
We like to keep things simple when it comes to blending smoothies. That’s why we’ve created a simple formula to keep in mind when making your smoothies.

Let’s discuss each of the components of this formula!
1. Fruits and/or Vegetables (1–3 servings)
Start with a mix of fruits, veggies, or both! Using what’s in season—like fresh blueberries—is less expensive and a great way to maximize flavour.
Don’t be afraid to add in some vegetables too! Options like carrots, spinach, or zucchini can be easily blended and add fibre and other nutrients to your smoothie without altering the taste too much.
2. Liquid
Choose a liquid to help everything blend smoothly. Our go-to options include:
Water
Milk
Milk alternatives like almond, oat, or soy milk
The liquid helps with texture, but it also helps keep you hydrated! Using milk or fortified alternatives can also increase the protein or micronutrient content of your smoothie.
3. Fibre
Fibre helps you stay fuller longer, supports digestion, and helps to regulate blood sugars. Some great smoothie-friendly options include:
Chia seeds
Ground flax
Rolled oats
Hemp hearts
4. Healthy Fats
Adding in a healthy fat can help make your smoothie creamier and keep you satisfied. Try adding in:
Greek yogurt
Peanut butter or other nut butters
Tahini
Avocado
Once you have chosen your base ingredients, you can stop there! Or you can consider adding in a little something extra to elevate the flavour. We call this your flavour pop! Some of our favourites include:
Thames River Melons Melon Blossom Honey
Cinnamon
Vanilla
Lemon


By using our smoothie formula, you can create endless tasty combinations that will keep you satisfied! Watch out for our next recipe post, where we use this formula to share our three favourite blueberry smoothie recipes.
References:
PEN Nutrition [Internet]. Canada: Dietitians of Canada; [updated 2018 Dec 17; cited 2025 Aug 1]. Antioxidants and your diet; [about 3 screens]. Available from: https://www.pennutrition.com/KnowledgePathway.aspx?kpid=3127&trid=13678&trcatid=467.
Unlock Food [Internet]. Canada: Dietitians of Canada; [updated 2019 Feb 20; cited 2025 Aug 1]. What you need to know about antioxidants; [about 3 screens]. Available from: https://www.unlockfood.ca/en/Articles/Vitamins-and-Minerals/What-You-Need-to-Know-About-Antioxidants.aspx.
Zucchini Fritters


Zucchini Fritters
These fritters are a great way to use up large, overgrown zucchini. They are a delicous side with breakfast, lunch, or dinner!
Prep time: 10 Minutes
Cook time: 15 Minutes
Yield: 10-15 fritters, depending on the preferred size and thickness you choose.
Ingredients
4 cups of shredded Thames River Melons zucchini (3-4 medium zucchini)
¼ teaspoon salt
1 teaspoon each of garlic powder, onion powder, and cracked black pepper
2 large eggs
2 tablespoons corn starch
Instructions
1. Shred the zucchini
Grate 3 to 4 medium zucchini to get 4 cups of loose shreds. Place them in a large bowl.
Sprinkle with ¼ teaspoon salt and let sit for 15 minutes. This helps pull out excess moisture. Too much moisture left in the shredded zucchini will make for soggy fritters that don’t hold together well.
2. Remove the moisture
After 15 minutes, use a cheesecloth or fine mesh strainer to squeeze out as much water as possible.
(Tip: Zucchini water makes excellent fertilizer for houseplants!)
3. Make the batter
Return the drained zucchini to a clean, dry bowl.
Add garlic powder, onion powder, black pepper, corn starch, and eggs.
Stir well to combine into a uniform batter.
4. Heat the pan
Place a nonstick or cast iron skillet over medium heat.
Lightly grease the pan with neutral oil like canola, avocado, or olive oil. You may need to adjust the heat slightly as you cook—the idea is to aim for golden brown, not black.
5. Form and cook fritters
Spoon about 2 tablespoons of the mixture per fritter into the pan to form 2-inch rounds.
Let them cook undisturbed until the edges start to look dry and golden.
6. Flip and finish
Carefully flip the fritters and gently press down with a spatula.
Cook until the second side is golden brown and the fritters feel firm to the touch.
7. Serve or store
Serve hot with our herby Greek yogurt sauce (recipe on our website).
Meal prep tip: Let fritters cool, then freeze. Reheat in the oven or air fryer for a quick and crispy meal.
Notes:
You can swap out frying these fritters in a skillet to baking them in a greased muffin pan at 375°F for 30 minutes or until golden brown.
Using cornstarch instead of flour makes for crispier fritters. It is also naturally gluten free - making this recipe celiac friendly!
Farmer Rob's Favourite Steak Marinade
If you’re ever chatting with Rob about our Black Angus Beef, he’s almost certainly mentioned this marinade. He swears by it, and wants everyone to experience the deliciousness along with him.
Marinades work best with tougher cuts of meat, and for steaks that will be cooked on the grill.

Check it out and let us know what you think!
Creamy Zucchini Pasta

Ingredients
6 slices bacon
3 zucchini, sliced into half rounds
1 head green garlic, minced
½ teaspoon black pepper
½ teaspoon salt
Pinch of red pepper flakes
½ cup vegetable broth
½ cup parmesan cheese
¼ cup cream
4 cups noodles of choice, cooked according to package directions
2 teaspoons breadcrumbs
More Parmesan, for topping
Instructions
Cook bacon in a large frying pan over medium heat until crisped to your liking. Be sure to flip and cook both sides evenly. Once ready, remove bacon from pan and place on a plate lined with paper towel. Pat the bacon strips to remove excess grease, then roughly chop into homemade bacon bits. Set aside for later.
In the same pan and still over medium heat, cook the zucchini and garlic. The bacon grease will provide all the fat you need and will offer delicious flavour. Stir often and continue to cook until the zucchini is golden brown and garlic is fragrant.
In the meantime, set a large pot full of water on another element. Salt the water, bring to a boil, and cook your pasta according to package directions.
Turn the heat off the pan with the zucchini and carefully pour the broth into the pan. Scrape up all the bits of garlic that have likely started to stick, then quickly transfer the zucchini and broth mixture into a blender.
Add cream and Parmesan to the blender as well, then buzz until a smooth sauce has formed.
Pour the sauce over the cooked noodles and stir until everything is evenly coated.
Serve pasta, then top with the bacon bits you prepared earlier, as well as breadcrumbs and extra Parmesan.
Serve with an additional protein if you’d like! We chose some leftover chicken strips. Sausage or grilled chicken would be delicious as well.
Enjoy!
Note: This recipe could be easily modified to become vegetarian by subbing olive oil for the bacon fat. To make it vegan, try using nutritional yeast in place of Parmesan and cashew cream or coconut milk instead of the dairy cream!
Chili Crisp and Green Garlic Potato Salad

Ingredients
4lbs potatoes (red, white, or Yukon Gold)
2 ½ teaspoons salt
6 boiled eggs, peeled and chopped
¼ cup Thames River Melons Corn Relish
3 stems green garlic, washed and minced (white and green parts separated)
1 teaspoon black pepper
¾ cup mayonnaise
¼ cup yogurt
1 tablespoon Thames River Melons Candied Jalapeno Syrup
2 tablespoons Chilli Crisp
2 tablespoons rice wine vinegar
8 slices bacon, cooked and chopped
Instructions
Cut potatoes into bite sized chunks (peel first if desired – we didn’t!). Place the potatoes and 2 teaspoons of the kosher salt in a large pot. Add enough cold water to cover the potatoes by about 1 inch. Bring to a boil over high heat. Reduce the heat to maintain a gentle simmer, and cook until the potatoes are fork-tender, 8 to 10 minutes.
Meanwhile, make the dressing. Add peeled and diced hard-boiled eggs, corn relish, white parts of the minced green garlic, remaining ½ teaspoon of salt, pepper, mayonnaise, yogurt, candied jalapeno syrup, chili crisp, 1 tablespoon of the rice wine vinegar, and chopped bacon. Stir to combine.
Drain the potatoes well in a colander, then transfer the potatoes to a rimmed baking sheet and spread into a single layer. Sprinkle the remaining 1 tablespoon vinegar evenly over the potatoes. Let cool to room temperature, about 15 minutes.
Add the potatoes to the bowl of dressing and fold to combine. Taste and season with more kosher salt and black pepper as needed. Cover and refrigerate for at least 1 hour or up to 1 day before serving.
Cheesy Asparagus Stuffed Chicken Breast

Ingredients
Cheese Filling
½ cup cream cheese (we used a local version called Crowdie, from Golspie Dairy!)
2 tablespoons Parmesan cheese
½ cup shredded cheese (mozzarella, cheddar, or whatever you have on hand)
1 teaspoon lemon juice
1 green garlic, minced
1 tablespoon sundried tomatoes, diced
Salt & Pepper
Spice Mixture
1 teaspoon paprika
1 teaspoon garlic powder
1 teaspoon onion powder
½ teaspoon thyme
½ teaspoon red pepper flakes
½ teaspoon brown sugar
Protein
2 chicken breasts
8 slices bacon
Other
8 – 12 spears asparagus, ends trimmed
Neutral cooking oil
Instructions
Preheat oven to 375°F.
Prepare the cheese filling: in a medium bowl mix cream cheese, Parmesan, shredded cheese, lemon juice, garlic, sundried tomatoes, salt, and pepper until smooth.
Prepare the spice mixture: in a small bowl, measure out spices and whisk together until evenly combined.
Set cheese filling and spice mixture aside until later.
Slice chicken breasts in half lengthwise, leaving you with a total of 4 thin pieces (they should be around ¾ inch) of chicken. If they are too thick, wrap in saran and pound with a meat tenderizer. If you don’t have one, a rolling pin will work as well! And if you don’t have one of those? Try a can of beans!
Now you are ready to assemble the stuffed chicken:
Season the inside of the chicken slices with a sprinkle of the spice mixture.
Next, add 2 tablespoons of the cheese mixture and spread so it covers the full length of the chicken.
Finally, add 2 – 3 spears of asparagus.
Carefully roll up the piece of chicken and wrap with 2 slices of bacon.
Place an oven-safe pan over medium heat on the stove top. Once hot, add the stuffed chicken pieces to the pan.
Sprinkle the remaining spice mixture all over the top of the chicken. Sear for 2 minutes per side, to give the chicken a nice golden brown exterior.
Transfer the pan to the oven and cook for 20 – 25 minutes, until an internal thermometer shows the chicken has reached 165°F (74°C).
Serve alongside veggies and a grain of your choice. We went with more asparagus and Cavatappi noodles sprinkled with more Parmesan and black pepper.
Sweet & Spicy Pickled Rhubarb

Ingredients
3 stalks rhubarb, washed and trimmed
1 mason jar of choice
1 cup water
1 cup apple cider vinegar
1 cup sugar
Zest from 1 orange
2 bay leaves
½ teaspoon peppercorns
1.5 teaspoons salt
1 teaspoon ginger
1 spring fresh thyme
Red pepper flakes
1 tablespoon whole mustard seeds
6 cloves
Instructions
Combine water, vinegar, and sugar in a small pot then add all seasonings.
Mix thoroughly, then set on the stove over medium heat.
Bring the pickling brine to a boil then reduce heat and simmer for 5 minutes, until sugar is dissolved.
While the brine boils, prep your rhubarb. Slice stalks in half, then cut on an angle until they are roughly the height of the mason jar you chose. Pack prepared rhubarb slices upright into the jar.
Remove the brine from heat, let cool, then pour overtop of the prepared rhubarb, into the mason jar.
Let cool on the counter then tightly screw the lid on the jar and transfer to the fridge.
Let sit in the fridge for at least 1 day before enjoying. The longer you leave them the more flavourful they will get!
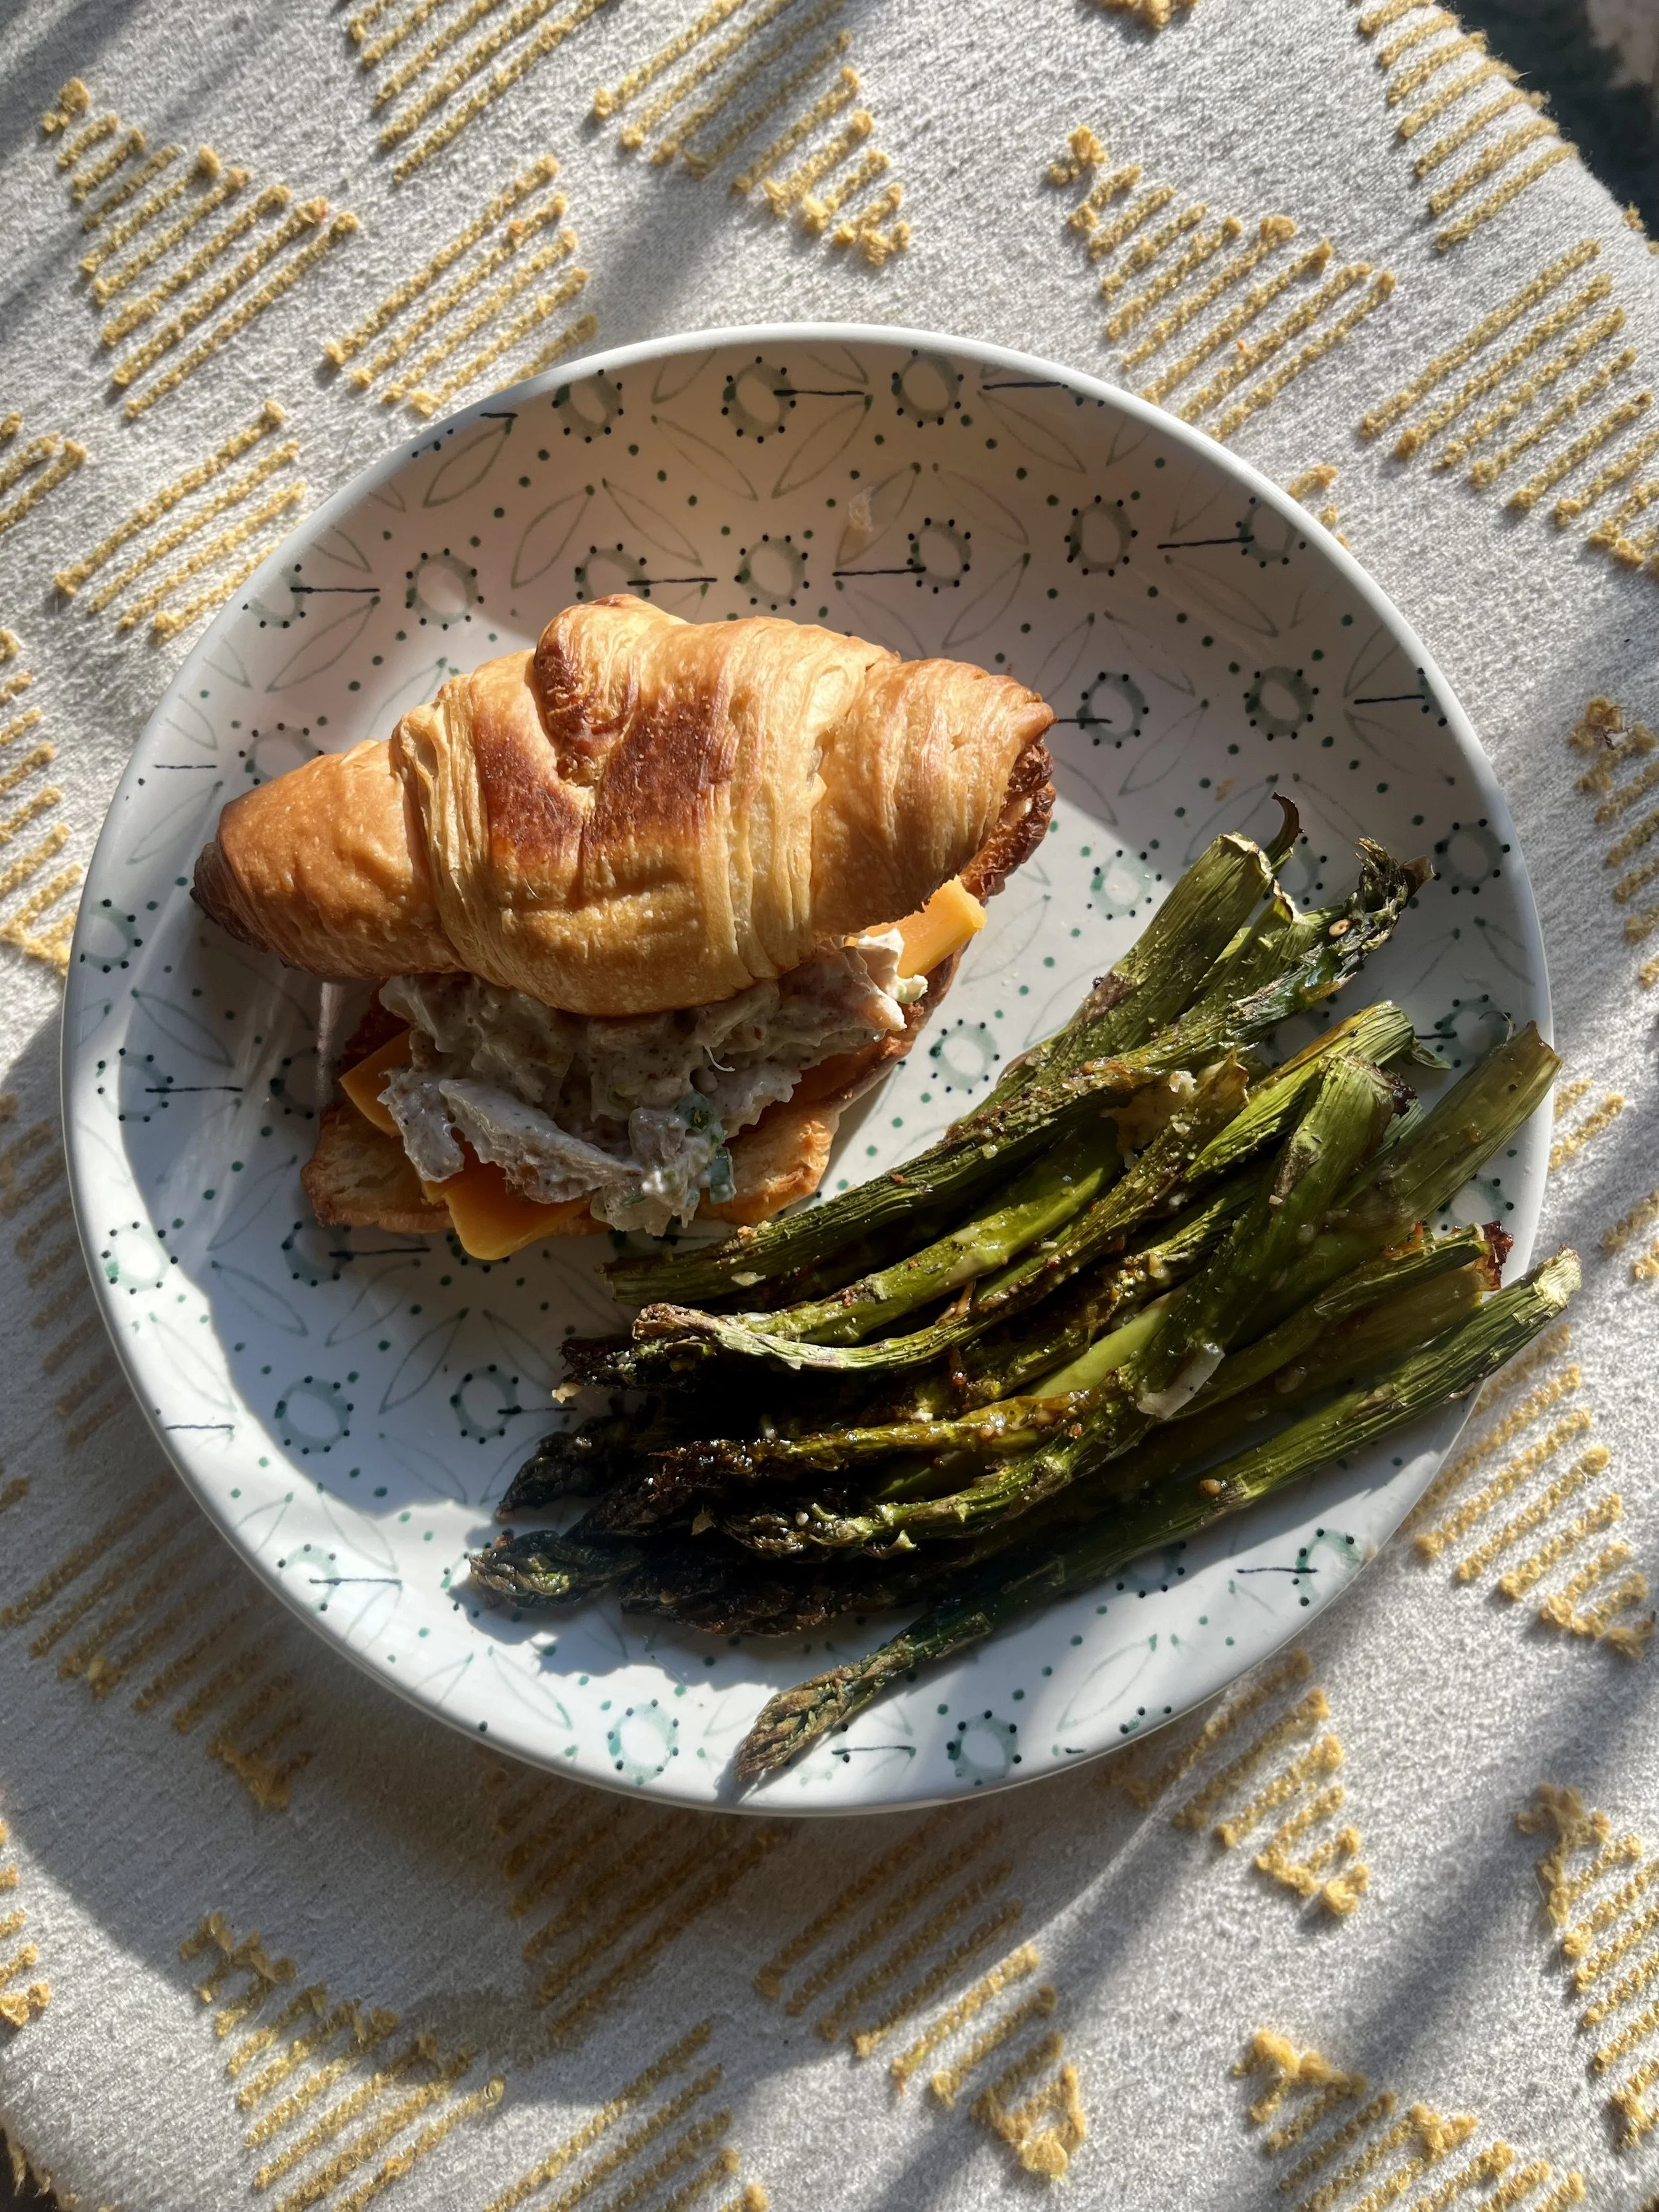
Chicken Salad with Pickled Rhubarb
Ingredients
¼ cup mayonnaise
¼ cup yogurt
2 stalks green garlic, washed and minced
½ teaspoon celery seed
½ teaspoon thyme
Salt
Pepper
½ cup pickled rhubarb, chopped
2 cups shredded chicken
Instructions
Whisk together mayonnaise and yogurt. Add green garlic, celery seed, and thyme, then whisk again. Season with salt and pepper and taste.
Fold in rhubarb and shredded chicken, and mix until evenly coated.
Serve on bread of choice (we used croissants!), with your preferred toppings (we chose farm fresh lettuce and a slice of local cheese).
Enjoy!
Our Favourite Ways to Eat Green Garlic

Green garlic is the young, tender version of garlic harvested before the bulb fully matures. It’s milder and sweeter than the garlic you’re used to, with hints of fresh onion and a delicate garlic flavour. Perfect for adding a subtle punch to your dishes without overwhelming them.
We’ve shared several recipes featuring this delectable spring crop, and thought we would round them up here for your convenience. Give them a try and let us know what you think!
Cheesy Smashed New Potatoes & Garlic Scapes
Asparagus & Green Garlic Ricotta Pasta
Steak Frites with Asparagus & Halloumi

Ingredients
2 Thames River Melons Black Angus steaks (rib or striploin)
1 block halloumi, sliced into rectangles
1 bunch Thames River Melons asparagus, washed and trimmed
1 bag frozen fries (or make your own!)
Salt
Pepper
Neutral cooking oil
Neutral cooking oil spray
Seasonings (We used Kinders Buttery Garlic Rub, from Costco)
2 tablespoons butter
Instructions
Cook Steaks
Thaw steaks in the fridge overnight.
Remove from packaging and thoroughly pat dry using paper towel. Once steaks are dry, let them sit out for 15 minutes, to come to room temperature. Thoroughly salt both sides of the steaks.
Heat a large stainless-steel skillet over medium-high heat.
When pan is very hot, pour in 1 tablespoon oil and swirl to coat pan.
Cook steak 6 - 8 minutes, until a brown crust forms. Flip, and cook for another 6 - 8 minutes.
Continue cooking until an instant-read thermometer inserted into thickest part registers 125°F (51°C).
Transfer steak to a cutting board.
Prepare Asparagus & Fries
Next, prepare the asparagus and fries for the oven.
Preheat oven to 400°F
For the asparagus, spread out evenly on a baking sheet lined with parchment paper.
Drizzle with cooking oil and season with salt and pepper, along with any other seasonings you’d like.
Transfer the prepared pan of asparagus to the oven and roast for approximately 15 minutes.
Spread the fries out on a baking sheet lined with parchment paper and generously spray with cooking oil.
When 10 minutes remains on the asparagus timer, add the pan of fries to the oven as well.
Cook Halloumi
While the asparagus and fries bake, cook your halloumi. Add 1 tablespoon of cooking oil to a large pan and place over medium-high heat.
Add your slices of halloumi and cook until golden brown. Flip and repeat.
By now, your asparagus, fries, and halloumi should all be ready. Turn off the oven and leave the asparagus & fries. Transfer the halloumi to an oven safe plate lined with paper towel and place them in the oven as well, to stay warm.
Cook Steaks – Part 2
Add 2 tablespoons of butter to the pan you originally cooked your steak in, and turn the heat to medium-high.
Slice your steaks into bite-sized pieces, working against the grain.
Once butter is melted, add steak bites to the pan. Season with your preferred selection of herbs and spices (again, we used that garlic-butter mixture from Costco!).
Cook until your desired level of doneness is achieved. The temperature listed earlier in the recipe (125°F/51°C) is rare.
Assemble Plates
Layer shallow bowls with a scoop of fries and top with halloumi, steak, and asparagus. Serve with a salad of your choice and enjoy!
PYO Meal Series: Garlicky Green Bean Salad
For our next Pick Your Own (PYO) meal, we are featuring The Garlicky Green Bean Salad. Summer is the season of salads. If you like garlic, and aren’t sure what to do with green beans, this salad will not disappoint. It has the best balance of flavours, a satisfying crunch, and is incredibly easy to throw together. This is a really good make-ahead salad as it gets even more delicious the next day. We love this salad on its own but it would pair well with fish or chicken!
Please tag us on Instagram (@thamesrivermelons) if you try this recipe!

The giant green beans!
Recipe
*Serves 6-8
Ingredients
2 lbs Thames River Melons beans
1 cup parmesan cheese
1 cup of pistachios (or sub slivered almonds), shelled and chopped
For the Dressing
⅓ cup of olive oil
Salt and pepper
1 lemon, juiced and zested
6 cloves Thames River Melons garlic
1 tsp Thames River Melon Blossom honey

Here is what you will need!
Instructions
1. Trim and wash green beans. Bring a large pot of salted water to a boil.
2. Blanch beans for 3 minutes by submerging them in the boiling water. Meanwhile, fill a large bowl with ice and water. Use tongs to transfer the blanched beans into the ice bath to stop them from cooking. Once cool, drain, pat dry, and place in the fridge to stay cool while the rest of ingredients are prepared.
3. Make the dressing: combine olive oil, the zest of one whole lemon (zest before cutting), juice from one whole lemon, 6 cloves of minced garlic, 1 tsp TRM honey, salt and pepper. Shake well.
4. In a separate bowl, combine 1 cup of chopped pistachio (or sub slivered almonds), 1 cup of grated parmesan cheese, and top with pepper.
5. Toss beans and dressing together in a large bowl so that beans are well coated, then slowly add the parmesan and nut mixture and toss well.
Serve up cold! This makes a perfect side dish.

Garlicky Green Bean Salad
Cost
PYO beans are $3/lb. 2 lbs of green beans are needed for this salad.
Therefore, the total cost of PYO vegetables for this salad was $6.
Nutritional Density
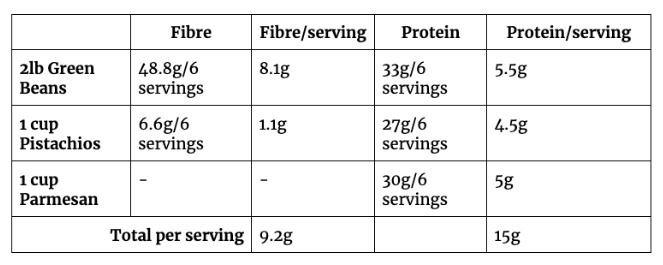
* Please note these amounts are based on 6 servings. If you want smaller portions or to get more servings per batch, divide by the amount of servings you decide to make, to get the correct amounts of fibre and protein.
Storage
This salad will keep in the fridge in an airtight container for 4 days. However, it’s important to note that the beans will not maintain their bright green colour for more than 1-2 days.
The dressing will keep for 5-7 days in an airtight container in the fridge.
Modifications
This recipe may be modified to suit your needs. If you have tree nut allergies or want to make this salad for a back-to-school meal, you may roast pumpkin seeds or sunflower seeds.
Recipe inspired by Molly Baz, developed and photographed by dietetic interns Lise Wolyniuk and Lexie Nobbs and reviewed by Alex Chesney, RD
Reference:
Health Canada. (2023). Canadian Nutrient File. Government of Canada. Retrieved August 12, 2024, from https://food-nutrition.canada.ca/cnf-fce/newSearch
Blueberry Recipes Inspo
As the blueberry season is wrapping up, you may ask yourself, “what can I do with blueberries?” Well, we’ve put together this post to inspire you to come out to the farm and take advantage of the last of the season Pick Your Own blueberries. There are so many recipes that incorporate this delicious and nutritious fruit.
Check them out below and try for yourself!
Please tag us on Instagram (@thamesrivermelons) if you make one of these recipes!
Blueberry Beet Pancakes
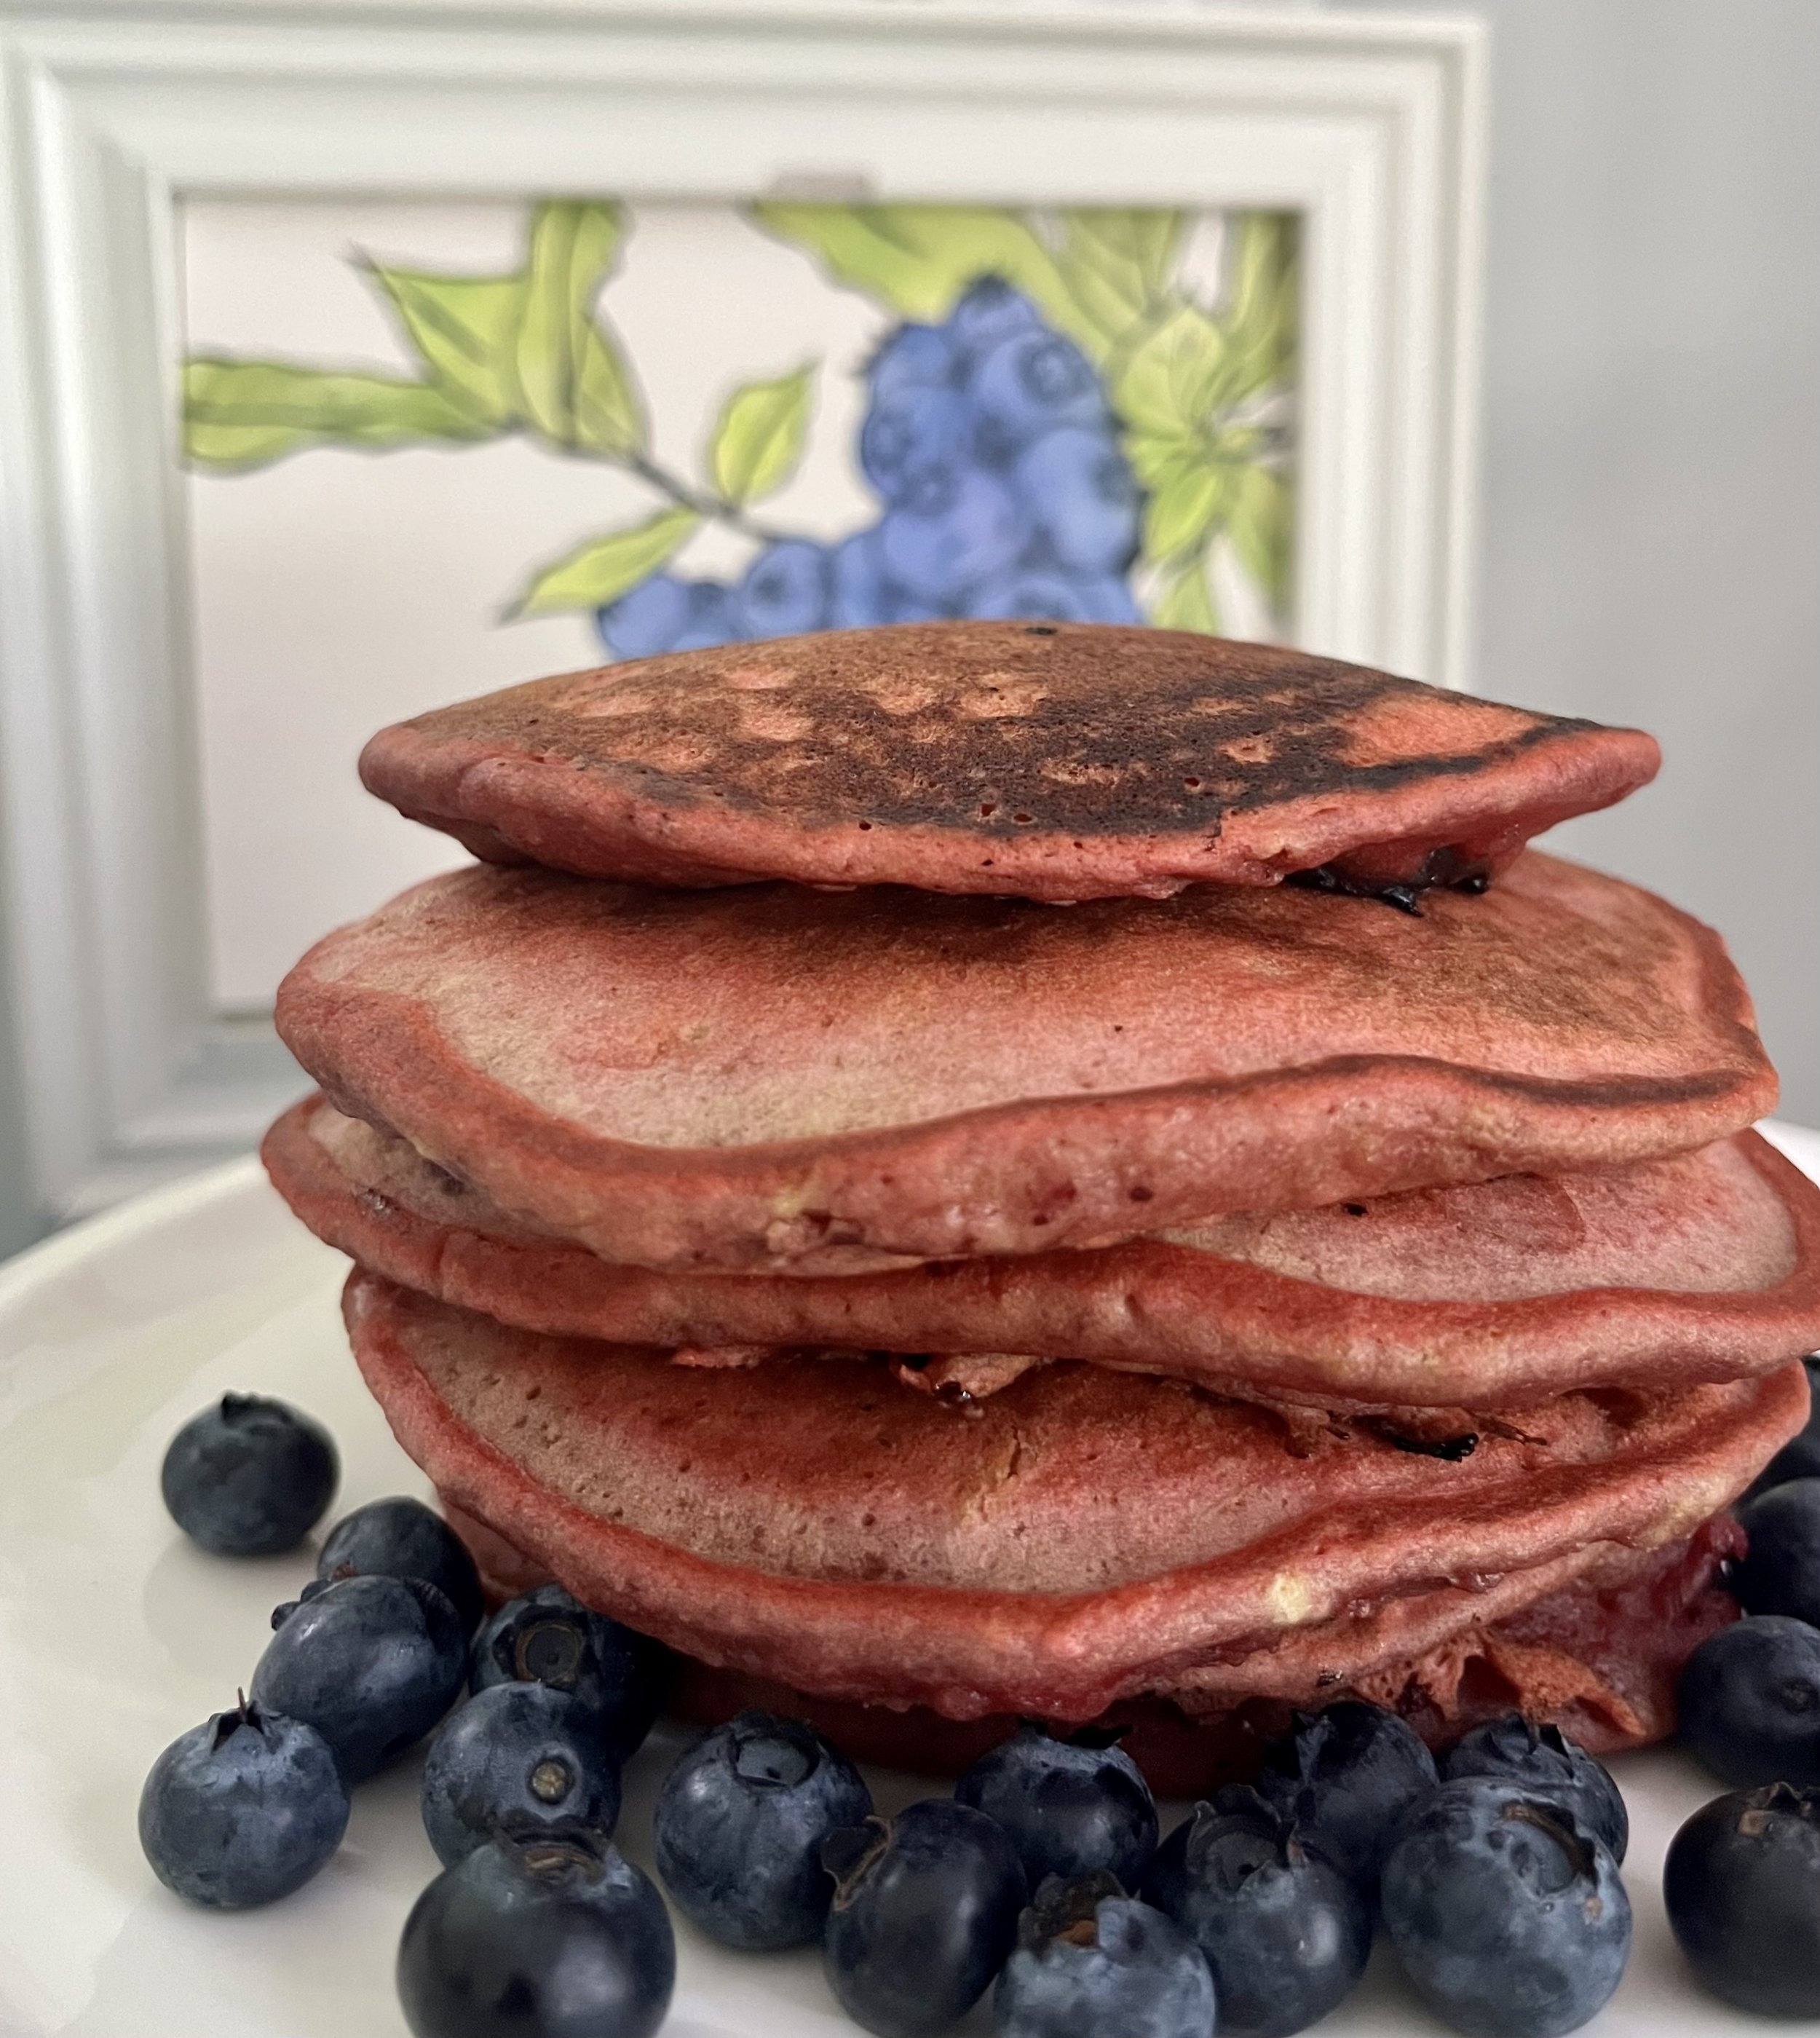


Blueberries are a very low maintenance fruit as there is no need to cut or peel before consuming. Just wash and eat! Also, if you can’t eat them all fresh, they are so easy to freeze and are delicious frozen as well. Frozen blueberries are also easy to incorporate into any recipes that require baking, or use to make a yogurt parfait!
Find out more about Thames River Melons blueberries by watching Blueberry to Product.
Also if you are interested in any of our blueberry baked goods or preserves, shop online or stop by our farm shop!
PYO Meal Series: Raisin and Sunflower Seed Eggplant Salad
We are featuring our eighth Pick Your Own (PYO) meal, Raisin and Sunflower Eggplant Salad. Yes, you heard it here, our eggplant plants are full of fruit ready to be harvested. What to do with eggplant you ask?... make a delicious salad! Eggplant has a mild flavour that pairs well with bold flavours like bitter pickled onions (an easy how-to-pickle guide is within the recipe instructions of this post). However, the toasted fruit and seeds and fig dressing add a sweet and savoury flavour that pairs perfectly with the pickled onions.
The balance of flavours and nutrients are some of the many highlights of this salad. Not only will you be satisfied with this salad, but it may inspire you to get out of your comfort zone and experience new flavours.
Please tag us on Instagram (@thamesrivermelons) if you try this recipe!
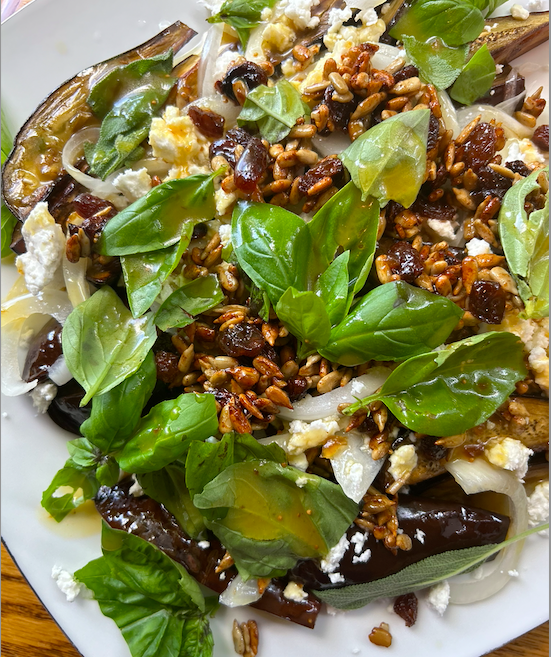
So much flavour, a must try!
Recipe
*Serves 4-6
Ingredients
~8 small (2 lbs) Thames River Melons eggplant
1 cup Thames River Melons herbs (basil and sage)
½ cup feta cheese (I used goats feta, but you may also use goat cheese)
Toasted Fruit and Seeds
½ cup of raisins (can substitute for currants or cranberries)
½ cup of sunflower seeds (can substitute for pumpkin seeds or use a nut such as walnuts)
1 tbsp butter
1 tsp Thames River Melons Melon Blossom Honey or maple syrup
2 dashes of cinnamon
Dressing
2 tbsp fig jam
1 tbsp Thames River Melons Melon Blossom Honey
⅓ cup olive oil
1 lemon, juiced
Pickled Onion
1 medium Thames River Melons sweet onion
¾ cup of apple cider vinegar
¼ cup water
½ tsp salt
1 tsp Thames River Melons Melon Blossom Honey

Here is what you will need!
Instructions
1. Preheat the oven to 400°F.
2. Wash the eggplant, then cut into quarter or 1/8th wedges (depending on the size of the eggplant). Place the wedges skin side up on a baking sheet, pour olive oil over them and season with salt. Place in the oven and set a timer for 10 minutes.

Eggplant wedges!
3. While the eggplants are in the oven, make the pickled onion brine: in a small pot on high heat bring the apple cider vinegar, water, salt, and honey to a boil.
4. Thinly slice the onion and place into a mason jar. Pour the boiling brine mixture over top of the onions and shake the jar. Let cool and marinate on the counter for a minimum 20 minutes (the longer the better).
5. After 10 minutes in the oven, or until the one side of the eggplant looks golden, flip the eggplant and set another timer for 10 minutes.

Golden and ready to be flipped!
6. Meanwhile, make the salad dressing by adding the honey, olive oil, lemon, and fig jam to a jar. Shake until evenly mixed .
* There may be chunks of fig, but that is okay!
7. Now, take out the eggplant and let it cool on top of the oven.
8. While the eggplant cools, add the butter, sunflower seeds, raisins, maple syrup/honey, and cinnamon to the same pot as the vinegar brine and put on medium heat. Stir until the sunflower seeds get golden and crisp.
* This is my favourite step as it gives off the most delightful aroma.
9. Assemble the salad: place the roasted eggplant wedges on a serving plate, then remove the pickled onions from the jar (look at the waste less notes for more ideas on how to use the remainder of the pickled onions) and add them on top of the eggplant wedges. Add the crumbled feta cheese, sprinkle on the fruit and seed mixture and lastly, cover the salad in dressing and garnish with sage and basil leaves.
10. Serve up warm or cool! This makes a perfect side dish to share with family & friends.

Tada! Raisin and Sunflower Seed Eggplant Salad!
Cost
This salad requires approximately 2 lbs of eggplant. Eggplant PYO cost is $2/lb. Therefore, the PYO vegetables for this salad cost $4 in total.
Nutritional Density
Eggplants contain manganese and vitamin K which are minerals and vitamins essential for good bone and blood health. Both micronutrients play a role in blood clotting. Manganese specifically plays a large role in reactions that contribute to bone formation and bone density (1).
For 100g of eggplant, there is 0.232 mg of manganese and 3.5µg vitamin K (2).
The recommended dietary allowances (RDA) for manganese is 1.8 for female adults and 2.3 for males adults. Therefore, 100g of eggplant provides females with 13% of RDA and males with 10% of RDA. The adequate intake (AI) for vitamin K is 90µg for male adults and 120µg for female adults. Therefore, 100g of eggplant gives 4% of AI for females and 3% of AI for males (3).
The pickled onions may provide probiotics. Probiotics are the good bacteria present when a food item is fermented. The fermentation process uses the bacteria present on the fruit or vegetable and a salt/water/sugar brine to activate the bacteria. When consumed, these bacteria may transport to the colon and help your digestive tract maintain good health (4).
Storage
This salad will keep in the fridge for 2 days. If planning to store, we recommend keeping the dressing on the side as the eggplant may become soggy.
The dressing will keep for 5-7 days in an airtight container in the fridge.
Waste Less Notes
You may not use all of the pickled onions (depending on how much your crowd likes onions). However, these pickled onions can be stored in the fridge for up to 2 weeks in a sealed container and used in a number of delicious recipes, especially in tacos, stir fry, and as a pizza topping.
Modifications
This recipe may be modified to suit your needs. You may substitute the raisins for any dried fruit, like currants or cranberries. Even diced dates would work great! As for sunflower seeds substitutes, pumpkin seeds or if you have nuts on hand, then walnuts or pecans would be lovely.
Recipe developed and photographed by dietetic interns Lexie Nobbs and Lise Wolyniuk and reviewed by Alex Chesney, RD
References
National Institutes of Health. (2021). Manganese: Fact Sheet for Health Professionals. Retrieve August 17, 2024, from https://ods.od.nih.gov/factsheets/Manganese-HealthProfessional/
Health Canada. (2023). Canadian Nutrient File. Government of Canada. Retrieved August 17, 2024, from https://food-nutrition.canada.ca/cnf-fce/newSearch
Health Canada. (2023). Dietary Reference Intake Tables: Reference values for vitamins and minerals. Government of Canada. Retrieved August 17, 2024, from https://www.canada.ca/en/health-canada/services/food-nutrition/healthy-eating/dietary-reference-intakes/tables/reference-values-vitamins.html#tbl1
Valentino V, Magliulo R, Farsi D, et al. Fermented foods, their microbiome and its potential in boosting human health. Microb Biotechnol. 2024;17(2). doi:10.1111/1751-7915.14428