
A sneaky way to gain all the nutritional benefits of liver.
Read moreBeef Stew with Cheddar Green Onion Dumplings

Ingredients
For Stew
2 lbs stewing beef
Salt
Pepper
3 tablespoons cooking oil
1 onion, diced
2 stalks celery, diced
3 cloves garlic, minced
1 teaspoon dried thyme
1 cup red wine (or an additional cup of broth)
4 cups beef broth
3 large carrots, diced
2 potatoes, cubed
2 tablespoons tomato paste
2 teaspoons Worcestershire sauce
1 bay leaf
2 tablespoons flour
For Dumplings
1 ¾ cups flour
1 tablespoon baking powder
½ teaspoon salt
2 green onions, diced
1 cup shredded cheddar cheese
¾ cup milk
Instructions
Season the cubes of stewing beef with salt and pepper. Heat 2 tablespoons of the oil in a large, heavy pot over medium-high heat. Brown the beef in batches until all sides are nicely seared. Remove the browned beef from the pot and set aside for later use.
In the same pot, add the remaining oil. Next add onion and celery, and cook for 5 minutes or so, until soft. Add garlic and thyme and cook for 1 additional minute. Finally, add tomato paste and cook for another minute, stirring frequently.
Pour red wine into the pot and scrape up any browned bits on the bottom. Return the beef to the pot followed by the beef broth, Worcestershire sauce, bay leaf, carrots, and potatoes.
Transfer entire contents of the pot to a slow cooker, and cook on low for 7 – 8 hours or high for 4 – 5 hours.
After the slow cooking time has completed, return the stew back to the original pot and place over medium heat. Whisk together the flour with some water until a thickened liquid has formed, then stir that into the contents of the pot.
Now, prepare to add the dumplings!
To make the dumpling batter, whisk together flour, baking powder, salt, and herbs in a bowl. Stir in milk and melted butter, followed by shredded cheese and diced green onion. Mix until just combined.
Drop spoonfuls of dumpling batter over the simmering stew. Cover and cook without lifting the lid for 15-20 minutes, until dumplings are puffed up and cooked through. If you’d like to add more colour, and if your pot is oven-safe, place under the broiler for 2 – 3 minutes.
Remove bay leaf and serve the stew in bowls topped with a dumpling.
Recipe modified from eatwithtenderness.com by Alex Chesney, RD
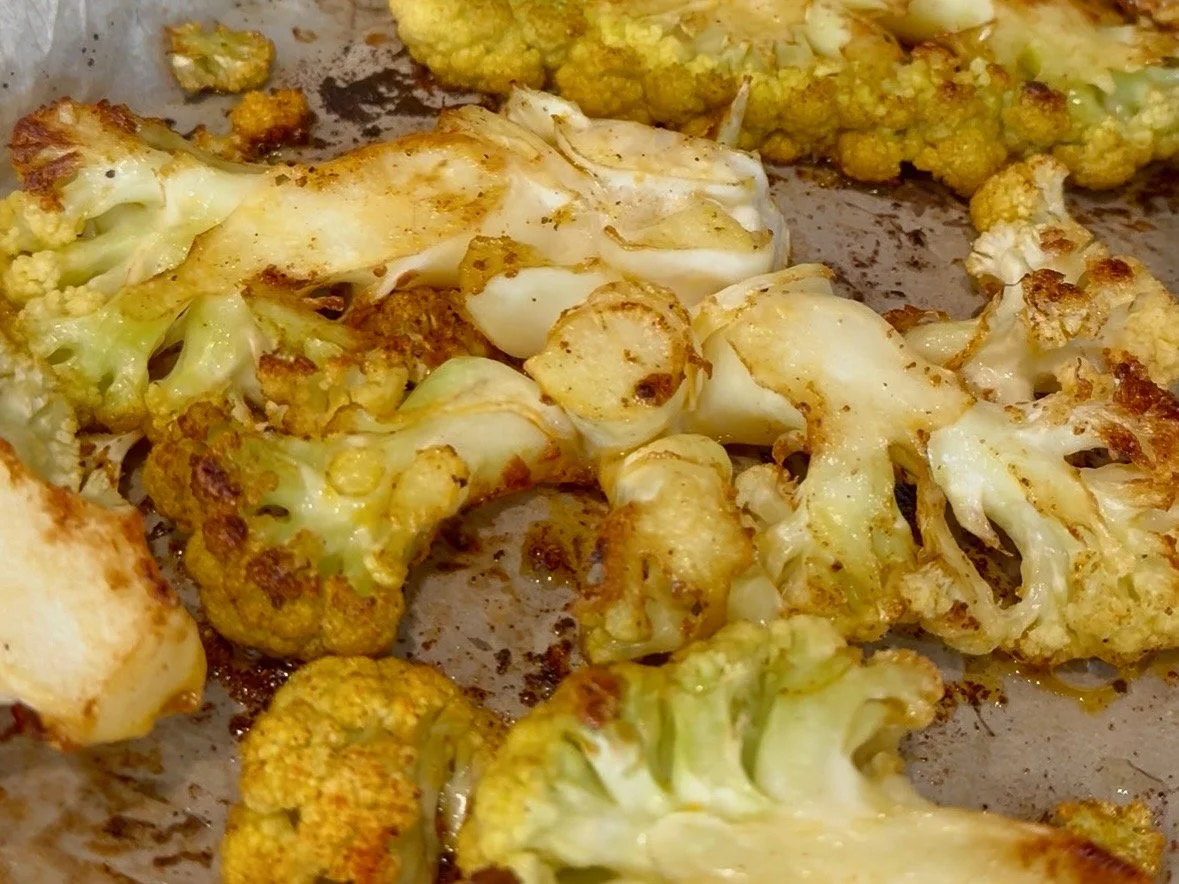
Roasted Cauliflower Steaks
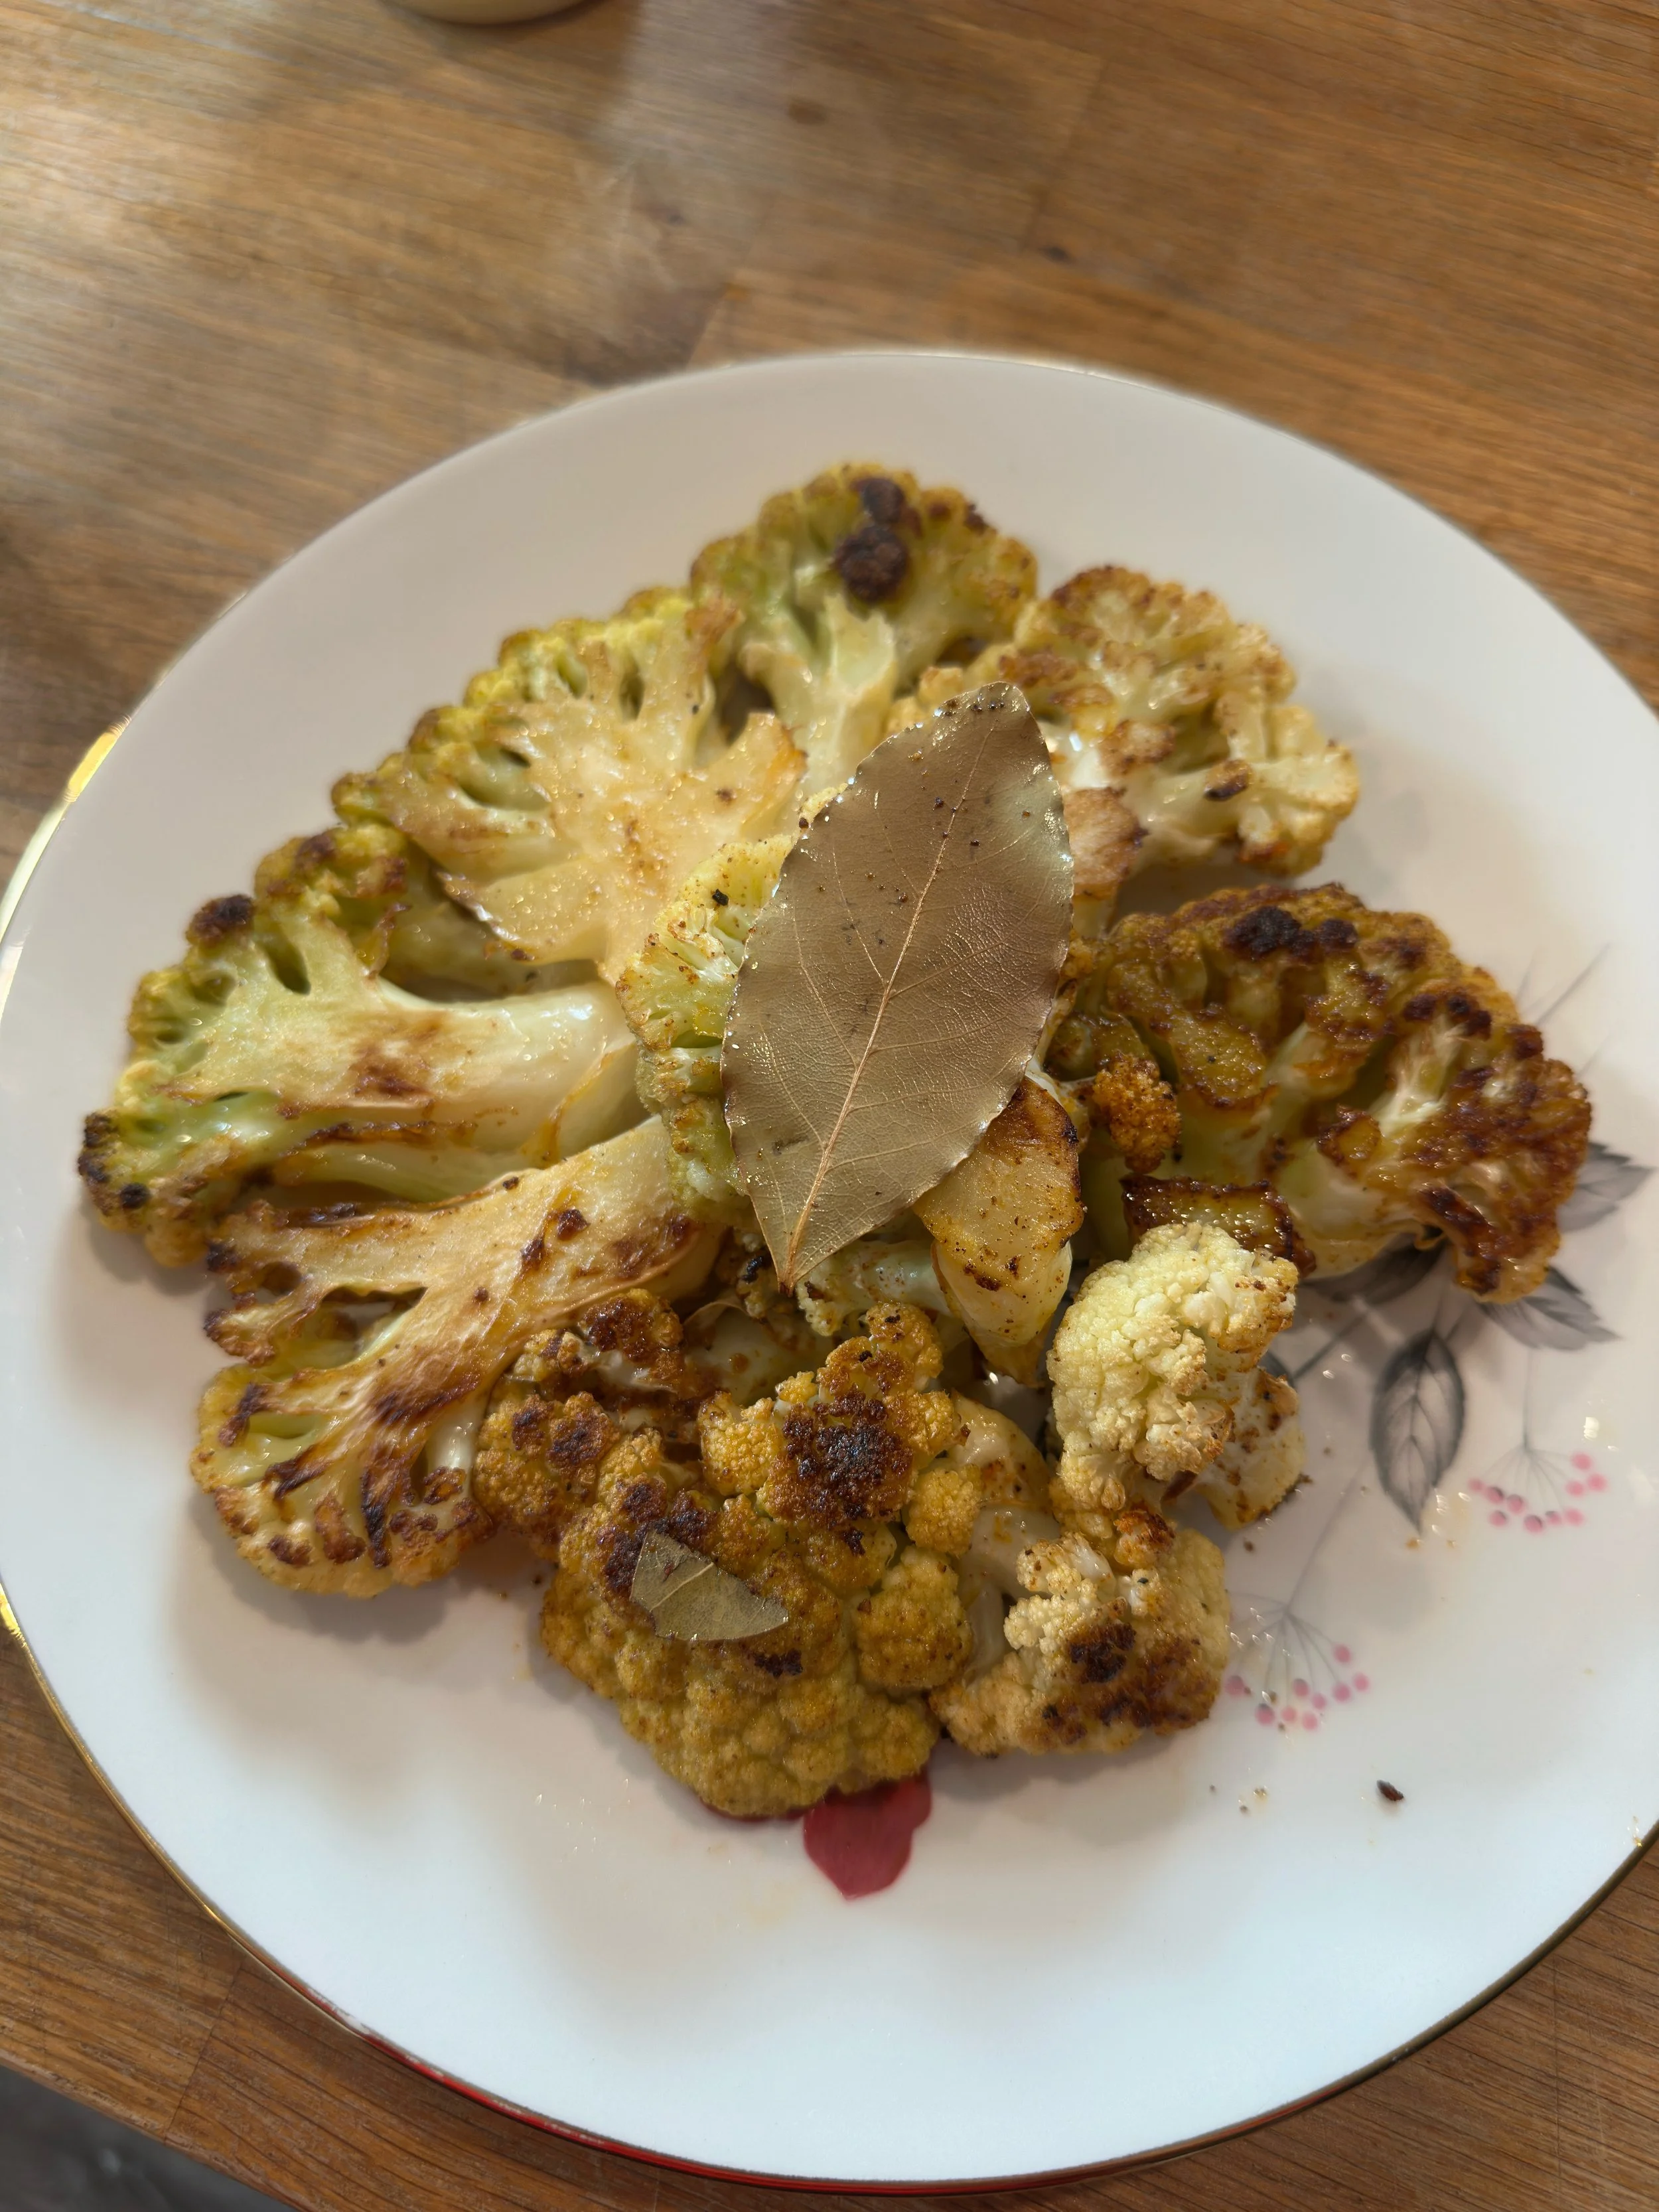
With only a few ingredients, these roasted cauliflower steaks are full of flavour and are easy to make!
Prep time: 10 minutes
Cook time: 25 minutes
Yield: Makes 2 steaks, plus other extra pieces that can be used for leftovers
Ingredients
1 head of Thames River Melons cauliflower
1 teaspoon paprika
1 teaspoon garlic powder
½ teaspoon salt
½ teaspoon pepper
1 tablespoon olive oil
8 bay leaves (optional)
Instructions
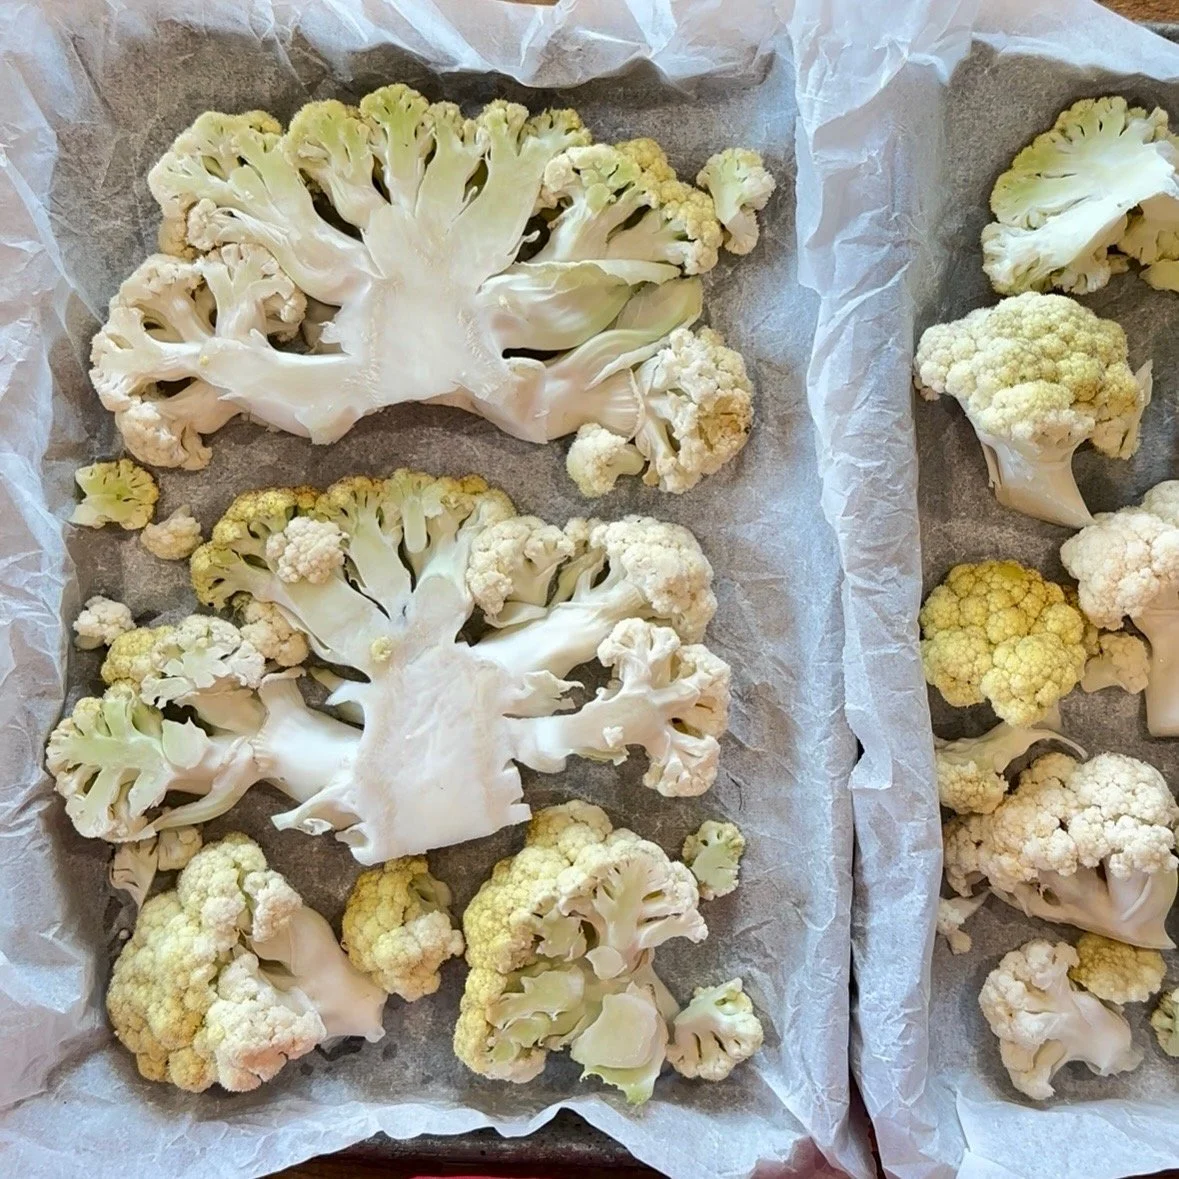
1. Preheat your oven to 425℉ and line a baking sheet with parchment paper.
2. Rinse the cauliflower under cold water and pat dry. Remove the outer leaves and carefully use a knife to trim the stem. Tip: cauliflower leaves are edible! Try using them in stir-fries, salads, or soups!
3. Slice the cauliflower into steaks about 1 inch thick. One head of cauliflower will make 2 steaks, but smaller pieces of cauliflower will fall off when you are cutting—this is normal! Keep all the pieces and place them on the prepared baking sheet.
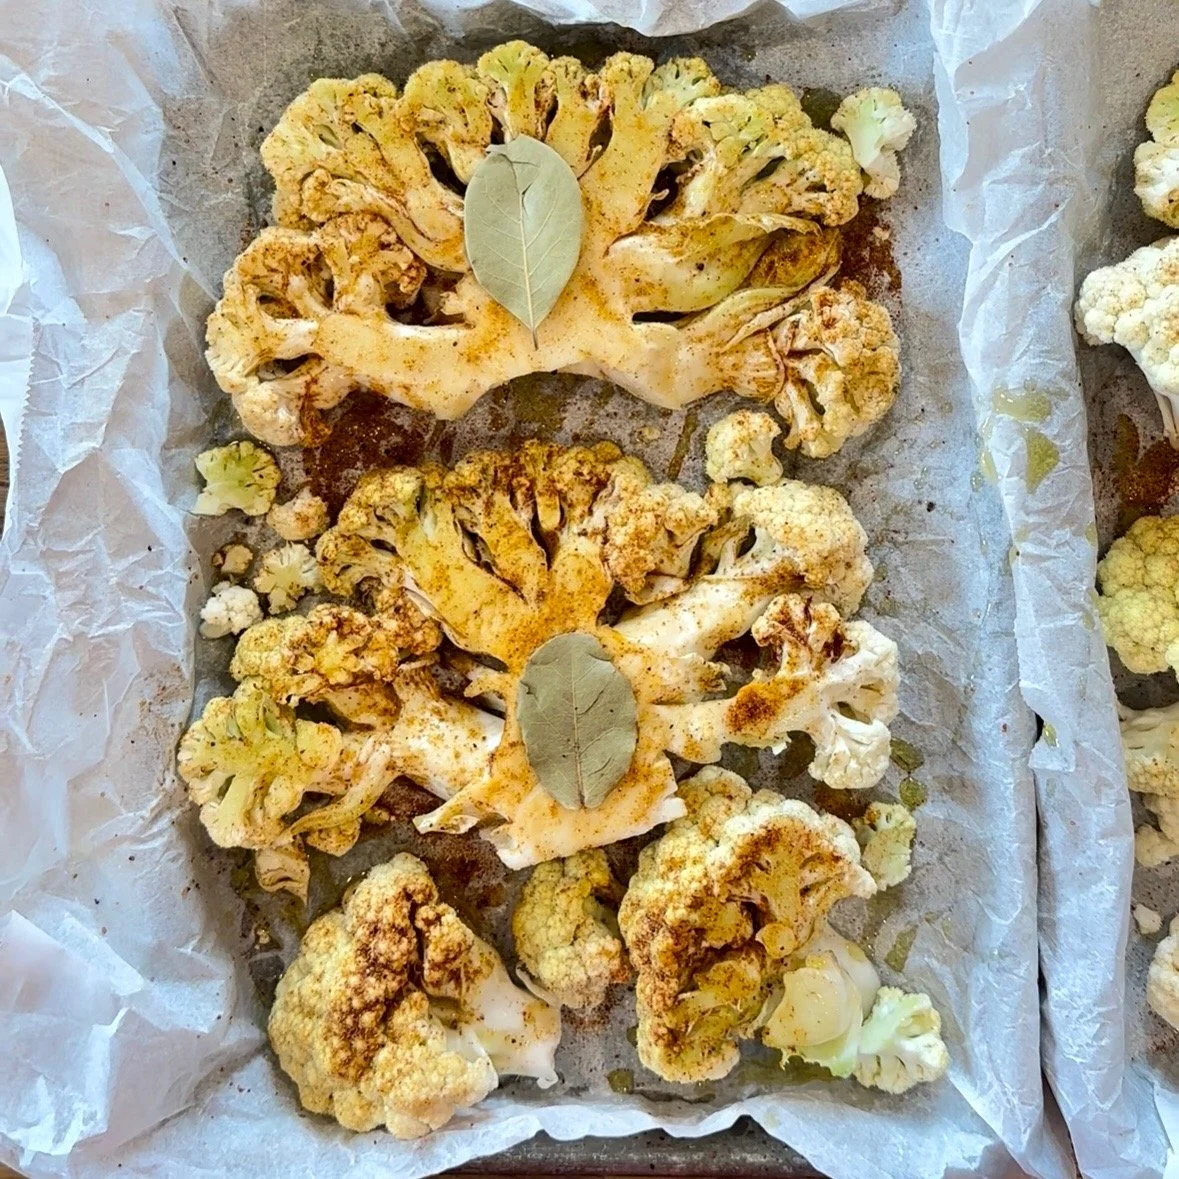
4. In a small bowl, mix together the paprika, garlic powder, salt, and pepper. Drizzle olive oil over the cauliflower steaks, then sprinkle the seasoning mixture on top. Use a brush to evenly coat both sides of each steak. Top with bay leaves.
5. Bake the cauliflower for 25 minutes or until golden brown and tender, flipping halfway through.
6. Let them cool for 5 minutes before serving.
Cost
PYO cauliflower is $2.00/head. Therefore, the cost of each cauliflower steak is $1.00.
Nutrient Profile
Each cauliflower steak provides 4 grams of fibre and contains important nutrients like vitamin C and vitamin K! Vitamin C supports your immune function and protects your cells, and vitamin K plays a role in blood clotting and blood health.
Storage
Store in an airtight container in the refrigerator for up to 4 days. For best results, reheat in the air fryer or oven–this will help the cauliflower stay crispy!
References:
Unlock Food [Internet]. Canada: Dietitians of Canada; [updated 2019 Mar 21; cited 2025 Aug 13]. What you need to know about vitamin C; [about 3 screens]. Available from: https://www.unlockfood.ca/en/Articles/Vitamins-and-Minerals/What-you-need-to-know-about-vitamin-C.aspx.
Unlock Food [Internet]. Canada: Dietitians of Canada; [updated 2019 Mar 21; cited 2025 Aug 13]. What you need to know about vitamin C; [about 3 screens]. Available from: https://www.unlockfood.ca/en/Articles/Vitamins-and-Minerals/What-You-Need-to-Know-About-Vitamin-K.aspx.
5 Minute, Garden-Fresh Herb and Greek Yogurt Dressing
5 Minute, Garden-Fresh Herb and Greek Yogurt Dressing

This is a vibrant and flavorful dressing for salads, or a delicious dip/sauce for your favorite foods.
Prep time: 5 minutes
Storage: Keeps for up to a week when refrigerated in an air-tight container.
Yield: 2 cups (~8 servings)
Ingredients
1 cup fresh Thames River Melons dill
½ cup fresh Thames River Melons sage
½ cup fresh Thames River Melons tarragon
¼ cup green onion
1 clove garlic
3 tablespoons lemon juice
¼ cup olive oil
1 cup plain greek, or skyrr yogurt (thick yogurt)
Salt and pepper to fit your tastebuds
Instructions
1. Prep the herbs
Wash the dill, sage, tarragon, and green onion thoroughly.
Remove any stems that feel too woody—this means anything that feels unusually stiff or hard when you bend it.
2. Blend it all together
Add all the ingredients into a food processor or blender.
Blend on medium speed (or pulse) for 60 to 90 seconds, until smooth and creamy.
3. Store and serve
Transfer the sauce into an airtight container.
Keep it in the fridge for easy serving throughout the week.
4. Enjoy!
Spoon over warm zucchini fritters, use as a dip, or drizzle over roasted veggies.
Notes:
Feel free to swap out any of the herbs used in this for your favorite options or with whatever you have on hand.
Our Pick Your Own fields are full of beautiful herbs, come out and grab some!
Zucchini Fritters


Zucchini Fritters
These fritters are a great way to use up large, overgrown zucchini. They are a delicous side with breakfast, lunch, or dinner!
Prep time: 10 Minutes
Cook time: 15 Minutes
Yield: 10-15 fritters, depending on the preferred size and thickness you choose.
Ingredients
4 cups of shredded Thames River Melons zucchini (3-4 medium zucchini)
¼ teaspoon salt
1 teaspoon each of garlic powder, onion powder, and cracked black pepper
2 large eggs
2 tablespoons corn starch
Instructions
1. Shred the zucchini
Grate 3 to 4 medium zucchini to get 4 cups of loose shreds. Place them in a large bowl.
Sprinkle with ¼ teaspoon salt and let sit for 15 minutes. This helps pull out excess moisture. Too much moisture left in the shredded zucchini will make for soggy fritters that don’t hold together well.
2. Remove the moisture
After 15 minutes, use a cheesecloth or fine mesh strainer to squeeze out as much water as possible.
(Tip: Zucchini water makes excellent fertilizer for houseplants!)
3. Make the batter
Return the drained zucchini to a clean, dry bowl.
Add garlic powder, onion powder, black pepper, corn starch, and eggs.
Stir well to combine into a uniform batter.
4. Heat the pan
Place a nonstick or cast iron skillet over medium heat.
Lightly grease the pan with neutral oil like canola, avocado, or olive oil. You may need to adjust the heat slightly as you cook—the idea is to aim for golden brown, not black.
5. Form and cook fritters
Spoon about 2 tablespoons of the mixture per fritter into the pan to form 2-inch rounds.
Let them cook undisturbed until the edges start to look dry and golden.
6. Flip and finish
Carefully flip the fritters and gently press down with a spatula.
Cook until the second side is golden brown and the fritters feel firm to the touch.
7. Serve or store
Serve hot with our herby Greek yogurt sauce (recipe on our website).
Meal prep tip: Let fritters cool, then freeze. Reheat in the oven or air fryer for a quick and crispy meal.
Notes:
You can swap out frying these fritters in a skillet to baking them in a greased muffin pan at 375°F for 30 minutes or until golden brown.
Using cornstarch instead of flour makes for crispier fritters. It is also naturally gluten free - making this recipe celiac friendly!
Creamy Zucchini Pasta

Ingredients
6 slices bacon
3 zucchini, sliced into half rounds
1 head green garlic, minced
½ teaspoon black pepper
½ teaspoon salt
Pinch of red pepper flakes
½ cup vegetable broth
½ cup parmesan cheese
¼ cup cream
4 cups noodles of choice, cooked according to package directions
2 teaspoons breadcrumbs
More Parmesan, for topping
Instructions
Cook bacon in a large frying pan over medium heat until crisped to your liking. Be sure to flip and cook both sides evenly. Once ready, remove bacon from pan and place on a plate lined with paper towel. Pat the bacon strips to remove excess grease, then roughly chop into homemade bacon bits. Set aside for later.
In the same pan and still over medium heat, cook the zucchini and garlic. The bacon grease will provide all the fat you need and will offer delicious flavour. Stir often and continue to cook until the zucchini is golden brown and garlic is fragrant.
In the meantime, set a large pot full of water on another element. Salt the water, bring to a boil, and cook your pasta according to package directions.
Turn the heat off the pan with the zucchini and carefully pour the broth into the pan. Scrape up all the bits of garlic that have likely started to stick, then quickly transfer the zucchini and broth mixture into a blender.
Add cream and Parmesan to the blender as well, then buzz until a smooth sauce has formed.
Pour the sauce over the cooked noodles and stir until everything is evenly coated.
Serve pasta, then top with the bacon bits you prepared earlier, as well as breadcrumbs and extra Parmesan.
Serve with an additional protein if you’d like! We chose some leftover chicken strips. Sausage or grilled chicken would be delicious as well.
Enjoy!
Note: This recipe could be easily modified to become vegetarian by subbing olive oil for the bacon fat. To make it vegan, try using nutritional yeast in place of Parmesan and cashew cream or coconut milk instead of the dairy cream!
PYO Meal Series: Garlicky Green Bean Salad
For our next Pick Your Own (PYO) meal, we are featuring The Garlicky Green Bean Salad. Summer is the season of salads. If you like garlic, and aren’t sure what to do with green beans, this salad will not disappoint. It has the best balance of flavours, a satisfying crunch, and is incredibly easy to throw together. This is a really good make-ahead salad as it gets even more delicious the next day. We love this salad on its own but it would pair well with fish or chicken!
Please tag us on Instagram (@thamesrivermelons) if you try this recipe!

The giant green beans!
Recipe
*Serves 6-8
Ingredients
2 lbs Thames River Melons beans
1 cup parmesan cheese
1 cup of pistachios (or sub slivered almonds), shelled and chopped
For the Dressing
⅓ cup of olive oil
Salt and pepper
1 lemon, juiced and zested
6 cloves Thames River Melons garlic
1 tsp Thames River Melon Blossom honey

Here is what you will need!
Instructions
1. Trim and wash green beans. Bring a large pot of salted water to a boil.
2. Blanch beans for 3 minutes by submerging them in the boiling water. Meanwhile, fill a large bowl with ice and water. Use tongs to transfer the blanched beans into the ice bath to stop them from cooking. Once cool, drain, pat dry, and place in the fridge to stay cool while the rest of ingredients are prepared.
3. Make the dressing: combine olive oil, the zest of one whole lemon (zest before cutting), juice from one whole lemon, 6 cloves of minced garlic, 1 tsp TRM honey, salt and pepper. Shake well.
4. In a separate bowl, combine 1 cup of chopped pistachio (or sub slivered almonds), 1 cup of grated parmesan cheese, and top with pepper.
5. Toss beans and dressing together in a large bowl so that beans are well coated, then slowly add the parmesan and nut mixture and toss well.
Serve up cold! This makes a perfect side dish.

Garlicky Green Bean Salad
Cost
PYO beans are $3/lb. 2 lbs of green beans are needed for this salad.
Therefore, the total cost of PYO vegetables for this salad was $6.
Nutritional Density
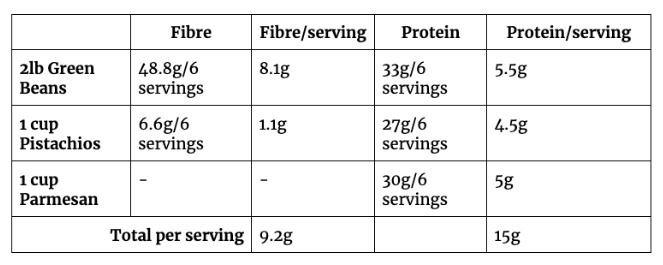
* Please note these amounts are based on 6 servings. If you want smaller portions or to get more servings per batch, divide by the amount of servings you decide to make, to get the correct amounts of fibre and protein.
Storage
This salad will keep in the fridge in an airtight container for 4 days. However, it’s important to note that the beans will not maintain their bright green colour for more than 1-2 days.
The dressing will keep for 5-7 days in an airtight container in the fridge.
Modifications
This recipe may be modified to suit your needs. If you have tree nut allergies or want to make this salad for a back-to-school meal, you may roast pumpkin seeds or sunflower seeds.
Recipe inspired by Molly Baz, developed and photographed by dietetic interns Lise Wolyniuk and Lexie Nobbs and reviewed by Alex Chesney, RD
Reference:
Health Canada. (2023). Canadian Nutrient File. Government of Canada. Retrieved August 12, 2024, from https://food-nutrition.canada.ca/cnf-fce/newSearch
PYO Meal Series: Raisin and Sunflower Seed Eggplant Salad
We are featuring our eighth Pick Your Own (PYO) meal, Raisin and Sunflower Eggplant Salad. Yes, you heard it here, our eggplant plants are full of fruit ready to be harvested. What to do with eggplant you ask?... make a delicious salad! Eggplant has a mild flavour that pairs well with bold flavours like bitter pickled onions (an easy how-to-pickle guide is within the recipe instructions of this post). However, the toasted fruit and seeds and fig dressing add a sweet and savoury flavour that pairs perfectly with the pickled onions.
The balance of flavours and nutrients are some of the many highlights of this salad. Not only will you be satisfied with this salad, but it may inspire you to get out of your comfort zone and experience new flavours.
Please tag us on Instagram (@thamesrivermelons) if you try this recipe!
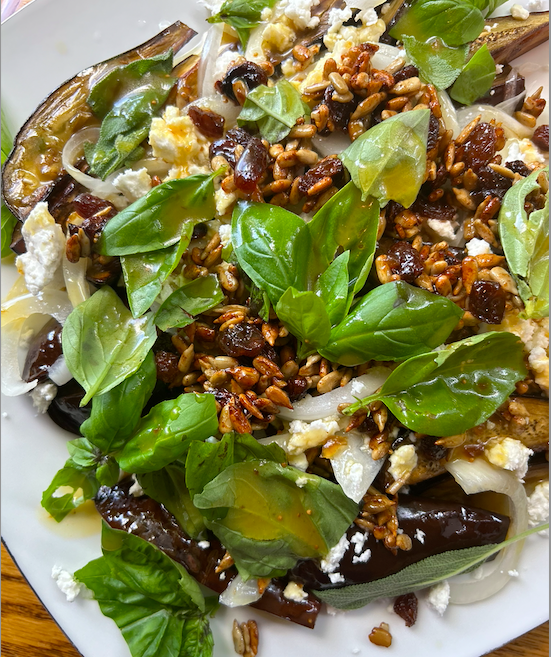
So much flavour, a must try!
Recipe
*Serves 4-6
Ingredients
~8 small (2 lbs) Thames River Melons eggplant
1 cup Thames River Melons herbs (basil and sage)
½ cup feta cheese (I used goats feta, but you may also use goat cheese)
Toasted Fruit and Seeds
½ cup of raisins (can substitute for currants or cranberries)
½ cup of sunflower seeds (can substitute for pumpkin seeds or use a nut such as walnuts)
1 tbsp butter
1 tsp Thames River Melons Melon Blossom Honey or maple syrup
2 dashes of cinnamon
Dressing
2 tbsp fig jam
1 tbsp Thames River Melons Melon Blossom Honey
⅓ cup olive oil
1 lemon, juiced
Pickled Onion
1 medium Thames River Melons sweet onion
¾ cup of apple cider vinegar
¼ cup water
½ tsp salt
1 tsp Thames River Melons Melon Blossom Honey

Here is what you will need!
Instructions
1. Preheat the oven to 400°F.
2. Wash the eggplant, then cut into quarter or 1/8th wedges (depending on the size of the eggplant). Place the wedges skin side up on a baking sheet, pour olive oil over them and season with salt. Place in the oven and set a timer for 10 minutes.

Eggplant wedges!
3. While the eggplants are in the oven, make the pickled onion brine: in a small pot on high heat bring the apple cider vinegar, water, salt, and honey to a boil.
4. Thinly slice the onion and place into a mason jar. Pour the boiling brine mixture over top of the onions and shake the jar. Let cool and marinate on the counter for a minimum 20 minutes (the longer the better).
5. After 10 minutes in the oven, or until the one side of the eggplant looks golden, flip the eggplant and set another timer for 10 minutes.

Golden and ready to be flipped!
6. Meanwhile, make the salad dressing by adding the honey, olive oil, lemon, and fig jam to a jar. Shake until evenly mixed .
* There may be chunks of fig, but that is okay!
7. Now, take out the eggplant and let it cool on top of the oven.
8. While the eggplant cools, add the butter, sunflower seeds, raisins, maple syrup/honey, and cinnamon to the same pot as the vinegar brine and put on medium heat. Stir until the sunflower seeds get golden and crisp.
* This is my favourite step as it gives off the most delightful aroma.
9. Assemble the salad: place the roasted eggplant wedges on a serving plate, then remove the pickled onions from the jar (look at the waste less notes for more ideas on how to use the remainder of the pickled onions) and add them on top of the eggplant wedges. Add the crumbled feta cheese, sprinkle on the fruit and seed mixture and lastly, cover the salad in dressing and garnish with sage and basil leaves.
10. Serve up warm or cool! This makes a perfect side dish to share with family & friends.

Tada! Raisin and Sunflower Seed Eggplant Salad!
Cost
This salad requires approximately 2 lbs of eggplant. Eggplant PYO cost is $2/lb. Therefore, the PYO vegetables for this salad cost $4 in total.
Nutritional Density
Eggplants contain manganese and vitamin K which are minerals and vitamins essential for good bone and blood health. Both micronutrients play a role in blood clotting. Manganese specifically plays a large role in reactions that contribute to bone formation and bone density (1).
For 100g of eggplant, there is 0.232 mg of manganese and 3.5µg vitamin K (2).
The recommended dietary allowances (RDA) for manganese is 1.8 for female adults and 2.3 for males adults. Therefore, 100g of eggplant provides females with 13% of RDA and males with 10% of RDA. The adequate intake (AI) for vitamin K is 90µg for male adults and 120µg for female adults. Therefore, 100g of eggplant gives 4% of AI for females and 3% of AI for males (3).
The pickled onions may provide probiotics. Probiotics are the good bacteria present when a food item is fermented. The fermentation process uses the bacteria present on the fruit or vegetable and a salt/water/sugar brine to activate the bacteria. When consumed, these bacteria may transport to the colon and help your digestive tract maintain good health (4).
Storage
This salad will keep in the fridge for 2 days. If planning to store, we recommend keeping the dressing on the side as the eggplant may become soggy.
The dressing will keep for 5-7 days in an airtight container in the fridge.
Waste Less Notes
You may not use all of the pickled onions (depending on how much your crowd likes onions). However, these pickled onions can be stored in the fridge for up to 2 weeks in a sealed container and used in a number of delicious recipes, especially in tacos, stir fry, and as a pizza topping.
Modifications
This recipe may be modified to suit your needs. You may substitute the raisins for any dried fruit, like currants or cranberries. Even diced dates would work great! As for sunflower seeds substitutes, pumpkin seeds or if you have nuts on hand, then walnuts or pecans would be lovely.
Recipe developed and photographed by dietetic interns Lexie Nobbs and Lise Wolyniuk and reviewed by Alex Chesney, RD
References
National Institutes of Health. (2021). Manganese: Fact Sheet for Health Professionals. Retrieve August 17, 2024, from https://ods.od.nih.gov/factsheets/Manganese-HealthProfessional/
Health Canada. (2023). Canadian Nutrient File. Government of Canada. Retrieved August 17, 2024, from https://food-nutrition.canada.ca/cnf-fce/newSearch
Health Canada. (2023). Dietary Reference Intake Tables: Reference values for vitamins and minerals. Government of Canada. Retrieved August 17, 2024, from https://www.canada.ca/en/health-canada/services/food-nutrition/healthy-eating/dietary-reference-intakes/tables/reference-values-vitamins.html#tbl1
Valentino V, Magliulo R, Farsi D, et al. Fermented foods, their microbiome and its potential in boosting human health. Microb Biotechnol. 2024;17(2). doi:10.1111/1751-7915.14428
Pick Your Own Meal Series: Grilled Vegetable Pasta Salad
We are featuring our next Pick Your Own (PYO) meal, Grilled Vegetable Pasta Salad. Craving pasta…but also wanting something summery and fresh? Presenting the long weekend Grilled Vegetable Pasta Salad, because it ages like fine wine, feeds a crowd, and you grill the veg on a barbecue which is perfect for keeping your house cool during those hot days.
We made this salad to go with a BBQ meal including steak, halloumi, and tofu, which provided protein, but you could always add protein of your choice directly to the salad. Things like tuna, or chicken would work great!
Please tag us on Instagram (@thamesrivermelons) if you try this recipe!

Look at all the veggies!
Recipe
*Serves 10 - 12
Ingredients
2-3 Thames River Melons zucchini
2-3 cups Thames River Melons grape tomatoes
½ medium Thames River Melons red onion
1 Thames River Melons red bell pepper
2 cups arugula
½ cup capers
½ kalamata olives
200g of dried pasta (we are using penne)
200g of feta
1 tsp salt (for boiling pasta)
For the Dressing
⅓ cup of olive oil
Salt and pepper
⅓ cup red wine vinegar
1 tbsp Thames River Melons honey
2 tbsp Thames River Melons garlic scape mustard
1 cup of fresh Thames River Melons herbs (dill, basil, oregano, etc)- please feel free to add more

Prepping the produce!
Instructions
1. Prepare the vegetables, beginning with the zucchini and bell pepper, for grilling. Wash and then cut zucchinis in half lengthwise then half again to get four pieces. Sprinkle salt over the zucchini to help draw excess water out, and set aside.
Cut the red pepper into quarters and set aside.
2. Slice the red onion with the grain and separate, halve the grape tomatoes, and mince fresh herbs. We used dill and basil.
3. Peel, crush and mince 3-4 garlic cloves
4. Dab the zucchini with a paper towel to remove water. Add olive oil, salt and pepper to the zucchini and red pepper, ensuring all is well coated.
5. Add pasta to boiling water and cook according to instructions.
6. Place the zucchini and red pepper on the BBQ.
7. Begin to assemble the salad. In a large serving bowl, place grape tomatoes, olives, capers, red onion, arugula, dill, basil, and crumbled feta
8. Make the salad dressing. Combine olive oil, minced garlic, dijon mustard, red wine vinegar, honey, salt and pepper and mix
9. Remove the vegetables from the grill.
10. Drain the pasta and set aside to cool slightly.
11. Cut the grilled vegetables into bite sized pieces.
12. Add the pasta, grilled vegetables, and dressing to the serving bowl. Toss and serve.

Grilled Vegetable Pasta Salad
Cost
The zucchini weighed 1lb. The bell pepper was 0.35lb. The tomatoes were 0.8lb.
PYO zucchini is $0.50/lb, bell peppers cost $2/lb, and grape tomatoes cost $0.80/lb.
Therefore, the PYO vegetables in this dish cost approximately $2 in total.
Storage
This salad will keep in the fridge for 4 days. If planning to store, we recommend keeping the arugula separate and adding at time of consumption. However, dressing the salad is recommended as the pasta and vegetables can marinate over time.
Waste Less Notes
It is an easy way to incorporate vegetables that may be on their last days of freshness.
Modifications
This recipe may be modified to suit your needs. You can add or subtract vegetables depending on what is in season and what you have on hand.
Recipe developed and photographed by dietetic interns Lise Wolyniuk and Lexie Nobbs and reviewed by Alex Chesney, RD
Pick Your Own Meal Series: Cucumber Salad, Two Ways
PYO Meal Series: Cucumber Salad, Two Ways
This is our fifth Pick Your Own (PYO) meal, featuring cucumbers from the farm, two ways: a Cool Creamy Cucumber Salad and an Acidic Cucumber Salad.
The cucumber plants are thriving right now in the PYO patch! What can you do with a cucumber? Here we will show you how to turn plain ole’ cucumbers into two different deliciously elevated cucumber side salads that will pair perfectly with your BBQ plans this summer.
The field cucumbers we have here on the farm are different from the English cucumber you may be used to seeing in your local grocery store. For these recipes, we recommend roughly peeling the cucumber skin, as it is a bit tough and can be hard to chew. In addition, we recommend halving the cucumbers and lightly scooping out the insides of the medium to large sized ones, to reduce the water content and remove the larger seeds.
Please tag us on Instagram (@thamesrivermelons) if you try this recipe!

Recipe for The Creamy Cucumber Salad
*Serves 4
Ingredients
1 lb Thames River Melons cucumbers
1/2 cup Thames River Melons dill
2 small Thames River Melons red onions and their greens
4 tbsp white vinegar or pickle juice
¾ cup Greek yogurt
1 tsp salt
Juice of half a lemon
Instructions
1. Thoroughly wash the cucumbers, onions, and dill.
2. To make the dressing, whisk together pickle juice (or vinegar), yogurt, salt and lemon juice + zest in a salad bowl. Finely chop the dill and add to the dressing.
*It is most efficient (and creates less dishes!) to make the salad dressing in the same bowl you plan to serve the salad in.
3. Slice onion from north to south* (greens to the root or ‘with the grain’) and add to the dressing bowl. Save some of the greens to slice and add as garnish). Marinate the onions in the dressing while preparing the cucumbers.
*Slicing onion ‘with the grain’ yields a more mild flavour, important when eaten raw
4. Roughly peel the cucumbers, and cut them each in half, then lightly scoop out the inside of the larger ones. Next slice the cucumber halves into half-moon shapes.
4. Chop dill and add to the salad bowl with the dressing. Add the cucumber slices as well.
5. Toss the salad in the dressing until the cucumbers are fully coated.
6. Garnish with onion greens.
This salad pairs well with a Greek inspired dinner, such as Souvlaki style chicken.

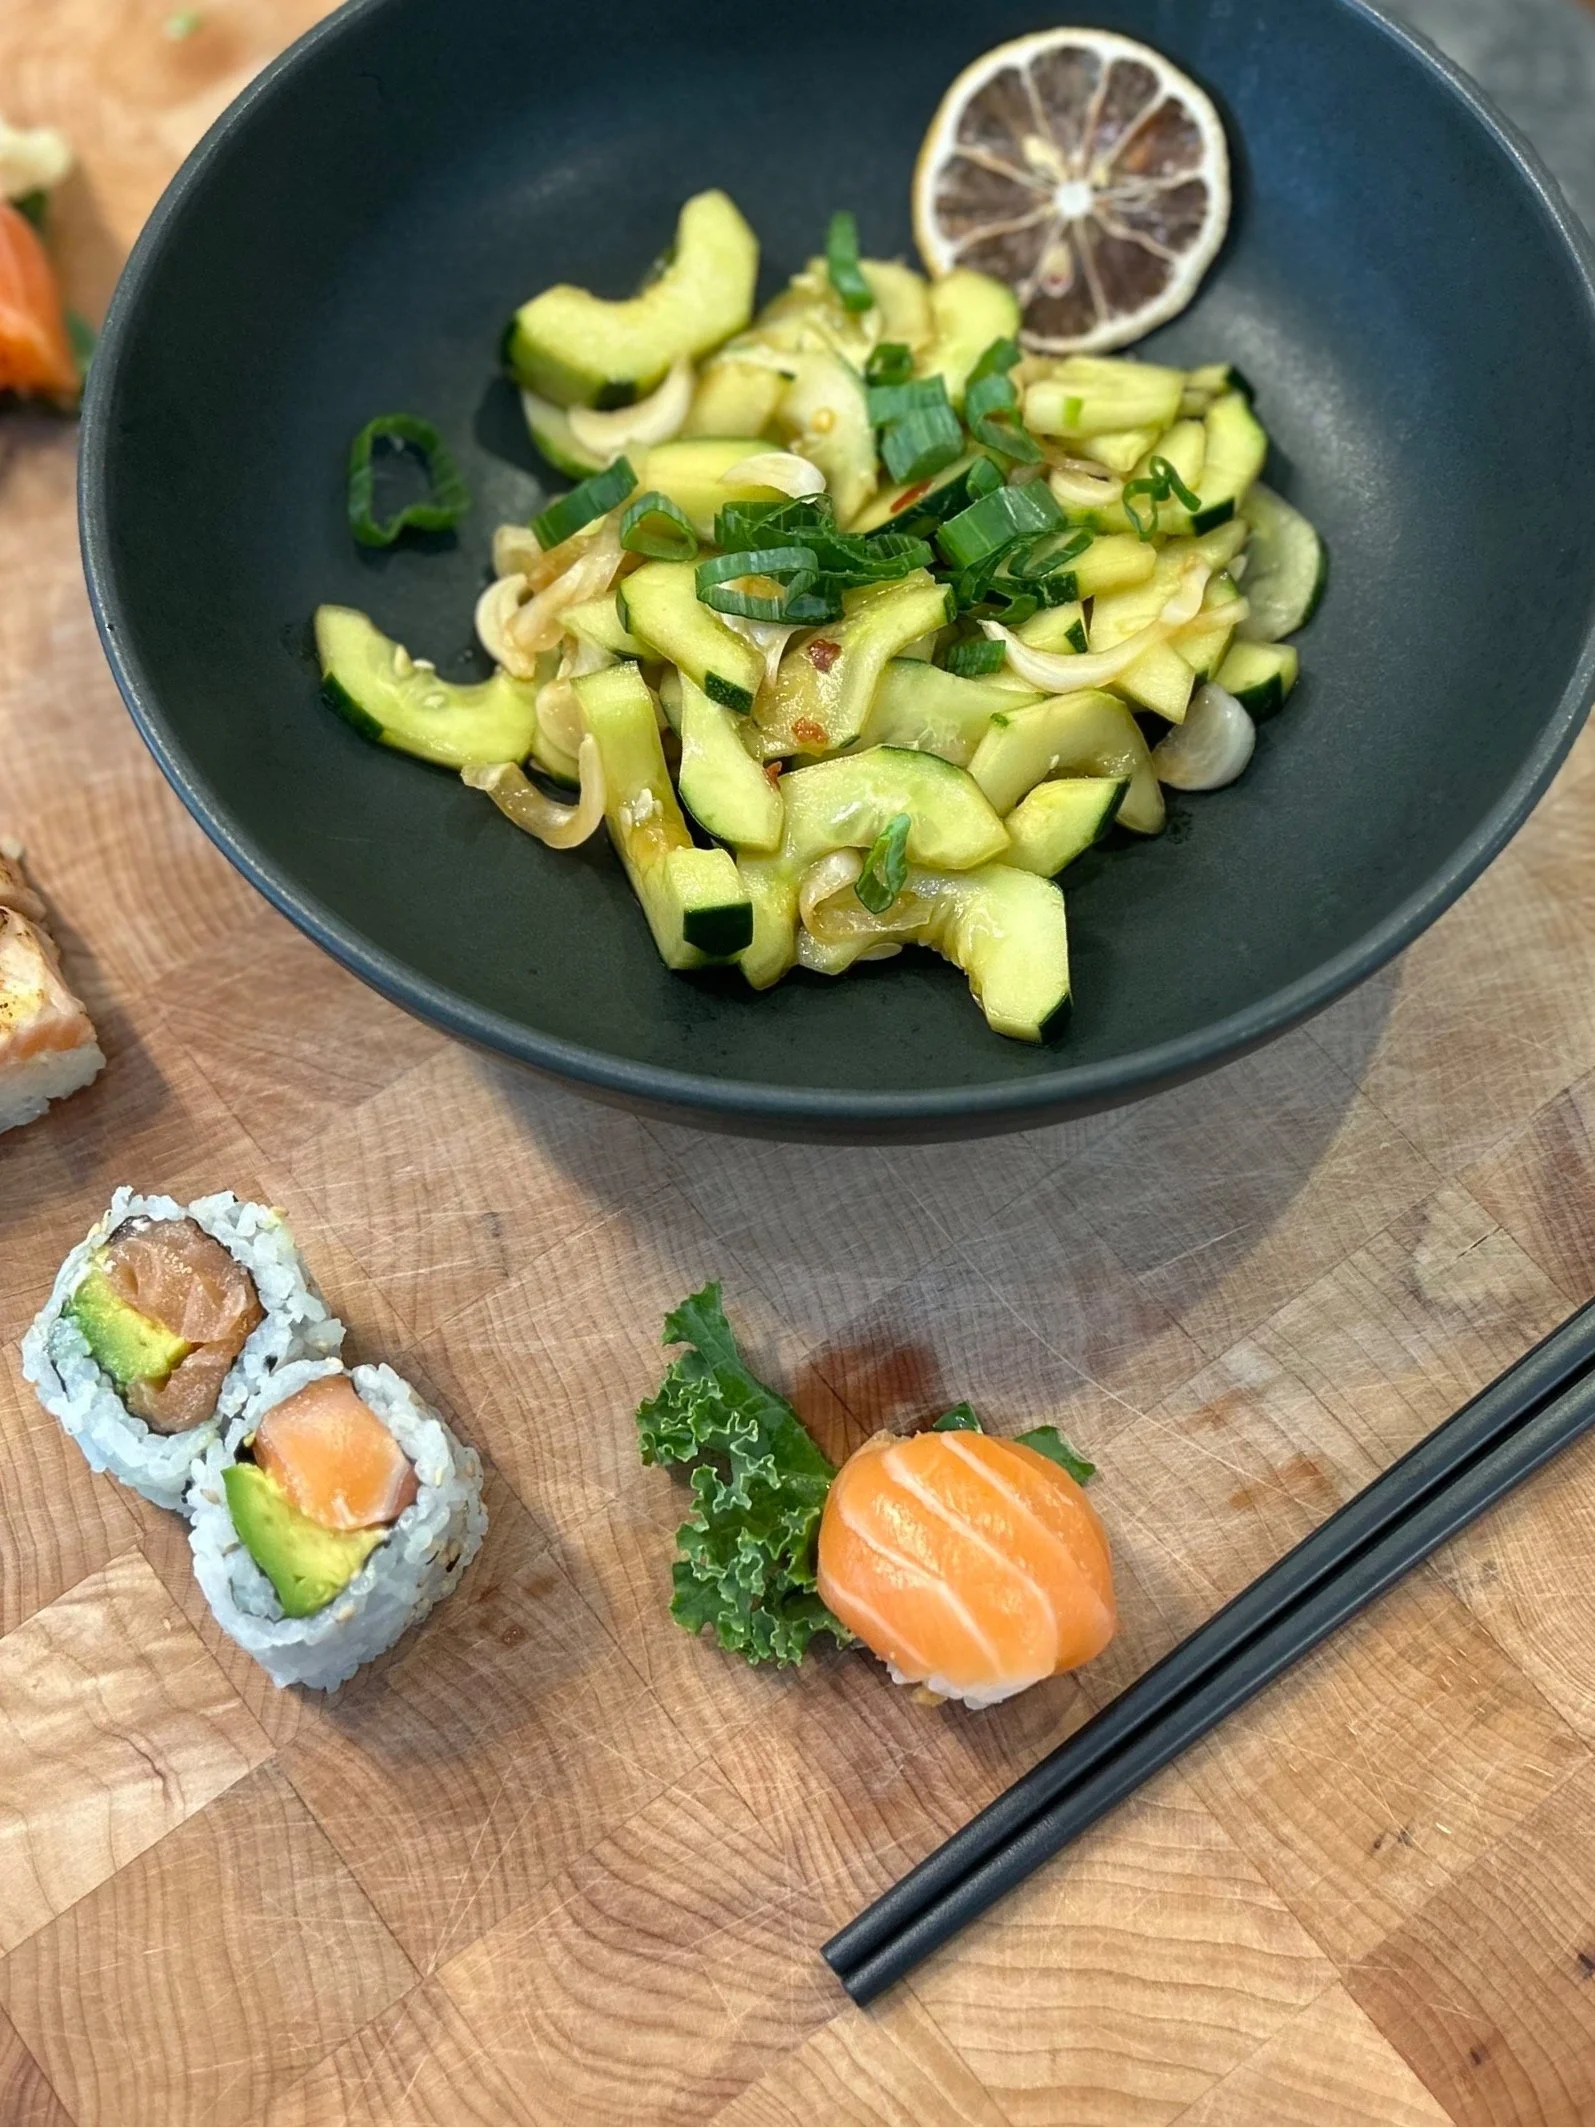
Recipe for The Acidic Cucumber Salad
*Serves 4
1lb Thames River Melons cucumbers (we suggest small to medium)
2 Thames River Melons onions and the greens
6 tbsp rice vinegar or white vinegar
1 tbsp Thames River Melon Blossom honey
1 + ½ tbsp soy sauce
2 tsp toasted sesame oil
¼ tsp red pepper flakes
Juice of half a lemon

Instructions
1. Wash cucumbers and onions.
2. To make the salad dressing, in a salad bowl whisk together the vinegar, sesame oil, soy sauce, honey, red pepper flakes, and lemon juice
*It is most efficient (and creates less dishes!) to make the salad dressing in the same bowl you plan to serve the salad in.
3. Slice onion from north to south* (greens to the root or ‘with the grain’) and add to the dressing bowl. Save some of the greens to slice and add as garnish). Marinate the onions in the dressing while preparing the cucumbers.
*Slicing onion ‘with the grain’ yields a more mild flavour, important when eaten raw
4. Lightly peel the cucumbers, then halve them. Scoop out the insides of the largest ones. Cut the cucumbers into half-moon and add to the salad bowl with the dressing and onions.
5. Garnish with onion greens.
6. Toss, then let sit for 5-10 minutes. Toss again, ensuring all cucumbers are coated in dressing. Let sit again for 5-10 minutes.
7. Enjoy! This version of the cucumber salad pairs beautifully with sushi, or a teriyaki chicken.
We ordered our favourite local sushi to complement the flavours of this salad. This lunch was a great balance between homemade and takeout food.
Cost
PYO cucumbers are $1/lb. PYO onions are $4/lb. PYO dill is $4/lb.
In total, the cost of PYO cucumbers per salad is $1. The onions cost PYO onions per salad $1 and dill (for the creamy cucumber salad) was $0.20.
Nutritional Density
Did you know? Cucumbers contain 95% water (1). These salads will surely keep you hydrated on a hot summer's day. Not only are cucumbers good for providing water to your body but they also contain an abundance of electrolytes such as potassium, magnesium, phosphorus, and calcium (1). These electrolytes control our bodies’ water balance, helping it to function optimally.
Storage
These salads will keep in an airtight container in the fridge for 2-3 days.
All of the onion greens won’t be needed for these salads, but you can freeze the remainder and use in your next stir-fry!
Modifications
This recipe may be modified to suit your needs.
In terms of the Creamy Cucumber Salad, you may substitute the Greek yogurt for a plain dairy, or lactose-free yogurt.
Recipes developed and photographed by dietetic interns Lexie Nobbs and Lise Wolyniuk and reviewed by Alex Chesney, RD
Reference:
Health Canada. (2023). Canadian Nutrient File. Government of Canada. Retrieved July 21, 2024, from https://food-nutrition.canada.ca/cnf-fce/newSearch .
Pick Your Own Meal Series: Breakfast Edition!
Easy Frittata, featuring PYO produce!
Over the summer we are excited to bring you recipes featuring produce from our PYO (Pick Your Own) patch! Each recipe will be easy, delicious, nutritious, and budget friendly. There is no better feeling than picking your own food from the dirt it was grown in and preparing a meal from scratch with it. We look forward to having you visit our farm and try these dishes yourself, using your harvest. The whole experience can be a great activity to enjoy with family or friends.
Please tag us on Instagram (@thamesrivermelons) if you try any of our PYO recipes – we would love to see them!

Ingredients ready to go!
The first recipe in this series is a breakfast (or brunch) frittata, perfect for hosting on summer weekends, as you can feed a crowd or just a few folks by easily adjusting the recipe up or down. This is also a host-friendly meal because it’s easy to whip up while guests are gathered, or the frittata can also be made ahead of time. The best part: this recipe uses almost exclusively ingredients from our farm! Right now, our PYO patch is full of kale and zucchini for picking. Our chickens have been busy laying, and you can purchase fresh eggs in our farm shop. We also sell a variety of local cheeses from Gunn’s Hill.
Kale and zucchini are sources of dietary fibre, as well as an abundance of important vitamins and minerals.
Kale contains 2.4 grams of fibre/100 grams. This recipe contains 7.2 grams of fibre in total, from the kale. Kale also contains vitamin C (120 mg/100g), important for immune health, and calcium (150 mg/100g), important for healthy bones and teeth (1).
Zucchini contains 1 gram of fibre /100 grams, and is a good source of potassium (261 mg/100g) and phosphorus (38 mg/100g), both important electrolytes (1). This recipe contains 3.6 grams of fibre from the zucchini.
Eggs are a complete protein (meaning they contain all 9 essential amino acids that our bodies cannot produce by themselves), helping to keep our bodies functioning optimally, and keep us satiated, with approximately 6-7 grams in a large egg.
Finally, herbs are an excellent way to provide flavour without the need to add too much salt, plus they add to the visual appeal of a dish.
Ingredients
Serves 7-8, and can be adjusted up or down as needed. Keep in mind that if you adjust, you will need to adjust the number of eggs and vegetables, to ensure they are proportioned well.
4-5 cloves Thames River Melons garlic, minced (garlic is available for PYO or for purchase at our farm shop)
1/2 cup Spanish onion, chopped (these aren’t ready for picking on our farm just yet, but they will be available in late July)
8 Thames River Melons eggs
1/3 cup whole milk or heavy cream (using a dairy-free milk alternative is also an option here!)
2 large stalks (300 grams) of Thames River Melons kale, chopped
1 medium (360 grams) Thames River Melons zucchini, chopped into quarter inch pieces
Salt and pepper to taste
Fresh herbs of your choice (we used Thames River Melons dill and basil)
Cheese of your choice (we used shredded mozzarella).
Instructions
1. Preheat the oven to 400°F.
2. In an oven-safe 12” pan or cast-iron skillet, warm olive oil over medium heat.
3. Prepare vegetables: wash, then chop kale and zucchini, dice onion, and mince garlic.
Although you can eat the entire kale stalk, it is preferable to ‘devein’ it. Fold the stalk in half to make this more efficient. Slice along the inside edge, from bottom to top. For a demonstration, see video below.
4. In a large bowl, crack eggs, add milk or cream, and whisk gently to combine. The key to get a silky-smooth texture is to avoid over-whisking, which creates bubbles. Set aside. Add salt and pepper to taste if you would like.
5. Add onion to the warm skillet, and stir occasionally, until translucent and beginning to caramelize.
6. Add chopped vegetables, and minced garlic. Sauté on medium for approximately 10 minutes, or until tender but still crisp.
Pre-cooking the vegetables ensures your frittata will not be soggy as some moisture in them will have had a chance to evaporate.
7. Remove from the element and pour the egg mixture into the skillet (you may need to tilt the pan to evenly distribute the egg). Do not mix or you will end up with scrambled eggs!
8. Sprinkle cheese and herbs of your choice over the top (we sell Gunns Hill cheese in our farm shop). You can use gouda, feta, cheddar, anything you like!
9. Cook on medium heat until the edges begin to set (this should not take long; you want to do the majority of the cooking in the oven), and then transfer to the oven to bake for 8 minutes.
10. Remove the finished frittata from the oven and add a sprinkling of fresh herbs and more cheese to the top if you like. Allow to cool before slicing and serving.

The finished product!
Cost
In total the PYO herbs, zucchini, and kale purchased on the farm cost $3.21 . In general PYO prices are half-price of our pre-picked produce.
A dozen of our eggs costs $6.00, bringing the total to $9.21. We only used 8 eggs, so $7.21 is actually more accurate.
Storage
This dish will keep for up to 4 days in an airtight container in the refrigerator, so for a smaller household this is an excellent make-ahead-of-time meal to take for an on-the-go breakfast throughout the week.
Modifications
Other vegetables you can use include bell pepper (available soon in our PYO patch), spinach, asparagus (available in our farm shop, and PYO in the Spring) or Swiss chard.
We used a 12” pan but you can certainly size down and just use less eggs, cream, and vegetables. Another idea is to divide the frittata mixture in a muffin pan for littles, or for using on breakfast sandwiches between an english muffin.
Recipe and blog post developed and photographed by dietetic intern Lise Wolyniuk and reviewed by Alex Chesney, RD
Reference:
Health Canada. (2023). Canadian Nutrient File. Government of Canada. Retrieved July 12, 2024, from https://food-nutrition.canada.ca/cnf-fce/newSearch .
Easter Recipe Inspo
Looking for some Easter recipe ideas? We’ve pulled a few of our favourites from the past for you to check out!
Quick & Easy Asparagus Benny


Cooking with Carrot Tops

Following a trip to the farm for hand-picking carrots, we often overlook one valuable resource right in our kitchen – the carrot tops. These vibrant greens, often discarded, hold the potential to transform into delicious dishes. From soups to pesto to sauteed greens, using carrot tops not only contribute to flavour, nutrition, and creativity but also aligns with minimizing food waste.
Here are three simple carrot top recipes to try:
1. Carrot Top Soup
Ingredients
- 1 bunch of carrots with leaves (carrots coined)
- 1 tablespoon olive oil
- 1 medium yellow onion (diced)
- 4 stalks of celery (sliced)
- 1 tablespoon of garlic (minced)
- 2 dried bay leaves
- 8 cups vegetable stock
- 1 15 ounce can of six bean medley (drained and rinsed)
- Salt and pepper to taste
Instructions
- Cut the carrot root from the stems of the carrots. Wash the root and slice into coins. Cut the carrot greens from the stem and place into a colander or bowl to wash away excess dirt. Set aside to dry (approx. 20 minutes). Once dry, remove remaining hard stems from the carrot leaves.
- Heat olive oil in a large soup pot over medium heat. Add diced onion, celery slices and coined carrots to the pot and cook for approx. 10 minutes (until vegetables begin to soften). Add minced garlic and cook until fragrant and browned, approx. 2 additional minutes.
- Add vegetable broth, six bean medley, and bay leaves to the pot and increase the heat to high. Bring to a boil and then reduce heat to simmer and cook for 35 minutes. Add. salt and pepper to taste.
- After the soup has simmered for 30 minutes, remove from the heat, and stir in carrot greens. Add a dollop of carrot top pesto, if desired.
1. Carrot Top Pesto
Ingredients
- 1 cup carrot leaves
- 1 cup of spinach
- ¼ cup roasted cashews
- 1 tablespoon garlic
- ½ cup olive oil
- ¼ cup grated parmesan
- Salt & pepper to taste
Instructions
- Pulse the carrot tops and spinach leaves, cashews, and garlic in a food processor until coarsely ground. Slowly drizzle in the oil, and process until blended. Add the Parmesan and some salt & pepper, and pulse until combined.
1. Sauteed Carrot Tops
Ingredients
- 4 cups of carrot tops
- 4 tablespoons garlic (minced)
- 3 tablespoons olive oil
- Salt & pepper to taste
Instructions
- Heat olive oil in a medium pan over medium heat. Add garlic and cook for approx. 1-2 minutes, until browned and fragrant. Add the carrot tops and stir continuously until they are covered in oil and have completely wilted, approx. 2-3 minutes. Add salt & pepper to taste.
Tips for using carrot tops effectively
- Wash carrot tops thoroughly before using to remove any dirt or debris
- Store them separately from the carrots in a plastic bag wrapped in a damp paper towel to maintain freshness
- Mix carrot tops with other herbs like parsley or cilantro to create unique flavour profiles
Potato Ham Soup
Servings: 6
Ingredients:
2 tbsp butter
3 cloves garlic, minced
1 white onion, chopped
1 medium sized carrot, chopped
1 celery stalk, chopped
4 white potatoes, chopped to bite sized
½ head of cauliflower, roughly chopped to bite sized pieces
1 ham steak (or about 1 cup ham), chopped
6 cups vegetable stock
¼ cup cream
1 tsp thyme, ground
Salt and pepper to taste
Instructions:
In a large pot, melt the butter. Add the onions, carrots, and celery and saute until tender. Add the garlic and stir for 1 minute.
Add the vegetable stock, and potatoes to the pot. Cook on low-medium heat for about 10 minutes. Add the cauliflower and ham and continue to cook until cauliflower and potatoes are tender.
Add ground thyme, and season with salt and pepper. Remove from heat and stir in cream.
Serve hot.
Note: you can serve this topped with cheddar cheese, bacon bits, a dollop of sour cream, and sliced green onions for added freshness and flavour!

Root Vegetable Sheet Pan Dinner
Sheet pan dinners are super easy and filling! You can omit the protein and use this as a side dish as well. Use any vegetables that you like and that you have on hand. This is a great way to use up those veggies that aren’t looking so fresh, but because we are roasting them, they are perfect for the job!
Ingredients: recommendations only
2 medium carrots, cut into wedges
1/2 onion (red/yellow/white, whatever you have!)
1 parsnip
½ beet, chopped (will change the colour of other vegetables on the pan)
5 mushrooms, cut into quarters
1 head of broccoli
2-3 potatoes (white, red, sweet, whatever you want!)
5-6 Brussels sprouts, halved
5 turkey sausages (if using as a meal)
2-3 generous tablespoons of olive oil or another
1 tsp garlic powder
1 tsp onion powder
½ tsp Italian seasoning
Instructions:
Preheat the oven to 375°F.
Cut up all vegetables and slice turkey sausages. Lay out on a roasting pan.
Cover in oil, and seasonings.
Bake for about 40 minutes, or until potatoes are soft.

Vegetable Pesto Gnocchi
Ingredients
2 tbsp olive oil
2 cups broccoli florets
2 cups leeks, sliced
1 pepper, sliced
1 tbsp garlic, minced
2 handfuls fresh spinach
700g gnocchi
2 cups heavy cream
½ cup pesto
1 cup parmesan cheese, shredded
Salt
Pepper
Instructions
Follow cooking instructions for gnocchi and set aside
If wanting to add a choice of protein such as chicken, shrimp, lentils, etc make now and set aside with gnocchi.
In a medium sauce pan add cream and pesto and season with salt and pepper. Bring to a boil. Once boiling bring heat down and simmer for about 10 minutes, occasionally stirring the mixture. During this time the vegetables can be started in the following step.
In a medium frying pan add olive oil, then add broccoli and peppers. Sauté on medium-high heat for 3 minutes. Then add chopped leeks and sauté for another 5 minutes.
Add garlic to pan and sauté for 1 minute before adding in fresh spinach. Continue stirring mixture around until spinach is cooked.
Going back to the sauce, after 10 minutes stir in 1 cup of parmesan and then let simmer another 5 minutes, until sauce begins to thicken. Sauce should be able to coat the back of a spoon when finished.
Once sauce is done add to pan with vegetables. At this time also add gnocchi and choice of protein to the pan. Top with a bit of parmesan cheese and serve hot.
Recipe Developed and photographed by Dietetic intern Rae Wilcox.

Cheesy Orzo with Roasted Broccoli
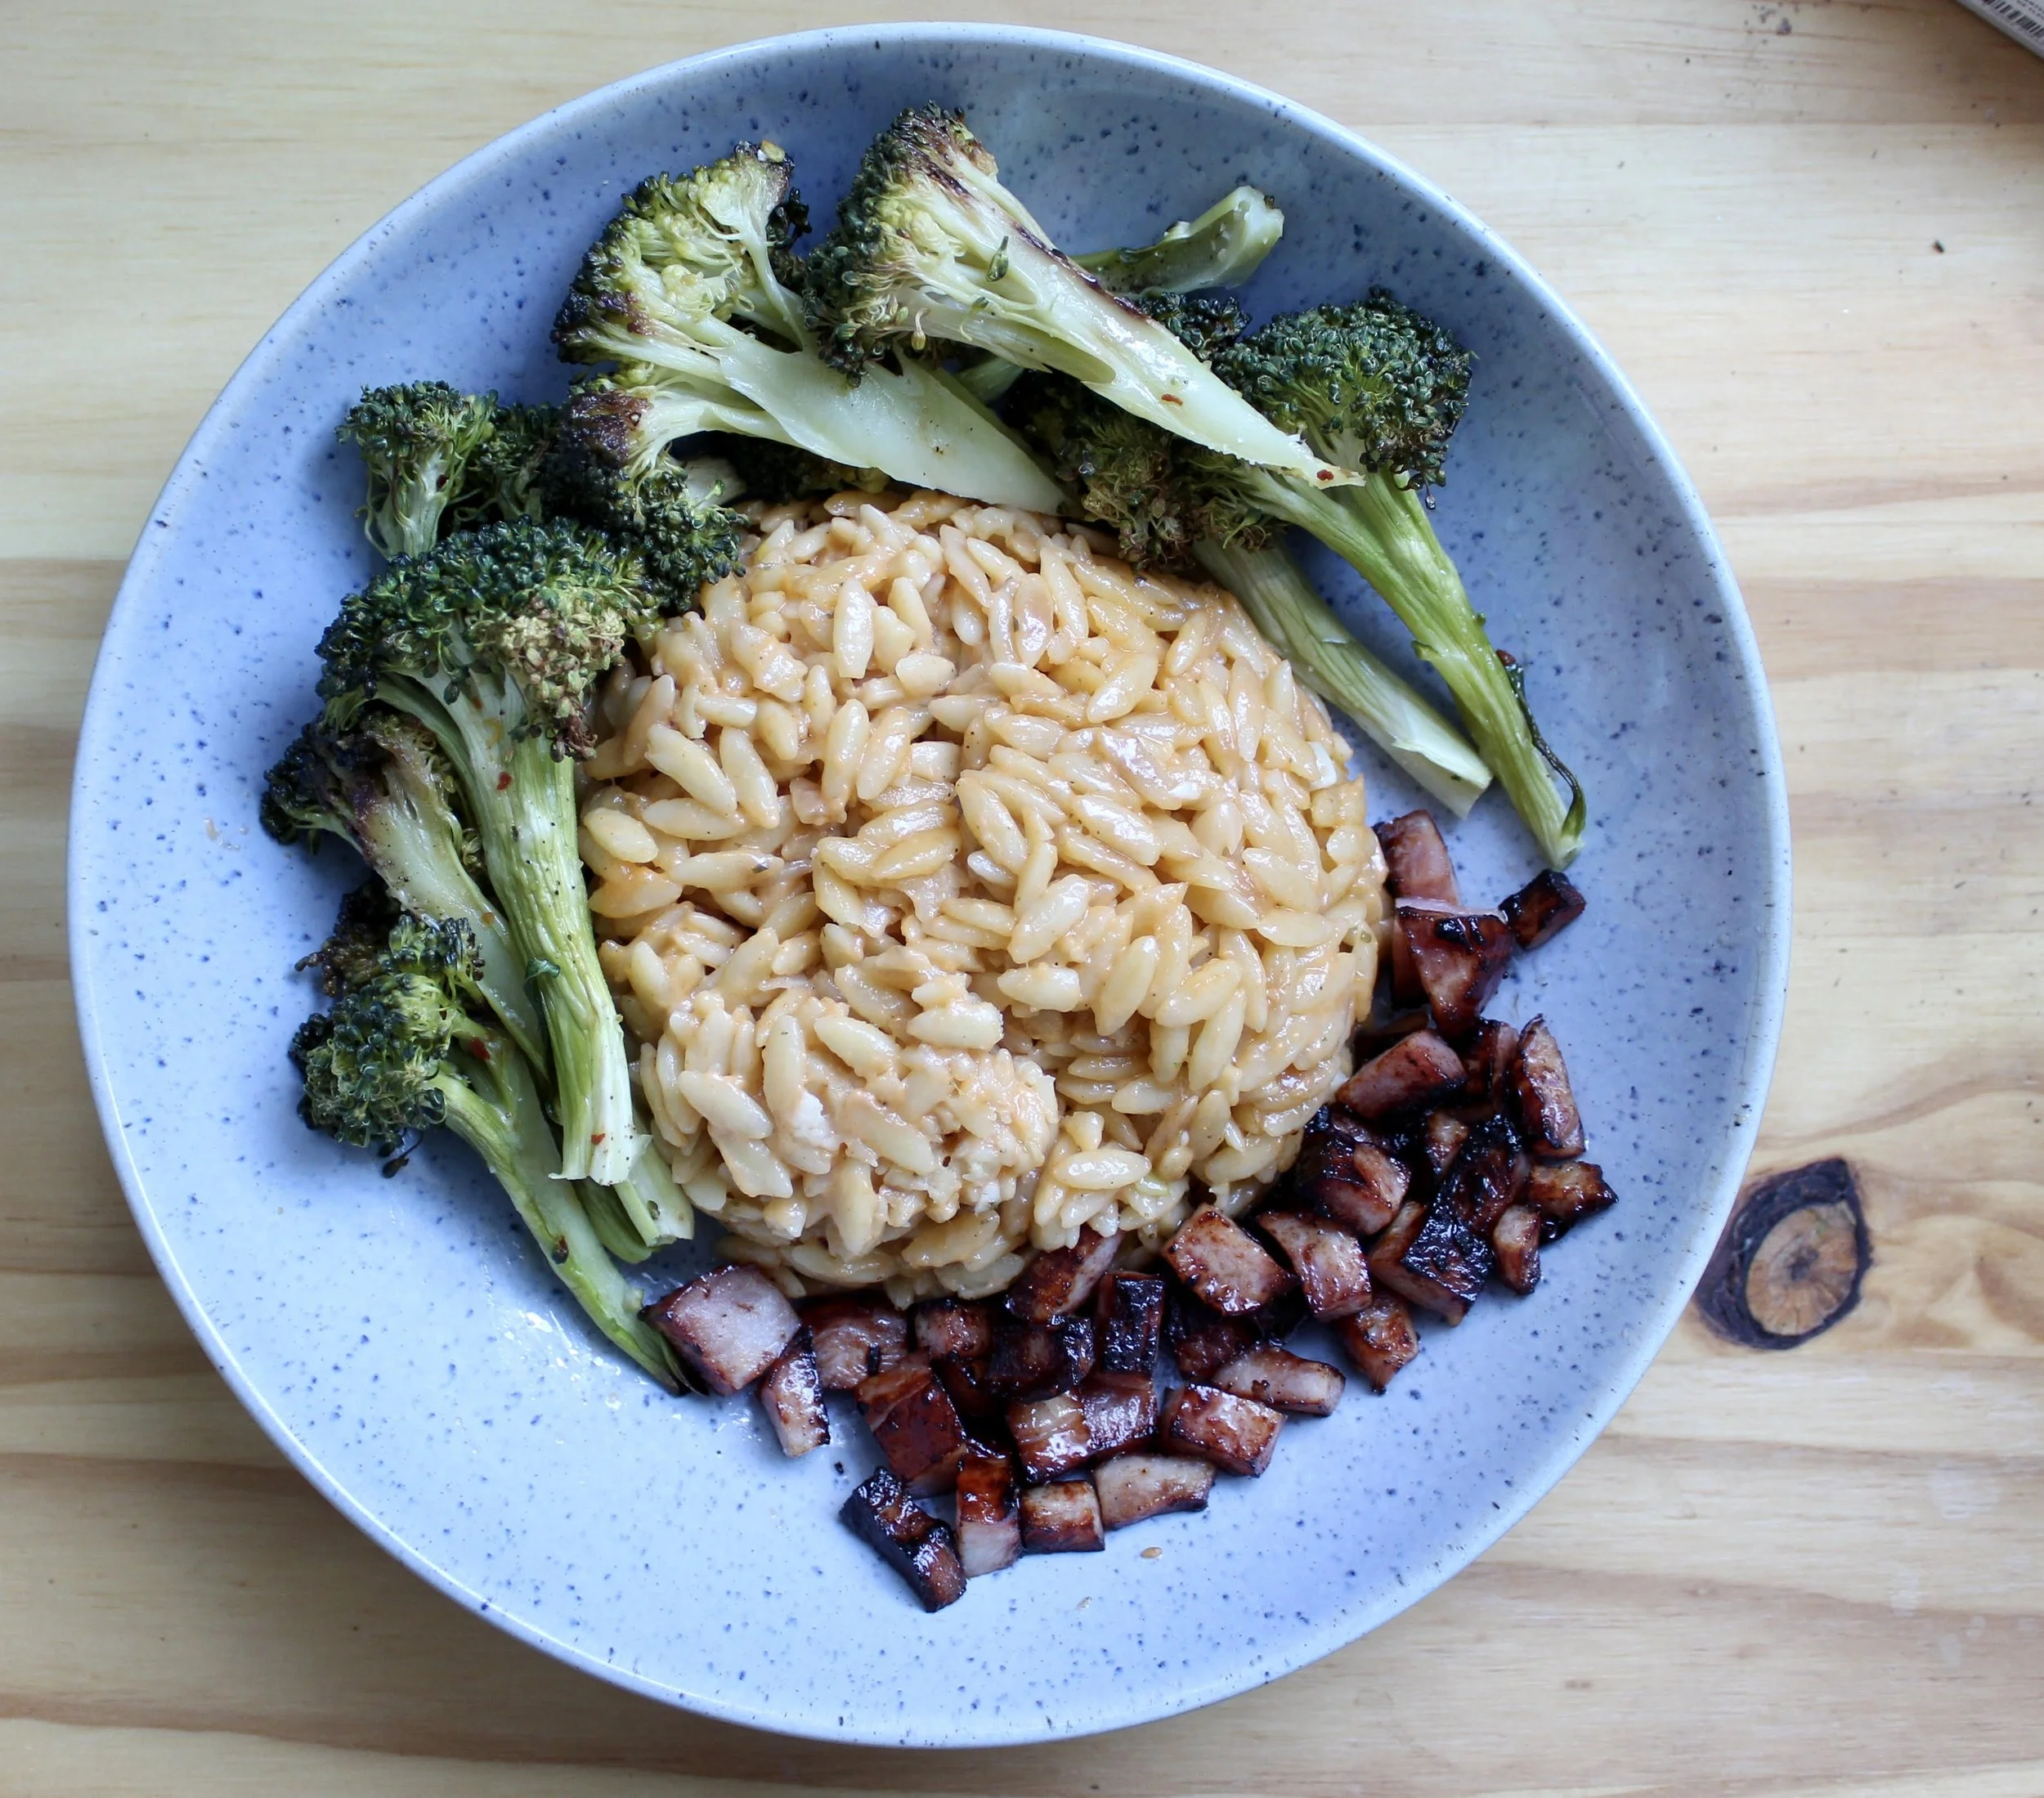
Ingredients
1 head broccoli, cut into florets
2 tablespoons canola oil, divided in half
Salt
Pepper
Red pepper flakes, to taste
1 small onion, diced
4 garlic cloves, minced
1 cup orzo
2 cups vegetable broth
1 cup shredded cheddar cheese
2 tablespoons cream cheese, softened
1 ½ cups diced protein of choice (we used ham, but roasted chicken or pinto beans would work well also)
Instructions
Preheat oven to 400°F and line a baking sheet with parchment paper. Set aside for now.
Chop head of broccoli into florets.
Toss broccoli florets with 1 tablespoon of the canola oil and season with salt and pepper.
Spread the broccoli out evenly on the prepared baking sheet.
Transfer the broccoli to the oven and roast for 30 minutes.
Meanwhile, heat canola oil over medium heat in a deep frying pan or shallow pot.
Add one piece of onion to the oil. When it starts to sizzle, add the rest of the onion and cook for 2-3 minutes, stirring frequently, until onion is softened.
Next add the minced garlic, and cook for an additional minute, until fragrant.
Now add the orzo, and cook for 2 – 3 minutes, until lightly browned and toasted.
Season with salt and pepper.
Add the vegetable broth and stir thoroughly.
Bring the mixture to a boil, then reduce heat to maintain a simmer and cover.
Cook the orzo mixture for 10 minutes, until broth is absorbed, and mixture is thickened.
While the orzo cooks, prepare your protein. We recommend lightly pan-frying to reheat and give some crisp.
Once the orzo has cooked for 10 minutes, remove from heat, and add shredded cheese and cream cheese and stir to combine, until melted.
Serve cheesy orzo topped with broccoli and protein and enjoy!
Twice-Baked Sweet Potatoes

Ingredients
4 small-medium sweet potatoes
1 tablespoon canola oil
2 cups kale or spinach, roughly chopped
1 small onion, diced
4 cloves garlic, minced
1 tablespoon balsamic vinegar
Salt
Pepper
¼ teaspoon red pepper flakes
¼ teaspoon cayenne pepper (optional, omit if you don’t like spice)
¼ teaspoon paprika
¼ cup cream cheese, softened
1 cup mozzarella cheese, grated + 2 additional tablespoons
1 cup protein of choice (we used a mix of shredded chicken & bacon!)
2 tablespoons Parmesan, grated
Instructions
Preheat the oven to 425°F.
Poke holes in the sweet potatoes (using a knife or fork), then lay on a baking sheet lined with parchment paper or aluminum foil.
Transfer to the oven and roast until potatoes are soft, around 40 minutes.
Remove sweet potatoes from the oven and allow to cool slightly, for 10 minute or so.
While the potatoes cool, add canola oil to a pan over medium heat.
Add one piece of diced onion to the pan, and when it starts to sizzle you know the pan is hot enough!
Add the remaining onion and saute for 2-3 minutes, until softened slightly.
Add the kale, garlic, and balsamic vinegar, and cook for an additional 5 minutes or so, until kale is wilted and softened, vinegar is evaporated, and garlic is nice & fragrant. Season the mixture with salt and pepper.
By now the potatoes should be cool enough to touch.
Slice each potato in half, being careful to keep the skin intact.
Carefully scoop the potato out of the skin, and place in a large mixing bowl.
Reserve the potato skins and leave them on the baking tray.
Mash the sweet potato thoroughly, until smooth with just a few lumps here and there. If you prefer a very smooth texture you can blend with a hand mixer.
At this point you can remove about ½ cup of the potato and reserve for another use. I like to save for making soup or homemade dog treats! If you don’t remove some potato the recipe will still work, but you will likely have very full potatoes 😊
Add the cream cheese, and 1 cup of the shredded mozzarella to the sweet potato. Mix to combine, until cheeses are melted and evenly combined.
Add the kale mixture and protein and again mix to combine.
Season with salt and pepper and give the filling a final mix together.
Next transfer the sweet potato filling back into the potato skins, about 1 cup per potato.
Top each potato with a sprinkling of the remaining mozzarella and the Parmesan cheese.
Transfer the stuffed potatoes back to the oven and bake for an additional 10-15 minutes, until the cheese is melted and browned.
If you find the cheese isn’t browning quickly enough, throw the broiler on for a minute or so at the end!
Recipe developed and photographed by Alex Chesney, RD
Stuffed Eggplant Parm

*Serves 4
Ingredients
2 eggplants, washed and stems trimmed
4 cloves garlic, thinly sliced
Olive oil
Salt & pepper to taste
½ onion, diced
2 tomatoes, roughly chopped
2 tablespoons tomato paste
½ cup water
1 teaspoon dried basil
1 teaspoon dried oregano
¼ - ½ teaspoon red pepper flakes
2 teaspoons red wine vinegar
2 tablespoons cream
¼ cup breadcrumbs
8 slices hot Genoa salami
¼ cup Parmesan cheese
1 cup mozzarella cheese
2 cups pasta of choice
Instructions
Preheat oven to 425°F.
Slice eggplants in half, then carefully score the inside by making long diagonal cuts. Be sure not to cut all the way through the eggplant, though, as we want to keep the skin intact!
Insert slices of garlic into the scored eggplant – evenly divide the garlic slices between the four halves.
Drizzle each eggplant half with olive oil and then season with salt and pepper.
Grease a non-stick baking pan with more olive oil, then place the eggplant halves cut side down onto the pan. Place in the oven and bake for 20 – 25 minutes, until skin is wrinkled and browned, and flesh is soft.
While the eggplant bakes, heat an additional tablespoon of olive oil in a large pan. Add one piece of diced onion to the pan to test the heat. Once it starts to sizzle, add the rest!
Cook the onion for 2 – 3 minutes, until softened.
Add the tomato paste, basil, oregano, and red pepper flakes and stir until they evenly coat the onions. Cook for an additional 2 minutes.
Next add the vinegar and cook until evaporated.
Next, add the chopped tomatoes and water. Bring to a simmer, then reduce heat and cook until thickened, smashing down the tomatoes every once in a while.
Once sauce is thickened, water is evaporated, and tomatoes are thoroughly crushed, add the cream.
By this time, the eggplant should be done baking. Remove the baking pan from the oven and scoop out the flesh (and the roasted garlic slices!) and add to the tomato sauce. Mash until evenly combined.
Be sure to reserve the eggplant skin and keep it intact after removing the flesh.
Place a generous scoop of the tomato and eggplant filling back into each of the eggplant skin. Sprinkle with some of the Parmesan and mozzarella and add 2 slices of salami per half.
Add another scoop of tomato filling to each eggplant half, then sprinkle the top with breadcrumbs and the remaining cheese.
Place the tray back in the oven for an additional 10 minutes.
While the eggplant bakes, cook your pasta following the package instructions.
Remove the eggplant from the oven. The cheese should be melted and browned.
Serve alongside pasta, and pair with a green salad for a balanced and delicious meal!
Recipe was developed & photographed by Alex Chesney, RD
Broccoli Freezing Guide


This blog post was created by dietetic internship students Hannah McGraw and Emma Belanger.