
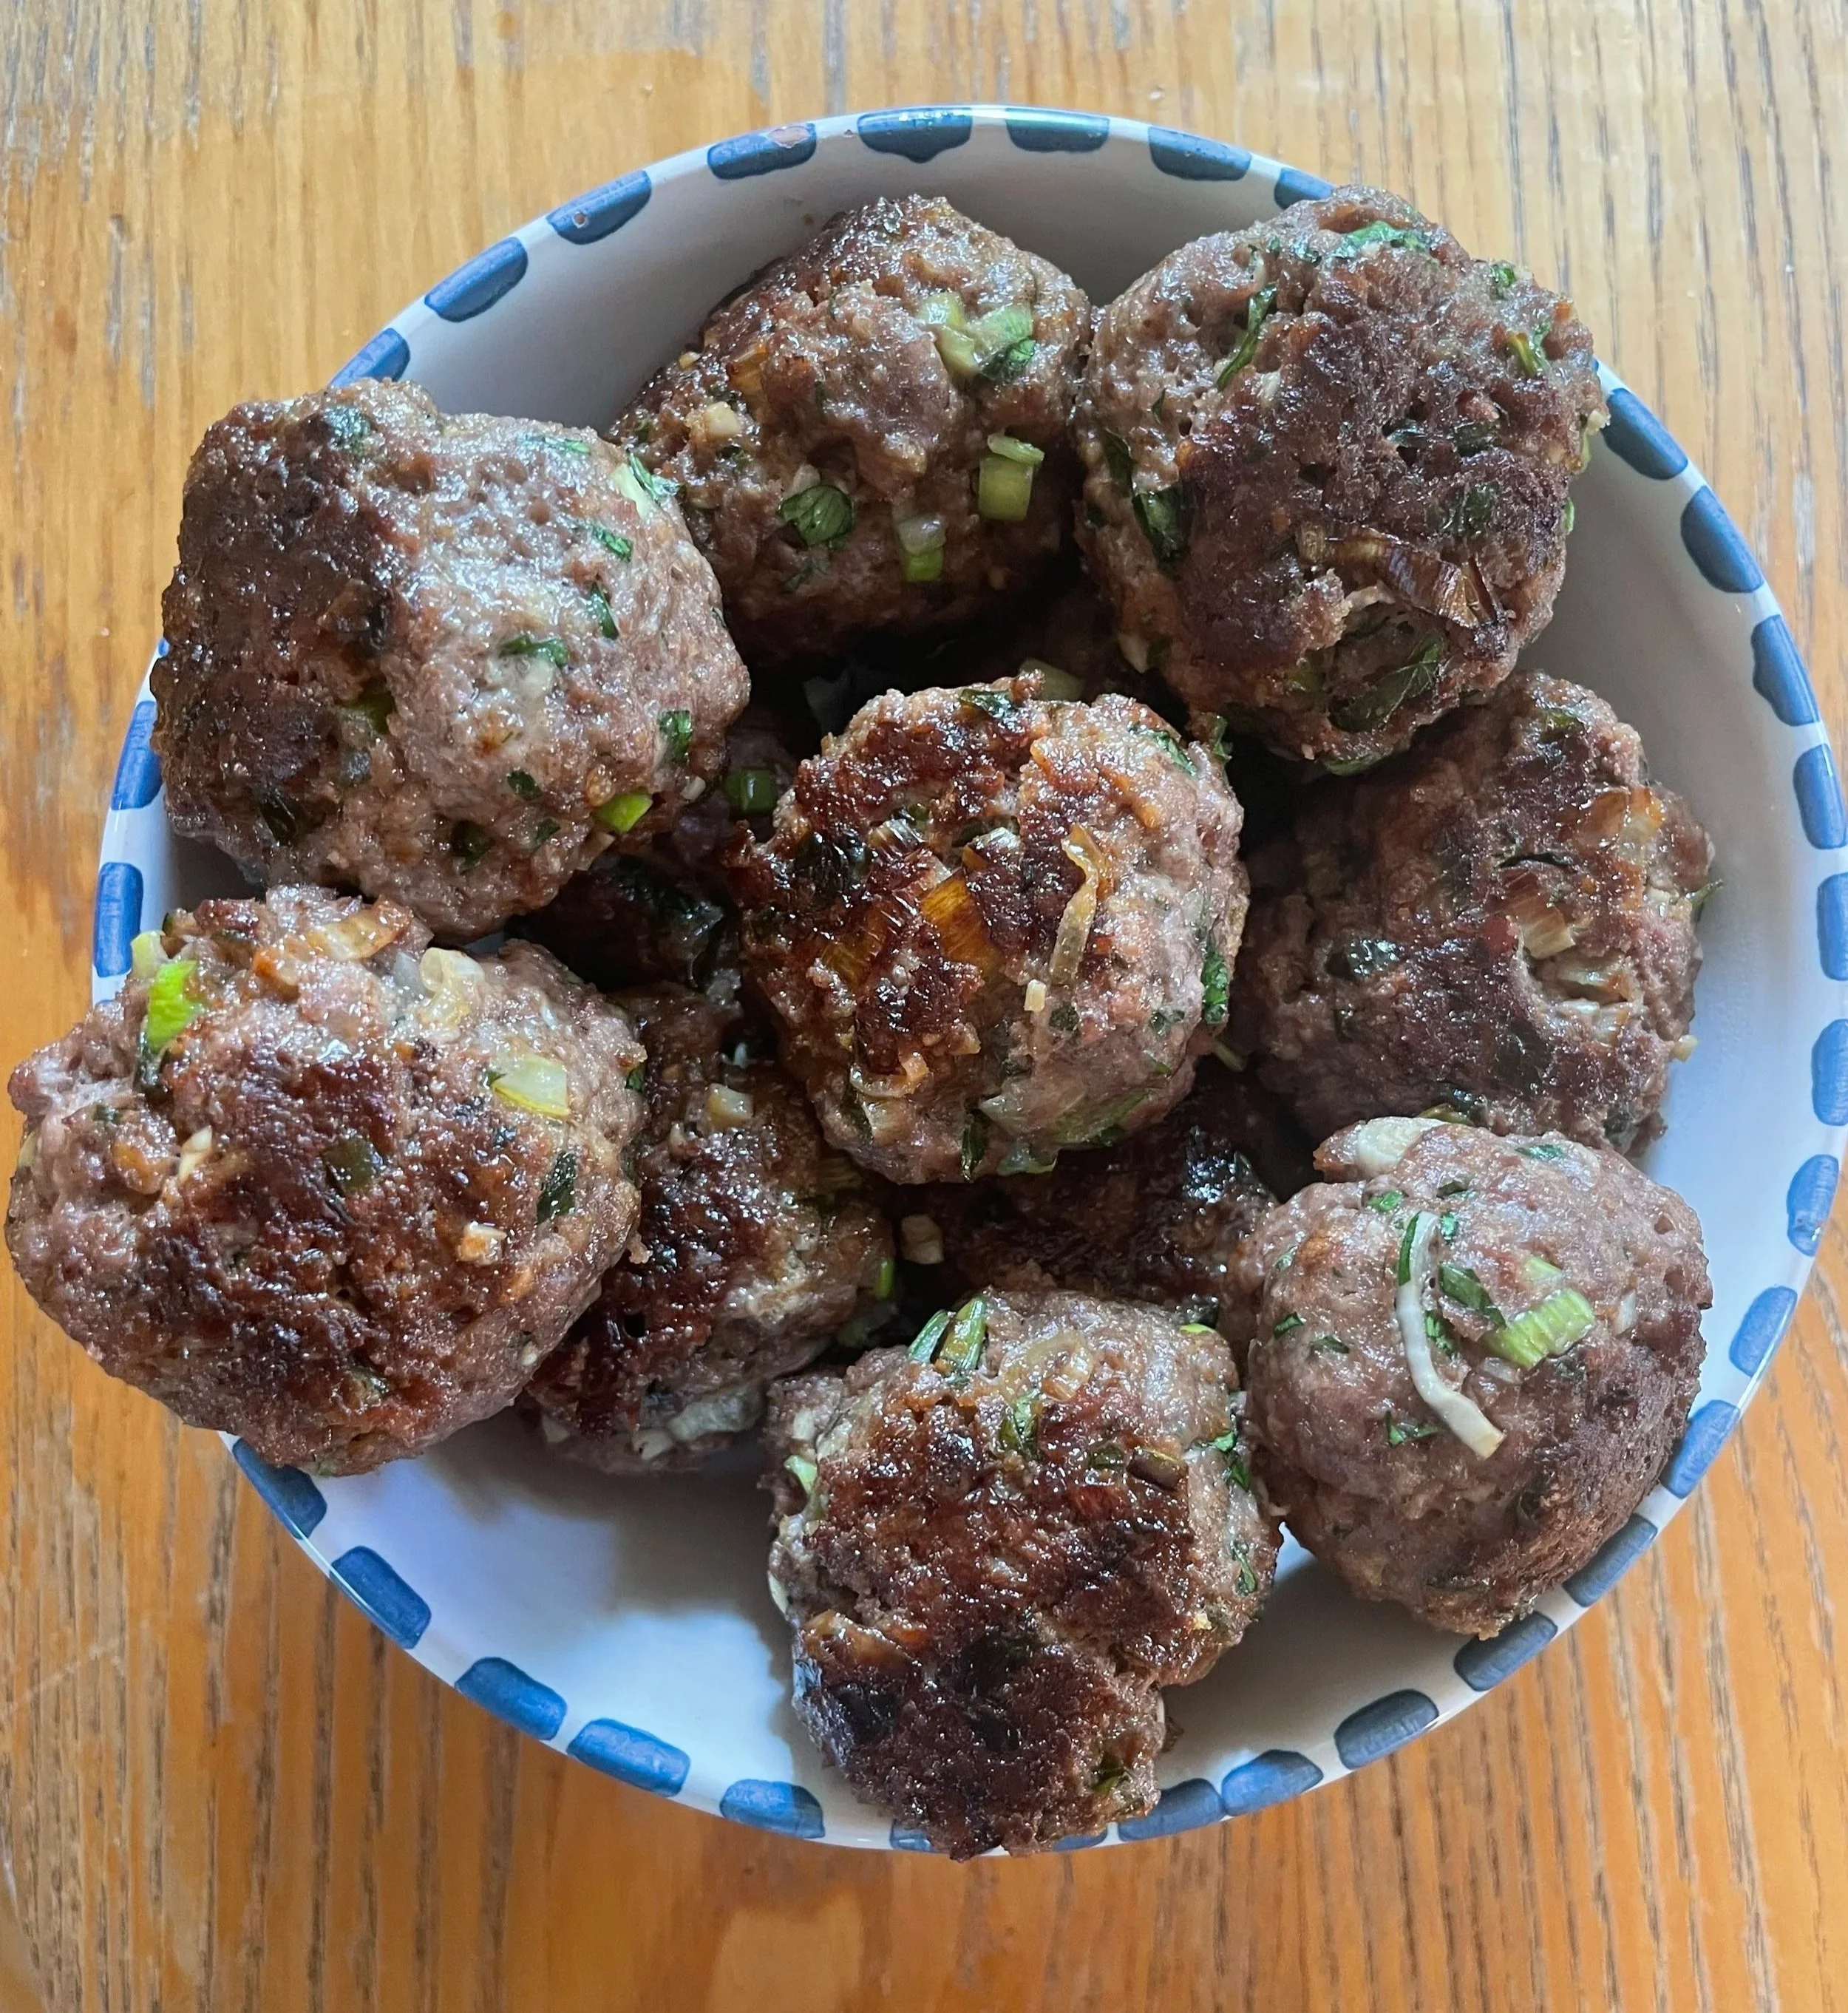
A sneaky way to gain all the nutritional benefits of liver.
Read moreBeef Stew with Cheddar Green Onion Dumplings

Ingredients
For Stew
2 lbs stewing beef
Salt
Pepper
3 tablespoons cooking oil
1 onion, diced
2 stalks celery, diced
3 cloves garlic, minced
1 teaspoon dried thyme
1 cup red wine (or an additional cup of broth)
4 cups beef broth
3 large carrots, diced
2 potatoes, cubed
2 tablespoons tomato paste
2 teaspoons Worcestershire sauce
1 bay leaf
2 tablespoons flour
For Dumplings
1 ¾ cups flour
1 tablespoon baking powder
½ teaspoon salt
2 green onions, diced
1 cup shredded cheddar cheese
¾ cup milk
Instructions
Season the cubes of stewing beef with salt and pepper. Heat 2 tablespoons of the oil in a large, heavy pot over medium-high heat. Brown the beef in batches until all sides are nicely seared. Remove the browned beef from the pot and set aside for later use.
In the same pot, add the remaining oil. Next add onion and celery, and cook for 5 minutes or so, until soft. Add garlic and thyme and cook for 1 additional minute. Finally, add tomato paste and cook for another minute, stirring frequently.
Pour red wine into the pot and scrape up any browned bits on the bottom. Return the beef to the pot followed by the beef broth, Worcestershire sauce, bay leaf, carrots, and potatoes.
Transfer entire contents of the pot to a slow cooker, and cook on low for 7 – 8 hours or high for 4 – 5 hours.
After the slow cooking time has completed, return the stew back to the original pot and place over medium heat. Whisk together the flour with some water until a thickened liquid has formed, then stir that into the contents of the pot.
Now, prepare to add the dumplings!
To make the dumpling batter, whisk together flour, baking powder, salt, and herbs in a bowl. Stir in milk and melted butter, followed by shredded cheese and diced green onion. Mix until just combined.
Drop spoonfuls of dumpling batter over the simmering stew. Cover and cook without lifting the lid for 15-20 minutes, until dumplings are puffed up and cooked through. If you’d like to add more colour, and if your pot is oven-safe, place under the broiler for 2 – 3 minutes.
Remove bay leaf and serve the stew in bowls topped with a dumpling.
Recipe modified from eatwithtenderness.com by Alex Chesney, RD
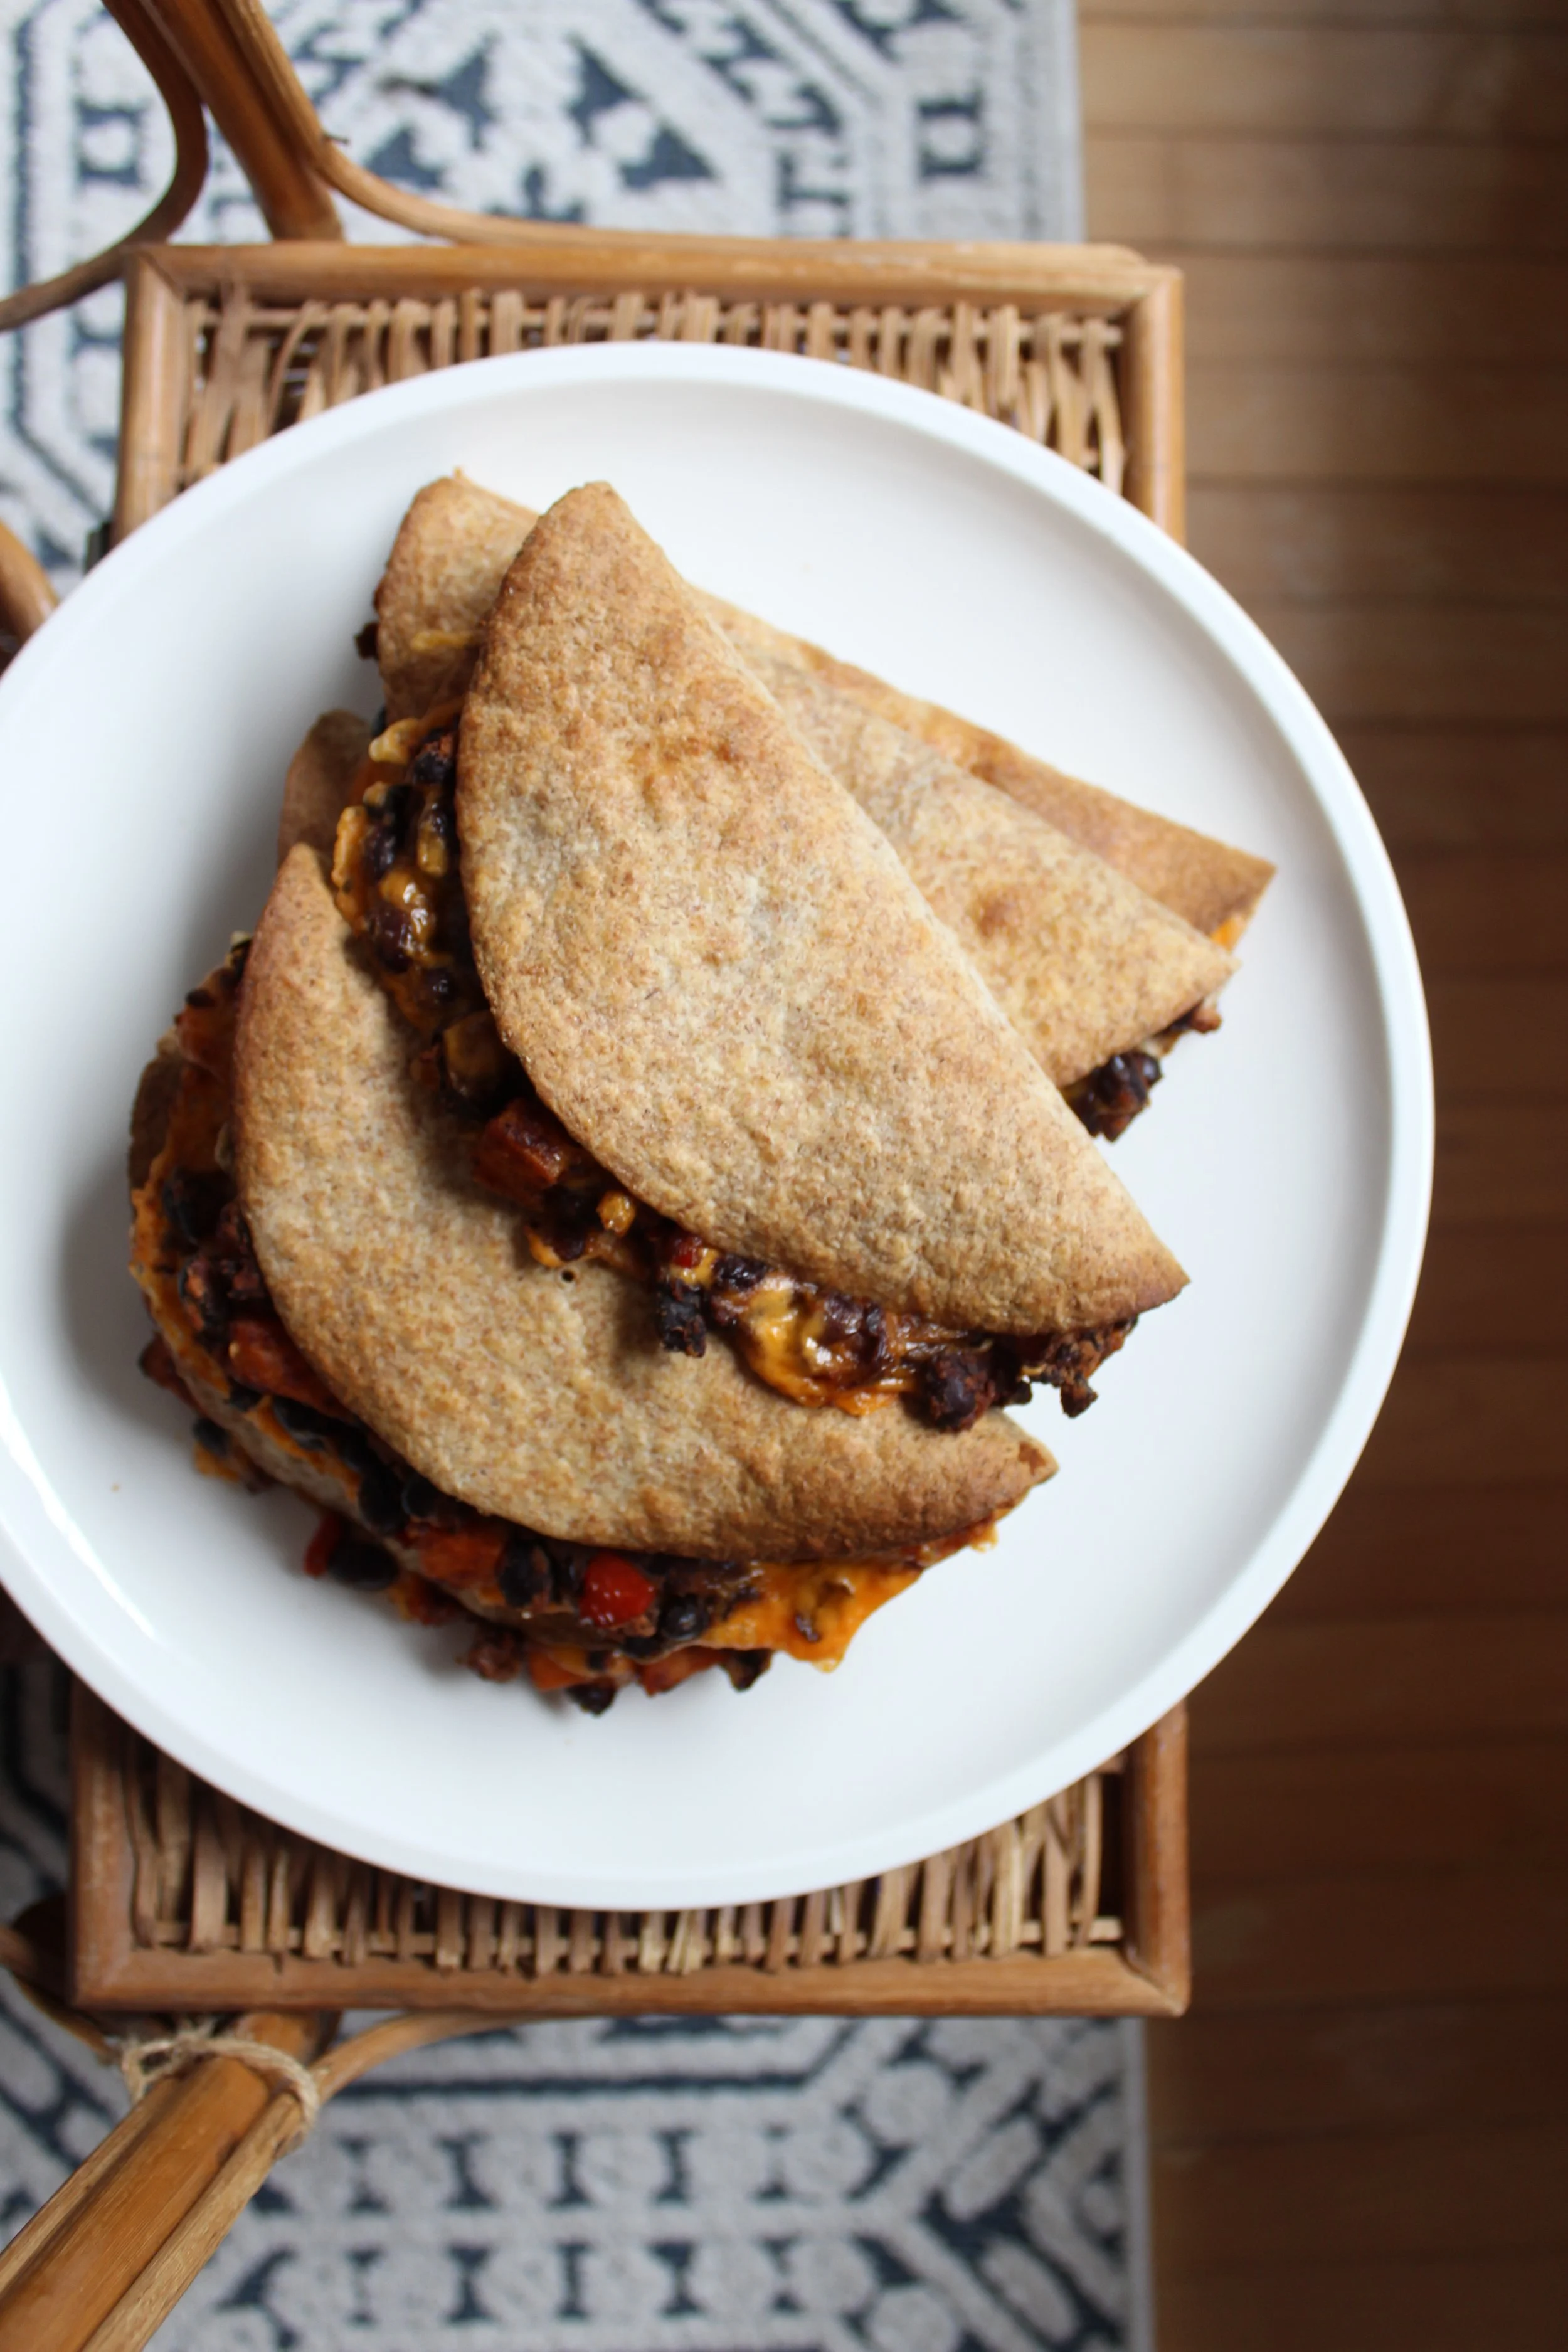
Black Bean and Sweet Potato Quesadillas
Ingredients
½ large sweet potato, washed, peeled, and diced
½ bell pepper, diced
1 can black beans, drained and rinsed
1 ½ cups cheddar cheese, shredded
1 teaspoon chili powder
1 teaspoon paprika
1 teaspoon Tajin
1 teaspoon onion powder
½ teaspoon oregano
1 clove garlic, minced
6 x 7-inch tortillas
Cooking oil
Cooking spray
Instructions
Preheat oven to 375°F. Line a baking sheet with parchment paper and set with aside.
Heat ~1 tablespoon cooking oil in a large pan over medium heat.
Sauté sweet potato and bell pepper for 8 – 10 minutes until soft.
Add seasonings and garlic and continue to stir and cook for an additional 2 minutes or so.
While the seasoned vegetables cook, transfer the black beans to a medium-sized bowl and partially mash – some beans should remain whole while others are mushed up completely.
By now, the vegetables should be thoroughly coated in spices and softened. Add remaining ingredients to the bowl and mix until completely combined.
Lay tortillas out on prepared baking sheet. Sprinkle each one with some cheddar cheese.
Add ½ cup of filling to the top of each tortilla and then top with more cheddar cheese.
Fold in half, spray the top with cooking spray and transfer to the preheated oven.
Bake for 15 minutes, until tops of tortillas are golden brown and cheese in filling is nicely melted.
Recipe developed and photographed by Alex Chesney, RD
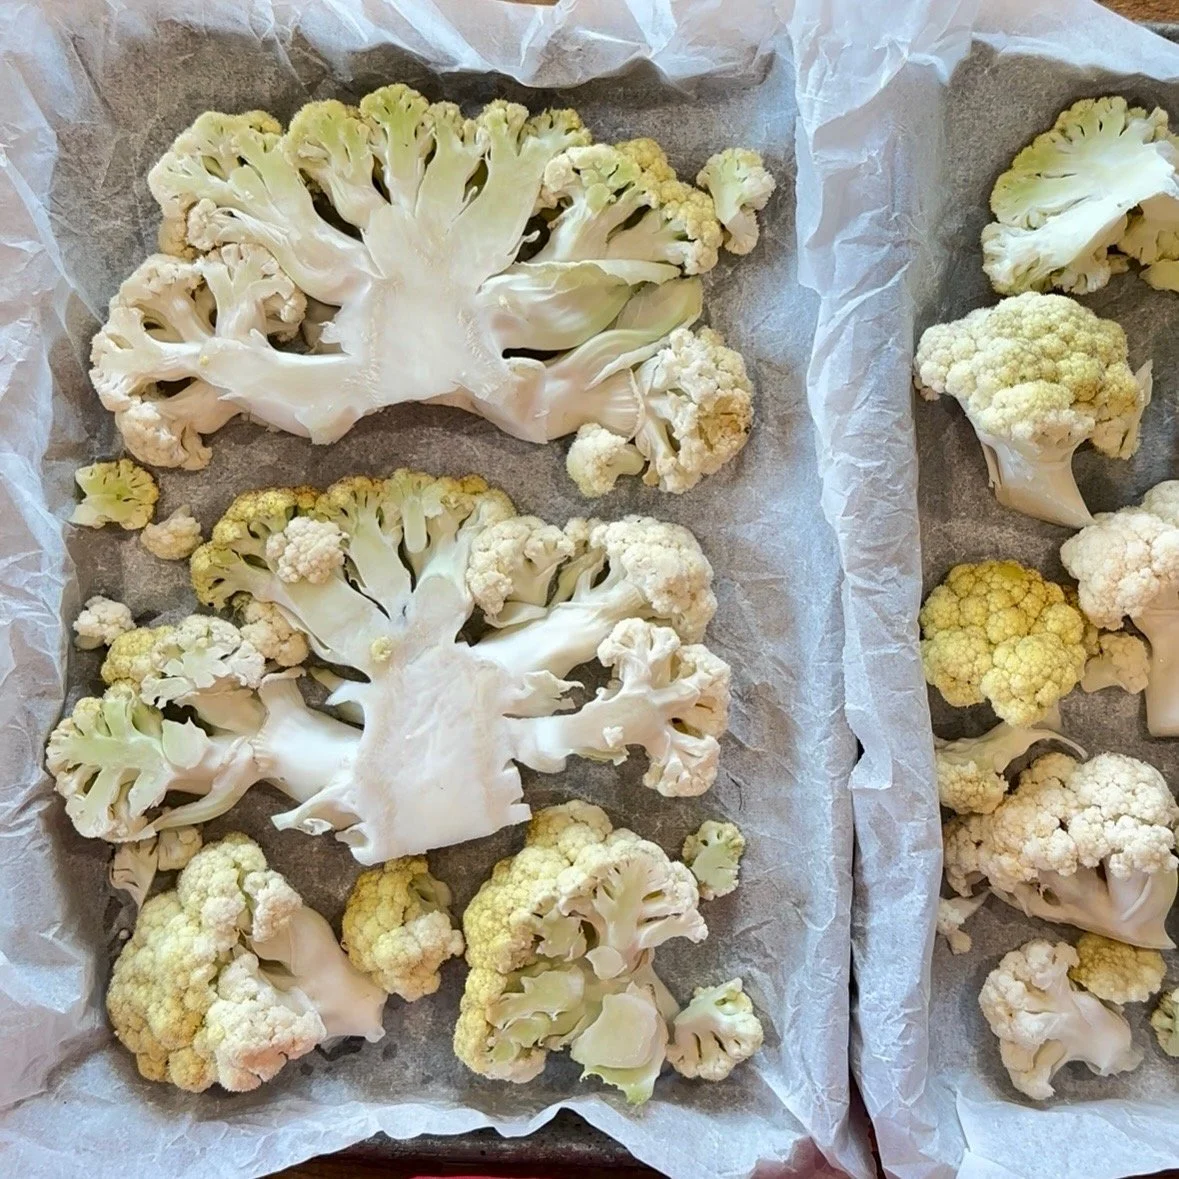
Roasted Cauliflower Steaks
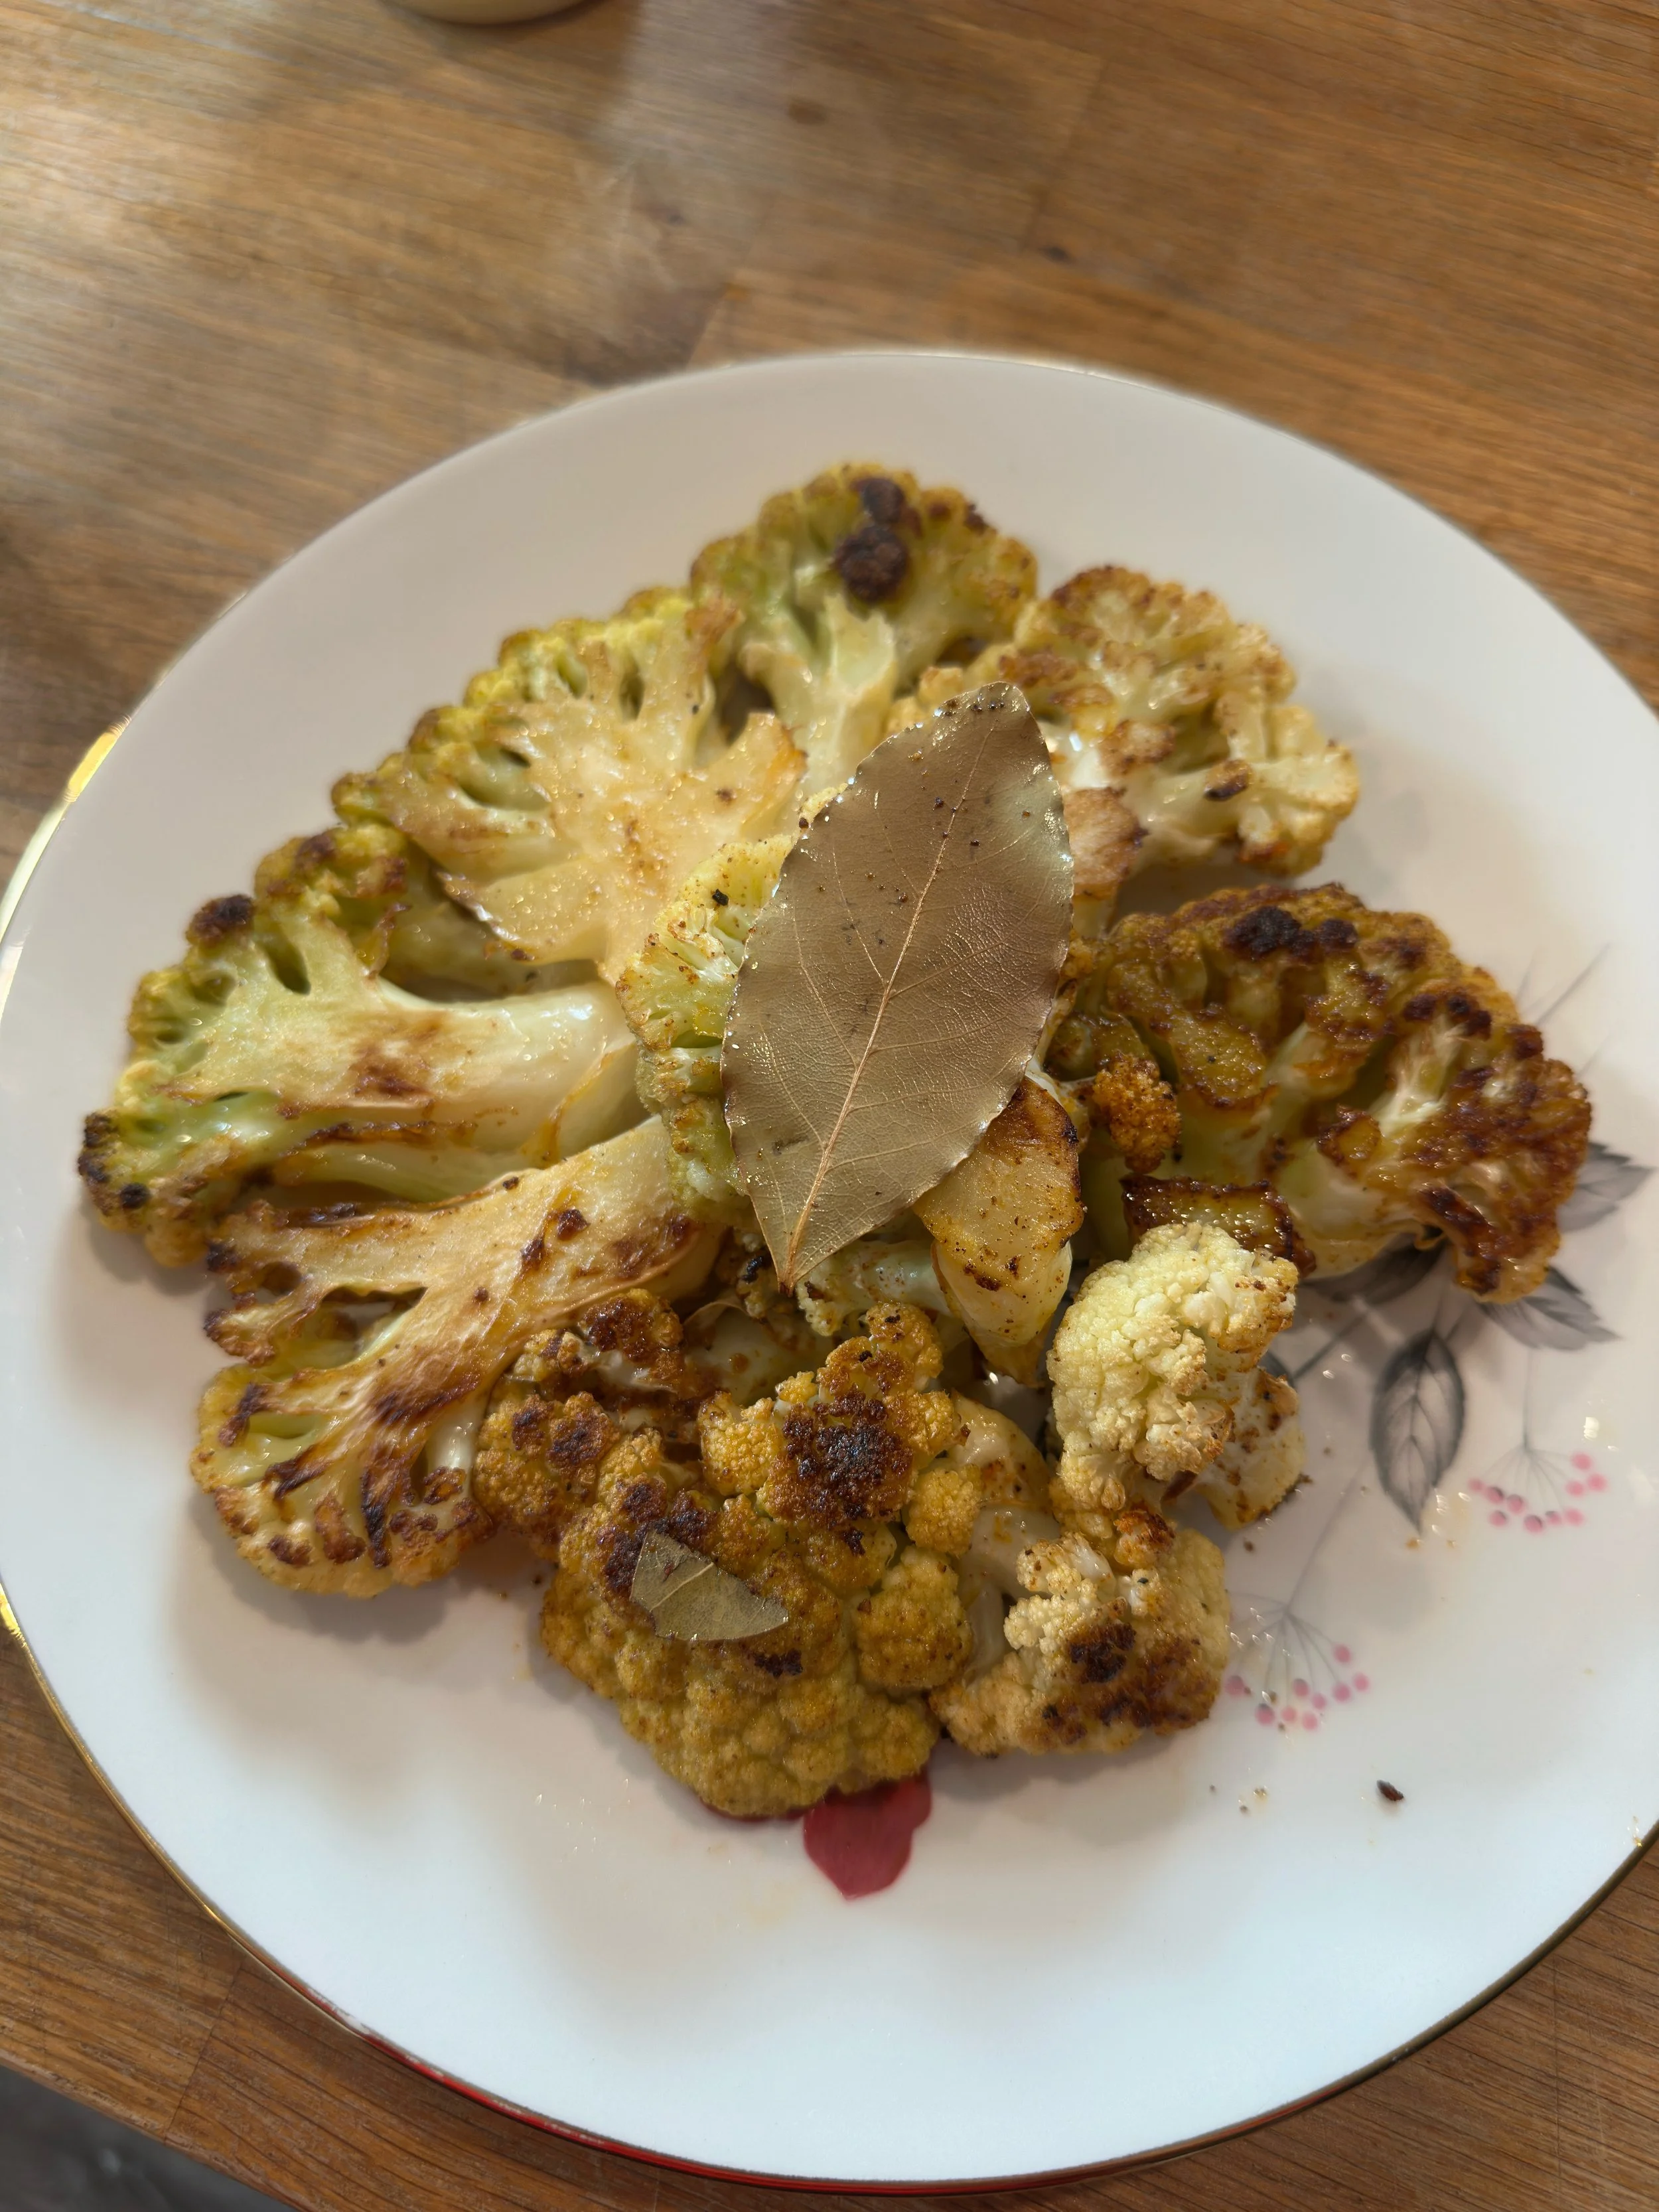
With only a few ingredients, these roasted cauliflower steaks are full of flavour and are easy to make!
Prep time: 10 minutes
Cook time: 25 minutes
Yield: Makes 2 steaks, plus other extra pieces that can be used for leftovers
Ingredients
1 head of Thames River Melons cauliflower
1 teaspoon paprika
1 teaspoon garlic powder
½ teaspoon salt
½ teaspoon pepper
1 tablespoon olive oil
8 bay leaves (optional)
Instructions
1. Preheat your oven to 425℉ and line a baking sheet with parchment paper.
2. Rinse the cauliflower under cold water and pat dry. Remove the outer leaves and carefully use a knife to trim the stem. Tip: cauliflower leaves are edible! Try using them in stir-fries, salads, or soups!
3. Slice the cauliflower into steaks about 1 inch thick. One head of cauliflower will make 2 steaks, but smaller pieces of cauliflower will fall off when you are cutting—this is normal! Keep all the pieces and place them on the prepared baking sheet.
4. In a small bowl, mix together the paprika, garlic powder, salt, and pepper. Drizzle olive oil over the cauliflower steaks, then sprinkle the seasoning mixture on top. Use a brush to evenly coat both sides of each steak. Top with bay leaves.
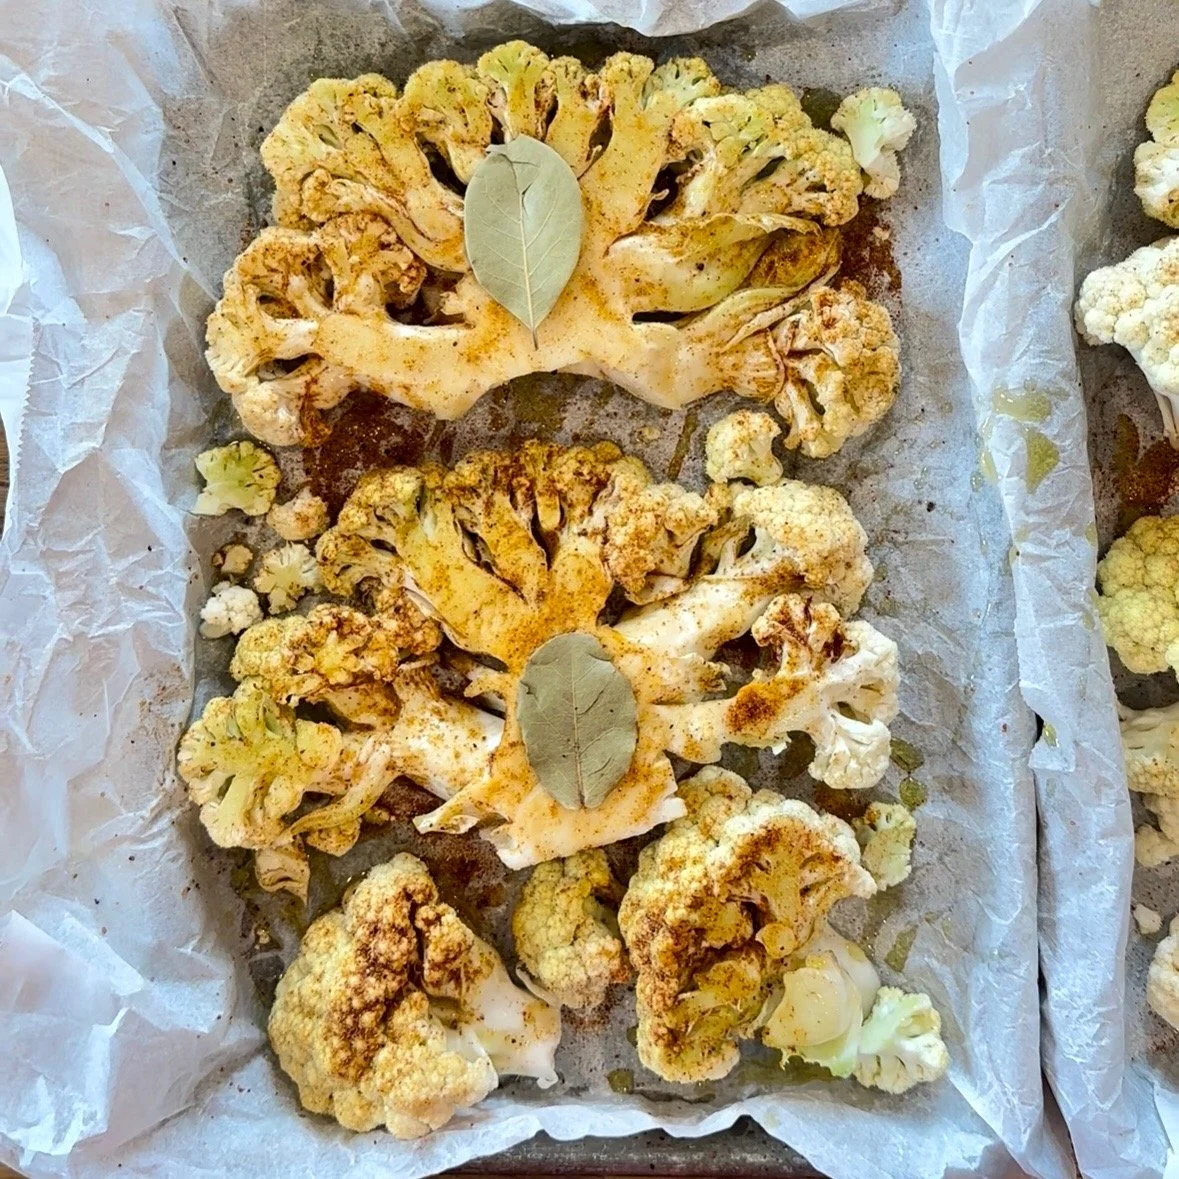
5. Bake the cauliflower for 25 minutes or until golden brown and tender, flipping halfway through.
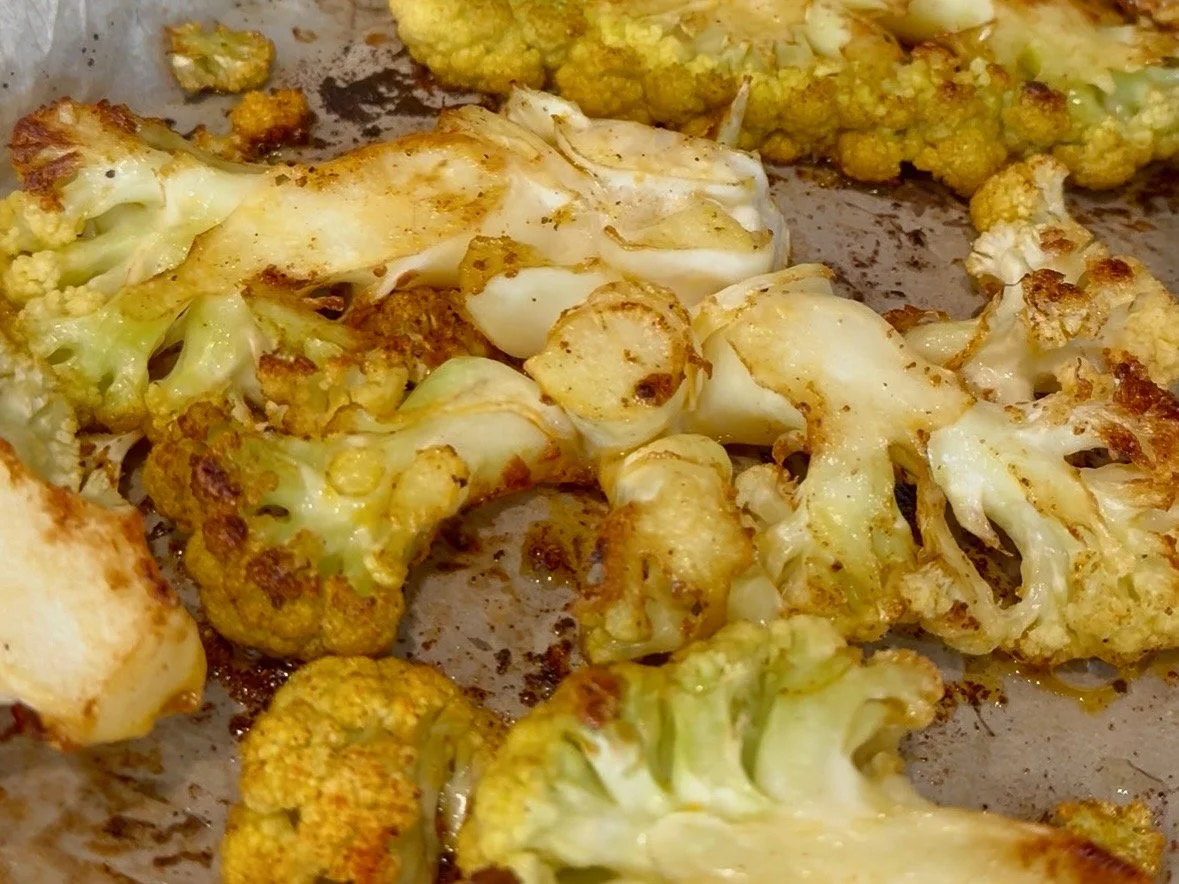
6. Let them cool for 5 minutes before serving.
Cost
PYO cauliflower is $2.00/head. Therefore, the cost of each cauliflower steak is $1.00.
Nutrient Profile
Each cauliflower steak provides 4 grams of fibre and contains important nutrients like vitamin C and vitamin K! Vitamin C supports your immune function and protects your cells, and vitamin K plays a role in blood clotting and blood health.
Storage
Store in an airtight container in the refrigerator for up to 4 days. For best results, reheat in the air fryer or oven–this will help the cauliflower stay crispy!
References:
Unlock Food [Internet]. Canada: Dietitians of Canada; [updated 2019 Mar 21; cited 2025 Aug 13]. What you need to know about vitamin C; [about 3 screens]. Available from: https://www.unlockfood.ca/en/Articles/Vitamins-and-Minerals/What-you-need-to-know-about-vitamin-C.aspx.
Unlock Food [Internet]. Canada: Dietitians of Canada; [updated 2019 Mar 21; cited 2025 Aug 13]. What you need to know about vitamin C; [about 3 screens]. Available from: https://www.unlockfood.ca/en/Articles/Vitamins-and-Minerals/What-You-Need-to-Know-About-Vitamin-K.aspx.
Creamy Zucchini Pasta

Ingredients
6 slices bacon
3 zucchini, sliced into half rounds
1 head green garlic, minced
½ teaspoon black pepper
½ teaspoon salt
Pinch of red pepper flakes
½ cup vegetable broth
½ cup parmesan cheese
¼ cup cream
4 cups noodles of choice, cooked according to package directions
2 teaspoons breadcrumbs
More Parmesan, for topping
Instructions
Cook bacon in a large frying pan over medium heat until crisped to your liking. Be sure to flip and cook both sides evenly. Once ready, remove bacon from pan and place on a plate lined with paper towel. Pat the bacon strips to remove excess grease, then roughly chop into homemade bacon bits. Set aside for later.
In the same pan and still over medium heat, cook the zucchini and garlic. The bacon grease will provide all the fat you need and will offer delicious flavour. Stir often and continue to cook until the zucchini is golden brown and garlic is fragrant.
In the meantime, set a large pot full of water on another element. Salt the water, bring to a boil, and cook your pasta according to package directions.
Turn the heat off the pan with the zucchini and carefully pour the broth into the pan. Scrape up all the bits of garlic that have likely started to stick, then quickly transfer the zucchini and broth mixture into a blender.
Add cream and Parmesan to the blender as well, then buzz until a smooth sauce has formed.
Pour the sauce over the cooked noodles and stir until everything is evenly coated.
Serve pasta, then top with the bacon bits you prepared earlier, as well as breadcrumbs and extra Parmesan.
Serve with an additional protein if you’d like! We chose some leftover chicken strips. Sausage or grilled chicken would be delicious as well.
Enjoy!
Note: This recipe could be easily modified to become vegetarian by subbing olive oil for the bacon fat. To make it vegan, try using nutritional yeast in place of Parmesan and cashew cream or coconut milk instead of the dairy cream!
Cheesy Asparagus Stuffed Chicken Breast

Ingredients
Cheese Filling
½ cup cream cheese (we used a local version called Crowdie, from Golspie Dairy!)
2 tablespoons Parmesan cheese
½ cup shredded cheese (mozzarella, cheddar, or whatever you have on hand)
1 teaspoon lemon juice
1 green garlic, minced
1 tablespoon sundried tomatoes, diced
Salt & Pepper
Spice Mixture
1 teaspoon paprika
1 teaspoon garlic powder
1 teaspoon onion powder
½ teaspoon thyme
½ teaspoon red pepper flakes
½ teaspoon brown sugar
Protein
2 chicken breasts
8 slices bacon
Other
8 – 12 spears asparagus, ends trimmed
Neutral cooking oil
Instructions
Preheat oven to 375°F.
Prepare the cheese filling: in a medium bowl mix cream cheese, Parmesan, shredded cheese, lemon juice, garlic, sundried tomatoes, salt, and pepper until smooth.
Prepare the spice mixture: in a small bowl, measure out spices and whisk together until evenly combined.
Set cheese filling and spice mixture aside until later.
Slice chicken breasts in half lengthwise, leaving you with a total of 4 thin pieces (they should be around ¾ inch) of chicken. If they are too thick, wrap in saran and pound with a meat tenderizer. If you don’t have one, a rolling pin will work as well! And if you don’t have one of those? Try a can of beans!
Now you are ready to assemble the stuffed chicken:
Season the inside of the chicken slices with a sprinkle of the spice mixture.
Next, add 2 tablespoons of the cheese mixture and spread so it covers the full length of the chicken.
Finally, add 2 – 3 spears of asparagus.
Carefully roll up the piece of chicken and wrap with 2 slices of bacon.
Place an oven-safe pan over medium heat on the stove top. Once hot, add the stuffed chicken pieces to the pan.
Sprinkle the remaining spice mixture all over the top of the chicken. Sear for 2 minutes per side, to give the chicken a nice golden brown exterior.
Transfer the pan to the oven and cook for 20 – 25 minutes, until an internal thermometer shows the chicken has reached 165°F (74°C).
Serve alongside veggies and a grain of your choice. We went with more asparagus and Cavatappi noodles sprinkled with more Parmesan and black pepper.
Steak Frites with Asparagus & Halloumi

Ingredients
2 Thames River Melons Black Angus steaks (rib or striploin)
1 block halloumi, sliced into rectangles
1 bunch Thames River Melons asparagus, washed and trimmed
1 bag frozen fries (or make your own!)
Salt
Pepper
Neutral cooking oil
Neutral cooking oil spray
Seasonings (We used Kinders Buttery Garlic Rub, from Costco)
2 tablespoons butter
Instructions
Cook Steaks
Thaw steaks in the fridge overnight.
Remove from packaging and thoroughly pat dry using paper towel. Once steaks are dry, let them sit out for 15 minutes, to come to room temperature. Thoroughly salt both sides of the steaks.
Heat a large stainless-steel skillet over medium-high heat.
When pan is very hot, pour in 1 tablespoon oil and swirl to coat pan.
Cook steak 6 - 8 minutes, until a brown crust forms. Flip, and cook for another 6 - 8 minutes.
Continue cooking until an instant-read thermometer inserted into thickest part registers 125°F (51°C).
Transfer steak to a cutting board.
Prepare Asparagus & Fries
Next, prepare the asparagus and fries for the oven.
Preheat oven to 400°F
For the asparagus, spread out evenly on a baking sheet lined with parchment paper.
Drizzle with cooking oil and season with salt and pepper, along with any other seasonings you’d like.
Transfer the prepared pan of asparagus to the oven and roast for approximately 15 minutes.
Spread the fries out on a baking sheet lined with parchment paper and generously spray with cooking oil.
When 10 minutes remains on the asparagus timer, add the pan of fries to the oven as well.
Cook Halloumi
While the asparagus and fries bake, cook your halloumi. Add 1 tablespoon of cooking oil to a large pan and place over medium-high heat.
Add your slices of halloumi and cook until golden brown. Flip and repeat.
By now, your asparagus, fries, and halloumi should all be ready. Turn off the oven and leave the asparagus & fries. Transfer the halloumi to an oven safe plate lined with paper towel and place them in the oven as well, to stay warm.
Cook Steaks – Part 2
Add 2 tablespoons of butter to the pan you originally cooked your steak in, and turn the heat to medium-high.
Slice your steaks into bite-sized pieces, working against the grain.
Once butter is melted, add steak bites to the pan. Season with your preferred selection of herbs and spices (again, we used that garlic-butter mixture from Costco!).
Cook until your desired level of doneness is achieved. The temperature listed earlier in the recipe (125°F/51°C) is rare.
Assemble Plates
Layer shallow bowls with a scoop of fries and top with halloumi, steak, and asparagus. Serve with a salad of your choice and enjoy!
Pick Your Own Meal Series: Grilled Vegetable Pasta Salad
We are featuring our next Pick Your Own (PYO) meal, Grilled Vegetable Pasta Salad. Craving pasta…but also wanting something summery and fresh? Presenting the long weekend Grilled Vegetable Pasta Salad, because it ages like fine wine, feeds a crowd, and you grill the veg on a barbecue which is perfect for keeping your house cool during those hot days.
We made this salad to go with a BBQ meal including steak, halloumi, and tofu, which provided protein, but you could always add protein of your choice directly to the salad. Things like tuna, or chicken would work great!
Please tag us on Instagram (@thamesrivermelons) if you try this recipe!

Look at all the veggies!
Recipe
*Serves 10 - 12
Ingredients
2-3 Thames River Melons zucchini
2-3 cups Thames River Melons grape tomatoes
½ medium Thames River Melons red onion
1 Thames River Melons red bell pepper
2 cups arugula
½ cup capers
½ kalamata olives
200g of dried pasta (we are using penne)
200g of feta
1 tsp salt (for boiling pasta)
For the Dressing
⅓ cup of olive oil
Salt and pepper
⅓ cup red wine vinegar
1 tbsp Thames River Melons honey
2 tbsp Thames River Melons garlic scape mustard
1 cup of fresh Thames River Melons herbs (dill, basil, oregano, etc)- please feel free to add more

Prepping the produce!
Instructions
1. Prepare the vegetables, beginning with the zucchini and bell pepper, for grilling. Wash and then cut zucchinis in half lengthwise then half again to get four pieces. Sprinkle salt over the zucchini to help draw excess water out, and set aside.
Cut the red pepper into quarters and set aside.
2. Slice the red onion with the grain and separate, halve the grape tomatoes, and mince fresh herbs. We used dill and basil.
3. Peel, crush and mince 3-4 garlic cloves
4. Dab the zucchini with a paper towel to remove water. Add olive oil, salt and pepper to the zucchini and red pepper, ensuring all is well coated.
5. Add pasta to boiling water and cook according to instructions.
6. Place the zucchini and red pepper on the BBQ.
7. Begin to assemble the salad. In a large serving bowl, place grape tomatoes, olives, capers, red onion, arugula, dill, basil, and crumbled feta
8. Make the salad dressing. Combine olive oil, minced garlic, dijon mustard, red wine vinegar, honey, salt and pepper and mix
9. Remove the vegetables from the grill.
10. Drain the pasta and set aside to cool slightly.
11. Cut the grilled vegetables into bite sized pieces.
12. Add the pasta, grilled vegetables, and dressing to the serving bowl. Toss and serve.

Grilled Vegetable Pasta Salad
Cost
The zucchini weighed 1lb. The bell pepper was 0.35lb. The tomatoes were 0.8lb.
PYO zucchini is $0.50/lb, bell peppers cost $2/lb, and grape tomatoes cost $0.80/lb.
Therefore, the PYO vegetables in this dish cost approximately $2 in total.
Storage
This salad will keep in the fridge for 4 days. If planning to store, we recommend keeping the arugula separate and adding at time of consumption. However, dressing the salad is recommended as the pasta and vegetables can marinate over time.
Waste Less Notes
It is an easy way to incorporate vegetables that may be on their last days of freshness.
Modifications
This recipe may be modified to suit your needs. You can add or subtract vegetables depending on what is in season and what you have on hand.
Recipe developed and photographed by dietetic interns Lise Wolyniuk and Lexie Nobbs and reviewed by Alex Chesney, RD
Pulled Beef
For tacos, nachos, quesadillas, pulled beef sandwiches, and more!

Ingredients
1 (2 ½ – 3 pound) Blade Roast or Blade Steaks
2 tablespoons chili powder
4 teaspoons ground cumin
2 teaspoons salt
2 teaspoons black pepper
1 teaspoon garlic powder
1 teaspoon onion powder
1 teaspoon paprika
Pinch of red pepper flakes
(Or, instead of the above spices use 2 x 1 ounce taco seasoning packets)
1 cup Thames River Melons salsa
1/2 cup low sodium beef broth
Instructions
Trim any large exterior fat, then place the roast in the slow cooker and rub the seasoning mix over all sides of the meat. Top with the salsa and beef stock.
Cook on low for 8 to 10 hours or on High for 5 to 6 hours, until the meat easily shreds.
Use tongs to transfer the beef to a cutting board. Discard any remaining bones and most of the liquid in the cooker, leaving about 2 tablespoons. Using two forks, shred the meat and return it to the remaining juices to keep moist.
Keep in the slow cooker on warm until ready to enjoy.
Use to top nachos (that’s what I did!) or in tacos, quesadillas, or sandwiches.
Easter Recipe Inspo
Looking for some Easter recipe ideas? We’ve pulled a few of our favourites from the past for you to check out!
Quick & Easy Asparagus Benny


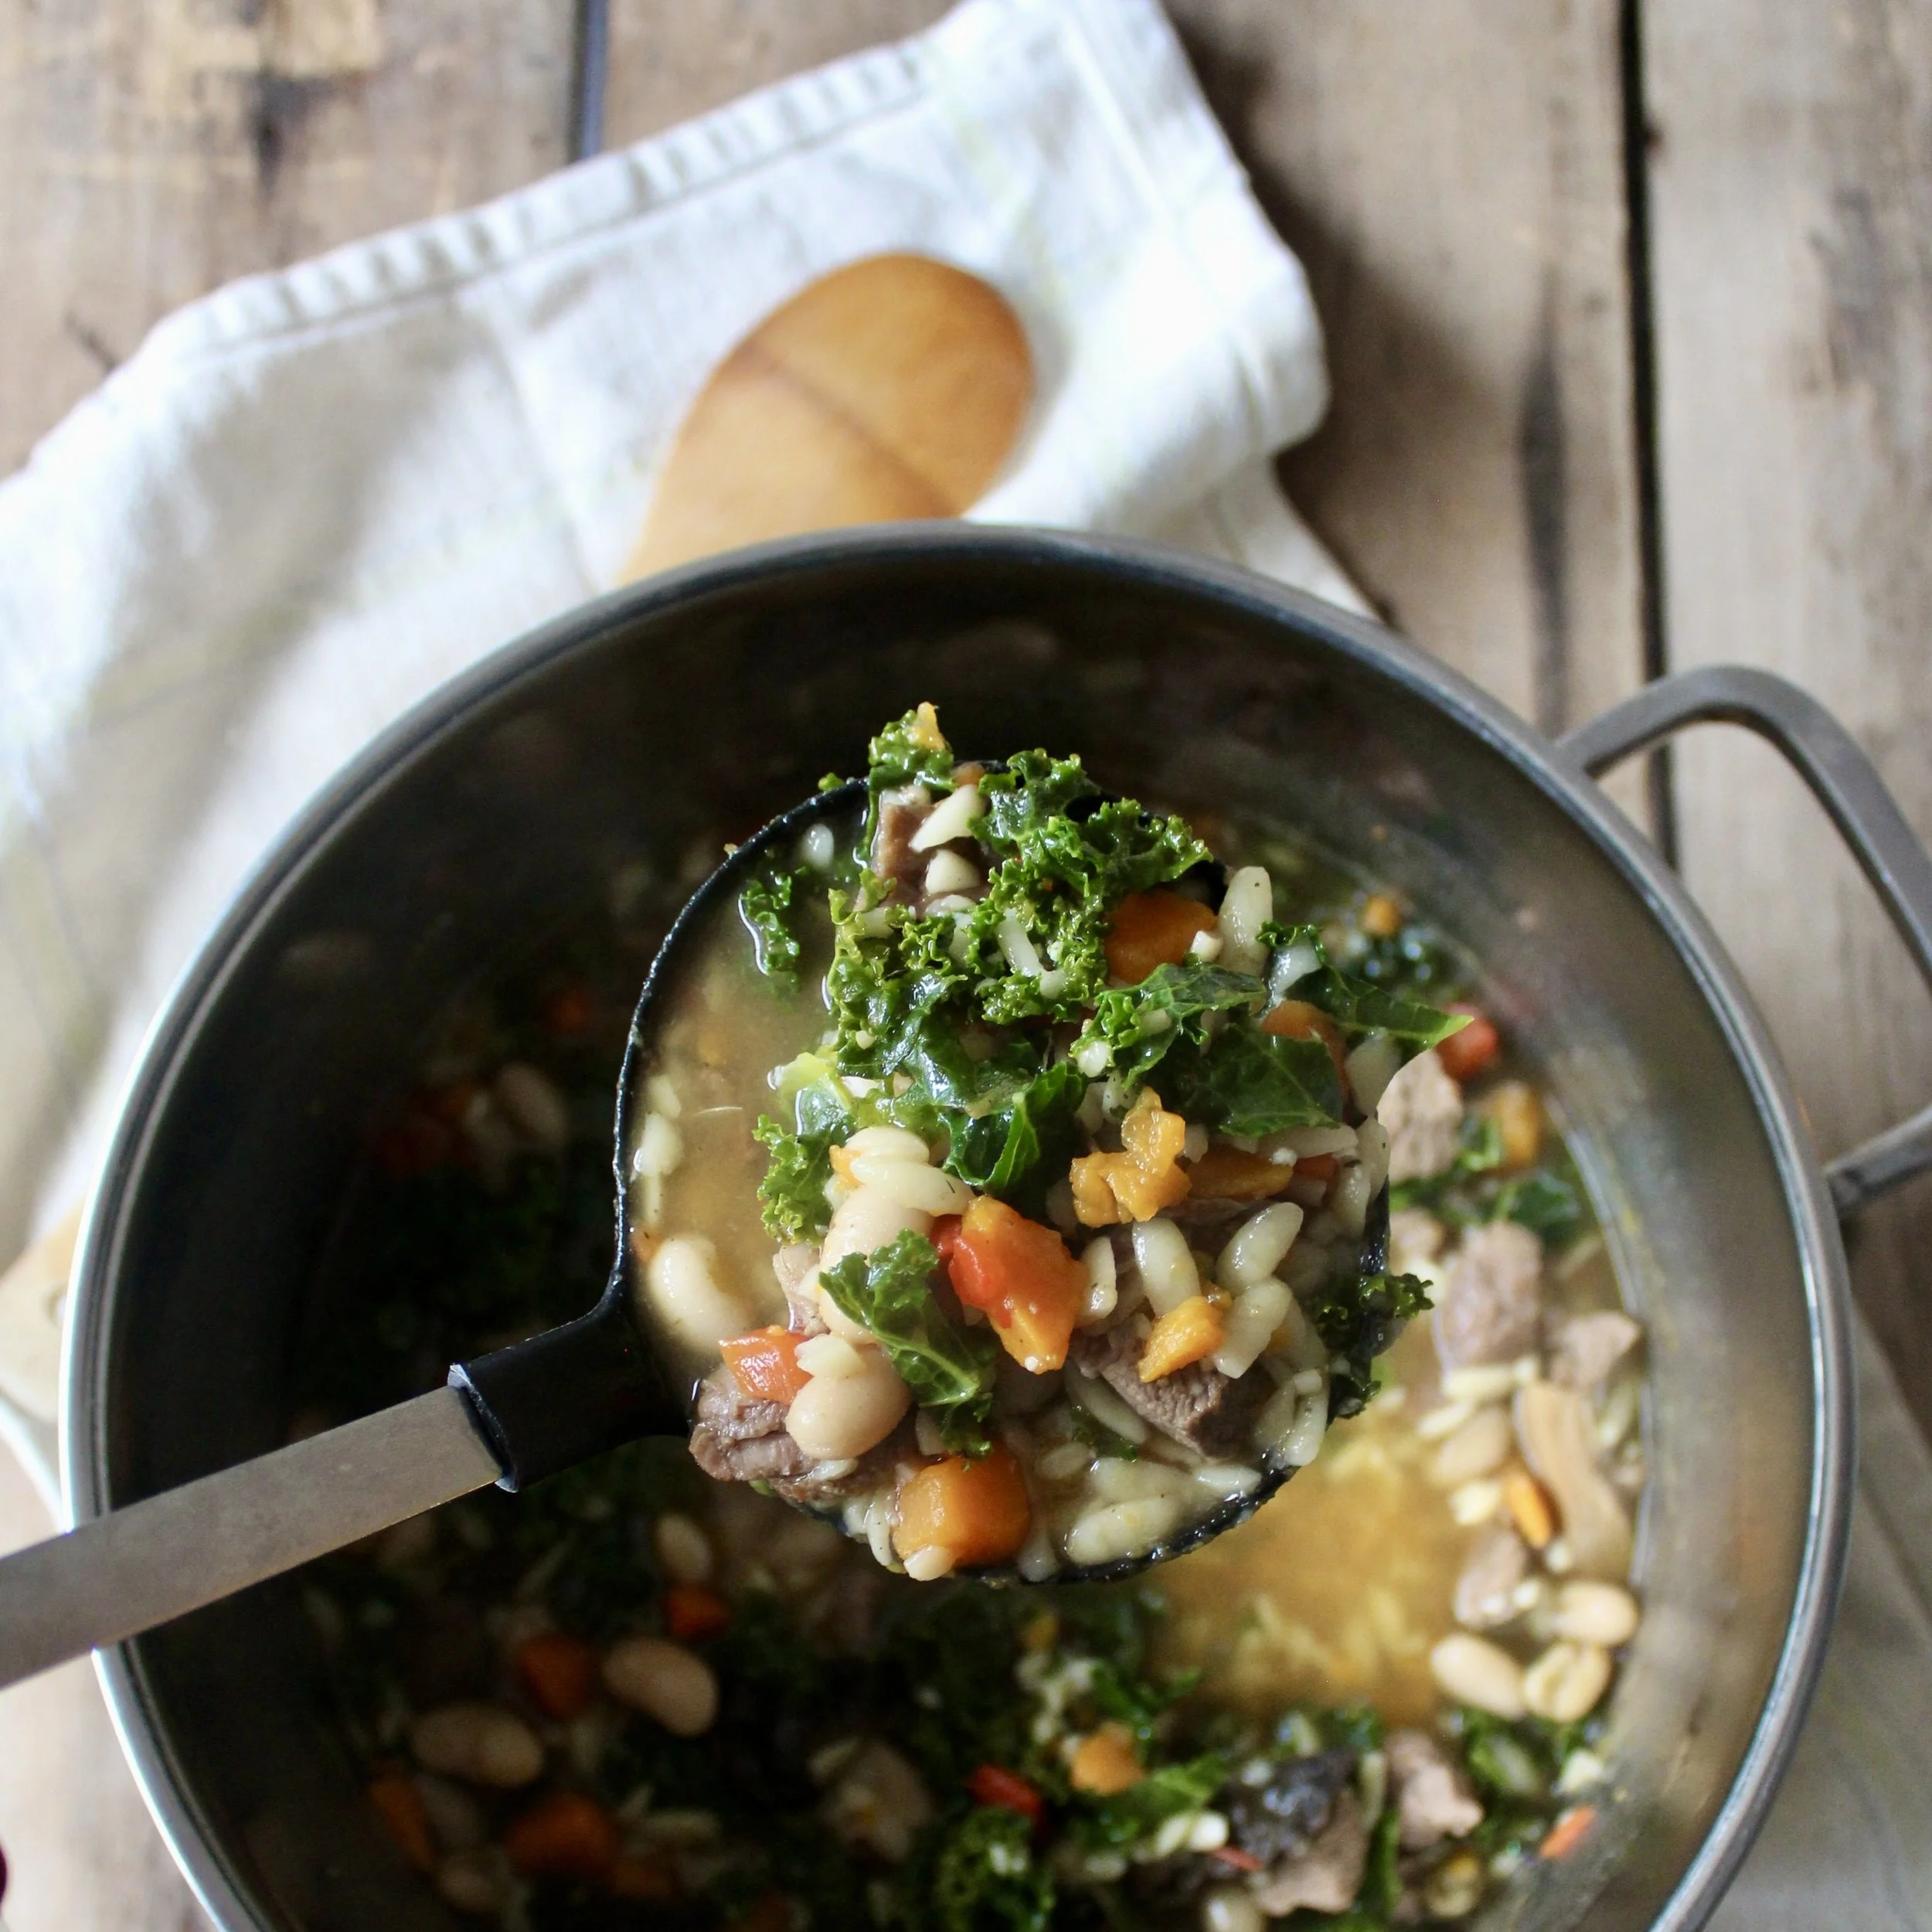
Kale, White Bean, and Beef Stew
Ingredients
1 rib steak, fat trimmed off and cubed
1 tablespoon each cooking oil and butter
½ onion, diced
2 cloves garlic, minced
1 carrot, peeled and diced
1 bell pepper, diced
1 cup mushrooms, washed and sliced
1 teaspoon dried thyme
½ teaspoon red pepper flakes
6 cups beef broth
½ sweet potato, washed, peeled, and diced
1 can white beans, drained and rinsed
½ cup orzo
1 bunch kale, washed and chopped (~2 cups)
Ingredients
Add cooking oil and butter to a large pot and place on the stove over medium heat.
Add cubed rib steak and thoroughly brown on all sides.
Once browned, remove steak from the pot and place in a bowl. Set aside for later use.
Transfer onion, garlic, carrot, bell pepper, and mushrooms to the pot and cook until softened and browned.
Once vegetables are cooked, add thyme and red pepper flakes and stir until thoroughly coated.
Add beef broth, beans, sweet potato, and orzo then bring pot to a boil.
Reduce heat and simmer for 20 minutes, until sweet potato and orzo are fully cooked.
Add kale and cook until softened and wilted.
Serve with crusty bread and slices of your favourite cheese for the perfect cold-weather meal.
Recipe developed and photographed by Alex Chesney, RD


Potato Ham Soup
Servings: 6
Ingredients:
2 tbsp butter
3 cloves garlic, minced
1 white onion, chopped
1 medium sized carrot, chopped
1 celery stalk, chopped
4 white potatoes, chopped to bite sized
½ head of cauliflower, roughly chopped to bite sized pieces
1 ham steak (or about 1 cup ham), chopped
6 cups vegetable stock
¼ cup cream
1 tsp thyme, ground
Salt and pepper to taste
Instructions:
In a large pot, melt the butter. Add the onions, carrots, and celery and saute until tender. Add the garlic and stir for 1 minute.
Add the vegetable stock, and potatoes to the pot. Cook on low-medium heat for about 10 minutes. Add the cauliflower and ham and continue to cook until cauliflower and potatoes are tender.
Add ground thyme, and season with salt and pepper. Remove from heat and stir in cream.
Serve hot.
Note: you can serve this topped with cheddar cheese, bacon bits, a dollop of sour cream, and sliced green onions for added freshness and flavour!

Root Vegetable Sheet Pan Dinner
Sheet pan dinners are super easy and filling! You can omit the protein and use this as a side dish as well. Use any vegetables that you like and that you have on hand. This is a great way to use up those veggies that aren’t looking so fresh, but because we are roasting them, they are perfect for the job!
Ingredients: recommendations only
2 medium carrots, cut into wedges
1/2 onion (red/yellow/white, whatever you have!)
1 parsnip
½ beet, chopped (will change the colour of other vegetables on the pan)
5 mushrooms, cut into quarters
1 head of broccoli
2-3 potatoes (white, red, sweet, whatever you want!)
5-6 Brussels sprouts, halved
5 turkey sausages (if using as a meal)
2-3 generous tablespoons of olive oil or another
1 tsp garlic powder
1 tsp onion powder
½ tsp Italian seasoning
Instructions:
Preheat the oven to 375°F.
Cut up all vegetables and slice turkey sausages. Lay out on a roasting pan.
Cover in oil, and seasonings.
Bake for about 40 minutes, or until potatoes are soft.

Butternut Boursin Sauce

Ingredients
3 cups cubed butternut squash (approximately ½ a squash)
1 block Boursin cheese
½ teaspoon garlic powder
½ teaspoon paprika
½ teaspoon thyme
½ teaspoon onion powder
2 tablespoons canola oil
1 tablespoon balsamic vinegar
½ teaspoon maple syrup
Salt & pepper to taste
½ cup broth
Sage
Instructions
Preheat oven 425°F.
Place butternut squash in a 9 x 13 dish, then add oil, spices, vinegar, and maple syrup.
Season with salt and pepper to taste, then stir to ensure all cubes of squash are coated in oil and the other flavours.
Make a space in the middle of the pan and add the block of Boursin cheese.
Transfer the prepared pan to the preheated oven and bake for 40 minutes, until squash is browned and softened.
Transfer the squash and cheese to a blender or food processor, and blend until smooth.
Loosen up the mixture with broth as desired.
This sauce can be used in lasagna, as a sauce for mac & cheese, or to coat cooked orzo. Or try making a rice casserole with it! The options are pretty endless.
If you want to add a fancy garnish, fry sage leaves in canola oil and place on top.
Recipe developed & photographed by Alex Chesney, RD

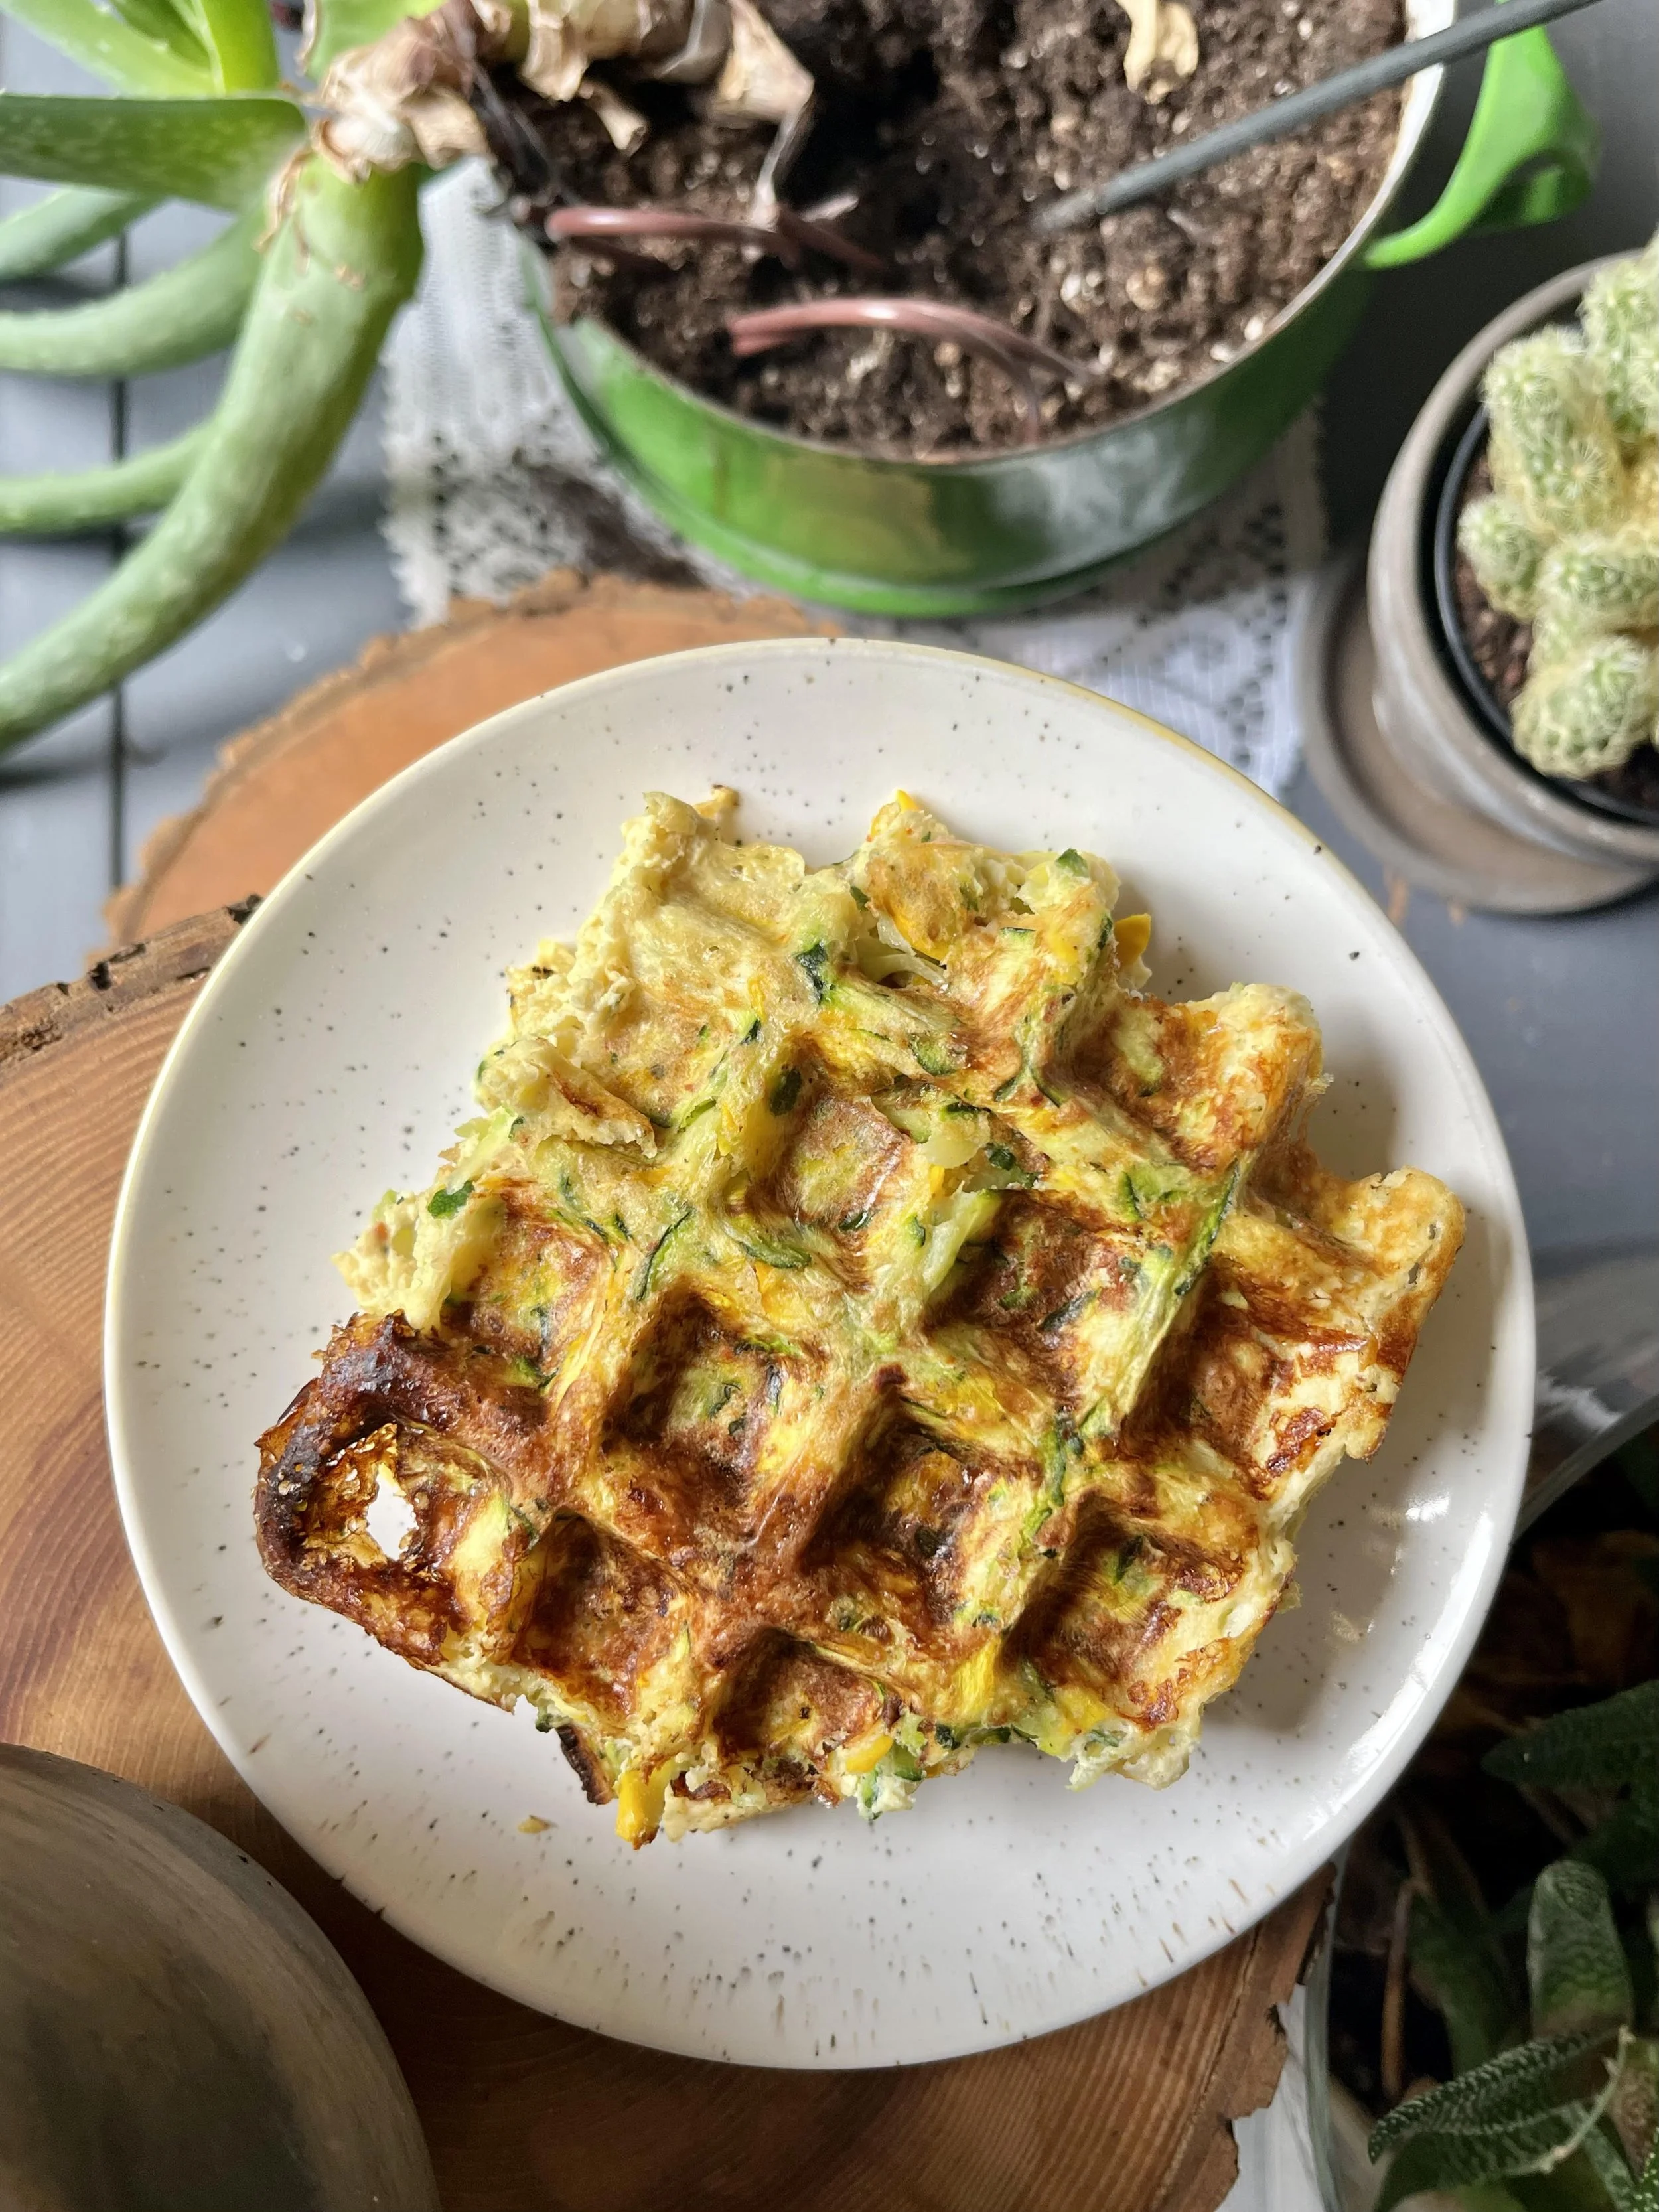
Waffle Iron Zucchini Fritters
Ingredients
4 zucchini, shredded
1/4 cup bread crumbs
1 egg, whisked
1/2 cup feta, crumbled
1/4 teaspoon red pepper flakes
1/2 teaspoon oregano
1/4 teaspoon salt
1/4 teaspoon pepper
Cooking spray
Instructions
Preheat your waffle iron.
Shred zucchini, then place in a dishtowel and squeeze out as much liquid as you can.
Place the shredded and drained zucchini in a mixing bowl and add all remaining ingredients.
Mix until combined.
By now the waffle iron should be nice and hot. Open it up, and grease it very thoroughly with cooking spray. This is important, so that the fritters don’t stick!
Scoop 1/3 cup of fritter batter and place in each waffle ‘square’. Use a spatula to gently spread the batter around so that it’s in a relatively even layer, reaching towards all four corners.
Close the waffle iron and cook until brown and crispy. The amount of time this takes will vary by waffle maker brand. For me, it took 2 rounds of the auto shut-off, or about 8 – 10 minutes.
Once brown and crispy, carefully lift up the fritter and remove from the waffle maker.
Cook another batch of fritters, making sure to thoroughly grease the waffle maker again before starting.
Serve zucchini fritters with your grilled proteins, a sunny-side up egg, or alongside pulled pork.
New Potato and Spinach Curry with Halloumi

Ingredients
1 head spinach, washed and roughly chopped
1 pint new potatoes, washed and cut so that sizes are all roughly similar
¼ cup minced garlic scapes
2 tablespoons tomato paste
½ teaspoon red chili powder (different than ‘regular’ chili powder – much more spice!)
2 teaspoons coriander
1 teaspoon ground ginger
½ teaspoon garam masala
¼ teaspoon turmeric
2 tablespoons water
½ cup cream
1 block halloumi, sliced
1 tablespoon canola oil
Instructions
Begin by prepping all ingredients: wash and chop your veggies, chop the halloumi, and measure out the spices, tomato paste, and cream. Having everything ready to add to the pan as needed will speed up the process!
Add canola oil to a large pan and turn on to medium-high heat. Cook until golden brown, then flip and repeat. This should take about 5 minutes per side. Once done, remove from the pan and set aside.
While the halloumi cooks, bring a medium pot of water to a boil. Once boiling, add your prepared new potatoes and cook for 15 minutes.
While the potatoes cook, add the garlic scapes to the pan you cooked the halloumi in. Stir often and cook over medium heat for 2-3 minutes until fragrant.
Next, add spices and tomato paste to the pan. Cook for another minute or so, then add the water.
Add the spinach and stir and cook until wilted. Add the cream and stir until combined. Reduce heat to low at this time.
By now the new potatoes should be done cooking. Drain the water then add them to the pan with the spinach curry. Stir until potatoes are coated.
Finally, add the cooked halloumi slices to the pan as well.
Serve with a dollop of yogurt and enjoy!
Recipe developed & photographed by Alex Chesney, RD
Roasted Asparagus Mac & Cheese
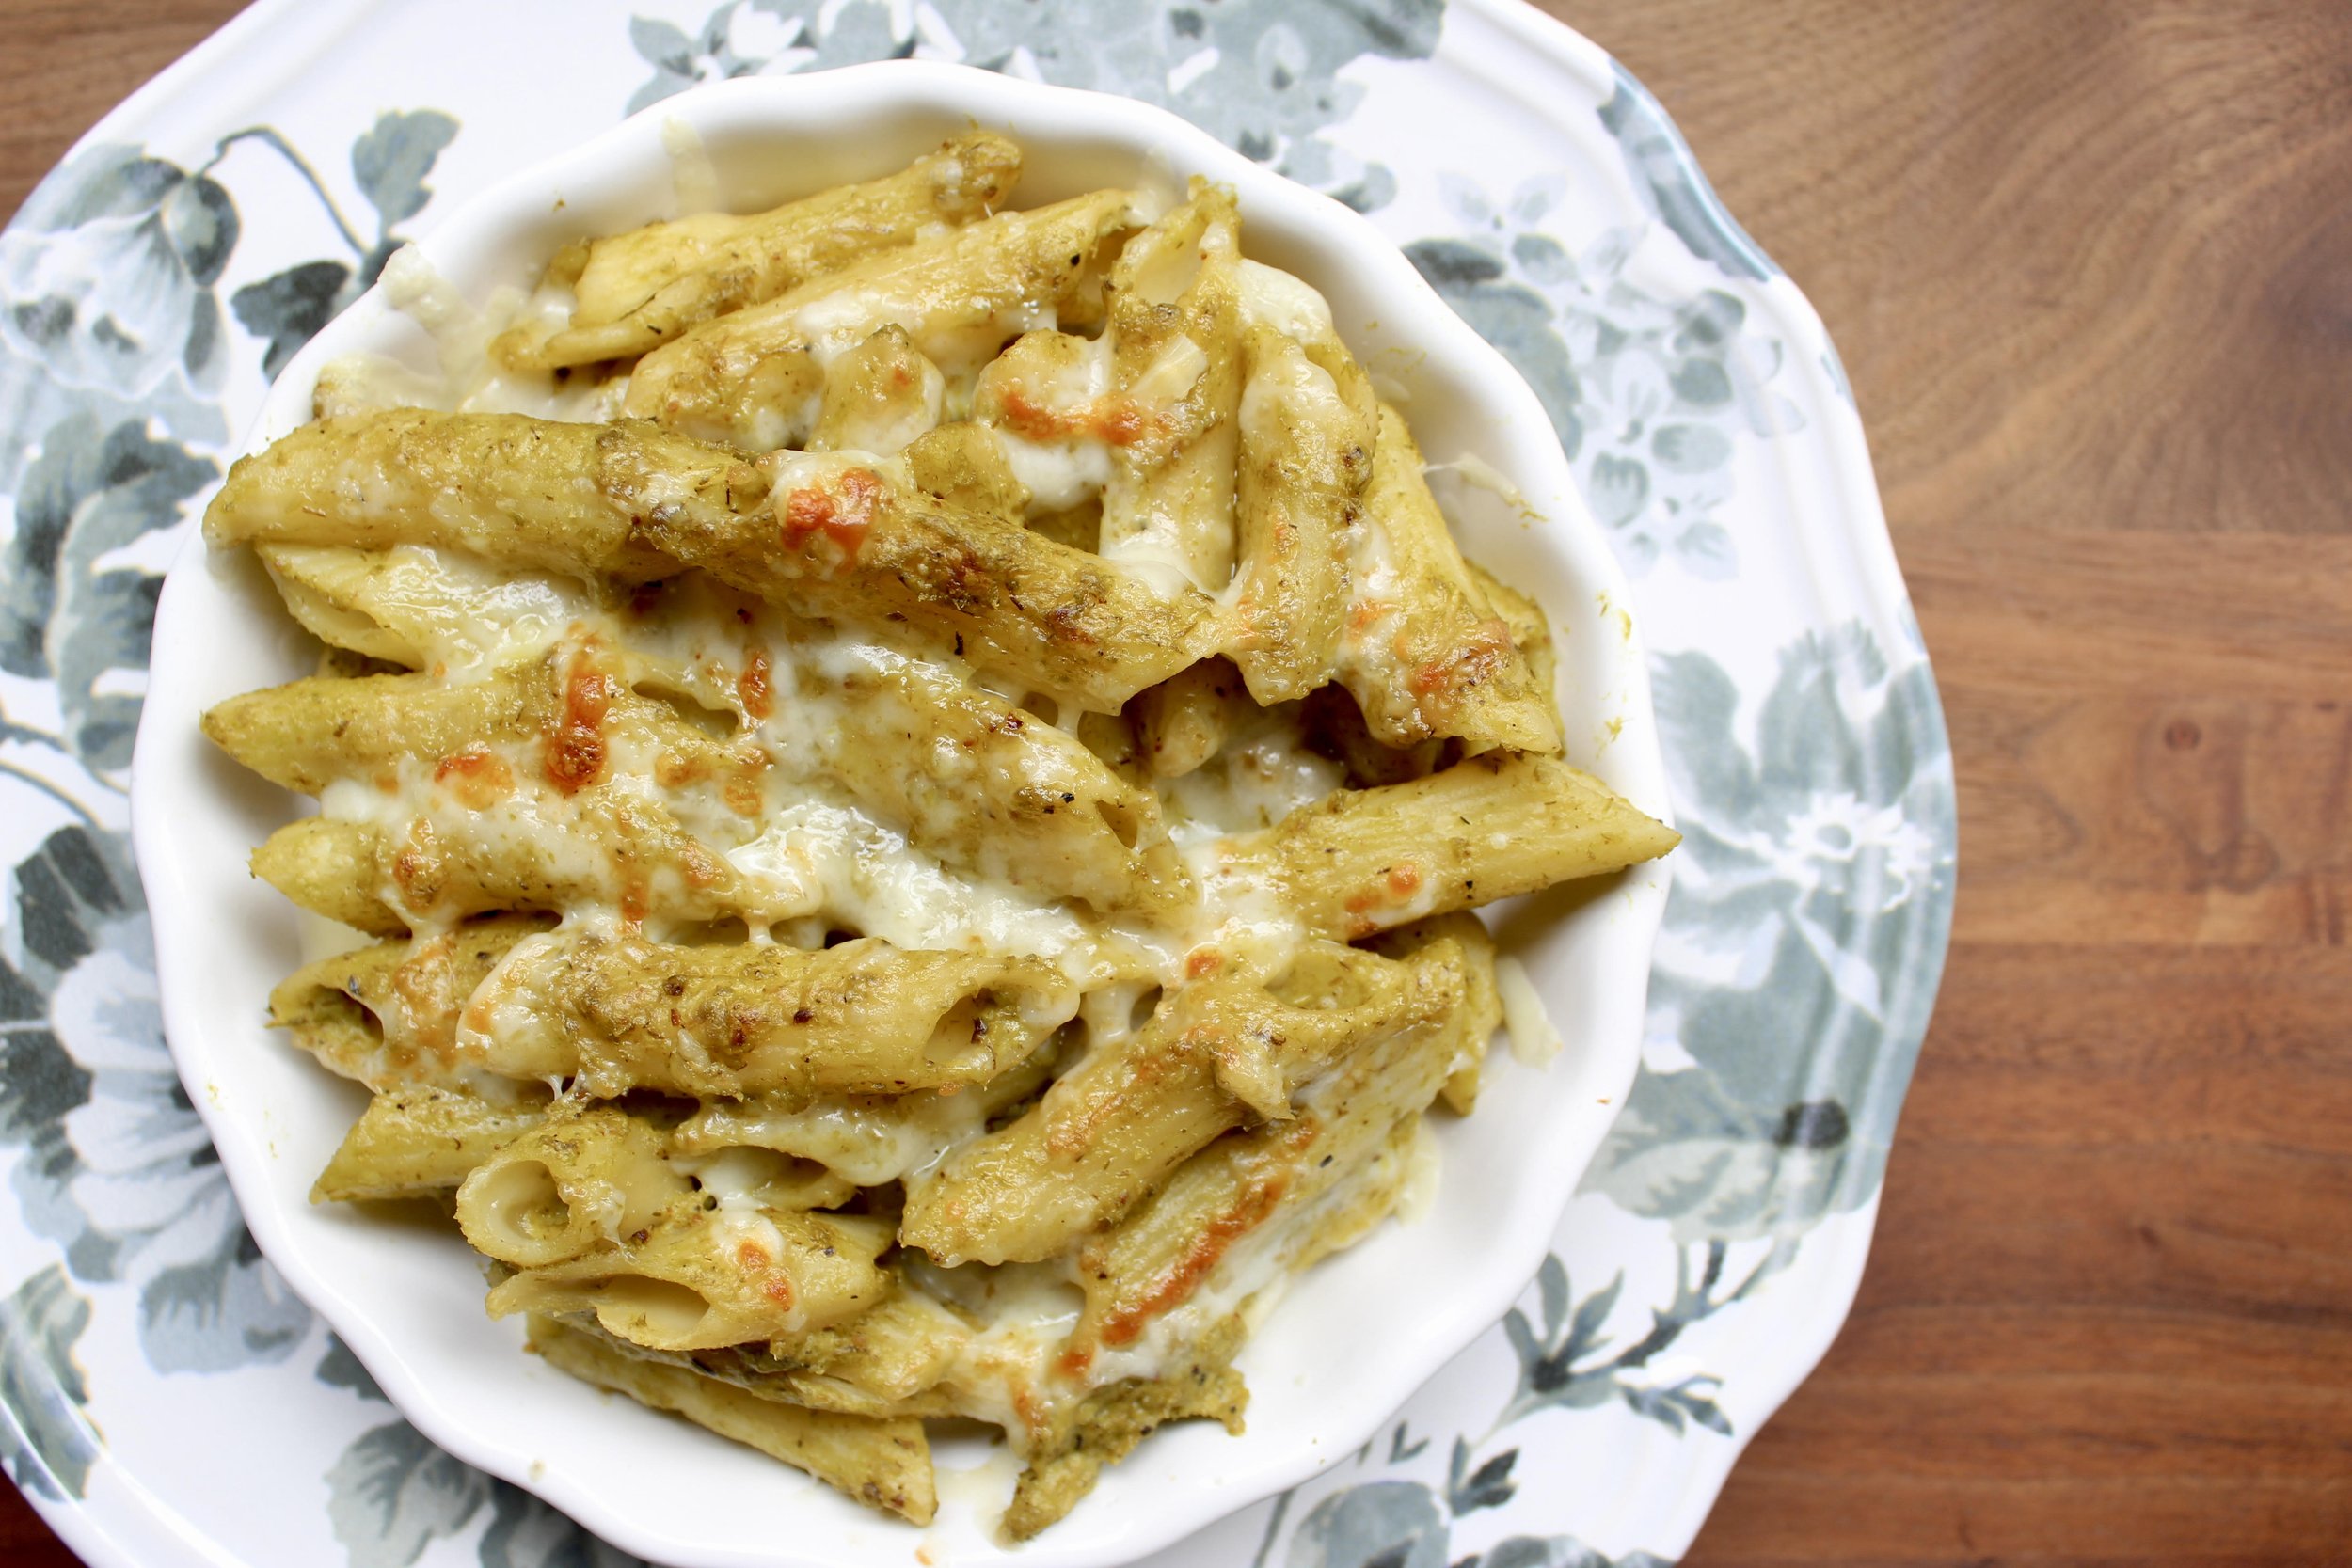
Ingredients
1 bunch asparagus, washed, ends trimmed, and then cut into 1-inch chunks
3 stalks green garlic washed, trimmed, and roughly chopped
1 log goat’s cheese, sliced
Cooking oil
Salt & pepper
Red pepper flakes
3 cups pasta of choice
½ cup reserved pasta water
½ cup cream
½ cup grated parmesan (optional)
¼ cup breadcrumbs (optional)
Instructions
Preheat oven to 425°F.
Add the prepared asparagus and green garlic to a baking sheet lined with parchment paper and drizzle with cooking oil. Toss until veggies are coated.
Season with salt, pepper, and red pepper flakes and again stir until coated.
Add slices of goat’s cheese on top of veggies and spray tops with cooking oil spray.
Place in the oven and roast for 20 minutes, until veggies are softened and browned.
While the veggies roast, cook your pasta according to package instructions. Once finished cooking, drain and drizzle with oil (so the noodles don’t stick!). Be sure to reserve ½ a cup of pasta water, though!
Transfer roasted veggies and goat’s cheese to a bowl, then add pasta water and cream. Blend with an immersion blender until smooth.
Pour asparagus sauce on top of cooked pasta and mix until noodles are evenly coated.
You can enjoy this take on mac & cheese as-is, or you can transfer to an oiled baking dish and top with parmesan and breadcrumbs. I transferred to some mini baking dishes to make cute single-serve portions, but a 9x13 would work just fine!
Recipe developed and photographed by Alex Chesney, RD
Asparagus Soup

Ingredients
1 tablespoon canola oil
1 tablespoon butter
1 small onion, diced
2 stems green garlic, trimmed and diced
½ teaspoon red pepper flakes
Salt & pepper to taste
1 bunch asparagus, washed and trimmed, then roughly chopped
1 potato, peeled and pureed
4 cups vegetable broth
1 tablespoon lemon juice
½ cup cream
Cottage cheese, for serving
Instructions
Heat oil and butter in a medium sized pot over medium heat, until butter is melted. Add one piece of diced onion, and when it starts to sizzle, add the rest along with the diced green garlic.
Cook until onions and garlic are softened. Season with red pepper flakes, salt, and pepper.
Next, add asparagus and potato to the pot and mix until coated with spices and oil.
Add the broth to the pot and bring the mixture to a boil. Lower the heat and simmer for 10 – 12 minutes, until asparagus and potato pieces are soft.
Use an immersion blender to purée the soup until smooth and silky.
Finish off the soup by stirring in the lemon juice and whipping cream, stirring to combine.
Serve soup with a dollop of cottage cheese and enjoy! Pair with a protein and a piece of crusty bread for a delicious and nutritious meal.
Recipe modified from a newspaper clipping (from my grandma!) & photographed by Alex Chesney, RD
Lasagna ft. TRM Pasta Sauce

Lasagna is a classic winter comfort food, don’t you think? It can be pretty time-consuming to make, though, so this past weekend we used a jar of our Pasta Sauce to speed up the process.
We didn’t take exact measurements, and were trying to use up some ingredients in the fridge, but we put together a rough guide for you. Head to our website to see the full recipe, and let us know if you give it a try. It may be the perfect meal to help get you through this snow storm that’s on its way to us tomorrow!
Ingredients
1 jar Thames River Melons Pasta Sauce
12 lasagna noodles
1 pound ground beef
1 bell pepper, diced
1 carrot, peeled & diced
6 mushrooms, diced
1/2 head of broccoli, minced
1/2 tub of ricotta cheese
1/2 cup milk
1/2 cup Parmesan cheese, shredded
1/2 cup mozzarella cheese, shredded
1 cup provolone cheese, shredded
Salt & pepper to taste
Cooking oil
Instructions
Add a generous glug of cooking oil to a shallow pot and heat on the stove over medium. Add one piece of bell pepper to the pan to test the temperature. Once it starts to sizzle, you’re good to go!
Add the remaining diced bell pepper along with carrots and mushrooms. Cook for 6-7 minutes, until veggies are softened.
Add the ground beef and cook until browned. You can also use a ground meat alternative!
Once meat is cooked, drain any extra fat. I like to drain it into a small cup lined with tinfoil. Once the fat hardens you can wrap it up and dispose of it!
While the meat cooks, cook your lasagna noodles according to package instructions. When done, drain and lay out on a baking sheet lined with a kitchen towel.
Add the jar of pasta sauce to the meat and veggie mixture, and stir evenly until coated. Remove from heat and set aside.
Whisk together ricotta, 1/2 of the Parmesan, 1/2 the mozzarella, milk, and minced broccoli. Season with salt and pepper and stir until evenly combined.
Now it’s time to assemble!
Grab your favourite 9x13 casserole dish and coat the bottom & sides of the pan with cooking spray.
Next, add a generous scoop of the sauce mixture. Lay 3 noodles on top, followed by more sauce and 1/3 of the ricotta mixture.
Add 3 more noodles, more sauce & ricotta, and then sprinkle on the remaining mozzarella and half of the provolone.
Again, add 3 noodles followed by sauce and the remaining ricotta.
Finish with 3 final noodles and top with the rest of the sauce, followed by the remaining provolone and Parmesan. Make sure the top noodles are completely covered by sauce and/or cheese so they don’t dry out during the baking process! You may need to shred more cheese at this time.
Cover the lasagna with either a lid or tinfoil (spray with cooking oil so it doesn’t stick to the cheese!) and then bake at 425°F for 50 minutes.
After 50 minutes, remove lid or tin foil and bake for another 5 - 10, until top cheese is fully browned.
Remove from the oven and let sit for 10 minutes before serving.
Recipe developed and photographed by Alex Chesney, RD
Cornbread Pancakes
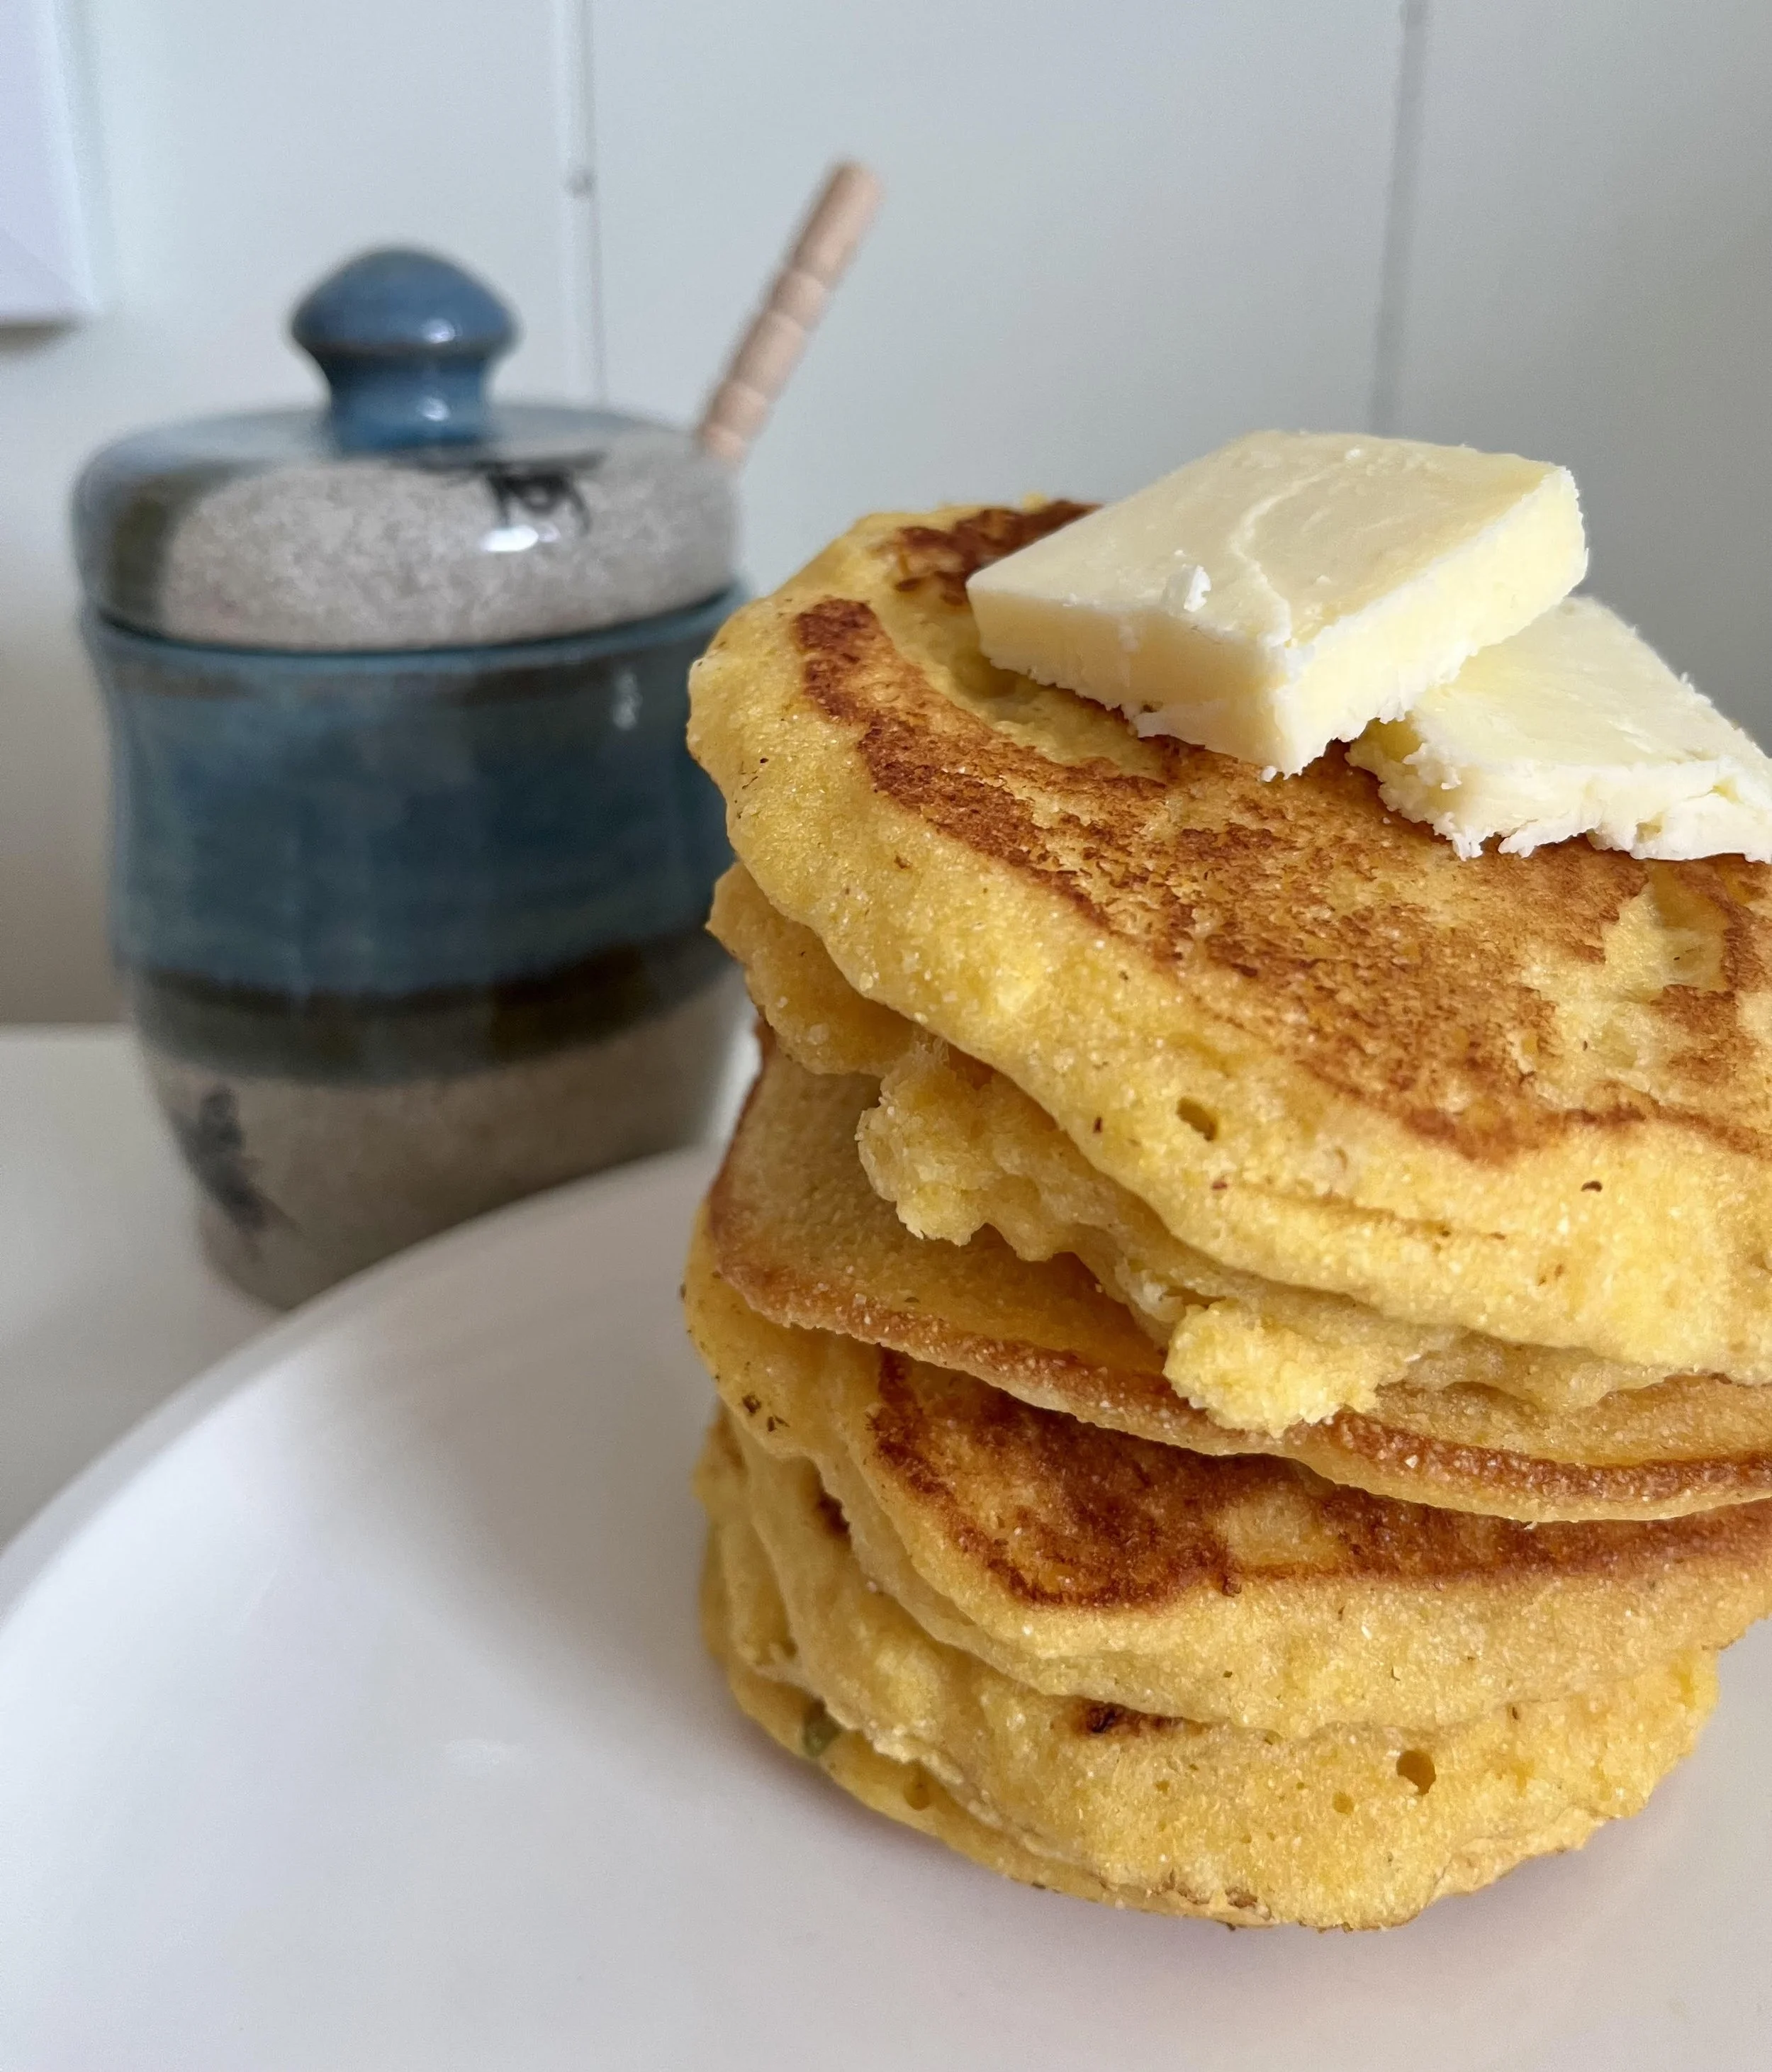
Ingredients
2 cups cornmeal
1 cup corn kernels
¼ teaspoon kosher salt
¼ cup flour
1/4 teaspoon baking powder
1 cup milk
1 teaspoon lemon juice
¼ cup water
¼ cup honey
1 egg
¼ cup melted butter
¼ cup canola oil, for cooking
Instructions
Whisk together milk and lemon juice and set aside.
Whisk together cornmeal, salt, and flour until well combined.
In a separate bowl, whisk together water, honey, egg, and melted butter. Next, add milk and lemon juice mixture, which should by now be a bit sludgy – a homemade buttermilk!
Pour the liquids into the bowl with the flour mixture and mix until a thick batter forms.
Add canola oil to a frying pan and heat over medium heat. Once shimmery, add batter to the pan, in ¼ cup scoops. Flatten the batter (it’s quite thick!) with the back of a spatula. Let the cornmeal pancakes cook until the edges are bubbling and the center is set.
Use a spatula to flip the pancakes, and let them cook on the other side.
Remove the pancakes to a plate lined with paper towel, which helps soak up excess oil.
Serve immediately. These pair well with breakfast foods, chili, or saucy meats like ribs or sausages. Don’t forget to add a side of greens as well to round out the meal!
Recipe developed and photographed by Alex Chesney, RD