
Happy Friday! All this rain today has us thinking about water, and the essential role it plays here on the farm. And although it feels like the rain is never-ending right now, by the time summer rolls around there are no guarantees! We’ve been known to experience some very hot and very dry seasons, and our crops can’t survive without a consistent water source. One way around this? Irrigation! We utilize both overhead and trickle irrigation, but today we wanted to teach you a little bit about our trickle tape system.
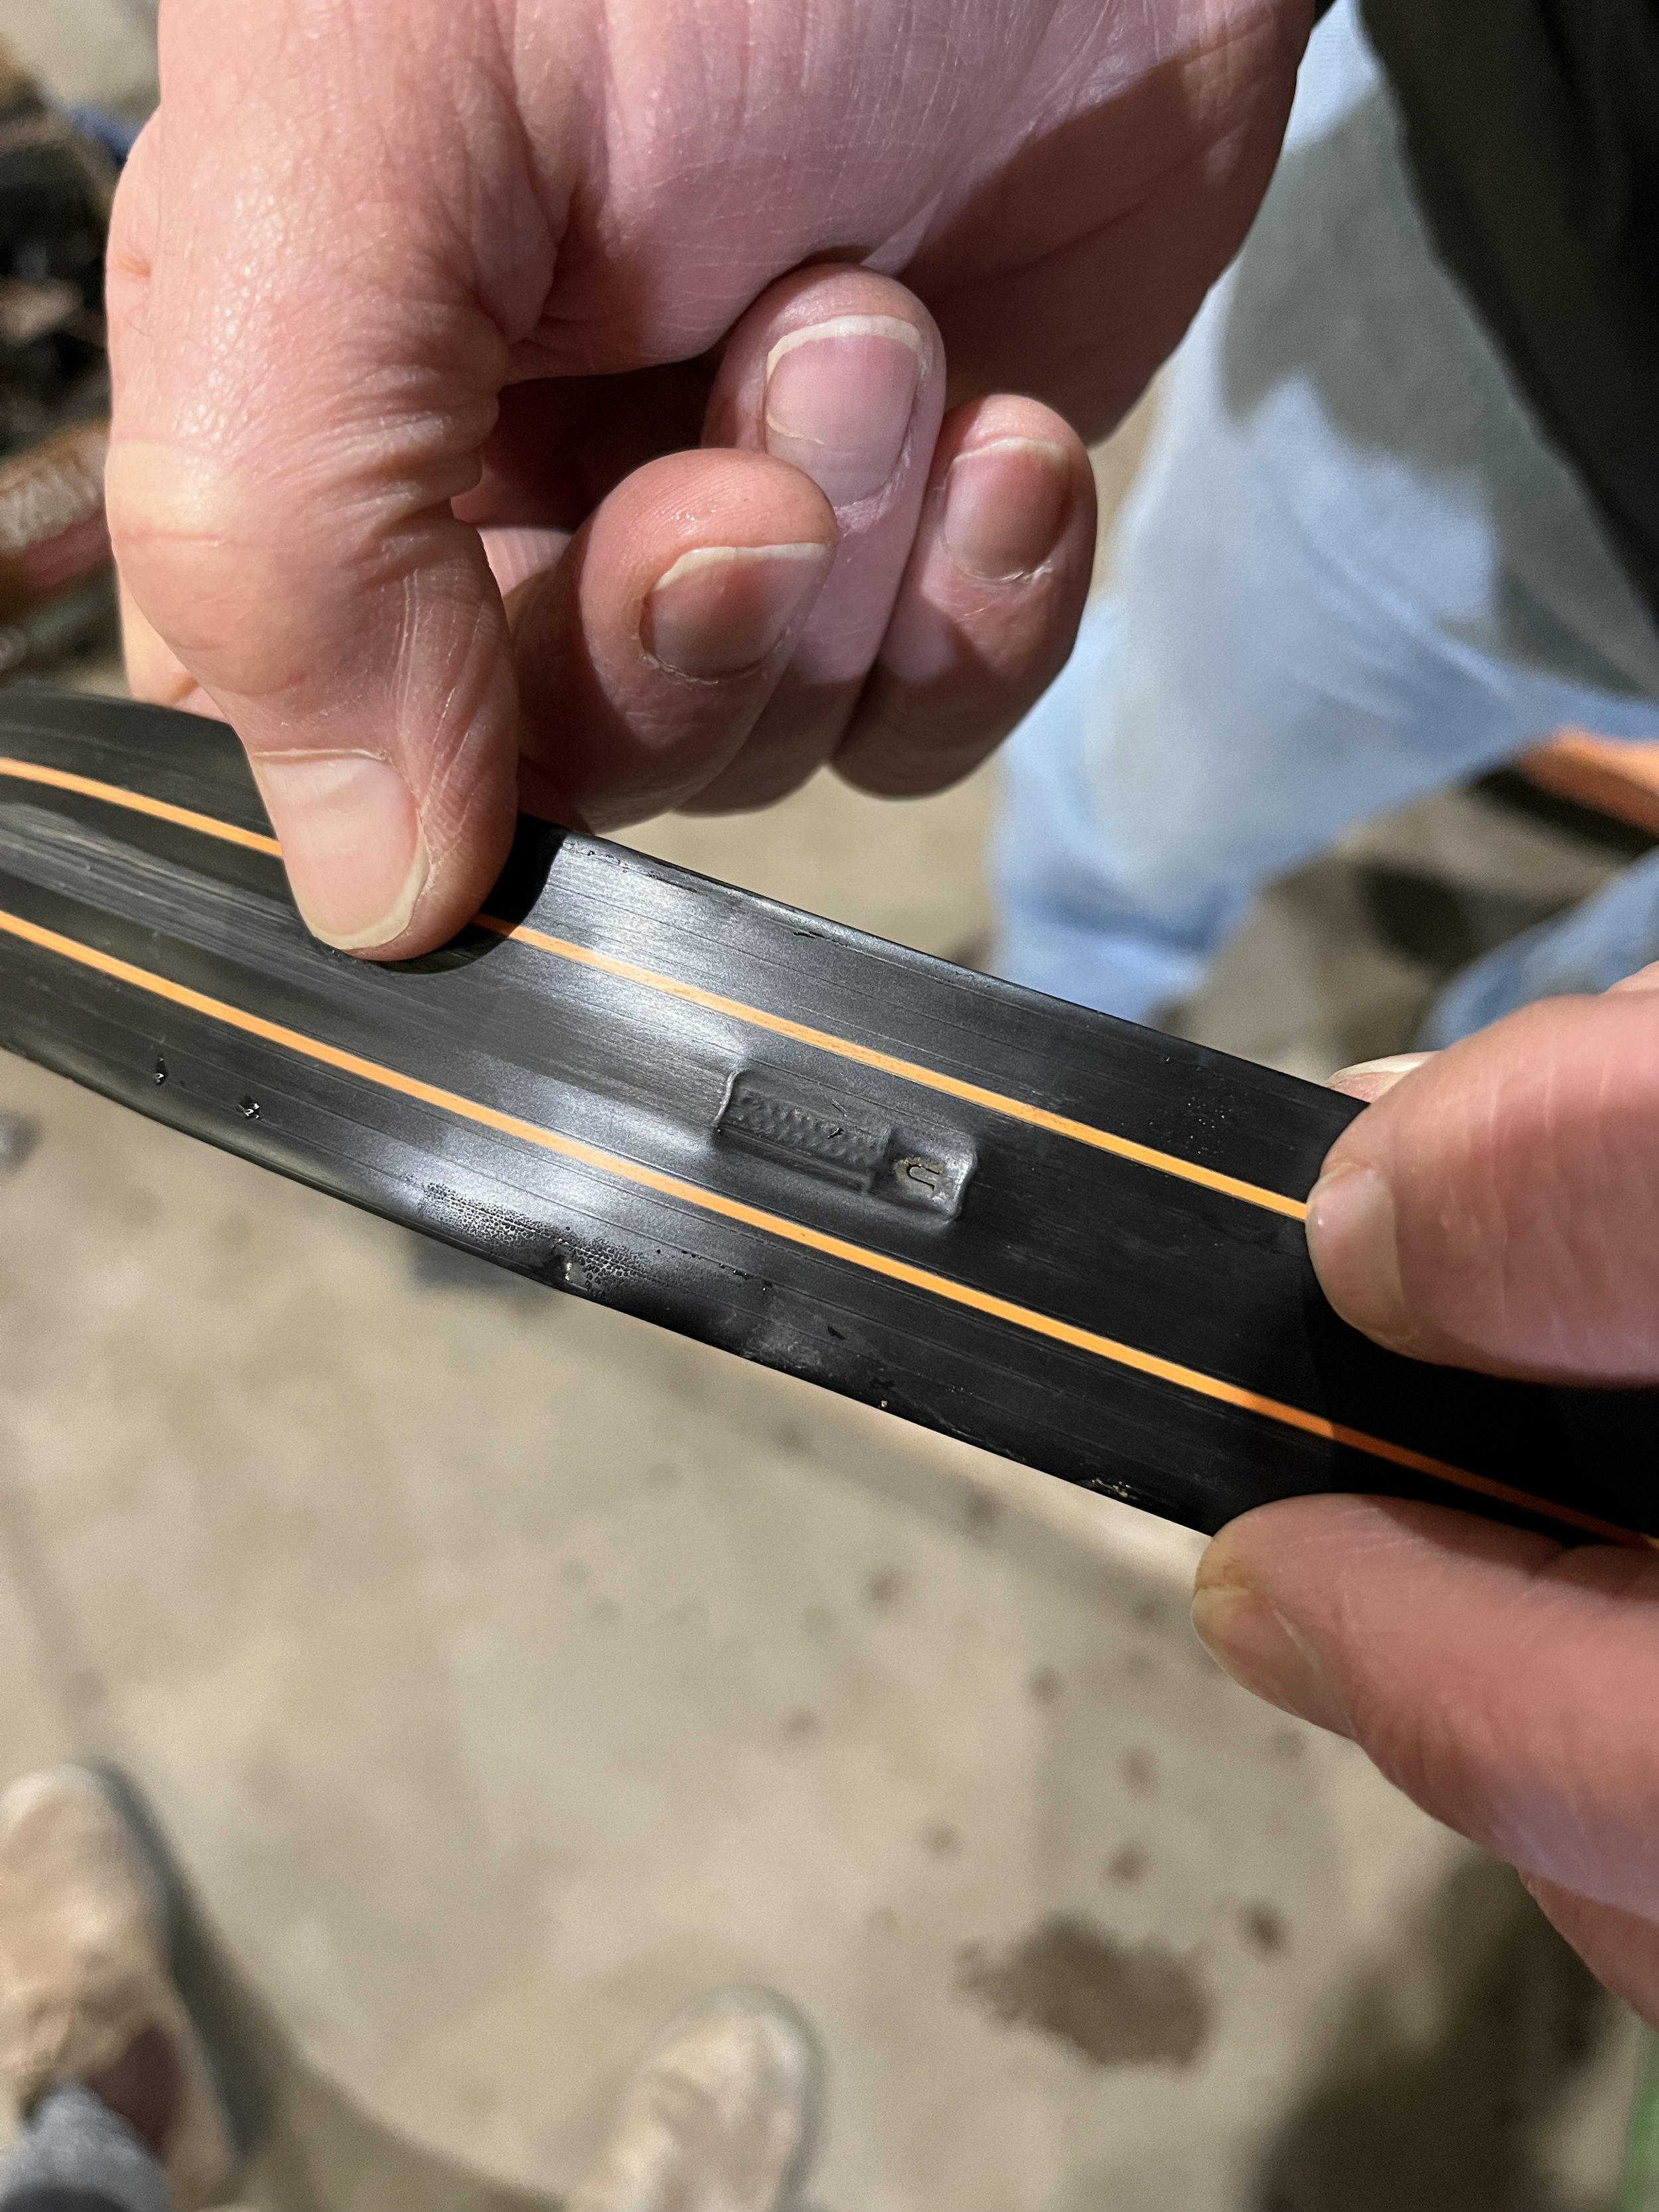
Trickle irrigation works by sending water from pipes through lines of tape – essentially small, flat, plastic tubing that has built in pressure-compensating emitters. These emitters are located 16-inches apart, and they ensure that water is evenly distributed (within 15% or so) all along the tape. In general, trickle irrigation uses 1/10th of the amount of water used by overhead irrigation, so it’s much more efficient!
We use trickle irrigation on high-value crops like strawberries, raspberries, zucchini, and tomatoes. There are certain instances where overhead irrigation is required (like for frost protection) but when trickle irrigation is an option we try to use it!
Right now, our team is hard at work preparing the trickle tape for another season of use. To back up, at the end of last season we worked our way through the fields, picking up the trickle tape and wrapping it onto spools for storage over the winter. Each row in the field has its own section of trickle tape, and we tied them together for easy storage on the spool.
Now, we are working to put them back together into a single strand, for use again this coming season. And the way we do this is pretty interesting, so we thought we’d fill you in!
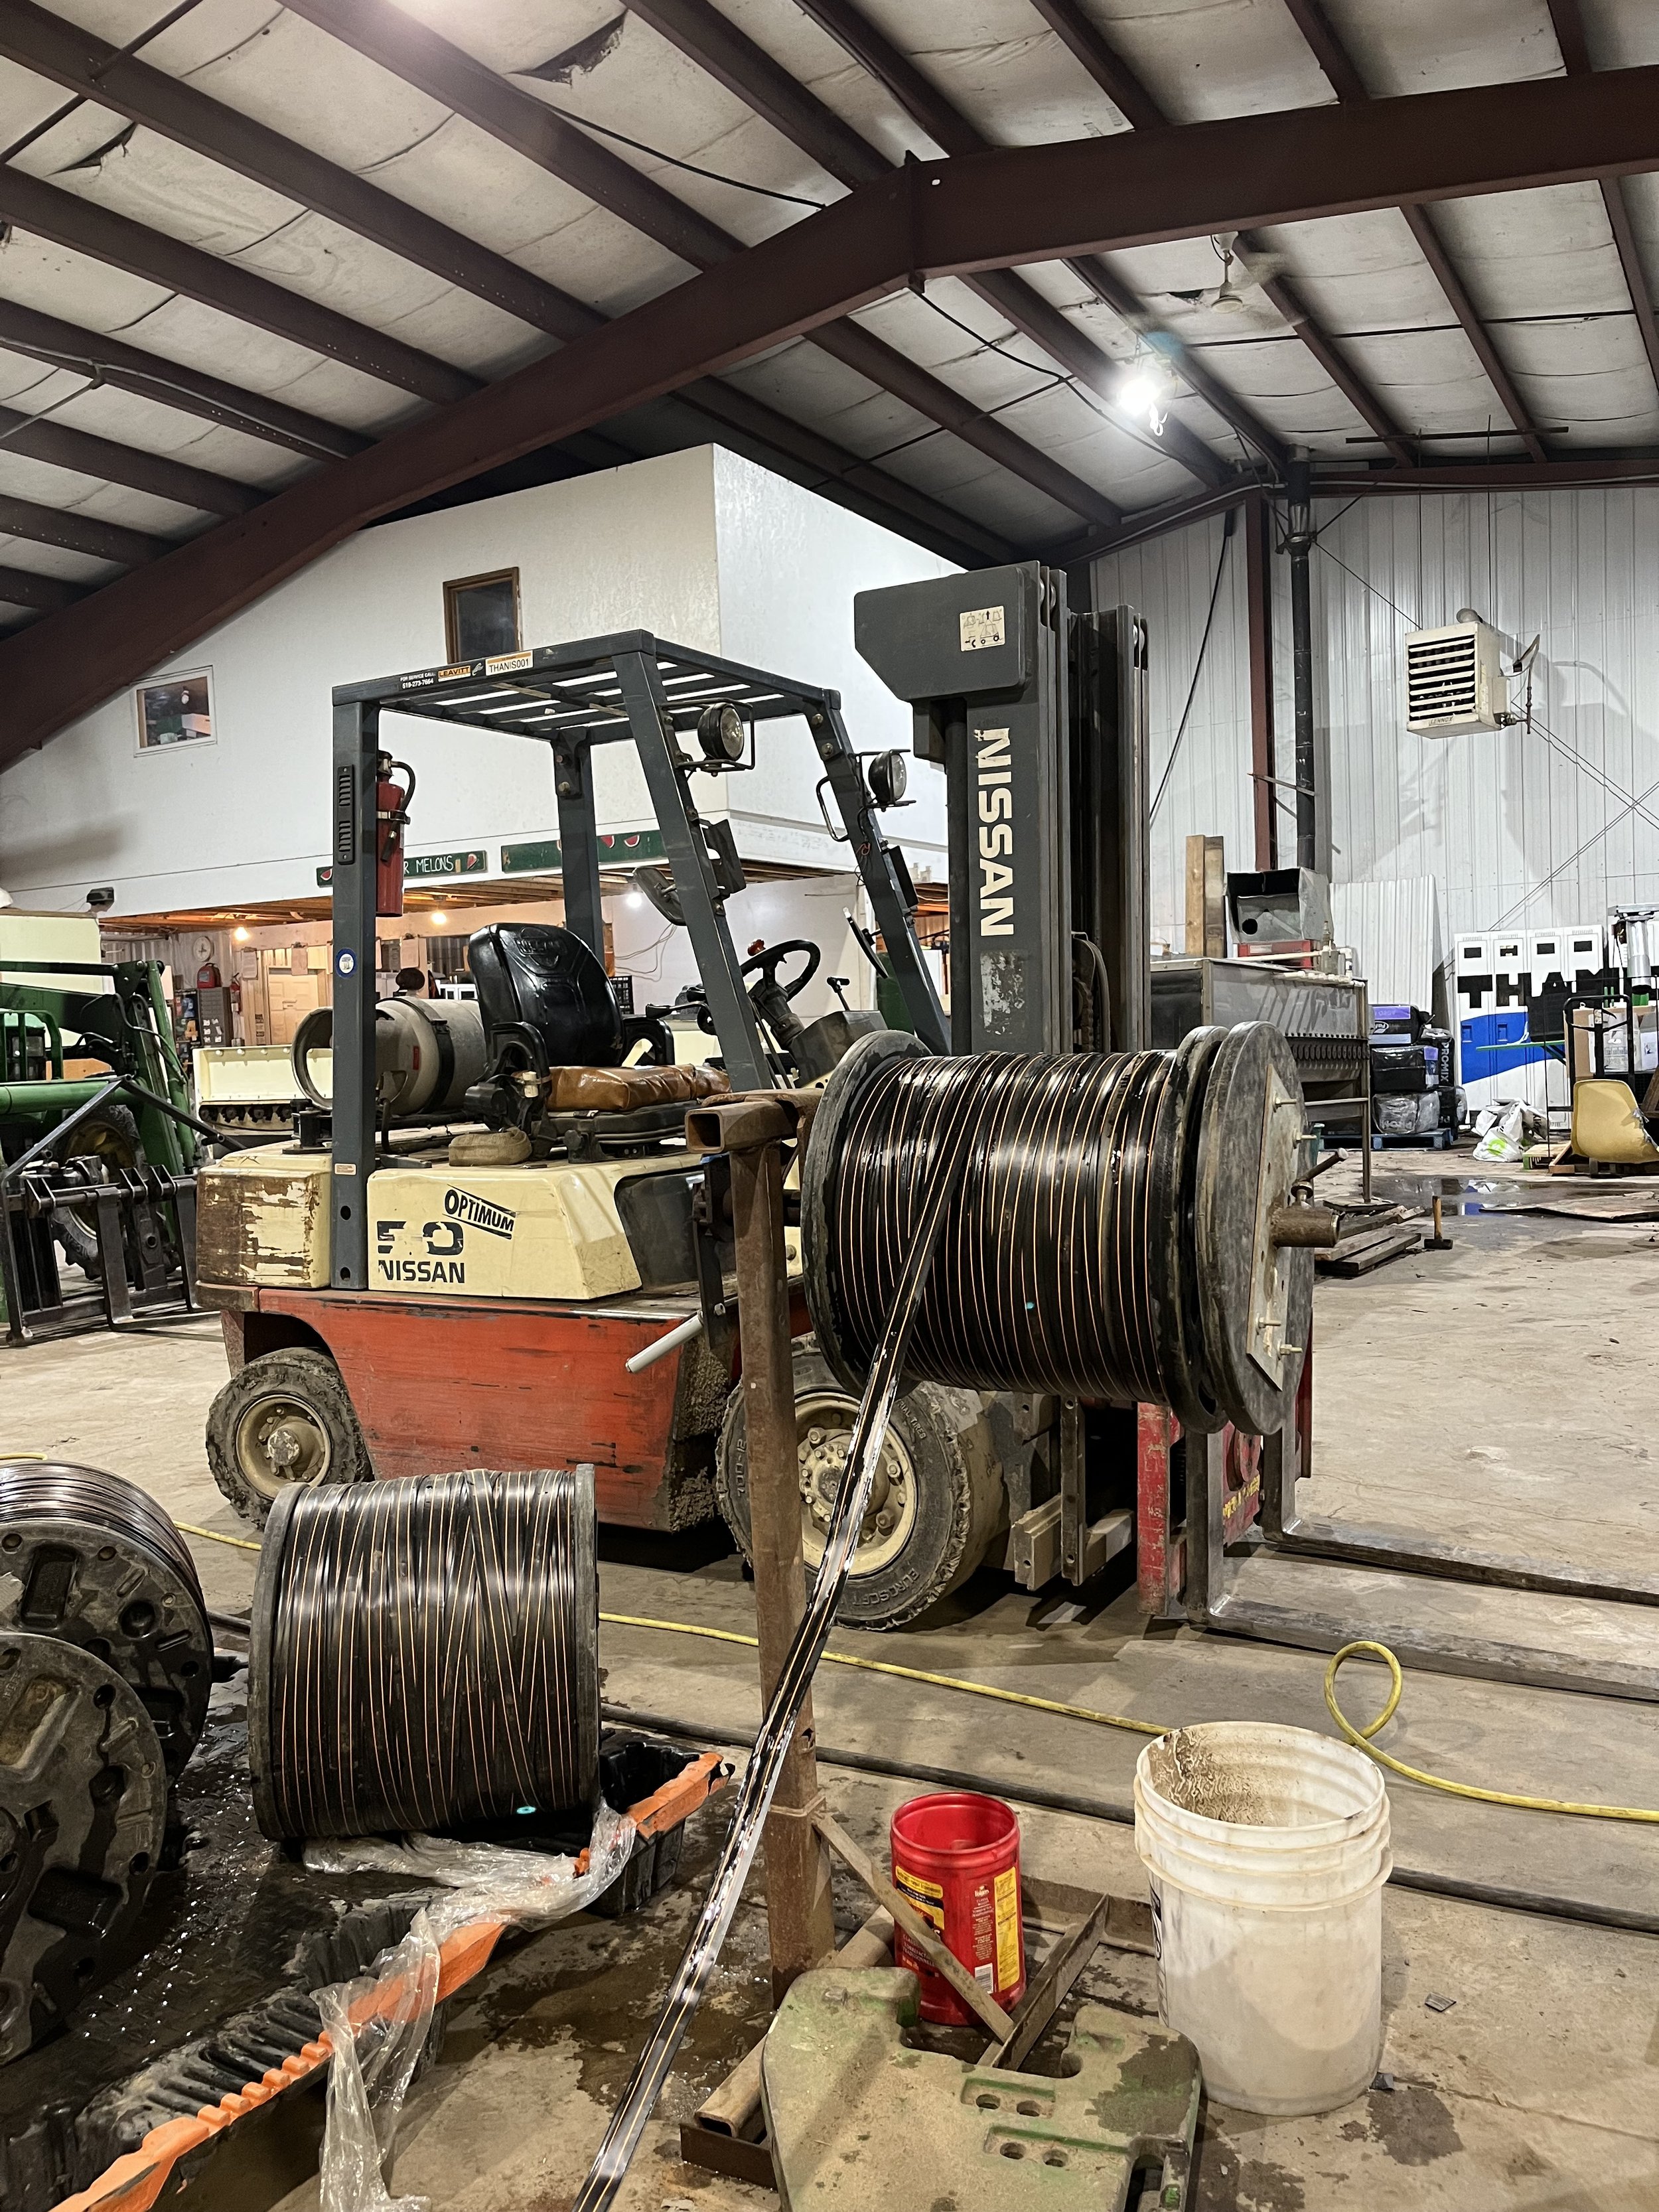

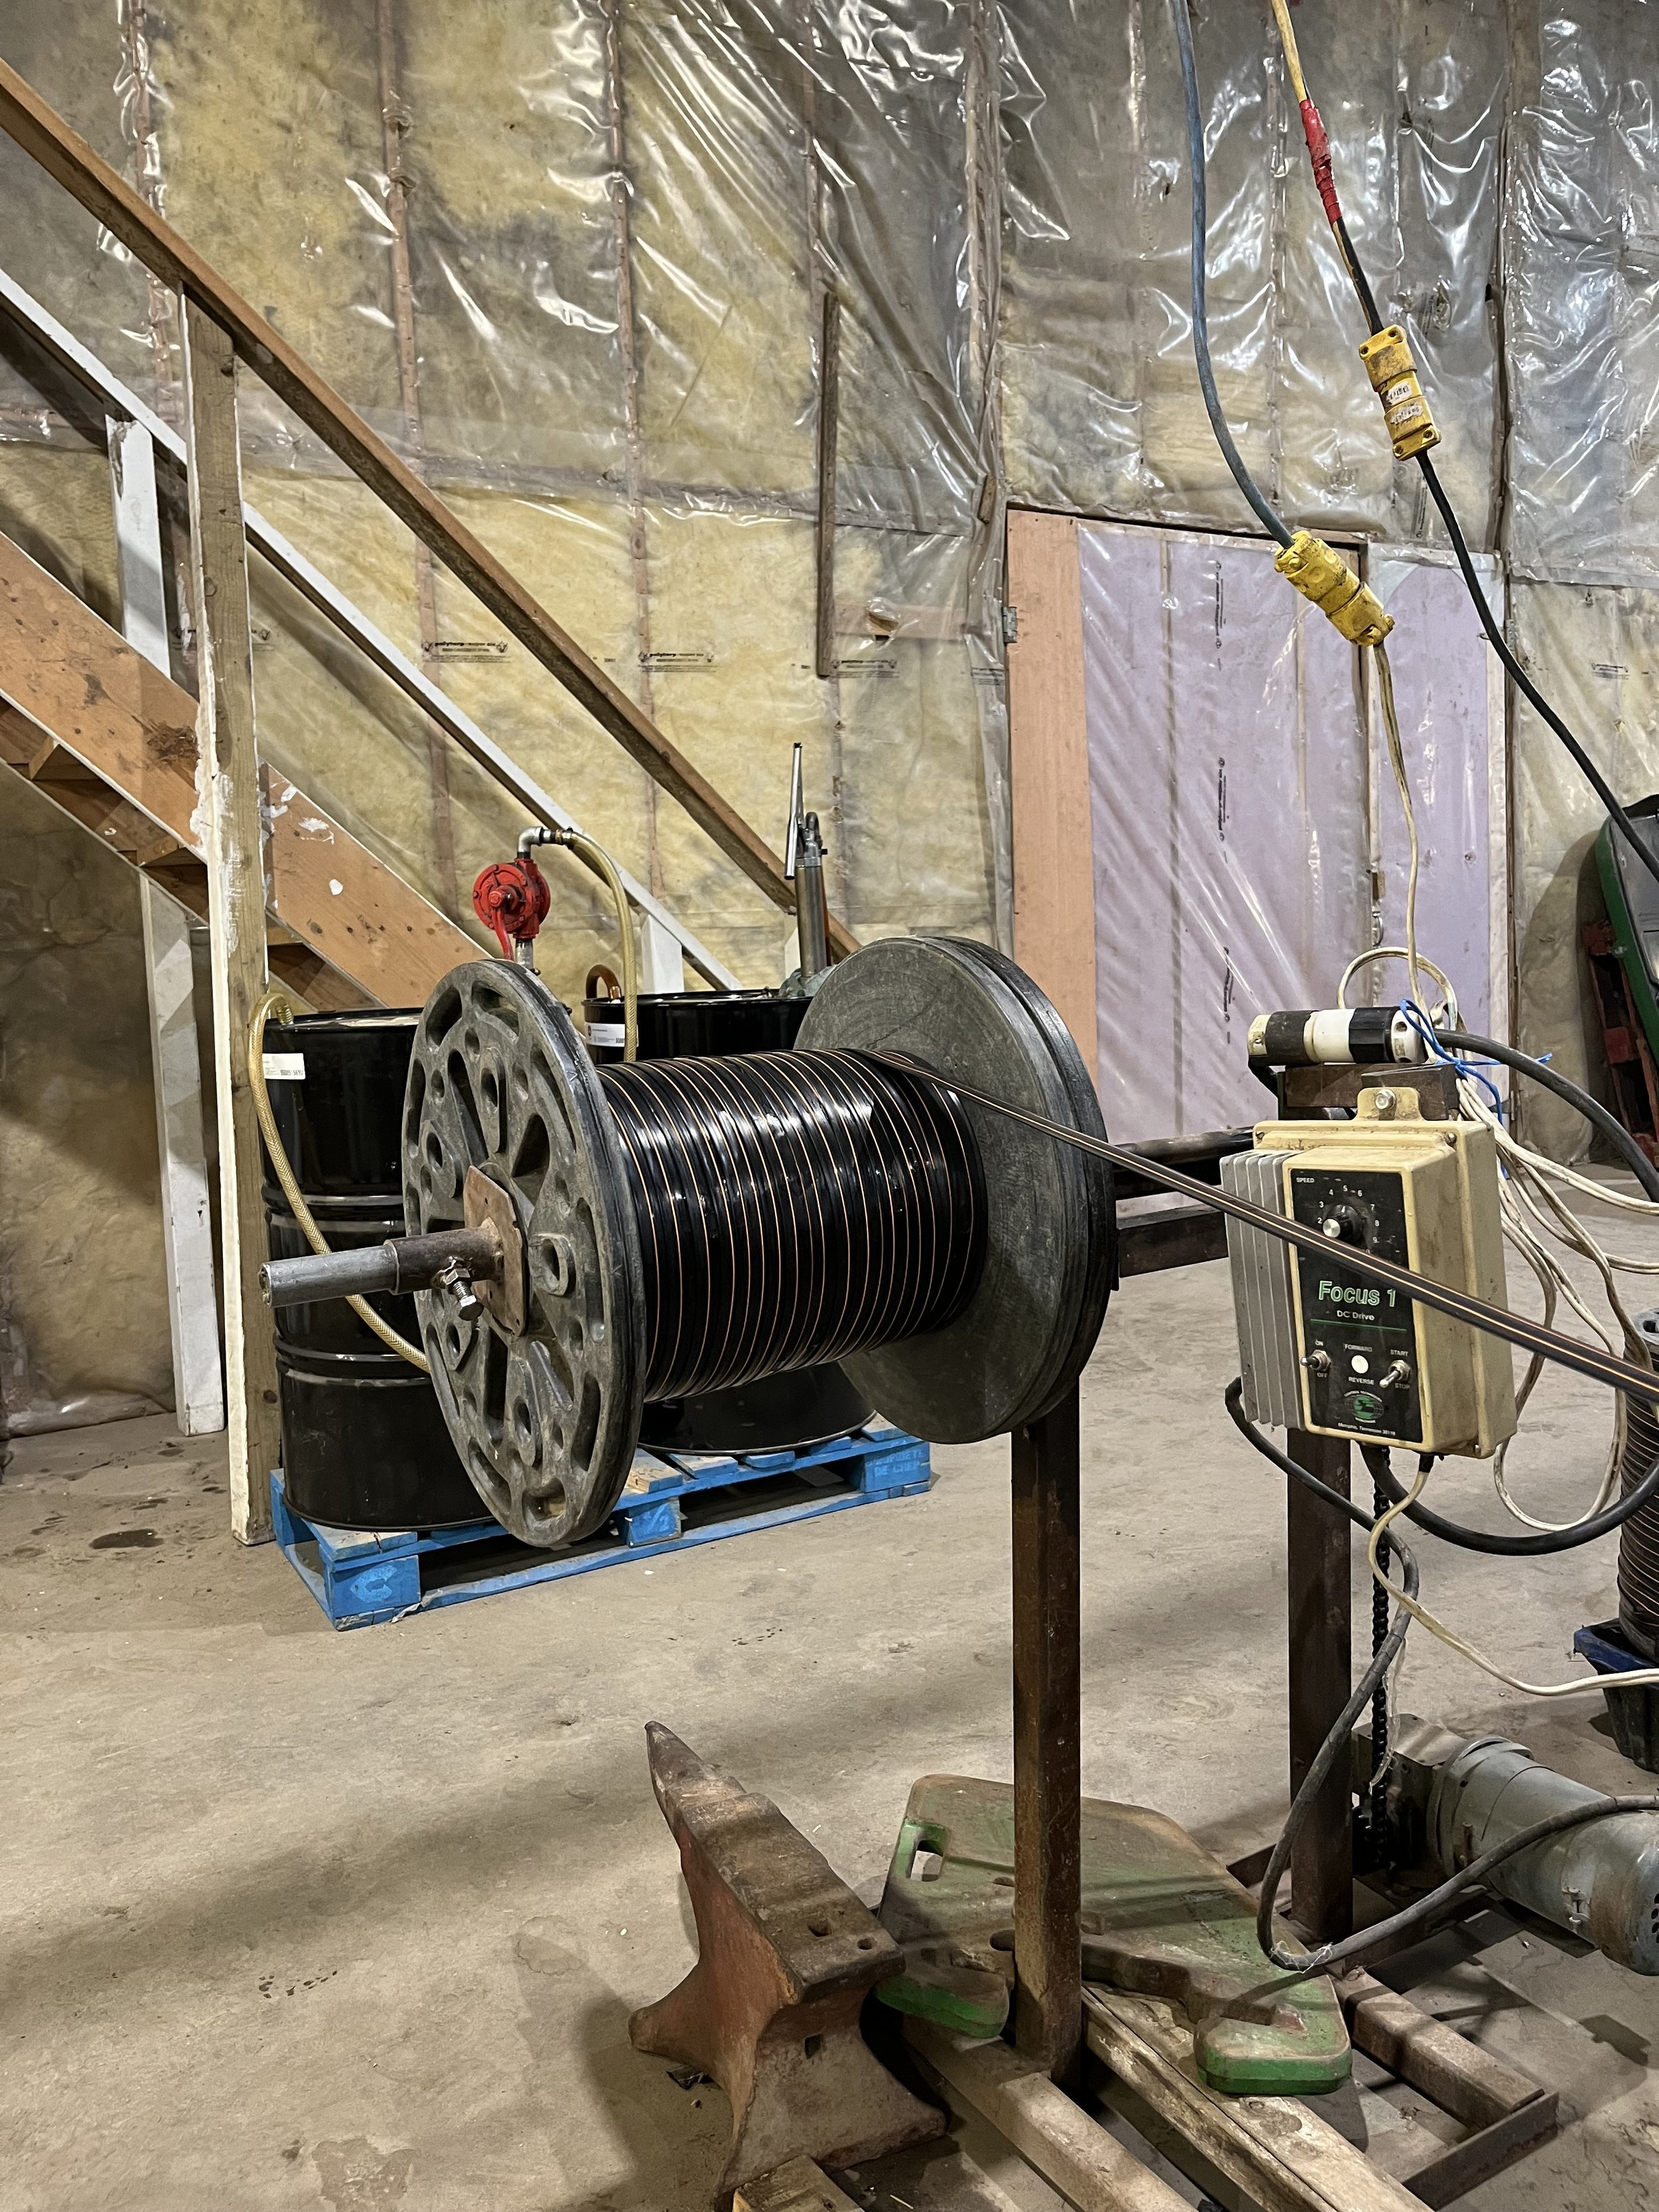
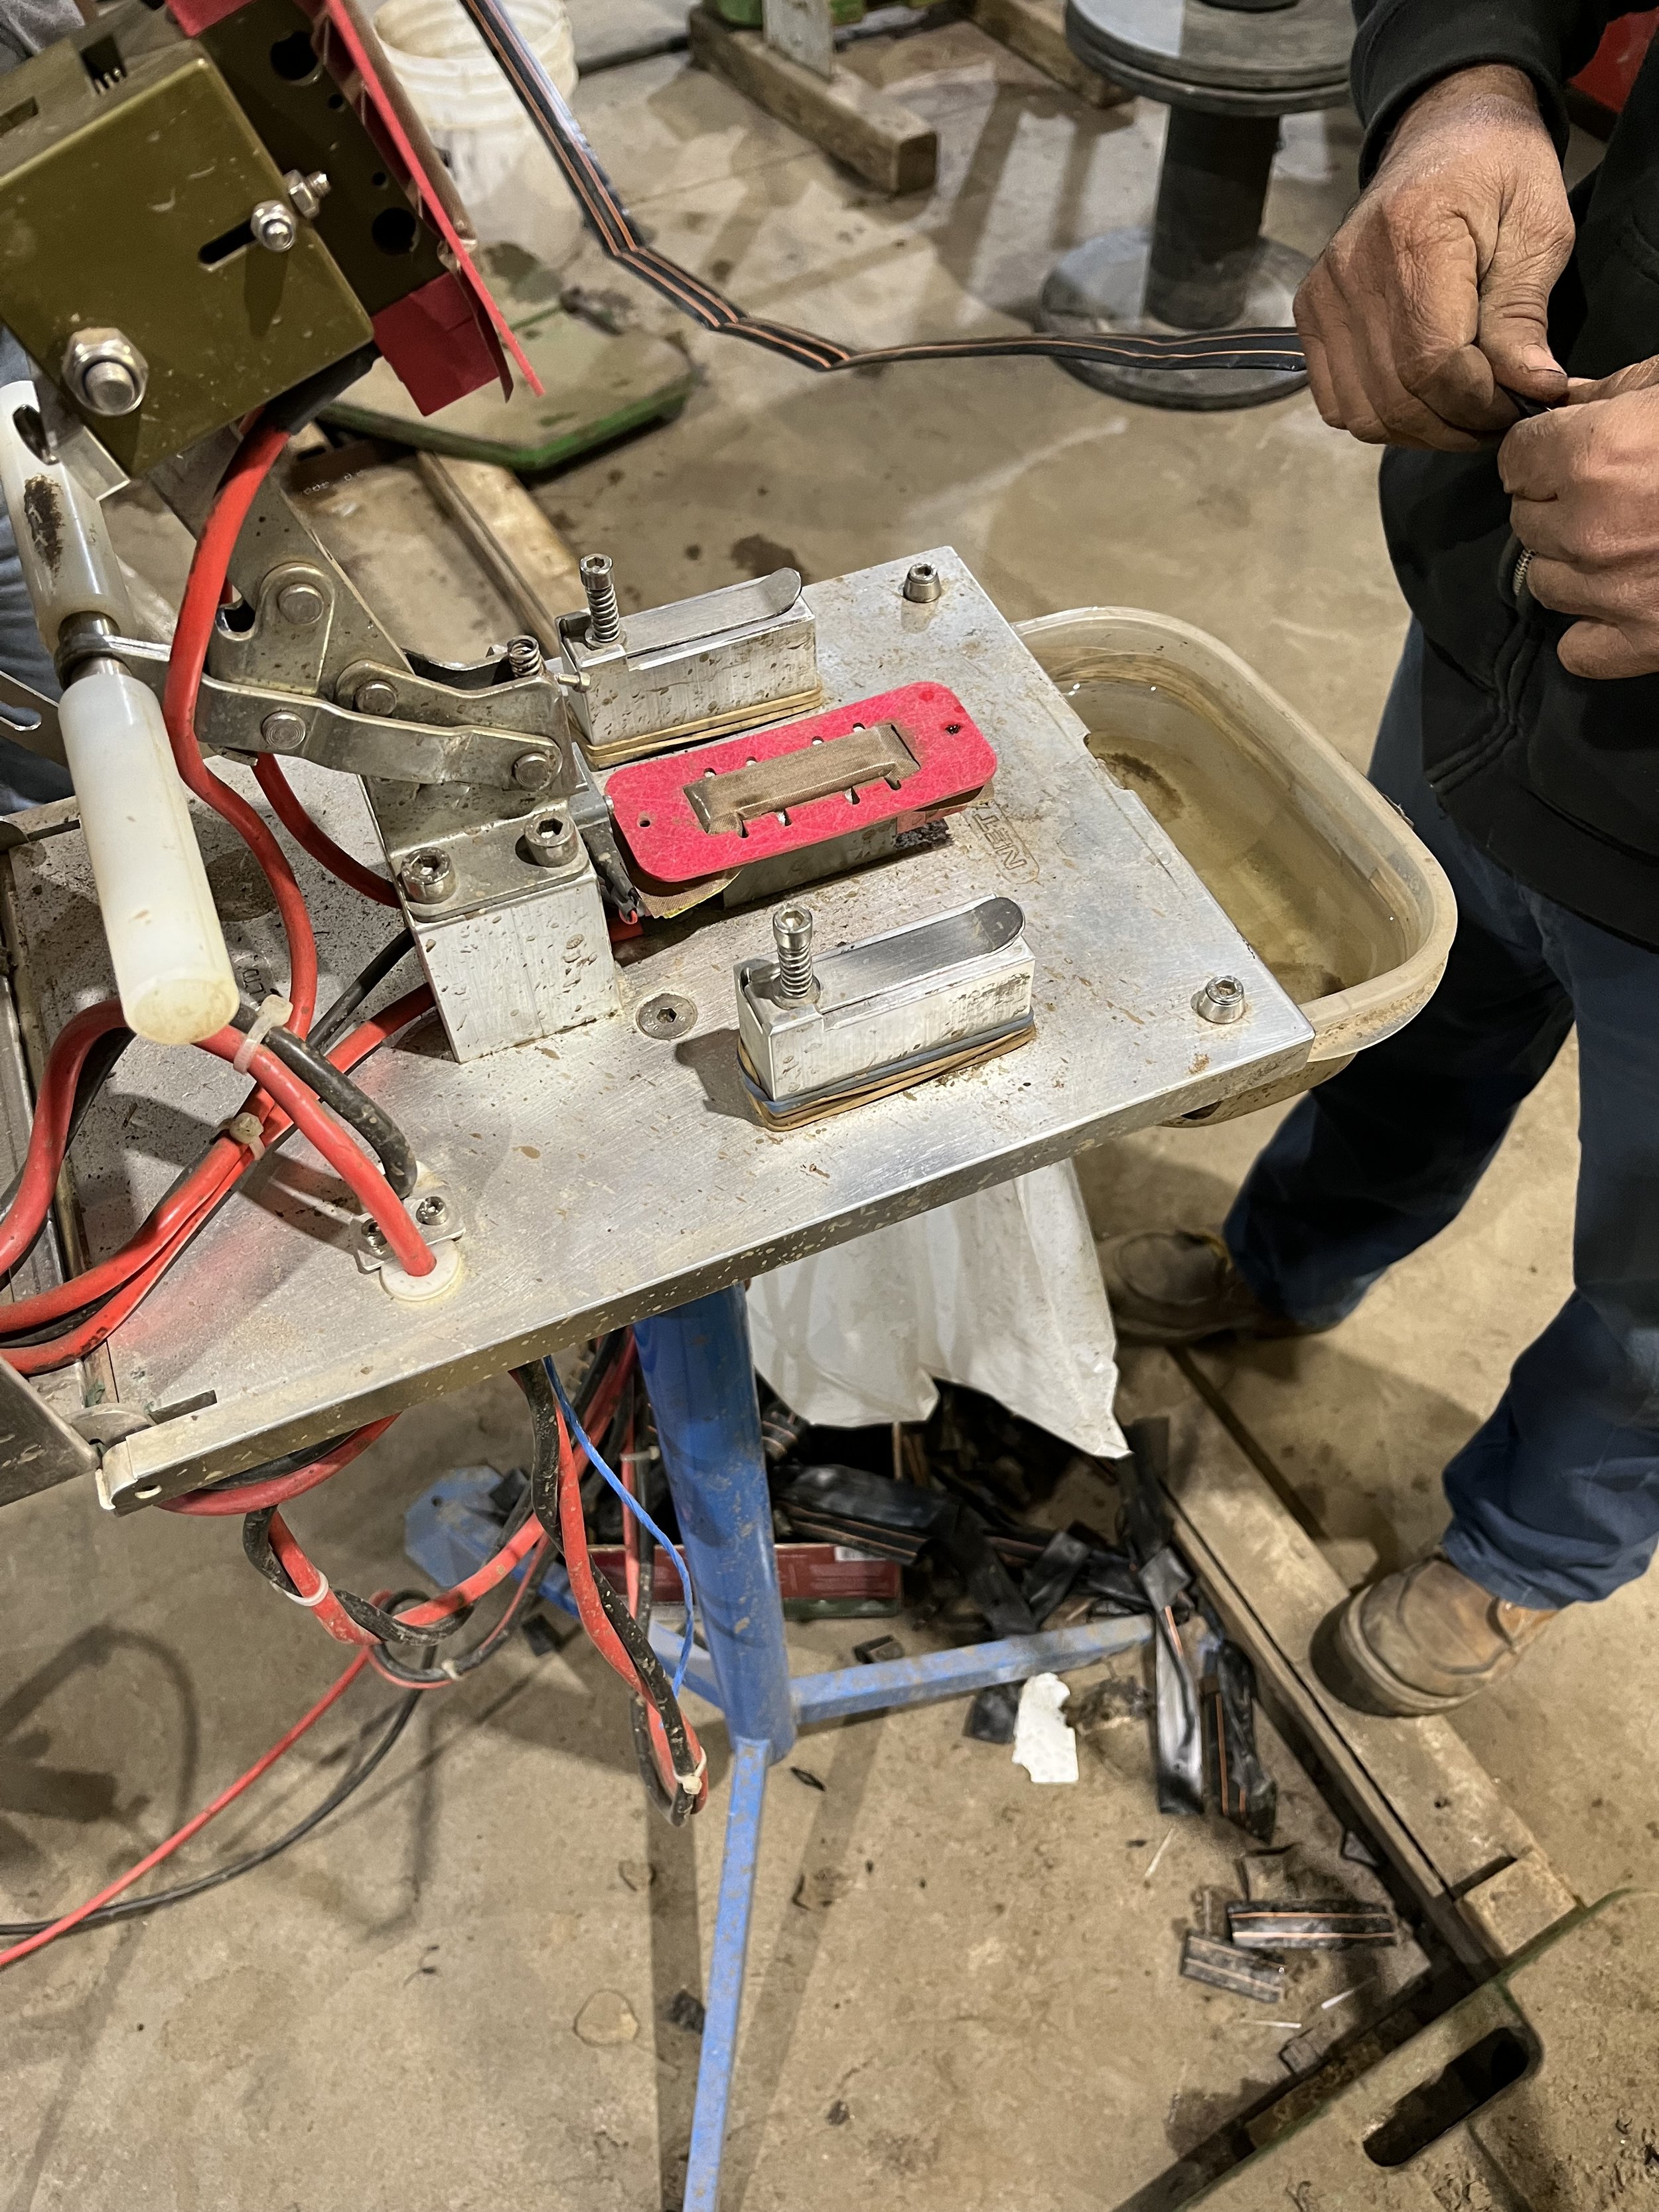
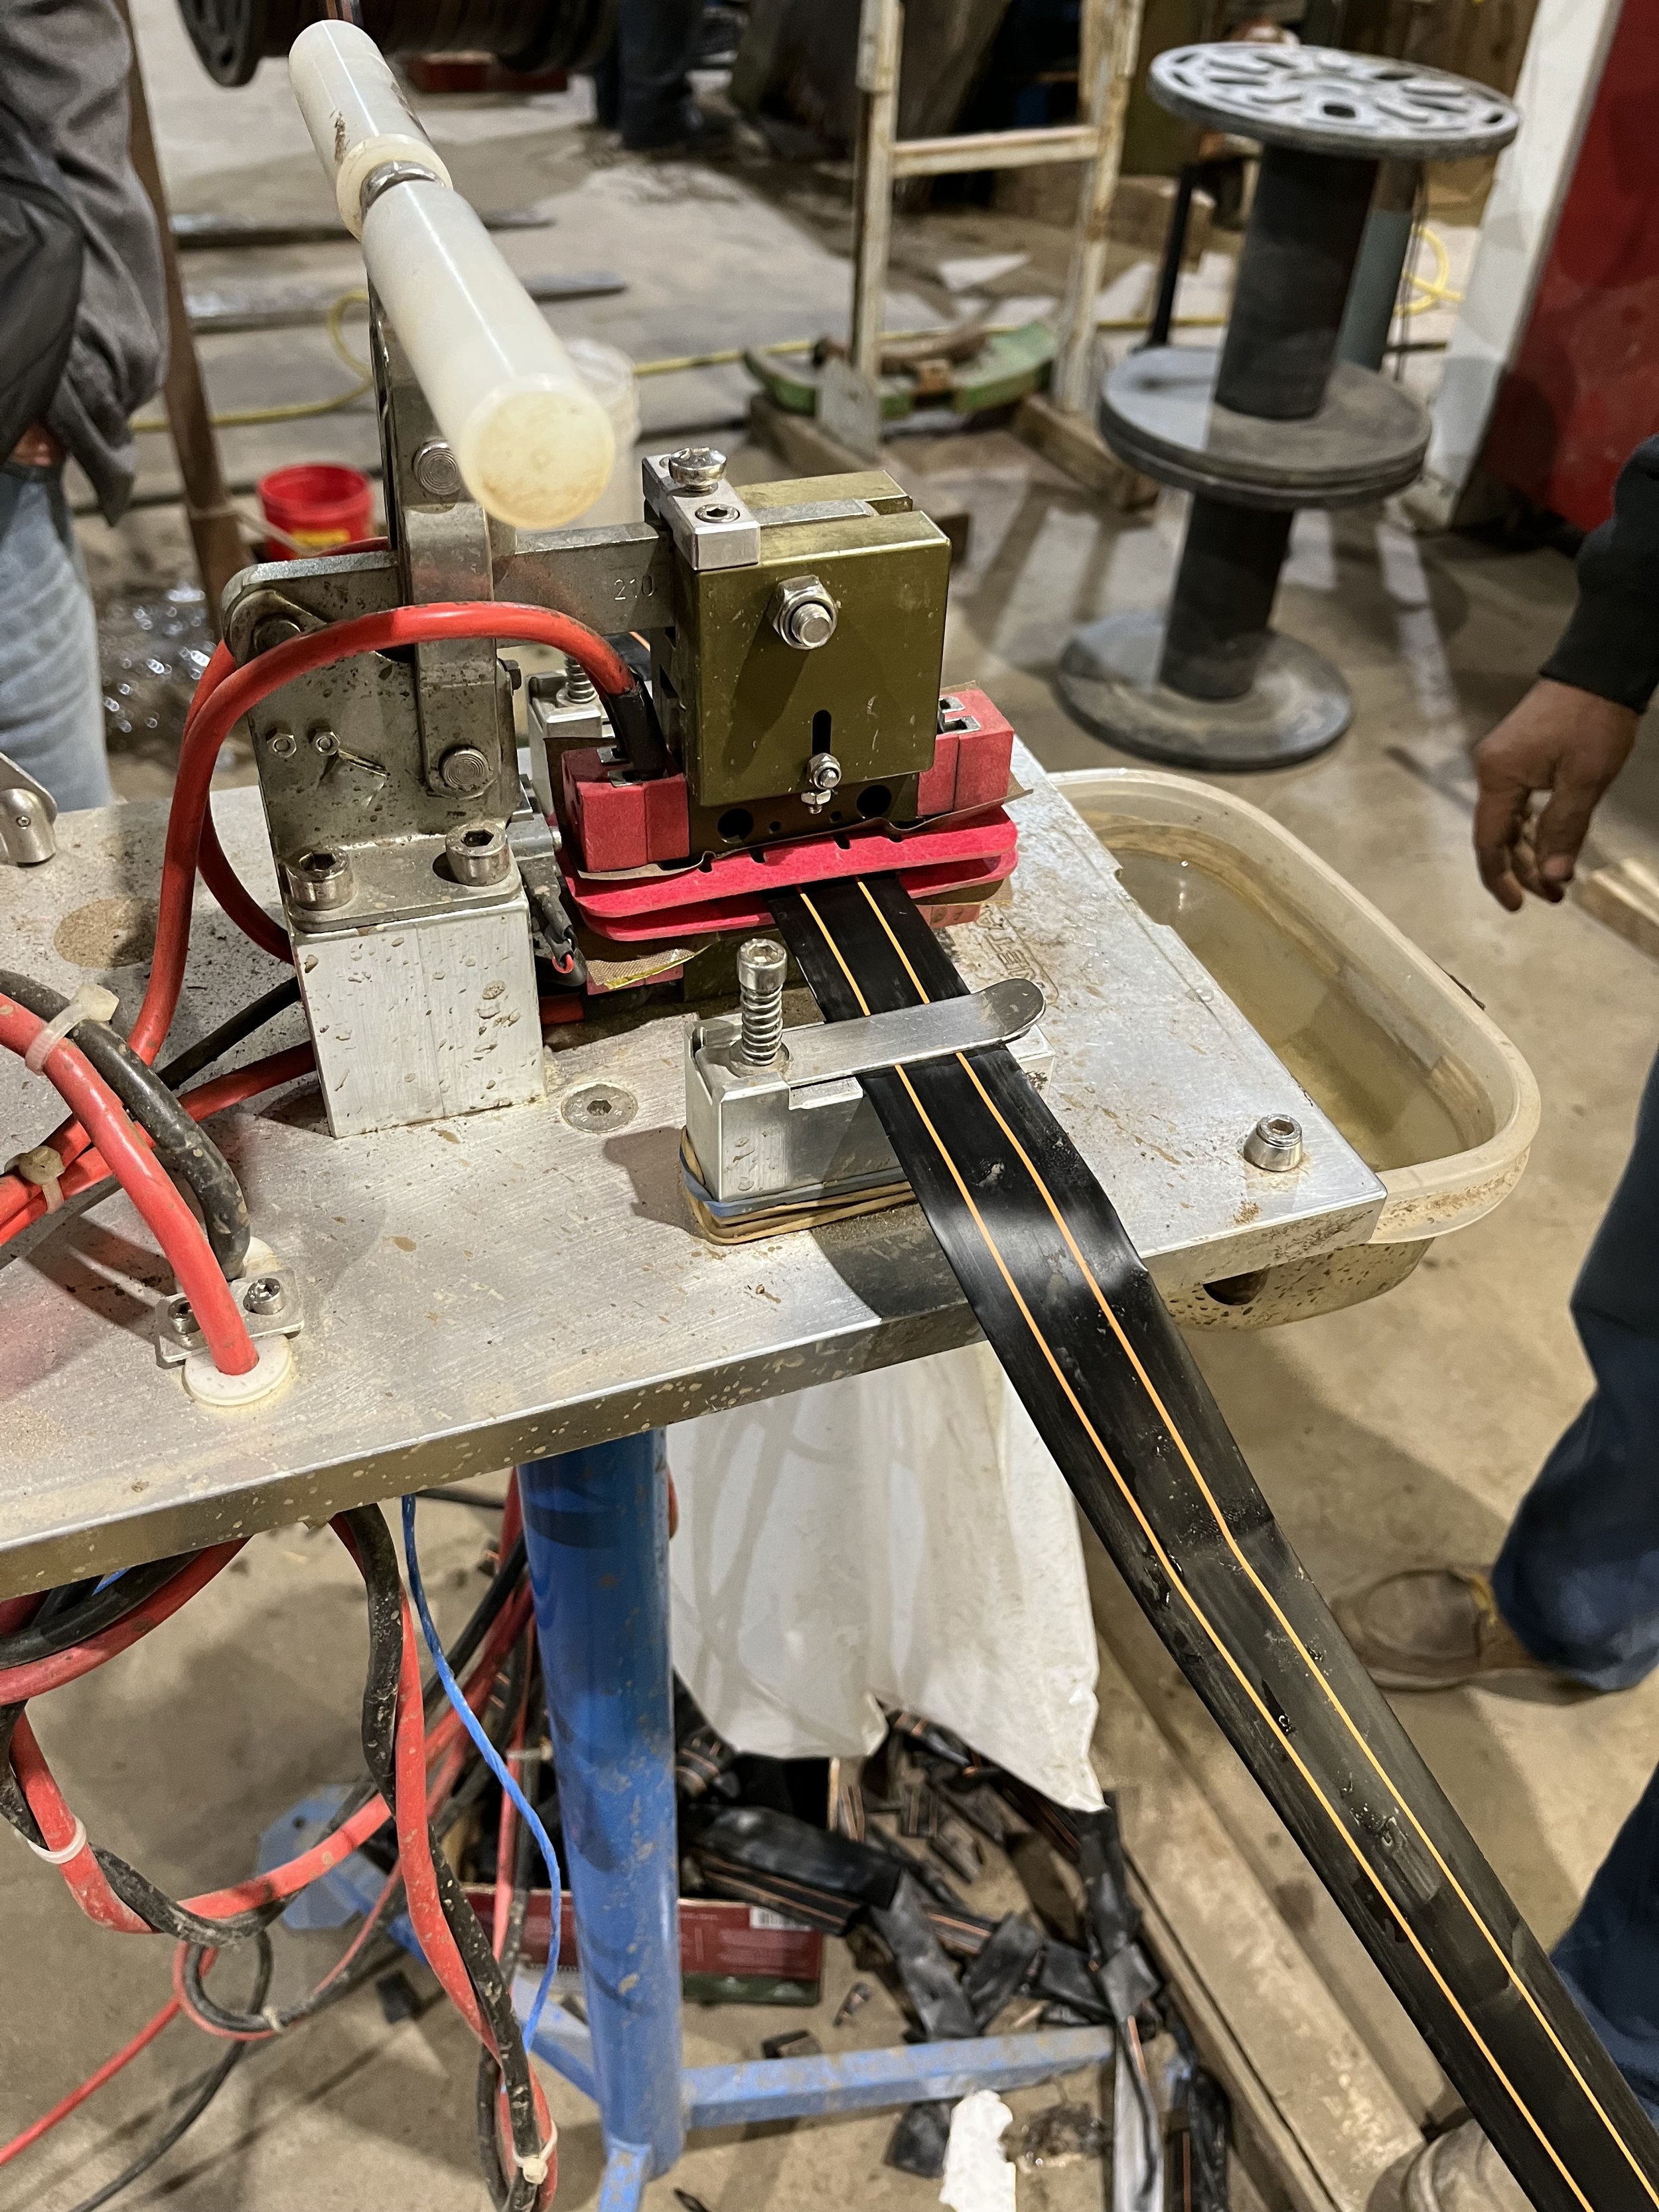
The spools of old trickle tape are set on a stand on one end of the workspace and the tape is then strung along to a second stand about 20 feet away. This second spool is controlled by a small motor that turns it round and round. In the middle there’s a nifty machine used to seal the tied ends of tape back together, as well as an old wringer washing machine that’s been converted to create tension and ensure the tape wraps onto the second spool neatly.
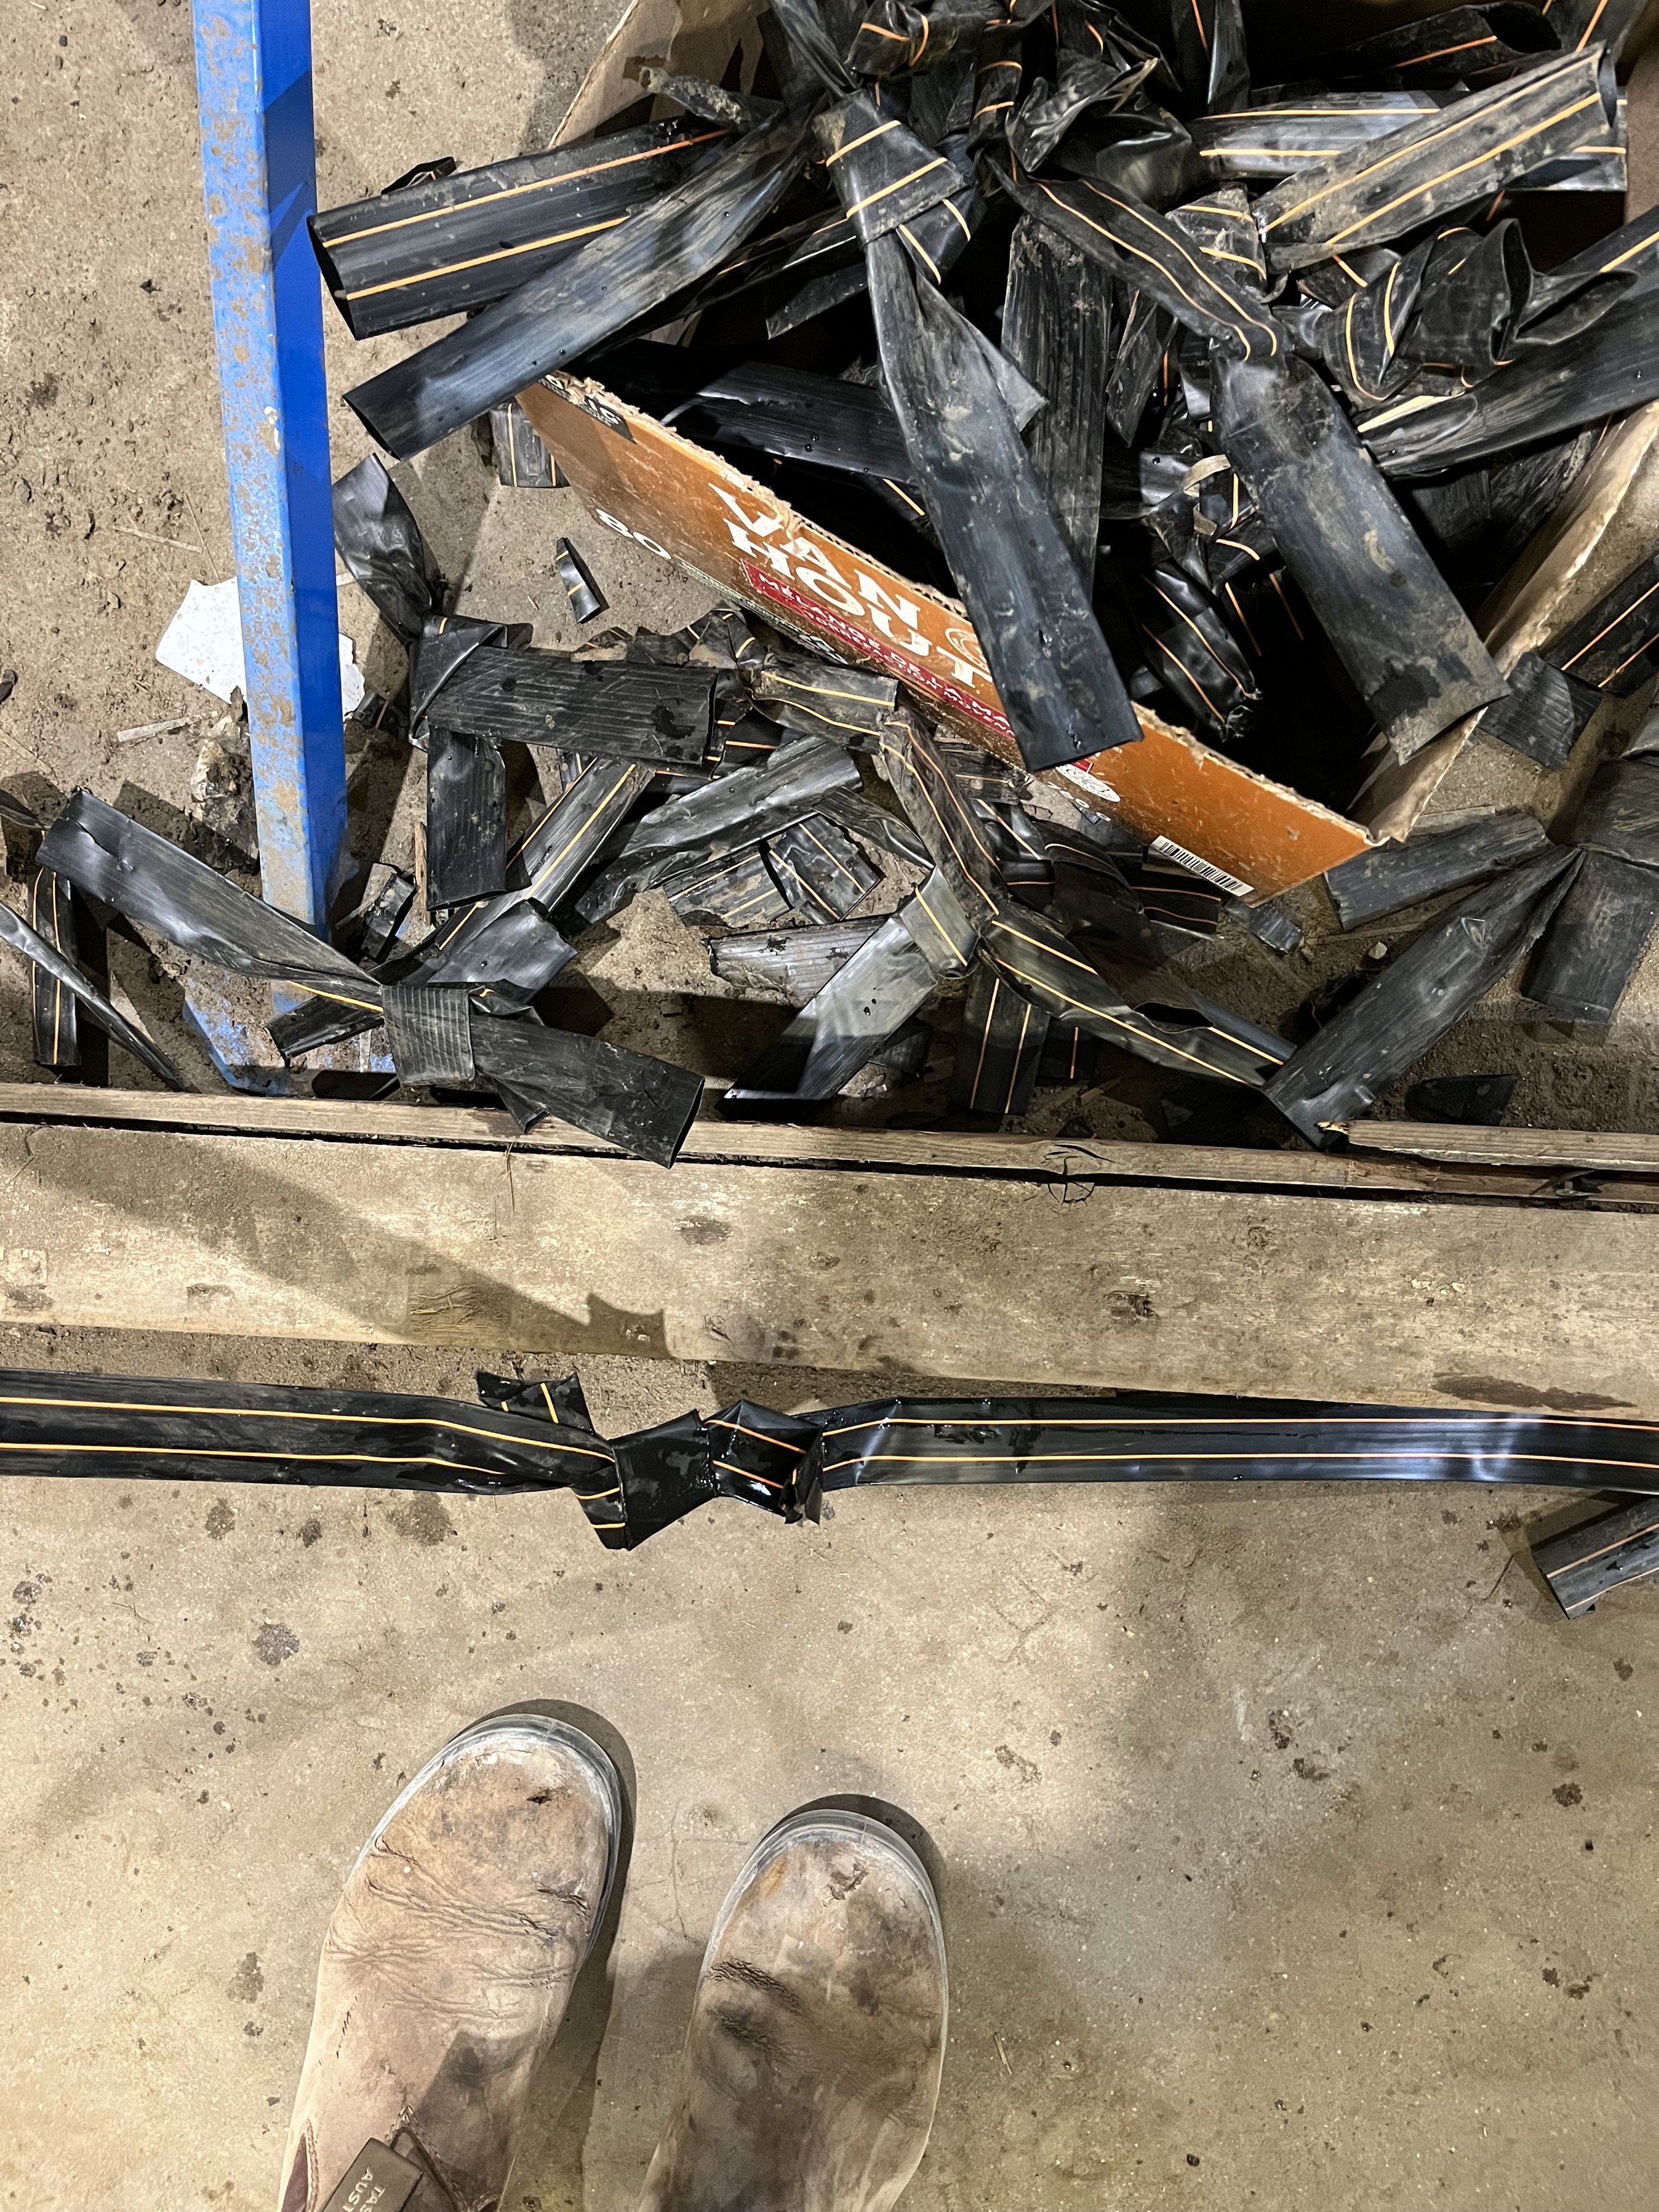

The nifty machine we mentioned is the real hero here. As the tubes of tape run from the old spool to the new one, our team is watching for the tied-together sections. When one is reached, they stop the motor and cut the tied section out. Now it’s time to meld them back together, to create that single strand we talked about earlier.
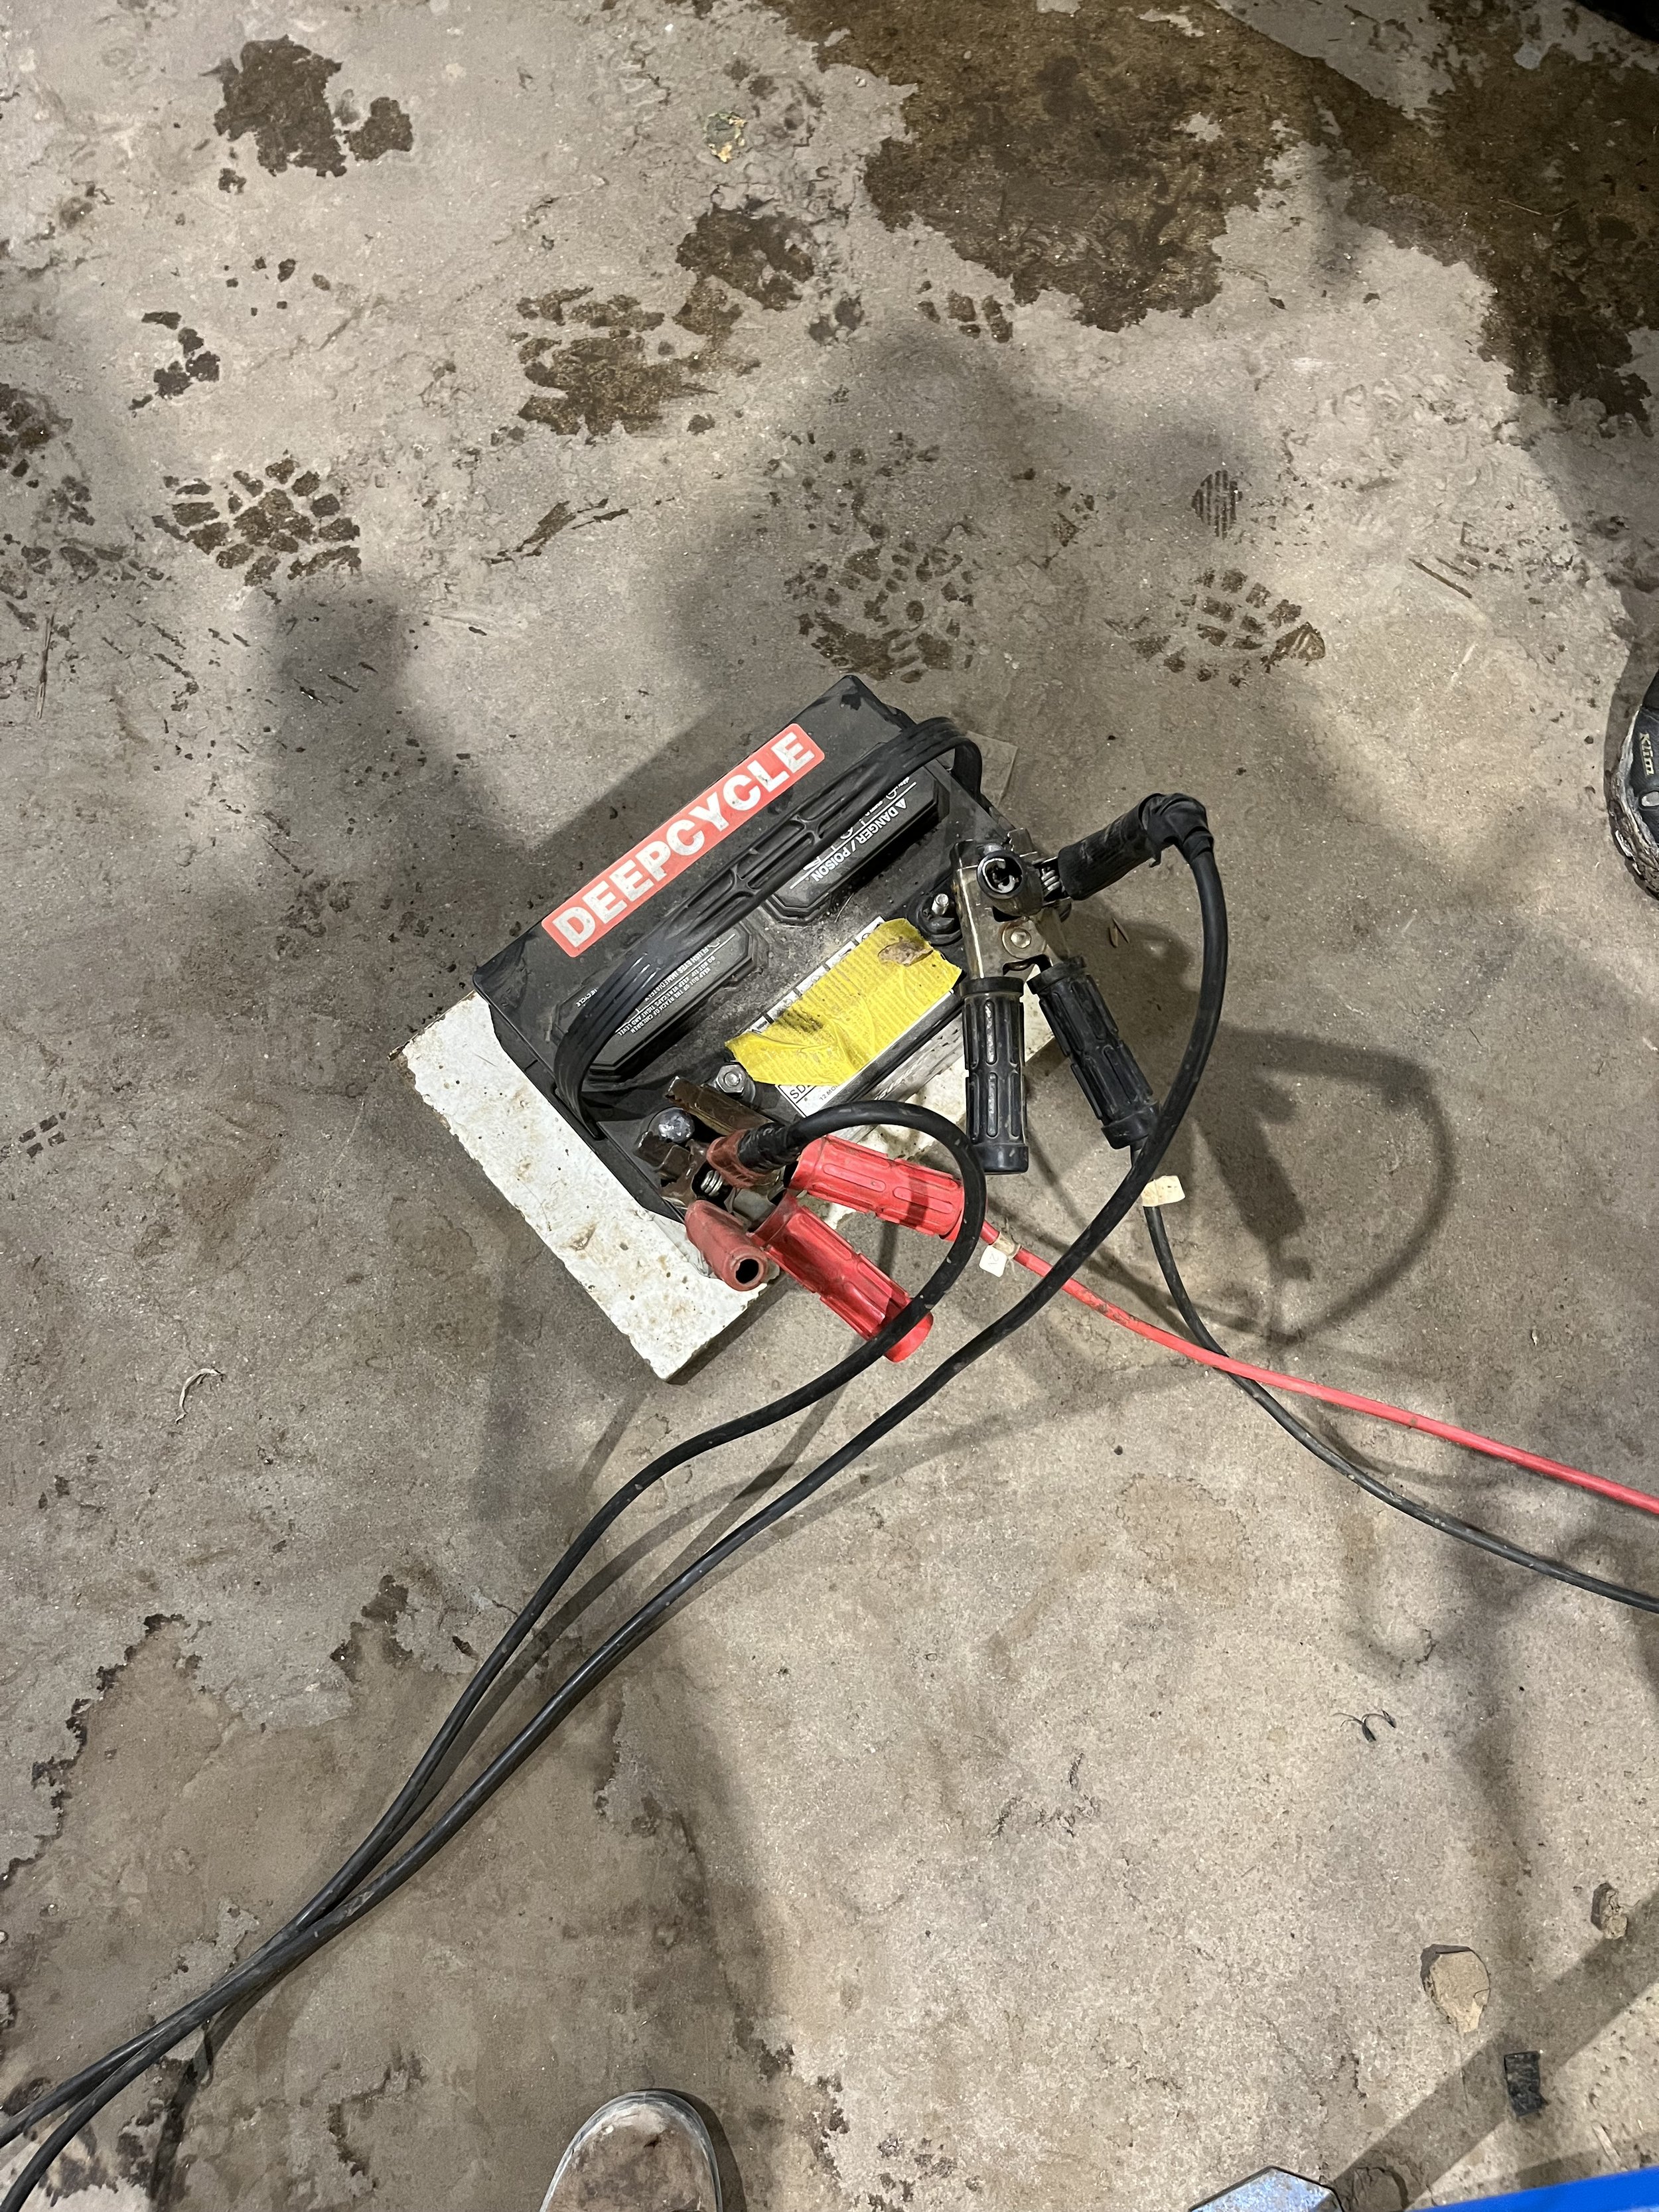
To do this, we pop the tube open and insert a small piece of plastic inside it, then slide the other end of tubing over top. We then place this recreated tube into the machine, and it presses down, applying heat - the heating panels are powered by a 12-volt battery! This heat application essentially melts the two sections of tubing together, creating a single unit, and the small piece of plastic keeps the tubing open, and prevents it from being sealed together. The heat is applied for 20 seconds or so, and then the tube is transferred into a water dish for about 10 seconds. From there, the motor is turned back on and the tubing continues to be fed through the old wringer washing machine and onto the new spool.
And that’s it! The new spools of trickle tape will then be taken out to the field and laid down on the rows for use for another season. We typically get 2 – 3 seasons of use out of these tubes. After that, the small emitters start to get plugged up, and don’t work anymore. Overall though it really reduces how much plastic we have to use, and how often we have to buy replacement tape.

If you made it this far, thanks so much for reading! This is fairly niche information, but it’s an important step in the complicated process of preparing for the upcoming season, and thought you may find it interesting!
Explore our produce boxes.
Blog post written & photographed by Alex Chesney, RD