Frank & the Bulletin Board
Each year the bulletin board in our farm’s office slowly fills up with memories of the season. Things are tacked up as they arise, first in an orderly fashion and then slowly becoming more jumbled as the days get longer and the fields get fuller. Business cards from other local entrepreneurs, funny signs from our creative farmers’ market staff, quotes, and more all crowd together to help us remember what an adventure-filled summer we had.
As we get ready for the 2019 season, we will take down many of last year’s papers and photos to make room for this year’s. Recently, as we were standing around looking at last year’s board, we were laughing and reminiscing. One memory in particular stood out: an email from Kathy, the daughter of one of our most loyal customers at the East York Farmers’ Market.
Frank has been a customer of ours for years . Last summer he attended the market every single week, bringing a flat of berries home with him without fail. That’s pretty impressive in and of itself, but what makes it even more so is that Frank was 96 years old at the time! We received Kathy’s email last fall, once the market concluded for the season:
“A huge thank you to all your staff for being so incredibly welcoming and attentive to my Dad again this season. His favourite day is Tuesday at the East York market for his flats of strawberries and the smiling faces at your booth! At 96 years old he didn’t miss a single Tuesday this summer. Hopefully he’ll see you all next summer!! 😘😘. P.S. he says your berries are the sweetest!!”
Without committed customers like Frank, our farmers’ markets would not be nearly as successful as they are. And they wouldn’t be as enjoyable, either! We looked forward to seeing Frank’s familiar and smiling face each week, and it meant so much to us that our strawberries were so special to him.
We have been emailing back and forth with Kathy over the winter, and were promised some photos from Frank’s 97th birthday party earlier this month. We just received them today and wanted to share with all of you! Take a look at Frank celebrating with his large extended family. His warm smile, sense of humour, and love for his family are clear.
Sadly, just 10 days after turning 97, Frank passed away surrounded by his children, grandchildren, great-grandchildren, and friends. We were incredibly sad to hear of his passing, and asked Kathy if we could honour Frank and thank him for his commitment to our farm. We hope he knew how much his weekly market visits meant to us. He will be missed.
Spring Cleaning
It’s officially spring! The sun is shining more often, the temperatures are rising, and colour is slowly starting to return to the landscape. And with these changes in weather come changes in our routine. The winter months are mostly spent indoors, thanks to the cold, wind, and snow, but we’ve been able to spend more and more time outdoors in the past week or so.
First on our spring-cleaning list is the greenhouse, where our famous melons start their lives each season. Melon seeds (both muskmelon and watermelon) are planted into trays and grown inside the greenhouse for about 5 weeks. Once the plants are approximately 6 inches tall, strong enough to successfully survive outside, and once the risk of frost has passed us by (we hope!) they are transplanted into the fields. But before this greenhouse growing can take place, there’s a lot of work that must be done!
To start, the greenhouse glass is carefully examined for any cracks or damage from the snow-filled winter months. Sometimes the weight of snow sitting on the glass can cause damage, and we need to ensure we address this before moving forward. If any damage is discovered, the glass is cleaned up and new panes are inserted.
Next, the greenhouse is carefully arranged into rows of racks. These racks are supported by cinder blocks, and are the perfect size to hold the trays that the melon seeds will be planted into. Before planting, the both the racks and the trays must be thoroughly washed and rinsed, to remove debris from last season. This rinsing and debris removal prevents the risk of contamination from disease from last year’s plants.
So there you have it! A peek into the beginning stages of prepping for the 2019 season. Are there any other areas of the farm that you’re curious about? Ask away! We’ll do our best to answer and provide some fun photos as well.
Blog Post Written & Photographed by Alex Chesney, RD
Butternut Squash Mac & Cheese
Even though spring is technically fast approaching, you’d never know it based on the weather lately! The snow continues to fall, the temperatures continue to hang out below zero, and the wind continues to blow. With these conditions comes a continued craving for warm, comforting foods. At least, for me it does! And one of my favourite comfort foods is mac & cheese. It’s a classic; one that’s creamy, cheesy, and oh-so-delicious. To give it a bit of a twist, and to help bump up its nutrition, I added a sneaky ingredient – butternut squash! You’d never know its there, because the colour blends right in alongside the cheddar cheese. Perfect for squeezing an extra serving of veggies onto the plates of your kids! It adds a delicious depth of flavour, especially when paired with the combination of spices listed in the recipe below. Give it a try today and let me know what you think! Happy eating 😊
Ingredients
1 tablespoon butter
½ onion, diced
1 clove garlic, minced
1 tablespoon flour
1 cup milk
1 cup butternut squash puree
1 cup cheddar cheese, grated
1 ½ cups whole wheat macaroni noodles
¼ teaspoon nutmeg
½ teaspoon thyme
½ teaspoon Dijon mustard
½ teaspoon paprika
¼ teaspoon black pepper
¼ teaspoon sea salt
¼ teaspoon cayenne
½ cup whole wheat breadcrumbs or Panko
1 tablespoon butter
Assorted herbs & spices
Instructions
Preheat the oven to 375⁰F.
Bring a large pot of salted water to a boil.
While the water boils, make the sauce:
Melt 1 tablespoon of butter in a shallow pot on medium/low heat until bubbly and fragrant.
Add onion and saute for 2-3 minutes, until softened. Then add garlic and saute for another 1-2 minutes.
Next, sprinkle flour over the onion mixture and stir until evenly coated. Cook for 1-2 minutes until mixture is thick and brown.
Slowly add the milk to the mixture, stirring constantly. Be sure to get into the sides of the pan, scraping up the flour/onion/garlic mixture and ensuring it is all combined.
Continue to cook on medium/low heat, stirring or whisking frequently.
After 5-8 minutes, the mixture will begin to thicken. Add the spices (nutmeg through to the cayenne) to the butternut squash puree, and then fold the spiced puree into the sauce. Whisk until evenly combined.
Sprinkle the grated cheese into the sauce and stir until melted.
Reduce heat to low, and stir occasionally.
By now, the pot of water should be boiling. Cook the pasta according to package directions.
While the pasta cooks, melt the remaining 1 tablespoon of butter and pour overtop of the breadcrumbs. Sprinkle in any combination of the spices used in the sauce and mix until combined well.
Once pasta is cooked, drain and return to the large pot. Pour the sauce overtop and mix well.
Transfer the pasta mixture to a baking dish and sprinkle the breadcrumb mixture overtop. You can also grate a bit more cheese and sprinkle that on too.
Place the baking dish in the oven and bake for 8-10 minutes, until the mixture is bubbling, the cheese on top is melted, and the bread crumbs are a golden-brown colour.
Remove from the oven, let sit for 5 minutes, then serve.
Paired with a side salad this makes the perfect meal!
Recipe created by Alex Chesney, RD
Soft Pretzel Twists & Garlic Scape Mustard Dipping Sauce
Superbowl Sunday is fast approaching, and that calls for just one thing - snacks! I’ve always enjoyed the Superbowl, but not really for the football. Instead, my priority has always been the food, and this year will be no different. I’ll be whipping up a batch of these delicious soft pretzels for guests to dunk into our delicious Garlic Scape Mustards. Check out the recipe below and try it for yourself! Serve alongside some fresh veggie sticks to balance it out. Have a great weekend!
Prep Time: 20 minutes
Baking Time: 8 minutes
Makes: 8 soft pretzels
Ingredients:
2 1/4 tsp active dry yeast (1 standard packet)
1 cup warm water
1 tbs unsalted butter, melted
1 tsp sugar
1 tsp salt
3 cups all-purpose flour + up to 3/4 cup more if needed
2 cups water
4 tbs baking soda
1 tbs coarse salt, for sprinkling on top
3 tbs salted butter, melted
Instructions
Preheat oven to 475⁰D and line a large baking sheet with parchment paper, then set aside.
Combine yeast, warm water, and sugar in the bowl of your stand mixer fitted with hook attachment. Let sit for approximately 5 minutes, until the mixture becomes "frothy". Stir in the salt and 1 tbs of melted butter.
Next, add flour 1 cup at a time until a dough forms and is no longer sticky. If you press your finger into the dough and it bounces back, it's ready to knead. Knead dough for 5 more minutes until smooth and pliable. Form the dough into a ball and place it back into the bowl to rest for 15 minutes. During this time, prepare baking soda bath.
In a small pot, combine 2 cups of water with 4 tbs of baking soda and bring to a boil. Once the baking soda is mostly dissolved, take mixture off heat and allow it to come down to a lukewarm temperature. Pour into a 9x9 baking dish once cooled down.
By now, the 15 minutes of dough resting time should be up. Take dough out of the bowl and flatten slightly with the palm of your hand. Cut dough into 8 sections (like a pizza). Roll each triangle into a long rope, about 19-20 inches long.
Shape dough as desired; into a traditional pretzel shape, twists, pretzel sticks, or pretzel bites. Place prepared pretzel shapes in the baking soda bath for 2 minutes. If the whole pretzel isn't covered by the water, spoon it on top of the areas is doesn't reach. Once the 2 minutes is up, carefully pick pretzel up either by your hand or with the help of a fork and place on prepared baking sheet. You may have to re-shape slightly. Sprinkle the pretzel with coarse salt while still wet (optional). Repeat these steps until all 8 pretzels are prepared and on the baking sheet(s).
Bake pretzels for 8-9 minutes or until golden brown. Remove from the oven and immediately brush the remaining melted butter.
These homemade soft pretzels are best served hot and fresh out of the oven but will keep for about 2 days stored at room temperature in an airtight container. Pop them in the microwave and they're good as new!
Recipe adapted from sprinklesomesugar.com by Alex Chesney, RD
Oatmeal-Raspberry Thumbprint Cookies
Chilly winter days were made for baking, don’t you think? There’s nothing I love more than hunkering down in my kitchen with some music playing in the background while I mix up some dough and roll it out. It’s soothing and comforting, and the end result is so delicious. This week I wanted to bake something that featured one of our jams, and thumbprint cookies immediately came to mind. They’re quick and easy, and super cute. Although these fall firmly into the treat category, this recipe features oats and whole wheat flour for a bump of fibre. Give them a try and let me know what you think!
Prep Time: 10 minutes
Bake Time: 10 minutes:
Makes: 3 dozen bite-sized cookies
Ingredients
1 ¾ cups old-fashioned oats, divided
¾ cups whole-wheat flour
1 teaspoon ground ginger
½ cup unsalted butter, at room temperature
¼ cup packed brown sugar
¼ cup white sugar
1 large egg
1 teaspoon vanilla extract
1/3 cup walnuts, chopped (optional)
¼ cup Thames River Melons raspberry jam
Instructions
Preheat the oven to 350⁰F. Prepare a large baking sheet (or two smaller ones) by lining with parchment paper or silicone baking mats. Set aside.
Grind ½ of the oats into a finely ground flour using a food processor, high-speed blender, or spice grinder. Transfer to a medium-sized bowl.
Add the flour, remaining oats, ground ginger, and salt to the oat flour and whisk to combine.
Next, beat together the butter and sugars using a stand mixer with a paddle attachment or an electric hand mixer. Use medium speed, and beat until light and fluffy (approximately 1 minute).
Add the egg and beat thoroughly. Then, beat in the vanilla.
Next, slowly add the flour mixture on low speed and beat until just incorporated.
Finally, gently fold in the walnuts (if using).
Using a spoon or small cookie scoop, measure about 1 tablespoon of dough from the bowl. Roll the dough between the palms of your hand to form a ball and place on the prepared cookie sheet(s).
Continue to scoop and roll, placing the balls of dough approximately 2 inches apart.
Use your thumb to press down on the middle of the dough ball. Fill each with a dab of raspberry jam.
Place the prepared cookie sheets into the preheated oven and bake for 5 minutes. Then, rotate the baking sheet from front to back (and between racks if using two pans!) and continue baking for another 3 to 4 minutes, until cookies are set but still soft.
Remove the cookies from the oven and cool for 1 to 2 minutes before transferring to a wire cooling rack to fully cool.
Store in an airtight container for 4 to 5 days. Enjoy!
Recipe modified from The Kitchn by Alex Chesney, RD
Thai Coconut Curry Soup
Today’s freezing temperatures and blustery wind have me craving more soup. Do you feel it too? This recipe is sure to warm you through and through thanks to the flavours of ginger and Thai curry paired with comforting butternut squash and coconut milk. As a bonus, you’ll get a generous dose of vitamins A and C thanks to the squash, and a hit of protein and iron offered up by the red lentils.
The iron found in plant-based proteins is called non-heme iron and is a bit harder for our bodies to absorb than heme iron (found in meat). However, pairing non-heme iron with Vitamin C increases absorption. See where I’m going? The Vitamin C from the squash will work in tandem with the iron in the lentils to fuel you more efficiently. Another bonus of red lentils are their quick-cooking nature and their tendency to start to disintegrate when cooked. This makes them essentially impossible to detect; a great way to power up the picky people in your lives!
Give it a try today and let me know what you think.
*Serves 4
Prep Time: 15 minutes
Cooking Time: 20 minutes
Ingredients
1 tablespoon cooking oil
1 bell pepper, diced
1 onion, diced
½ teaspoon ground ginger
½ teaspoon black pepper
¼ teaspoon salt
1 –2 tablespoons Thai red curry paste (depending on your spice preference; I used 2!)
1 can coconut milk
3 cups low-sodium vegetable broth
4 cups butternut squash, peeled and cubed
1 carrot, diced
½ cup red lentils
Instructions
Heat oil in a medium pot, over medium heat. Place 1 piece of diced onion in the pot to test the temperature of the oil. Once the onion starts to sizzle, add the remaining onion.
Sauté the onion for 1-2 minutes, until it begins to soften. Then, add the diced bell pepper and continue to sauté for another 1-2 minutes.
Once the vegetables have softened, and onion has started to become translucent, add the ginger powder, salt, pepper, and Thai curry paste. Mix to combine.
Next, add the coconut milk. Stir to combine, making sure to scrape the bottom of the pan, gathering up all of those flavourful bits that may have started to stick!
Add the vegetable broth, again stirring to combine.
Finally, add the butternut squash, carrot, and red lentils. Stir to combine, then place the lid on the pot and bring to a boil.
Once the pot reaches a boil, reduce the heat and simmer for 15 – 20 minutes.
At this point, the butternut squash should be soft, and the lentils should have started to disintegrate.
Blend the soup with an immersion blender until smooth and glossy.
Top with your favourite roasted winter veggie and serve with a slice of whole wheat bread for a filling and nutritious meal. Enjoy!
Recipe created by Alex Chesney, RD
Leek and Potato Soup
The weather has been unpredictable lately — snowy and cold one day then slushy and warm the next. Regardless of the temperature, one thing has remained constant, and that’s my desire for soup. The winter months have always made me crave this warm and comforting meal, and that hasn’t changed this year! Their ease and versatility are also a great selling point. I de!ided to start off 2019 with a classic: leek and potato!
Both leeks and potatoes are crops that keep well long after harvest. The farm has settled into a quiet rhythm for these next few months, but we do still have a few veggies kicking around the barn. I rescued a bundle of leeks and a handful of potatoes to pair with leftover veggies from my fridge and then hit the kitchen!
When preparing the potatoes, I washed them thoroughly then removed any eyes and marks, otherwise leaving the skin intact. As with many fruits and vegetables, the skin houses the majority of the nutrients, particularly the fibre! When it comes to leeks, many consumers are not aware of their nutrition content. Are you? Just in case, I’ll fill you in! Leeks contain an incredibly high amount of Vitamin K, a fat-soluble vitamin that helps our bodies heal wounds, and maintain the health of blood vessels and bones. Because it’s fat-soluble, it’s best absorbed when paired with fat. In this recipe, both the butter and the milk/cream contribute fat. Pretty neat, hey?
Overall, this soup is flavourful, creamy, and satisfying. It makes the perfect lunch for a chilly weekend, or a quick and easy dinner for those busy weeknights. Give it a try and let me know what you think!
*Serves 4-6
Prep Time: 10 minutes
Cooking Time: 25 minutes
Ingredients
1 tablespoon cooking oil or butter
3 large leeks*, white parts sliced into coins
2 cloves garlic, minced
1 bell pepper, diced
1 large carrot, diced (or 1 cup frozen diced carrots)
2 stalks celery, diced
½ teaspoon paprika
½ teaspoon dried thyme
¼ teaspoon pepper
¼ teaspoon salt
4 cups low-sodium vegetable stock
4 medium potatoes, cubed
½ cup milk or cream
Instructions
Heat oil or butter in a medium stock pot over medium heat. Add one small piece of leek and wait for it to start to sizzle.
Once sizzling, add the rest of the sliced leeks. Cook for 3 minutes or so, stirring frequently, until leeks are softened.
Add minced garlic and other diced vegetables. Cook for another 3-4 minutes, again stirring frequently.
Next, add herbs and spices, mixing until all vegetables are evenly coated. Cook for another 1-2 minutes.
Add the vegetable stock and the potatoes and bring to a boil. Once boiling, reduce heat to medium-low (maintaining a gentle simmer) and cook for approximately 20 minutes.
Once potatoes are softened, remove soup from heat. Blend the soup using an immersion blender or upright blender until a creamy consistency is achieved. Add the milk or cream and stir to combine.
*Be sure to wash the leeks very thoroughly, as although they are pre-washed before being sold, dirt has a way of working its way inside of this tasty veggie!
Recipe created by Alex Chesney, RD
Late Summer Chowder
Cooler weather is approaching, the official start of autumn is around the corner, and soup season has arrived! I’m looking forward to being able to comfortably use the stove and oven again and put them to work cooking up the tasty fall recipes I have in mind. To start us off we’ve got a hearty, delicious, and easy chowder. Flavour is built by cooking the vegetables in stages, and coating them with a lovely combination of spices. A low-sodium vegetable broth and just a dash of salt at the end will ensure a hearty-healthy final bowl, and all the wonderful vegetables featured make for a soup that is satisfying and filling. Take advantage of these still-in-season vegetables combined with comfortable cooking temperatures and try this recipe today. Let me know what you think!
Ingredients
1 tablespoon oil
1 red onion, diced
3 cloves garlic, minced
1 small jalapeno, diced (more or less, depending on spice tolerance!)
2 bell peppers, diced
2 cobs sweetcorn, cooked & removed from the cob
1 zucchini, diced
5 small red potatoes, cubed
1 teaspoon paprika, oregano, and parsley (each)
½ teaspoon thyme
2 tablespoons flour
3 cups low-sodium vegetable broth
1 cup milk
Salt & pepper, to taste
Instructions
Heat oil in pan over medium-high heat until hot. A handy trick to test the readiness of the pan is to toss in a small piece of diced onion along with the oil. When it starts to sizzle you know you’ve reached the right temperature!
Once hot, add all the onion to the pan. Cook for 5 minutes until translucent and softened.
Add the garlic and peppers and cook for another 5 minutes, stirring frequently.
Add the corn, zucchini, spices, and flour. Mix until vegetables are evenly coated with the spices & flour.
Next, slowly add the vegetable broth, stirring constantly.
Once all the broth has been mixed in, add the potatoes. Lower the heat slightly and bring the mixture to a simmer. Cook for 15-20 minutes, until potatoes are softened.
Add the milk and stir until hot.
Season with salt and pepper, to taste.
Enjoy!
Recipe created by Alex Chesney, RD
Southwest Pasta Salad
What a wonderful time of year: the weather is still warm, excitement is building over back-to-school and other upcoming fall adventures, and the fields are overflowing with produce. There are so many delicious vegetables to choose from, it can be difficult to decide on just one. Thankfully we have a solution for that – use them all! This pasta salad is loaded with all our favourite summer veggies and coated with a tangy, creamy sauce. Pairing the veggies and sauce with whole wheat noodles and protein-packed black beans makes for an end result that is full of fibre, super satisfying, and oh-so-delicious. Try it today and let us know what you think!
Ingredients
2 cups whole wheat pasta
1 can low sodium black beans, drained and rinsed
1 red pepper, diced
1 zucchini, diced
2 cobs corn, cooked and sliced off the cob
1 jalapeno pepper, minced
1 cup grape tomatoes, halved
¼ cup Greek yogurt
¼ cup mayonnaise
2 tablespoons lime juice
1 tablespoon milk
1 teaspoon paprika
1 teaspoon chili powder
3 cloves garlic, minced
Instructions
Cook pasta according to package directions. Set aside to cool.
Prepare beans and vegetables and toss together in a large bowl.
Add pasta to the vegetables and toss again.
Prepare the dressing by whisking together the yogurt, mayonnaise, lime juice, milk, spices, and garlic.
Pour the dressing over the salad and mix well, until evenly coated.
Refrigerate until ready to serve – enjoy!
Recipe created by Alex Chesney, RD
Tomato, Corn, and Goat Cheese Flatbread
Here’s a fresh, sunny recipe for this rainy, dreary day featuring two of our favourite late summer veggies. Tomatoes are a great source of several key nutrients like vitamin C, vitamin A, and folate. They also contain lycopene, the nutrient that gives tomatoes their gorgeous red colour. In addition to being bright and colourful, lycopene is a powerful antioxidant. Meanwhile, sweet corn is also a nutrition powerhouse, giving you a healthy dose of fiber, magnesium, and potassium. Paired with a spread of goat’s cheese and freshly minced garlic, these vegetables make for a tangy, delicious, and filling flatbread. Remember, you can find the tomatoes, sweet corn, and garlic at our Innerkip Farm Market, Pick Your Own stand, or a Farmers’ Market near you. Let me know what you think of the recipe, and happy eating!
Ingredients
1 log goat’s cheese
2 large cloves garlic, minced
2 tablespoons olive oil
1 cup sweet corn kernels (from approximately 2 large cobs)
1 teaspoon chili powder
1 teaspoon paprika
¼ teaspoon black pepper
¼ teaspoon salt
2 tomatoes, sliced
4 whole wheat pitas (or something similar like naan bread)
1 cup arugula, for topping (optional)
Instructions
Preheat the oven to 425⁰F.
Bring a medium-to large pot of water to a boil and cook the corn for 5 minutes. Remove from the water and let cool. Once cool enough to handle, cut the kernels off the cob.
Toss the corn kernels with the chili powder, paprika, pepper, and salt.
Place the pitas onto a baking sheet. Slice the goat cheese into quarters and spread ¼ onto each of the pitas.
Next, sprinkle on the minced garlic, followed by a drizzle of approximately a ½ tablespoon of olive oil.
Spread the slices of tomato on top of the goat cheese, garlic, and olive oil.
Finally, sprinkle the corn on top of the tomato.
Pop the prepared flatbreads into the oven for about 15 minutes, until goat cheese is melted and bubbly, and corn and tomatoes are nicely browned.
If desired, top with fresh arugula for some extra crunch and a dose of greens. Slice & enjoy!
Recipe created by Alex Chesney, RD
Summer BBQ Side Dishes
Summer Weekends are made for BBQs, and BBQs call for some delicious treats. The focus of an outdoor meal is often the main course – what protein is being marinated, grilled, and topped. However, side dishes are just as important! They round out, balance, and complete a meal, and side dishes are where you’ll often find some of our favourite summer veggies. These two recipes are quick, easy, and delicious. They feature lots of herbs and spices for huge hits of flavour while also keeping the amount of salt to a minimum. And despite their difference in colour, shape, and size, sweet corn and green beans actually have quite a lot in common! Both summer veggies boast generous amounts of Vitamin C and fibre, which means you’ll feel full and satisfied with them on your plate. Pair these dishes with some freshly grilled chicken breasts or sausages and you’ve got one tasty meal!
Sweet & Smoky Corn on the Cob
Ingredients
6 cobs sweet corn, husked
½ cup butter, softened
2 teaspoons paprika
2 teaspoons chili powder
1 teaspoon garlic powder
½ teaspoon granulated sugar
½ teaspoon salt
½ teaspoon black pepper
2 tablespoons lime juice
Instructions
Bring a pot of water to a boil on the stove top.
Mix together the softened butter, spices, and lime juice until well combined.
Once the water comes to a boil, place the husked corn cobs in and cook for 3 minutes.
Remove the corn from the pot and carefully pat dry.
Transfer the corn to a preheated grill, then slather with the butter & spice mixture.
Grill for an additional 2-3 minutes, until the butter is melted and the spices have seeped into the corn.
Serve with a wedge of lime and enjoy!
Parmesan Garlic Green Beans
Ingredients
1 lb. green beans
1 tbsp cooking oil
1/2 teaspoon salt
2 garlic cloves, minced
½ cup water
½ teaspoon red pepper flakes
¼ cup parmesan cheese
¼ cup whole wheat bread crumbs
Instructions
Rinse the beans, shake them dry, and trim off their stems.
Mix together the red pepper flakes, cheese, and bread crumbs. Set aside until later.
Heat the oil in a pan over medium-high heat until shimmering. Add the beans and saute for about 5 minutes, stirring frequently until the beans are bright and glossy.
Add the garlic and salt, then continue to cook for an additional 30 seconds. Be sure to stir constantly!
Add the water to the pan and cover immediately. Cook, covered, for another 1 – 2 minutes, until the beans are bright green and crisp tender.
Add the cheese mixture to the pan and mix until the beans are coated.
Serve and enjoy!
Recipes created by Alex Chesney, RD
Banana Blueberry Muffins
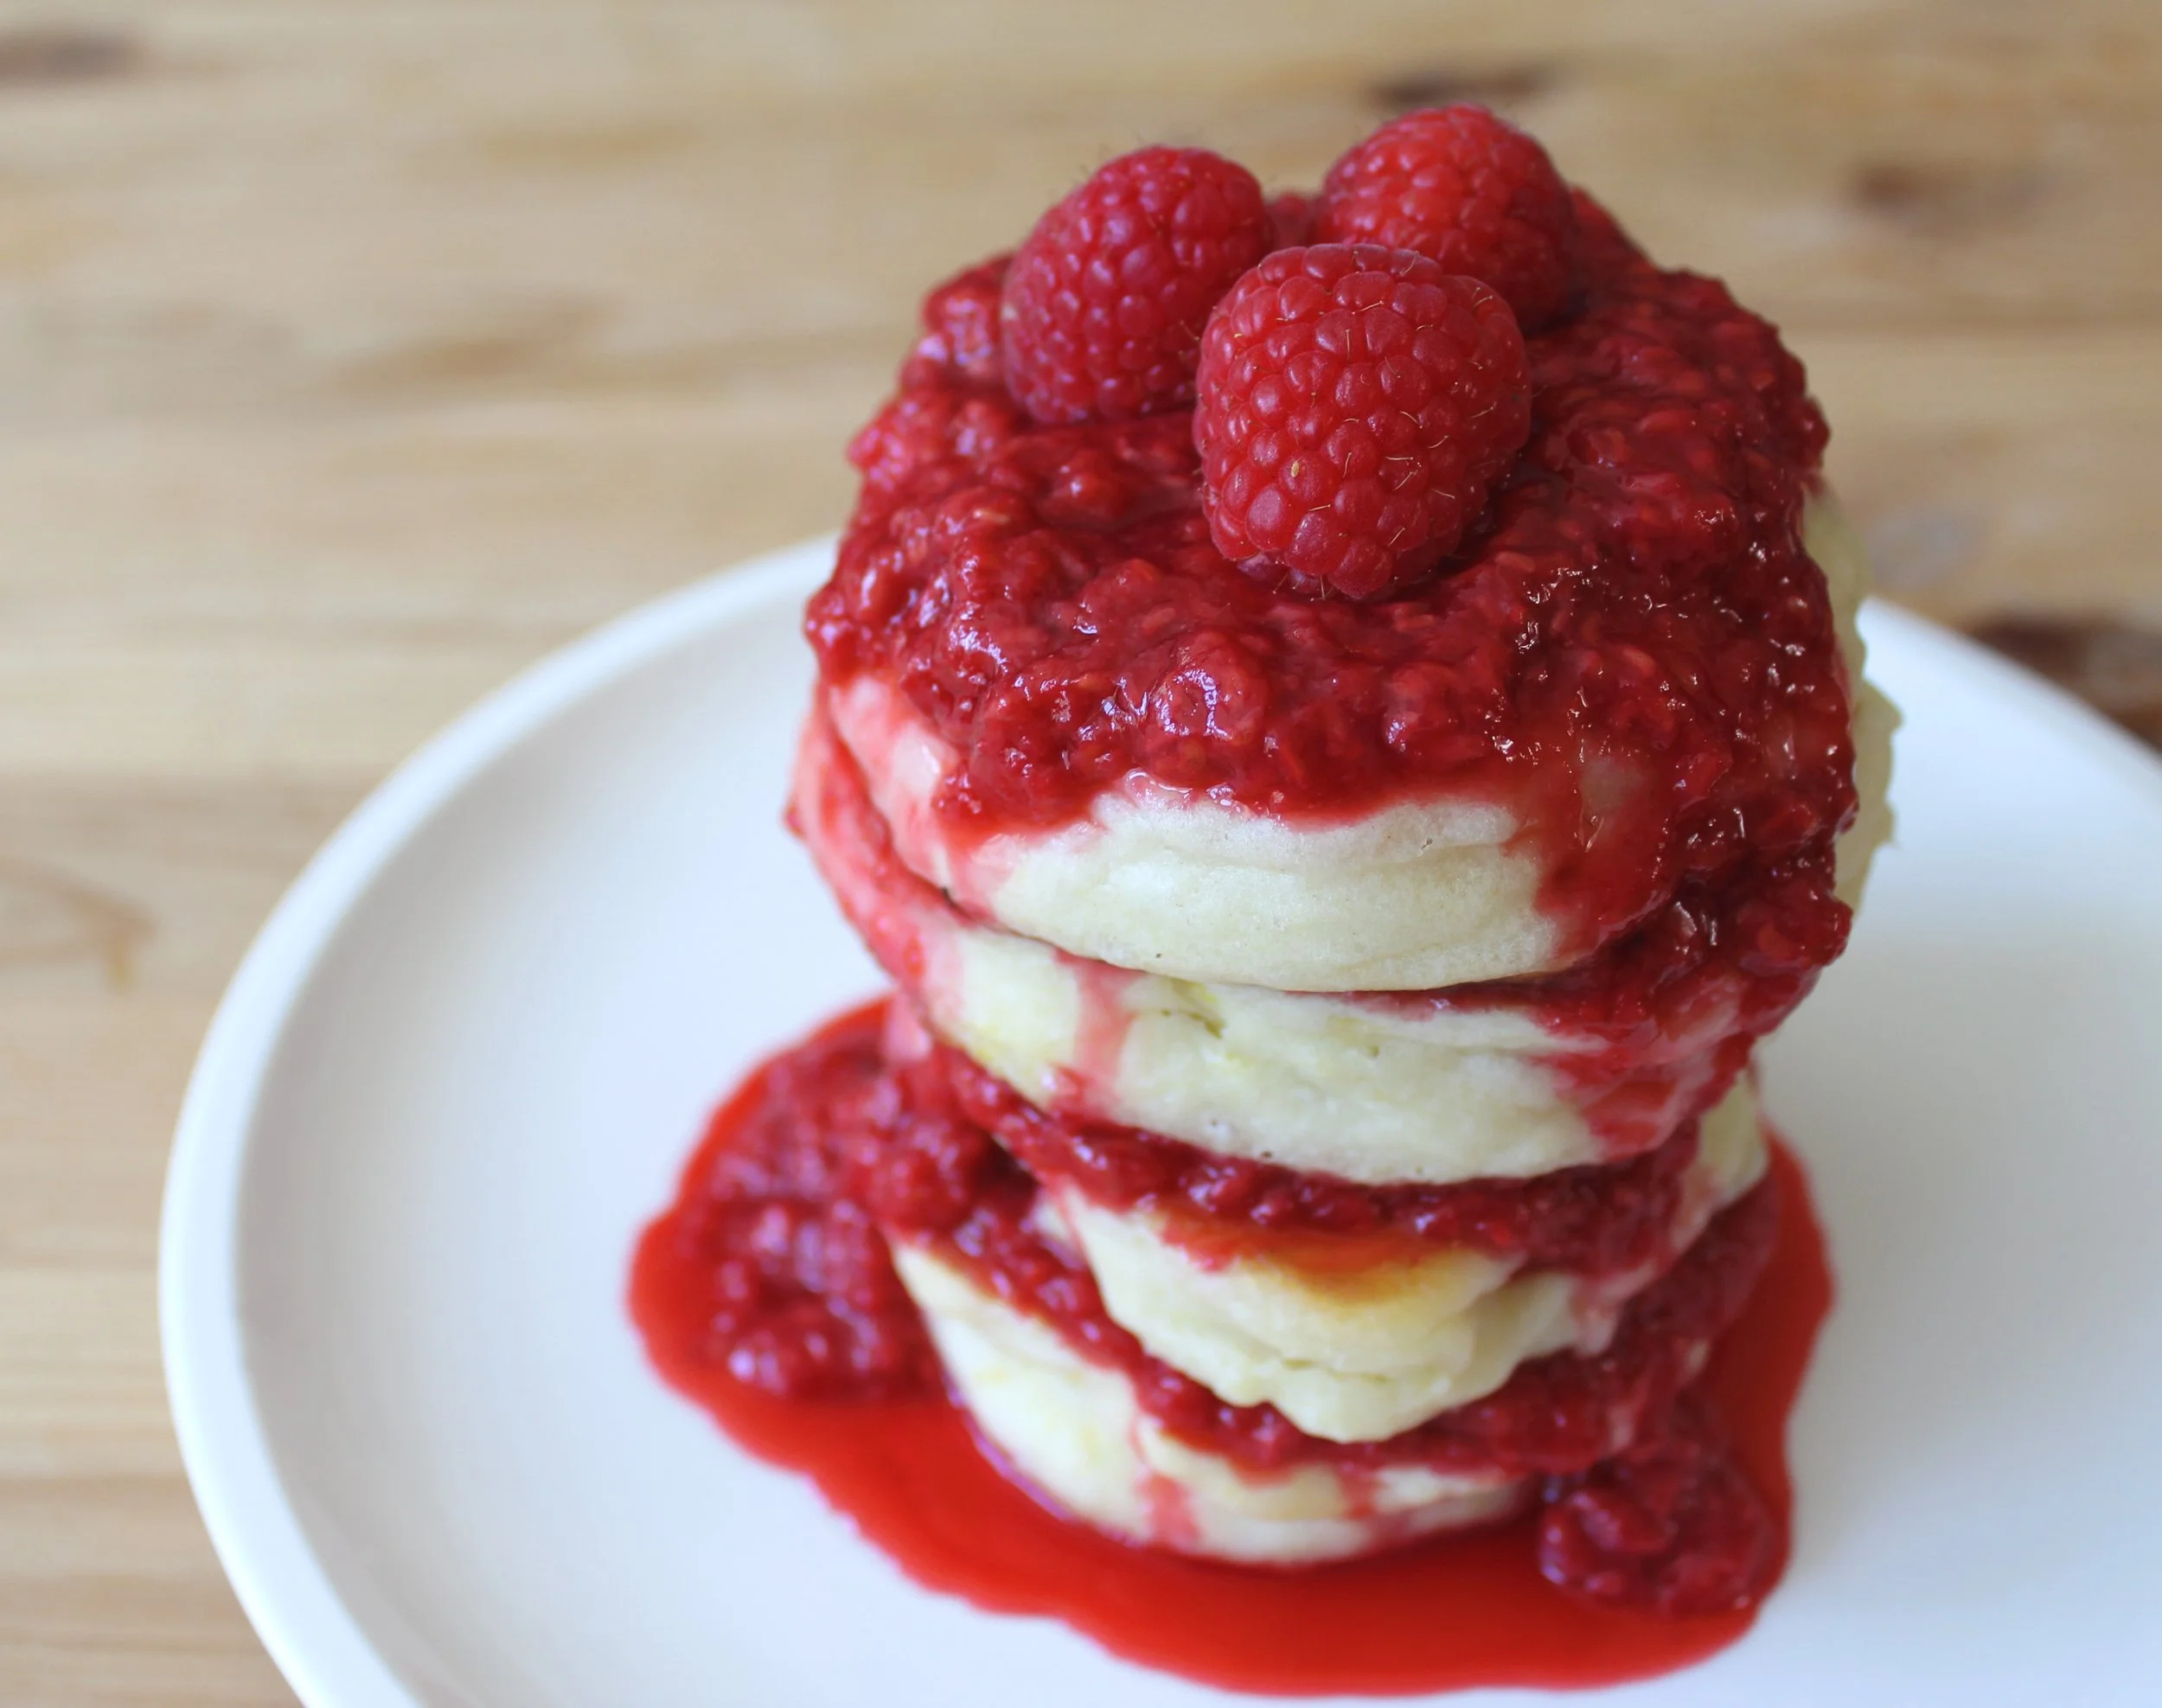
Today’s recipe is a spinoff of Gramma Nancy’s classic banana muffins, one of the first things I ever learned to bake. I’ve been making them for years, and absolutely love how moist and fluffy they are. They are quick and easy and make a great pairing for your morning coffee or the perfect afternoon snack. I love whipping them up on Sunday evenings so that we have a grab-and-go option for those busy weekdays.
In last week’s recipe I talked a lot about sugar. Many of those same concepts apply to muffins! Muffins purchased from fast food restaurants, grocery stores, or gas stations are usually more like cake. Again, we can look at the numbers to back this up. On that note, did you know that all fast food restaurants have nutrition information pamphlets available both in-store and online? They’re usually in a little holder on the wall near the napkin dispenser. If you don’t see them, just ask! It’s important to be informed as a consumer — if you have the knowledge you will be able to make smarter, healthier food choices.
Another fun fact about sugar involves another commonly debated macronutrient — fat. Low-fat diet fads have been popular since the 80s, and since then specialized low-fat products and recipes have made the rounds. It’s not uncommon to see products marked as low-fat on grocery store shelves and on fast-food menus. However, it’s important to be aware that when you remove fat from a product, you also take away some delicious taste. To make up for that, many food processors add other ingredients. Can you guess what the most popular replacement is? You got it — sugar! So that seemingly “healthy” low-fat muffin is now overloaded with sugar. Want a real-life example? Starbucks has two blueberry muffins; a standard one and one made with yogurt and honey. I think it’s safe to say that many people would assume that the yogurt version is healthier. I know I would! But when we look further, it turns out the regular blueberry muffin is home to 18g of fat and 28g sugar. Meanwhile, the yogurt version houses 16g of fat and 30g of sugar. So yes, it has less fat (but not that much less!) and the amount sugar actually increased. Either way, those numbers work out to 7 and 7.5 teaspoons respectively, more than half the recommended daily intake of added sugar. In the end, consumers aren’t being done any favours by the “low-fat” option. Recent research has begun to debunk the low-fat fads — since their popularization rates of obesity, diabetes, and heart disease have not decreased. Instead, they’ve all gone up. Obviously the low-fat craze hasn’t helped us.
Discussions like the above can feel confusing. What are you supposed to do if there isn’t really any good choice on the shelf? I once again offer you the solution of diving into your kitchen. Get cooking, and use whole, real ingredients. I promise you the taste will be better, and your body will thank you for it. Just so you know, these muffins have about 1 teaspoon per muffin, which is a whole lot less than the Starbucks version! Give them a try and let me know what you think!I’ll be sure to pass along your compliments to Gramma 😊
Prep Time: 10 minutes
Cooking Time: 20 minutes
Makes: 1 dozen muffins
Ingredients
¼ cup sugar
½ cup vegetable oil
2 eggs
3 ripe bananas, mashed
1 cup whole wheat flour
1 cup white flour
1 teaspoon baking soda
½ teaspoon baking powder
¼ teaspoon salt
¼ cup milk
1 cup blueberries, washed
Instructions
Line a muffin tin with muffin tin liners then set aside for later use.
Preheat the oven to 350˚F.
In a medium bowl, whisk together the sugar and oil. Once mixed, beat in the eggs. Finally, add the mashed bananas.
In a separate bowl whisk together the flours, baking soda, baking powder, and salt.
Make a well in the dry ingredients, and then pour in the liquid mixture.
Mix until just combined. Some lumps and pockets of flour will remain, and that’s okay! You don’t want to over mix, as this will lead to tough muffins.
Next, add the blueberries and the milk to the batter and carefully fold in.
Your batter is now ready to go! Use a spring-loaded ice cream scoop and begin to portion the batter into the individual muffin tin slots.
Once the muffin batter is portioned, pop the muffin tin into the preheated oven. Bake the muffins for 18-20 minutes, until the tops are golden and they spring back when you touch them.
Remove from the oven and cool to room temperature. Store in an airtight container on your counter for up to 5 days.
Enjoy!
Recipe modified from Grandma Nancy's original by Alex Chesney, RD
Lemon Ricotta Pancakes with Fresh Raspberry Sauce
Raspberries are my absolute favourite fruit, and for good reason! They’ve got a whole lot of goodness going for them, starting with their micronutrient profile. Similar to blueberries, raspberries are an excellent source of Vitamin C. We’ve talked about this before, but I’ll give you a little recap just in case. Vitamin C is a water-soluble vitamin (which means your body absorbs what it needs, filters the rest through your kidneys, and then excretes the excess out via urine) that assists with the absorption of non-heme (plant-sourced) iron, produces tissues that hold our muscles and bones together, and assists with healing of cuts and wounds. Additionally, Vitamin C is an antioxidant, and has been linked to brain and heart health and reduction in the occurrence of cancer and diabetes.
On another note, raspberries are a fibre powerhouse! Fibre is a non-digestible carbohydrate found in plant foods. Consuming enough of it is an essential part of a healthy lifestyle, as it helps regulate bowels, lower blood cholesterol levels, and keeps you feeling full for longer. Did you know that one cup of raspberries contains more than twice the amount of fibre found in a cup of strawberries or blueberries? In number form, one cup of raspberries packs in 8g of fibre, while strawberries and blueberries each provide around 3g per cup. Don’t get me wrong, all berries are a great choice, but extra fibre from raspberries is certainly a bonus! The average adult should aim for between 25 and 38 grams of fibre per day, which means that adding some raspberries to your breakfast in the morning will be a great start to meeting that recommendation.
Today’s recipe is another quick and easy one, with delicious results. Pancakes have long been found on the breakfast table thanks to their ease in preparation and ability to feed a crowd, but I personally find they can get a bit boring after a while. This boredom motivated me to switch things up a bit and try something new! I added ricotta to the pancake batter for a boost of protein and a fluffier end result, along with lemon zest for a flavour flair. The raspberry sauce is tangy but just sweet enough, and makes the perfect topper. Give them a try and let me know what you think!
*Serves 4
Prep Time: 10 minutes
Cooking Time: 20 minutes
Ingredients
1 ½ cups flour
2 tablespoons sugar
2 tablespoons baking powder
½ teaspoon salt
1 cup milk
½ cup ricotta
2 eggs
2 teaspoons lemon zest
2 tablespoons vegetable oil
4 cups fresh raspberries
¼ cup lemon juice
3 tablespoons sugar, or to taste
½ tablespoon cornstarch
1 tablespoon water
Oil for cooking
Instructions
Whisk together the dry ingredients (flour, sugar, baking powder, salt) in a large bowl. Set aside for a few minutes.
Next, grab another bowl and whisk together the milk and ricotta until smooth.
Crack the eggs into the milk mixture one at a time, whisking after each until smooth.
Add the vegetable oil and lemon zest and whisk once more.
Grab that bowl of dry ingredients again and make a well in the center. Slowly pour the wet ingredients into the dry, and carefully fold together.
Mix until well incorporated. The batter will be quite thick – that’s okay!
Place a non stick pan over medium-low heat and add 1 tablespoon of neutral cooking oil (canola works well!). Swirl the oil around so that the pan is evenly coated.
Begin to scoop the pancake batter into the pan. I used a ¼ measuring cup. My pancakes turned out super thick and fluffy but quite small. Feel free to use a larger size and/or spread out the batter more in the pan to achieve your desired pancake shape.
Cook the pancakes over medium/low heat until bubbles begin to appear on top. At this point, flip the pancakes and cook until golden brown on both sides.
Place the prepped pancakes into a warm oven or toaster oven to keep warm until breakfast is served. I like to turn the oven to 200⁰F, wait until it preheats, then turn it off again. This creates a nice warm environment that won't dry out your perfect pancakes.
Once the pancakes are ready, make your delicious raspberry sauce! Place the raspberries, lemon juice, and sugar into a small saucepan over medium heat.
The raspberries will begin to breakdown and the mixture will start to bubble. Continue to cook until it starts to thicken, about 5 minutes. Create a slurry with the cornstarch and water (mix together in a small container) then add to the raspberry mixture. Cook for approximately 2 minutes more, until the mixture has reached the desired consistency.
Grab your pancakes and slather with a dollop of sauce. Voila!
Recipe created by Alex Chesney, RD
Blueberry Parfait
The foundation of a parfait is the combination of yogurt, fruit, and granola. It’s a popular snack, found everywhere from large-chain coffee shops to gas station fridges to airport cafes. But did you know that these commercially produced parfaits are often laden with added sugar? For example, a Starbucks parfait packs in 19g of sugar and the version found at Timmies is home to even more ― 25g! That translates to 4.75 and 6.25 teaspoons respectively. According to the World Health Organization (WHO), added/free sugar should be limited to less than 5-10% of our total daily energy intake. This translates to no more than 12 teaspoons of added sugar per day for the average adult. For kids, it’s no more than 6 teaspoons. So that means that a fast food version of a parfait is going to contribute a lot of our daily recommended intake—from nearly half to more than all!
I do want to clarify that some of those grams of sugar will be coming from the naturally found carbohydrates (aka sugars) in the fruits, yogurt, and oats. At present nutrition fact labels unfortunately do not separate added (also known as “free”) sugars from these natural ones, but that may change in the future! For now, we have to rely on the ingredient list. If you see sugar as an ingredient, that means the product has had extra sugar added to it. And if sugar is one of the first ingredients on the list then be aware: there’s probably a lot of it! Now, I’m not saying carbohydrates or sugars are bad or evil. They play a big role in our diets, and it’s important to understand the different types (complex carbs like the ones found in fruits and whole grains vs. simple sugars found in white sugar and honey) and what they do for our bodies. I don’t believe that any food is innately bad, as long as it’s being consumed thoughtfully and in moderation. And one way to ensure moderation is to start making more foods from scratch, at home. Of course, I understand that sometimes there’s absolutely no time for at-home prep, and I get that! There will be crazy busy mornings, long road trips with no other options, and weekends spent at the arena for hockey tournaments. But if we can work towards making that Tim Horton’s parfait the exception and not the day-to-day habit, then we’ll be well on our way to a healthier lifestyle.
And finally, that brings us to today’s creation! A homemade yogurt parfait featuring farm fresh blueberries, a mixture of oats and chia seeds, and plain 2% Greek yogurt sweetened with a touch of our Melon Blossom Honey. Sweetening plain yogurt is a great way to control sugar intake. Pre-sweetened varieties often have an unnecessary amount of sugar added, but plain old yogurt is a bit too tangy for a lot of folks. Adding your own sweetener is a great in-between. The blueberry compote also brings lots of natural sweetness, so between the two this recipe is oh so sweet! Another bonus of this pretty parfait is the fiber it provides. The oats, chia seeds, and berries each contribute fiber and will leave you feeling full and satisfied. Finally, using plain oats and chia seeds vs. a commercially prepared granola will also help cut down the amount of sugar. Store-bought granola often gives the illusion of healthfulness but again is packed full of sneaky sugars. Give this homemade parfait a try and let me know what you think. Feel free to reach out with nutrition-related questions as well!
*Serves 4
Prep Time: 30 minutes
Cooking Time: None
Ingredients
4 cups blueberries, washed
1 cup water
½ teaspoon cinnamon
¼ teaspoon nutmeg
2 cups Greek yogurt
2 teaspoons honey
1 teaspoon vanilla extract
1 cup oats
¼ cup chia seeds
Instructions
To begin, make the blueberry compote. Combine the blueberries, water, cinnamon, and nutmeg in a small saucepan and place on the stovetop over medium/low heat.
Cook the berries with the lid off for approximately 15 minutes. Leaving the lid off while cooking allows for evaporation of some of the liquid, which helps the compote thicken. In this case, while you do want the mixture to thicken, you also want it to be runny enough to mix well with the yogurt.
While the compote cooks, prep your yogurt by whisking it together with the honey and vanilla.
Once the compote is ready, remove from heat. At this point you may allow the compote to cool and then refrigerate for later use. However, you can also use it right away! The warm compote and cool yogurt make a great pair.
Begin to assemble the parfaits! To start, find 4 glass containers – mason jars or drinking glasses both work well. Next, scoop ¼ cup of the yogurt mixture into the bottom of each jar. Top with 2 tablespoons of oats and a ½ tablespoon of chia seeds. Next, spoon in a few scoops of the blueberry compote. Repeat this layering (yogurt, oats, chia seeds, then compote) and top with any extra fresh blueberries.
Enjoy!
Recipe created by Alex Chesney, RD
Gussied Up Grilled Cheese
Grilled cheese is a classic – it’s quick, easy, reliable, and delicious. Now, the standard grilled cheese consists of bread, butter, and cheese. But this is just the beginning! There are tons of possible variations, and today I’ve got one for you featuring one of our favourite summer berries. This grilled cheese still relies on the good ole bread and butter but adds a twist with its combination of balsamic blueberry compote and sharp, tangy goat’s cheese. Sweet and savoury have long been a popular combination, and this recipe proves it to be true once again.
This tasty sandwich is packed full of fiber, thanks to the whole wheat bread and blueberries. Blueberries are also a great source folate (which contributes to production of red blood cells, a healthy heart, and prevention of some birth defects) and potassium (important for our bone, kidney, nerve, and muscle health). Further, blueberries are rich in Vitamin C, which plays an important role in the absorption of plant sources of iron, and bone and muscle health. Additionally, Vitamin C is one of many antioxidants found in blueberries. Antioxidants have been linked to heart health and improved cognitive function as well as reduction in cancer and diabetes.
One last fun fact about blueberries – there’s no waste involved, and they are ultra-fast to prepare! Unlike strawberries which must be hulled, blueberries simply need a quick rinse before they’re good to go.
Overall, you really can’t go wrong with blueberries! And this recipe is a real show stopper. Impress your guests this weekend with our gussied up grilled cheese.
*Serves 4
Ingredients
Balsamic Blueberry Compote
2 cups blueberries, washed
½ cup water
2 teaspoons honey
4 teaspoons balsamic vinegar
1 teaspoon ground dried rosemary
Sandwich
8 slices bread of choice
4 tablespoons butter, softened
1 log goat’s cheese
Instructions
To begin, make the blueberry balsamic compote. Combine the blueberries and water in a small saucepan and place on the stovetop over medium/low heat.
Cook the berries with the lid off for approximately 20 minutes. Leaving the lid off while cooking allows for evaporation of some of the liquid, which helps the compote thicken. Halfway through cooking, stop to gently mash the berries. Don’t mash too much, as you want the berries to maintain some texture! ,
While the compote is cooking, begin to prep the bread for assembling the sandwiches. Spread an even layer of butter on each slice of bread. Place 4 slices butter-side-down into a frying pan. Set the other 4 aside for later use.
Next, spread ¼ of the goat’s cheese log onto each of the 4 slices of bread.
Once the compote is thick and bubbly, add the honey, balsamic vinegar, and ground rosemary. Cook for a couple more minutes, and then remove from heat.
Add 2 tablespoons of compote to each slice of bread in the frying pan. Spread the compote to the edges, then top the sandwich with a second slice of bread, butter side up.
Cook the sandwiches over medium-low heat for approximately 7 minutes per side. The key to a perfectly golden & melty grilled cheese is low and slow. You have to be patient!
Once the goat’s cheese has softened and melted into the blueberry compote and the bread is golden brown, remove the sandwiches from heat and slice in half. Serve alongside a side salad for a perfect summery lunch!
Recipe created by Alex Chesney, RD
Oven-Baked Asparagus Three Ways
Asparagus is one of my favourite veggies for so many reasons. Not only is it packed full of many essential vitamins and minerals and a great source of filling fiber, it also has an uncanny ability to pair well with a seemingly endless number of flavour combinations. These quick and easy recipes below are a perfect example of this versatility. No matter what food mood you’re in, asparagus can work for you!
These recipes also offer a great way to squeeze veggies into our busy schedules. Finding time for a well-rounded meal that the whole family will enjoy can be tough to do when you’re juggling work, school, extra-curricular activities, and more. Offering a variety of flavours means you can easily cater to personal preferences while still using just one baking dish. And what’s easier than a wash and toss recipe like this?! Wash and snap the asparagus, toss in the wet ingredients, and follow up with the dry. Give another toss, spread on the baking dish, then pop in the oven. Serve alongside a whole grain and a lean protein and voilà! Dinner is ready.
Give these combos a try and let us know what your favourite is.
From left to right: Lemony Goodness, Garlic & Ginger, Chili Lime
*Serves 2-4
Prep Time: 5 minutes
Cooking Time: 5-8 minutes
Flavour Combination Options
Lemony Goodness
1/3 bunch asparagus
2 teaspoons lemon juice
1 teaspoon olive oil
½ teaspoon black pepper
¼ teaspoon salt
Chili Lime
1/3 bunch asparagus
¼ teaspoon cayenne pepper (more if you like it real spicy!)
2 teaspoons lime juice
1 teaspoon chili powder
Garlic & Ginger
1/3 bunch asparagus
1 teaspoon sesame oil
½ teaspoon garlic powder
½ teaspoon dried ginger
Pinch of sesame seeds
Instructions
Preheat the oven to 400⁰F.
Prep the asparagus: wash & snap off the ends.
Choose your favourite flavours.
Toss the asparagus with the liquid ingredients, followed by the dry.
Spread prepared asparagus stalks evenly on a baking sheet (you can like the sheet with parchment paper for quicker cleanup).
If using fresh lemon & limes, cut a few slices off and lay them on top of the asparagus for an extra punch of flavour and stunning presentation.
Pop in the oven and bake for 5-8 minutes, watching closely.
Serve alongside a whole grain and lean protein for the perfect weeknight meal.
Enjoy!
Recipe created by Alex Chesney, RD
Asparagus & Italian-Spiced Grape Tomato Pasta Salad
Warm weather and pasta salad go hand in hand! It's a great option for a BBQ potluck, or the perfect make-ahead lunch. This recipe is overflowing with filling fiber thanks to the whole wheat pasta, asparagus, and beans. The beans also offer up a lean source of protein that will help keep you full and satisfied all afternoon long. The low-fat oil and vinegar dressing packs a serious flavour punch thanks to the addition of many herbs and spices. Feel free to play around with these and customize to your liking! Finally, this salad features an extra special ingredient: one of our newer preserves, Italian-Spiced Grape Tomatoes. I always find myself craving tomatoes this time of year, when there are still months between me and our freshly picked field-grown varieties. Fortunately, a jar of these little preserves is a wonderful placeholder. They are the perfect addition to this recipe, as they are pre-seasoned with even more herbs and spices. They are also nice and soft, and blend seamlessly into the salad.
Visit us on-farm or at a farmers’ market this week to stalk (get it?!) up on freshly-picked asparagus and other fresh produce and preserves. Mention this recipe to any of our staff, and get a special Mix & Match deal: 1 lb of asparagus and 1 jar of Italian-Spiced Grape Tomatoes for just $10!
Offer applies from today until end of asparagus season.
*Serves 6
Prep Time: 10 minutes
Cooking Time: 20 minutes
Ingredients
Pasta Salad
2 cups whole wheat pasta noodles of your choice (macaroni works well!), dried
1 lb. asparagus, washed with ends trimmed
1 jar Thames River Melons Italian-Spiced Grape Tomatoes
¼ cup feta cheese, crumbled
1 can beans (black beans, chickpeas, or kidney beans) drained and rinsed
Dressing
2 tablespoons olive oil
2 tablespoons red wine vinegar
½ tablespoon mayonnaise
½ teaspoon dried basil
½ teaspoon dried oregano
¼ teaspoon dehydrated onions
¼ teaspoon garlic powder
Dash of salt
Dash of black pepper
Instructions
Wash the asparagus thoroughly, then trim the ends, as they are tough and not tasty to eat! Once washed, cook the asparagus using your favourite method. You could roast it (8 minutes in a 400⁰F oven), BBQ it (8 minutes on a hot grill), or steam it (5 minutes in a steamer). Any method will do!
Next, cook the pasta according to package directions. Once cooked, drain in a colander and transfer to a large bowl. Don't rinse the pasta, as this decreases its ability to soak up the dressing!
Once the asparagus has cooked, cut the stalks into bite-sized chunks and add them to the bowl along with the cooked pasta.
Next, open the jar of Italian-spiced grape tomatoes and drain most of the liquid. Toss the tomatoes and a small amount of the remaining liquid into the salad mixture of pasta & asparagus.
Open the can of beans of your choice, drain and rinse them, then add to the growing salad mixture.
Crumble the feta cheese and add this to the salad as well.
Finally, prepare the dressing by vigorously whisking together the oil, vinegar, and mayonnaise (which acts as an emulsifier). Once mixed well, add the spices and whisk again.
Drizzle the dressing over the pasta salad ingredients and toss the salad together.
Serve right away or chill in the fridge overnight and serve the next day.
Enjoy!
Recipe created by Alex Chesney, RD
Asparagus Fries with Garlic Dipping Sauce
Asparagus season is here! We endured many weather-related ups and downs to get here, but we’ve made it at last. Our favourite spring veggie has burst into season, and we can’t get enough of it! Although my favourite way to enjoy the first asparagus of the year is simply steamed with a dab of butter and sprinkling of salt and pepper, I also love to get creative. On that note, check out these asparagus fries!
They are oven-baked, but still deliciously crispy: a great alternative to traditionally deep-fried fries. The parmesan cheese gives them a wonderful saltiness without needing to add much extra sodium, and asparagus offers some essential vitamins and minerals, too! Did you know that asparagus is a decent source of iron? Now, it’s important to keep in mind that any plant-based source of iron is non-heme, which means that its not as easily absorbed as heme-iron, found in meat, fish, and poultry. However, pairing non-heme iron with Vitamin C helps it be absorb more efficiently. And as I mentioned earlier, asparagus just so happens to offer both! Although I would certainly not recommend relying on asparagus alone for your daily iron requirements (8mg/day for men and 18mg/day for women, ages 19-50), it is a fun little fact.
Finally, top off the recipe with a creamy, garlicky sauce, and I think we’ve got a winner! Give it a try and let me know what you think.
Prep Time: 20 minutes
Baking Time: 10 – 12 minutes
Cooking Time: 6
Ingredients
Asparagus Fries
1 bunch asparagus
2/3 cup bread crumbs
2/3 cup parmesan cheese
2/3 cup flour
2 eggs
¼ teaspoon salt
¼ teaspoon pepper
¼ teaspoon dried basil
¼ teaspoon red pepper flakes
¼ teaspoon garlic powder
Cooking spray (optional)
Garlic Dipping Sauce
¼ cup Greek yogurt
2 tablespoons mayonnaise
½ - 1 teaspoon sriracha or other hot sauce
½ teaspoon garlic powder
Instructions
Wash asparagus and trim or snap off the ends.
Prepare a baking sheet by lining it with parchment paper. Set aside for later.
Preheat oven to 400⁰F.
Whisk eggs together and place in a deep dish or shallow bowl.
Whisk together pepper and flour and place on a plate.
Whisk together bread crumbs, parmesan cheese, salt, and other herbs and place on a plate.
Begin to assemble the fries:*
Rinse asparagus stalk.
Roll in the flour mixture.
Roll in the egg mixture.
Roll in the bread crumb mixture.
Place coated asparagus stalks on the prepared baking sheet. Repeat until all asparagus stalks are coated.
Sprinkle with any extra bread crumb mixture, then spray generously with cooking spray (optional, but gives increased crispiness!).
Bake in preheated oven for 10 – 12 minutes, turning once halfway through.
While the fries are baking, prepare the dipping sauce by whisking together all ingredients.
Once fries are baked, remove from the oven and serve with the dipping sauce. Enjoy!
Recipe created by Alex Chesney, RD
Stuffed Green Pepper
Our pick-your-own patch is still full to the brim of delicious sweet peppers available for you to come harvest. While peppers are often found within salsas and sauces, they can also be the star of the show at dinner time! Check out this stuffed pepper recipe to see what I mean. It’s not only delicious, but also a great way to use up leftovers. I created this recipe on a Monday afternoon, following a Sunday night BBQ. My fridge was full of a random assortment of leftovers – sausages, veggies from kabobs, and a bit of brown rice. I did a bit of chopping, mixed it all up with some cheese and BBQ sauce, stuffed it inside a pepper, and bam! A delicious meal all in one. Pretty nutritious too! It’s heavy on the veggies, and features brown rice, both high-fiber foods, which means it will leave you feeling full and satisfied.
What’s more is it’s not only healthy for our bodies, but also for the planet. Using up leftovers is a great way to minimize food waste. Did you know that each year in Canada, $31 billion worth of food is wasted? That works out to approximately $28/week for the average household. Nearly 50% of Canadian food waste occurs in the home, too.* So although tossing leftovers in the trash or compost may seem like no big deal, it really does add up for not just your pocket but also the health of our world. Small, everyday changes in the way we think about food and food waste really can make a difference!
Overall, this recipe is by no means set in stone. Feel free to get creative and swap out the meat or veggies for whatever you have available. I’m excited to see what you come up with!
*http://tfpc.to/food-waste-landing/food-waste-theissue
*Serves 4
Prep Time: 15 minutes
Cooking Time: 25-30 minutes
Ingredients
4 sweet green pepper
2 pre-cooked sausages
2 cups cooked mixed veggies: zucchini, bell peppers, mushrooms, diced jalapeno, onion or whatever you have on hand
1 cup cooked brown rice
¾ cup sharp cheddar cheese
¼ cup BBQ sauce
Instructions
Preheat the oven to 400°F. Fun fact, you can also use a toaster oven! That’s what I did for this recipe, in an attempt to keep the house cooler during this hot summer weather.
Carefully slice off the top of the peppers. Remove the seeds and white membranes by carefully sliding a paring knife around the inside of the peppers and then tugging it all out. This is a handy trick, as it keeps the mess to a minimum!
Place the peppers in a microwave-safe dish. Add about 1 cup of water to the dish, so that it reaches approximately 1 cm up the side of the pepper.
Microwave the peppers in 30 second increments, for a total of 3 minutes. This steams them, par-cooking them so that they cook evenly later on in the recipe along with the filling.
While the peppers are cooking, mix together the rice, chopped veggies, BBQ sauce, and cheese (but save a little bit for the end!) in a small bowl. Set aside
Carefully remove the peppers from the microwave – they will be very hot! I recommend using oven mitts, just to be safe.
Transfer the steamed peppers to an oven-safe dish. Season the inside of the peppers with a sprinkle of garlic powder, salt, and pepper. Transfer the rice and vegetable mixture into the peppers, and top with a little bit more cheese.
Place in the pre-heated oven and bake for 25-30 minutes, until the peppers are browned and the cheese is melted and browning.
Remove from the oven & serve! Be careful, though – they will be hot!
Recipe created by Alex Chesney, RD