Gussied Up Grilled Cheese

Grilled cheese is a classic – it’s quick, easy, reliable, and delicious. Now, the standard grilled cheese consists of bread, butter, and cheese. But this is just the beginning! There are tons of possible variations, and today I’ve got one for you featuring one of our favourite summer berries. This grilled cheese still relies on the good ole bread and butter but adds a twist with its combination of balsamic blueberry compote and sharp, tangy goat’s cheese. Sweet and savoury have long been a popular combination, and this recipe proves it to be true once again.

This tasty sandwich is packed full of fiber, thanks to the whole wheat bread and blueberries. Blueberries are also a great source folate (which contributes to production of red blood cells, a healthy heart, and prevention of some birth defects) and potassium (important for our bone, kidney, nerve, and muscle health). Further, blueberries are rich in Vitamin C, which plays an important role in the absorption of plant sources of iron, and bone and muscle health. Additionally, Vitamin C is one of many antioxidants found in blueberries. Antioxidants have been linked to heart health and improved cognitive function as well as reduction in cancer and diabetes.

One last fun fact about blueberries – there’s no waste involved, and they are ultra-fast to prepare! Unlike strawberries which must be hulled, blueberries simply need a quick rinse before they’re good to go.

Overall, you really can’t go wrong with blueberries! And this recipe is a real show stopper. Impress your guests this weekend with our gussied up grilled cheese.

Blueberry Balsamic Grilled Cheese.jpg

*Serves 4

Ingredients

Balsamic Blueberry Compote

2 cups blueberries, washed

½ cup water

2 teaspoons honey

4 teaspoons balsamic vinegar

1 teaspoon ground dried rosemary

Sandwich

8 slices bread of choice

4 tablespoons butter, softened

1 log goat’s cheese

Instructions

  1. To begin, make the blueberry balsamic compote. Combine the blueberries and water in a small saucepan and place on the stovetop over medium/low heat.

  2. Cook the berries with the lid off for approximately 20 minutes. Leaving the lid off while cooking allows for evaporation of some of the liquid, which helps the compote thicken. Halfway through cooking, stop to gently mash the berries. Don’t mash too much, as you want the berries to maintain some texture! ,

  3. While the compote is cooking, begin to prep the bread for assembling the sandwiches. Spread an even layer of butter on each slice of bread. Place 4 slices butter-side-down into a frying pan. Set the other 4 aside for later use.

  4. Next, spread ¼ of the goat’s cheese log onto each of the 4 slices of bread.

  5. Once the compote is thick and bubbly, add the honey, balsamic vinegar, and ground rosemary. Cook for a couple more minutes, and then remove from heat.

  6. Add 2 tablespoons of compote to each slice of bread in the frying pan. Spread the compote to the edges, then top the sandwich with a second slice of bread, butter side up.

  7. Cook the sandwiches over medium-low heat for approximately 7 minutes per side. The key to a perfectly golden & melty grilled cheese is low and slow. You have to be patient!

  8. Once the goat’s cheese has softened and melted into the blueberry compote and the bread is golden brown, remove the sandwiches from heat and slice in half. Serve alongside a side salad for a perfect summery lunch!

Recipe created by Alex Chesney, RD


Oven-Baked Asparagus Three Ways

Asparagus is one of my favourite veggies for so many reasons. Not only is it packed full of many essential vitamins and minerals and a great source of filling fiber, it also has an uncanny ability to pair well with a seemingly endless number of flavour combinations. These quick and easy recipes below are a perfect example of this versatility. No matter what food mood you’re in, asparagus can work for you!

These recipes also offer a great way to squeeze veggies into our busy schedules. Finding time for a well-rounded meal that the whole family will enjoy can be tough to do when you’re juggling work, school, extra-curricular activities, and more. Offering a variety of flavours means you can easily cater to personal preferences while still using just one baking dish. And what’s easier than a wash and toss recipe like this?! Wash and snap the asparagus, toss in the wet ingredients, and follow up with the dry. Give another toss, spread on the baking dish, then pop in the oven. Serve alongside a whole grain and a lean protein and voilà! Dinner is ready.

Give these combos a try and let us know what your favourite is.

From left to right: Lemony Goodness, Garlic & Ginger, Chili Lime

From left to right: Lemony Goodness, Garlic & Ginger, Chili Lime

*Serves 2-4

Prep Time: 5 minutes

Cooking Time: 5-8 minutes

Flavour Combination Options

Lemony Goodness

1/3 bunch asparagus

2 teaspoons lemon juice

1 teaspoon olive oil

½ teaspoon black pepper

¼ teaspoon salt

Chili Lime

1/3 bunch asparagus

¼ teaspoon cayenne pepper (more if you like it real spicy!)

2 teaspoons lime juice

1 teaspoon chili powder

Garlic & Ginger

1/3 bunch asparagus

1 teaspoon sesame oil

½ teaspoon garlic powder

½ teaspoon dried ginger

Pinch of sesame seeds

Instructions

  1. Preheat the oven to 400⁰F.

  2. Prep the asparagus: wash & snap off the ends.

  3. Choose your favourite flavours.

  4. Toss the asparagus with the liquid ingredients, followed by the dry.

  5. Spread prepared asparagus stalks evenly on a baking sheet (you can like the sheet with parchment paper for quicker cleanup).

  6. If using fresh lemon & limes, cut a few slices off and lay them on top of the asparagus for an extra punch of flavour and stunning presentation.

  7. Pop in the oven and bake for 5-8 minutes, watching closely.

  8. Serve alongside a whole grain and lean protein for the perfect weeknight meal.

  9. Enjoy!

Recipe created by Alex Chesney, RD

Asparagus & Italian-Spiced Grape Tomato Pasta Salad

Warm weather and pasta salad go hand in hand! It's a great option for a BBQ potluck, or the perfect make-ahead lunch. This recipe is overflowing with filling fiber thanks to the whole wheat pasta, asparagus, and beans. The beans also offer up a lean source of protein that will help keep you full and satisfied all afternoon long. The low-fat oil and vinegar dressing packs a serious flavour punch thanks to the addition of many herbs and spices. Feel free to play around with these and customize to your liking! Finally, this salad features an extra special ingredient: one of our newer preserves, Italian-Spiced Grape Tomatoes. I always find myself craving tomatoes this time of year, when there are still months between me and our freshly picked field-grown varieties. Fortunately, a jar of these little preserves is a wonderful placeholder. They are the perfect addition to this recipe, as they are pre-seasoned with even more herbs and spices. They are also nice and soft, and blend seamlessly into the salad.

Visit us on-farm or at a farmers’ market this week to stalk (get it?!) up on freshly-picked asparagus and other fresh produce and preserves. Mention this recipe to any of our staff, and get a special Mix & Match deal: 1 lb of asparagus and 1 jar of Italian-Spiced Grape Tomatoes for just $10!

Offer applies from today until end of asparagus season.

Updated pasta salad (6) edited.jpg


*Serves 6

Prep Time: 10 minutes

Cooking Time: 20 minutes

Ingredients

Pasta Salad

2 cups whole wheat pasta noodles of your choice (macaroni works well!), dried

1 lb. asparagus, washed with ends trimmed

1 jar Thames River Melons Italian-Spiced Grape Tomatoes

¼ cup feta cheese, crumbled

1 can beans (black beans, chickpeas, or kidney beans) drained and rinsed

Dressing

2 tablespoons olive oil

2 tablespoons red wine vinegar

½ tablespoon mayonnaise

½ teaspoon dried basil

½ teaspoon dried oregano

¼ teaspoon dehydrated onions

¼ teaspoon garlic powder

Dash of salt

Dash of black pepper

Instructions

  1. Wash the asparagus thoroughly, then trim the ends, as they are tough and not tasty to eat! Once washed, cook the asparagus using your favourite method. You could roast it (8 minutes in a 400⁰F oven), BBQ it (8 minutes on a hot grill), or steam it (5 minutes in a steamer). Any method will do!

  2. Next, cook the pasta according to package directions. Once cooked, drain in a colander and transfer to a large bowl. Don't rinse the pasta, as this decreases its ability to soak up the dressing!

  3. Once the asparagus has cooked, cut the stalks into bite-sized chunks and add them to the bowl along with the cooked pasta.

  4. Next, open the jar of Italian-spiced grape tomatoes and drain most of the liquid. Toss the tomatoes and a small amount of the remaining liquid into the salad mixture of pasta & asparagus.

  5. Open the can of beans of your choice, drain and rinse them, then add to the growing salad mixture.

  6. Crumble the feta cheese and add this to the salad as well.

  7. Finally, prepare the dressing by vigorously whisking together the oil, vinegar, and mayonnaise (which acts as an emulsifier). Once mixed well, add the spices and whisk again.

  8. Drizzle the dressing over the pasta salad ingredients and toss the salad together.

  9. Serve right away or chill in the fridge overnight and serve the next day.

  10. Enjoy!

Recipe created by Alex Chesney, RD

Butternut Squash Lasagna Roll-Ups

This recipe combines some of my all-time favourite winter foods - lasagna and squash! I don't know about you, but warm, comforting, and filling dishes are a must to get me through windy, snowy days like this one. Pairing butternut squash with whole wheat lasagna noodles makes for a meal that's high in fibre and will keep you feeling full. The squash also boasts a hefty serving of Vitamin A, which helps keep our eyes, skin, and immune system healthy. 

Ingredients:
2 cups butternut squash, cooked & mashed
1 teaspoon brown sugar
1 teaspoon butter
2 cups plain, low-sodium tomato sauce
½ teaspoon dried oregano
½ teaspoon dried basil
½ teaspoon garlic powder
¼ teaspoon salt
¼ teaspoon black pepper
¼ teaspoon red pepper flakes (optional, if you like some heat!)
6 whole-wheat lasagna noodles, cooked
¼ cup walnuts
1 small log reduced-fat goat cheese

Instructions:

  1. Preheat oven to 350°F.

  2. Prepare 2 9x13 pans – 1 for the squash, and 1 for the completed lasagna. The pan for the lasagna needs to be sprayed with cooking spray, while the pan for the squash does not.

  3. In the meantime, prep the squash for cooking. To bake, slice squash in half and scoop out the seeds. Place halves skin-side down in a 9x13 baking and add a ½ inch of water around them. Bake for approximately 45 minutes, until flesh is soft and easy to scoop.

  4. While squash is baking, cook the lasagna noodles. Bring a large pot of salted water to a boil, then cook noodles according to package directions. Once cooked, drain and place noodles on a cookie sheet lined with a dish towel to cool. Set aside.

  5. Gather 2 cups of cooked squash, and add brown sugar and butter. Mash together and set aside.

  6. Mix the herbs & spices into the tomato sauce. Set aside.

  7. Once the above ingredients are prepped, you can begin to assemble the lasagna.

  8. Start by spreading approximately 2 tablespoons of goat cheese on each lasagna noodle.

  9. Next, layer on a few tablespoons of mashed squash.

  10. Once the cheese & squash are on each of the noodles, begin to firmly roll them up. Place the rolls seam-side down in the greased baking pan, ensuring they are grouped together (they will not take up the whole pan – that’s okay!)

  11. Carefully pour the prepared tomato sauce over the lasagna rolls, ensuring there is no exposed noodle.

  12. Top each roll with a dollop of goat cheese, and then sprinkle the walnuts all over the top.

  13. Bake the lasagna rolls for 25-30 minutes, until sauce is bubbly and goat cheese is melted and browned.

Recipe created by Alex Chesney, RD


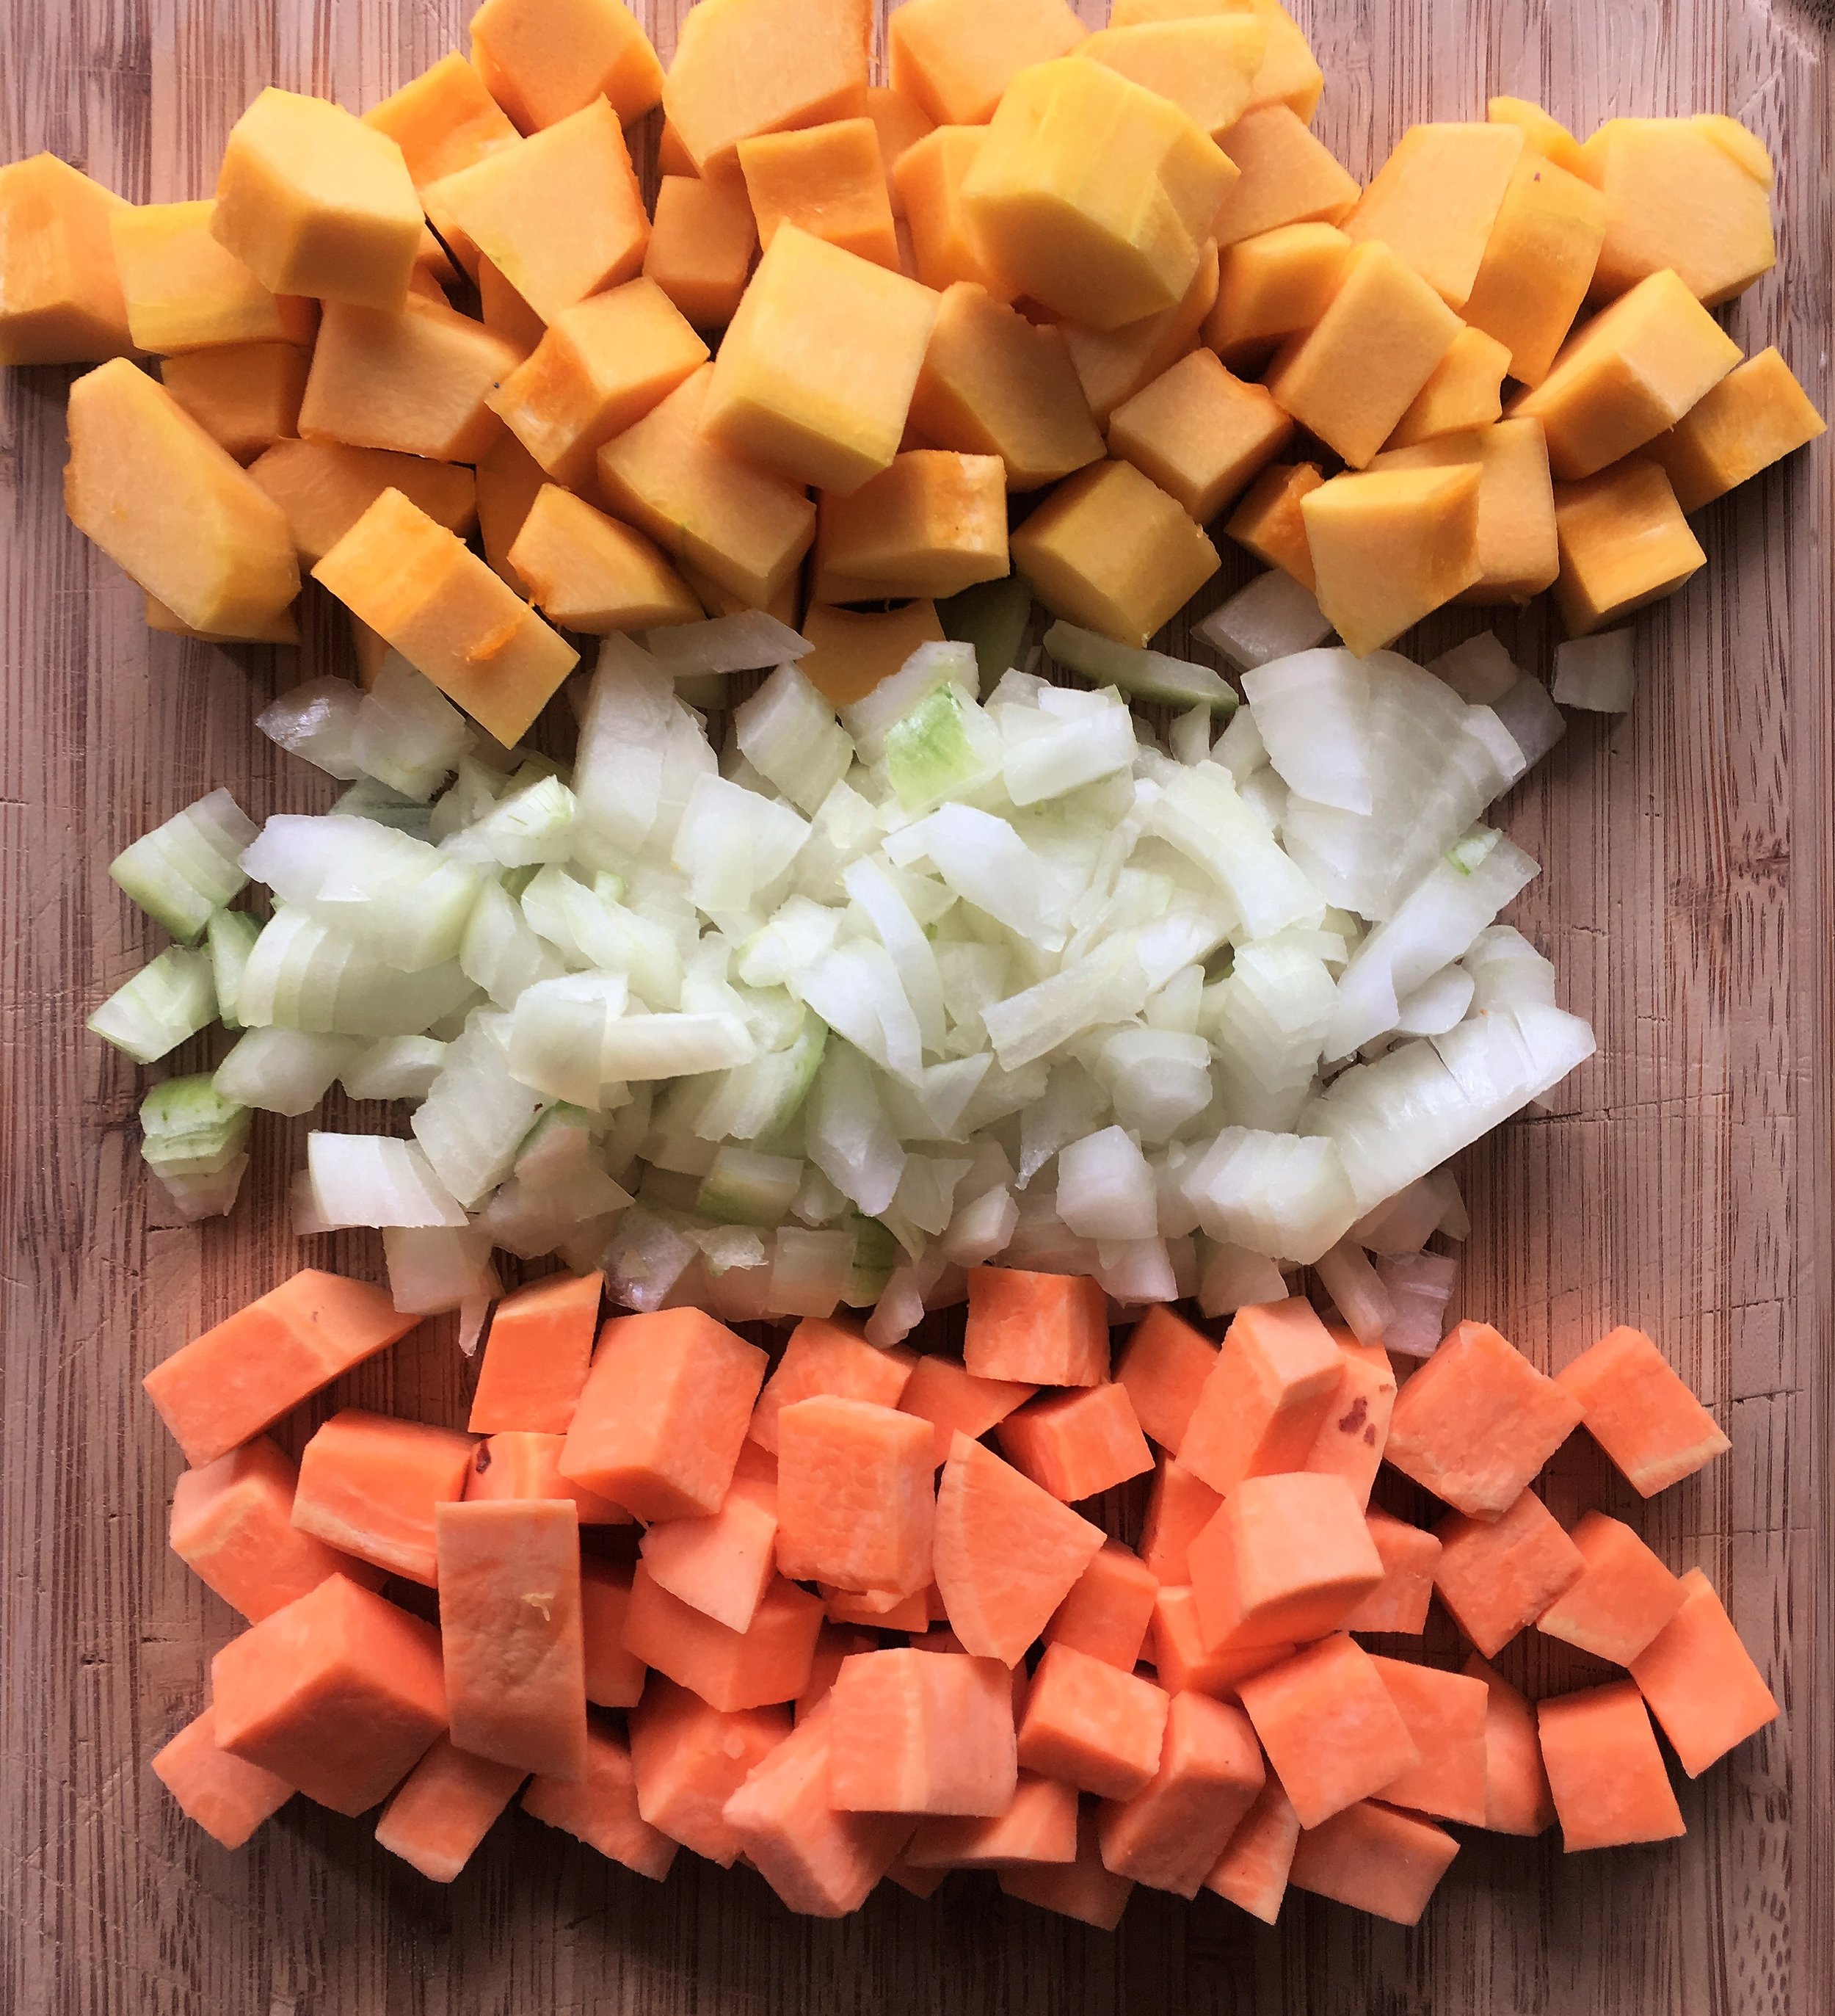
Sweet Potato (Squash) Soup

Sweet Potato (Squash) Soup
*Serves 4-6

This soup features a few of the many fall veggies we have on the farm – delicata squash (aka sweet potato squash), sweet potato, and onion. Both of the squash are small and easy to peel & chop. These powerhouse ingredients are chock full of not only delicious flavour, but also vitamins A and C! Blending the soup + adding some coconut milk provides an amazingly creamy texture and the cinnamon and nutmeg add some wintertime depth to the overall flavour. 

Ingredients:
2 delicata squash (aka sweet potato squash), peeled and cubed
2 large sweet potato, peeled and cube
1 onion, diced
2 cups low-sodium vegetable broth
1/2 cup coconut milk
Pinch of cinnamon and nutmeg
Pinch of salt and pepper

Instructions

  1. Place vegetable broth in a medium-sized pot and add the diced onion and peeled and cubed squash and sweet potato over medium-high heat.

  2. Bring mixture to a boil and then lower heat and simmer for approximately 20 minutes or until squash and sweet potato are tender.

  3. Blend soup mixture using an immersion blender or a blender. If using a blender, allow soup to cool and then transfer in small batches.

  4. Once soup is blended, mix in coconut milk and spices. Add salt and pepper to taste.

    Recipe created by Alex Chesney, RD

Zucchini Lasagna

This neat take on lasagna features zucchini slices instead of pasta noodles. It’s super simple, and super delicious. Zucchini provides lots of fiber, plus vitamins A & C!

*Makes one 9x9 pan of lasagna

Ingredients:
2 large green zucchini, sliced in half and then thinly sliced lengthwise
2 cups tomato sauce (homemade or store-bought)*
½ lb lean ground turkey, cooked
1 cup cheese (mixture of cheddar and mozzarella), grated

Instructions

  1. Preheat oven to 350 F.

  2. Once the zucchini is sliced, it should be briefly pan-fried or grilled to let out some of the moisture. Zucchini has a very high water content, so if it is placed directly into the lasagna, you’ll end up with a watery final product. Fry or grill the lasagna for approximately 2 minutes per side, and then set aside.

  3. Next, thoroughly brown the ground turkey. Divide cooked meat into 2 sections and then set this aside too.

  4. Once the zucchini & turkey have been prepped, it’s time to assemble the lasagna! Making any kind of lasagna is all about the layers. Start off this version by coating the bottom of a 9x9 baking dish with ½ cup tomato sauce. This will prevent sticking. Next, layer slices of zucchini until the bottom of the pan is covered.

  5. On top of the zucchini spread ½ cup of sauce, then sprinkle ¼ cup cheese and half of the ground turkey.

  6. Place another layer of zucchini, sauce, cheese, and meat, then top with one final layer of zucchini. On top of the final zucchini layer, spread the remaining 1 cup of sauce, then sprinkle the remaining ½ cup of cheese.

  7. Bake in preheated oven for 20 minutes, until cheese is melted and browning on top, and sauce is bubbling.

  8. Remove from oven and let sit for 5 minutes, then dig in and enjoy!

* I used a homemade tomato sauce & added my own herbs and spices, which gave me control over the salt content, but if store-bought is your choice, try to choose one that says low/no added sodium. Unfortunately, tomato sauce is often crazy high in salt!

Recipe created by Alex Chesney, RD


Oven-Baked Onion Rings

Onion rings make the perfect addition to a summertime burger & beer on the patio, especially on a long weekend! Although the deep-fried version is super delicious, its high fat content makes it something to be enjoyed just once in a while. Fortunately, I created this tasty oven-baked version that is virtually fat-free, while still giving you that crunch & taste you may be craving. Try them at home today!

*Makes approximately 18 onion rings

Ingredients:
1 fresh sweet onion
¼ cup flour
2 eggs
1 tbsp milk
1-2 cups panko bread crumbs
1 tsp garlic powder
½ tsp salt

Instructions

  1. Line a baking sheet with parchment paper and set aside. Preheat oven to 450 F.

  2. To prepare the onion, remove the greens and the root. Place the onion on its side, and then carefully slice into ¼ inch slices. Separate the slices into individual rings and set aside.

  3. Set up an onion ring prep assembly-line using 3 bowls. Work from left to right: in the first bowl, place the flour, in the second, whisk together the eggs & milk, and in the third, mix together the bread crumbs, garlic powder, and salt.

  4. Begin to assemble the onion rings. One at a time, dip the onion rings into the flour and coat evenly. Next, drop the onion slices into the egg mixture and again, coat evenly. Finally, place the onion rings in the panko mixture and coat evenly once again. Repeat this process for each individual onion ring.

  5. Place coated onion rings on the baking sheet. Once all onion rings are prepped, place in the preheated oven and bake for 12-15 minutes. The coating on the onion rings should be nicely browned. Remove from oven and enjoy!

*Tip: The panko mixture can get quite gummed up from the egg & milk mixture. To ensure the final stage of coating is successful, it helps to only put a little panko at a time into the third bowl, and refresh every 3 rings or so.

Recipe created by Alex Chesney, RD


Mixed Berry Muffins

These muffins are hearty, filling, and delicious! Chock full of fiber from the whole wheat flour, oats, and berries + a boost of protein from the hemp hearts & chia means they'll make the perfect addition to a breakfast-on-the-go or as an afternoon pick-me-up snack. Try topping with a tablespoon of natural peanut butter and pair with a glass of milk. Enjoy!
*Makes 12 muffins

Ingredients

Dry Ingredients:
2 cups whole wheat flour
½ cup oats
1/8 cup hemp hearts
1/8 cup chia seeds
¼ cup sugar
2 tsp baking powder

Wet Ingredients:
1 cup milk
1 egg, lightly beaten
¼ cup canola oil
1 tsp vanilla extract
2 ripe bananas, mashed

Add-ins:
1 cup mixed berries (I used raspberries & blueberries)

Instructions

  1. Preheat oven to 350. Lightly grease a muffin tin, or fill with muffin liners. Set aside until batter is prepared.

  2. In a large mixing bowl, thoroughly whisk together all dry ingredients. Set aside. In a separate bowl, whisk together wet ingredients. Slowly stir wet ingredients into the dry ingredients and mix gently until just combined. Do not overmix or muffins will be tough and chewy! Finally, gently fold in berries.

  3. Using a spring-loaded ice-cream scoop (my favourite tool to ensure evenly sized muffins!) drop muffin batter into muffin tins.

  4. Bake in pre-heated oven for approximately 20 minutes. To check doneness, insert a toothpick. If it comes out clean, your muffins are ready to be removed from the oven.

  5. Let cool, and then dig in!

Recipe created by Alex Chesney, RD


Chia Seed Pudding + Blueberries

It's blueberry season! I have been adding blueberries to just about everything these days, because they are not only super delicious but also packed with nutrition! Blueberries are an excellent source of fibre and of Vitamins A & C - which are important micronutrients and antioxidants! They make the perfect mix-in for this creamy chia seed pudding.

Chia seeds are these nifty little guys that form a pudding-like texture when soaked in liquids. The end result is kind of like tapioca pudding, but with packed with fibre, healthy omega-3 fats, and minerals like iron & calcium. Here I chose a mixture of 1% milk and coconut milk, which allows gives the pudding some incredible creaminess without being too laden with fat.

This recipe can be enjoyed as an afternoon snack or as a tasty dessert! Try it out today & let me know what you think.


*Serves 4

Ingredients

3 tbsp chia seeds
½ cup 1% milk
½ cup coconut milk
1 tsp maple syrup
½ tsp vanilla extract

Instructions

  1. Place all ingredients in a blender and pulse gently until mixed well.

  2. Place the mixture in the fridge for an hour.

  3. Transfer to mason jars, top each serving with ¼ cup of berries, and enjoy!

Note: For an even prettier presentation, try layering - a few spoonfuls of pudding, a sprinkle of blueberries, and repeat!

Recipe developed by Alex Chesney, RD


Freshened-up Potato Salad

Potato salad is a staple during the summer months, but has a reputation for being loaded with mayo. I was determined to come up with a fresh, lighter version that still maintained the delicious flavour and creaminess we all love. Check out my take on this classic, using lots of herbs, Greek yogurt, and some extra veggies. It will be the star of the show at your next barbecue!

Ingredients: 

Salad
1 quart red potatoes (1.5lbs), washed well, cut into equal bite-sized pieces (If potatoes are mixed sizes, cut larger, leave smaller ones whole)
1 tbsp red wine vinegar
¼ teaspoon basil
¼ tsp oregano
¼ tsp paprika
¼ tsp garlic powder

Dressing
½ cup Greek yogurt
1 tbsp mayonnaise
Herbs: basil, oregano, onion flakes, red pepper flakes, salt, pepper – a pinch of each
1 tsp honey Dijon mustard
¾ cup other veggies (ie. red pepper, carrots, celery) – leave them raw to give the salad some crunch & texture

Instructions

  1. Add potatoes to a medium sized pot and cover with water. Season the water with ½ tsp salt (potatoes will absorb more flavour while cooking vs. after!) Bring the water to a boil and cook potatoes for 8-10 minutes, until you can easily poke with a fork.

  2. Drain the potatoes then spread out on a cookie sheet.

  3. Sprinkle with vinegar and spices (basil, oregano, paprika, garlic powder) and allow the potatoes to cool completely.

  4. To make the dressing, whisk together the Greek yogurt, mayo, mustard and spices.

  5. Once the potatoes are cool, gently toss with the other veggies and add the dressing. Mix gently to coat evenly. At this point, the salad can be served, or refrigerated overnight. Allowing it to sit will help the flavour profiles develop more fully.

Recipe created by Alex Chesney, RD