
Looking for some Easter recipe ideas? We’ve pulled a few of our favourites from the past for you to check out!


Blueberry Beet Pancakes

Ingredients
1 cup all-purpose flour
2 tablespoons sugar
2 teaspoons baking powder
½ teaspoon salt
½ cup milk
1 beet, peeled
2 tablespoons canola oil
1 large egg
½ cup blueberries, plus more for serving
Instructions
Place beet in a small pot and cover with water. Bring to a boil and cook until tender, about 10 – 15 minutes depending on the size.
Remove the beet and place in a blender, along with ¼ cup of reserved beet water.
Blend the beet and water until smooth. You should have a bright pink puree!
In a medium bowl, whisk together flour, sugar, baking powder, and salt.
In a large bowl whisk together milk, beet puree, egg, and canola oil until smooth.
Add the flour to the milk and beet mixture and mix until just combined. Some small lumps of flour are ok!
Heat a large non-stick pan over medium. Add a splash of canola oil and use a paper towel to carefully spread it all over the pan.
Add 2 – 3 tablespoons of the pancake batter to the pan and use the back of the measuring spoon to spread the pancake out into a circle.
Let the pancake cook for 1 – 2 minutes, until bubbles start to form. Add a sprinkle of blueberries to the pancake while it cooks.
Once the 2 minutes are up, and lots of bubbles have formed on the top of the pancake, give it a flip. Cook for an additional 1 – 2 minutes.
Serve immediately, or keep warm in a 200°F oven.
In total you should get 6 – 8 pancakes, depending how big you make them.
Unfortunately the beautiful pink colour of the pancake batter is a bit lost during the cooking process, but it’s so much fun while it lasts! I saw the Barbie movie this week and was inspired to make a pink breakfast food because of it.
Enjoy!
Recipe developed & photographed by Alex Chesney, RD

Aunt Geri's Quiche

A super quick & easy family recipe, perfect for serving a crowd at brunch. It's so cheesy, and so delicious! Try pairing with a fruit smoothie and a croissant for a delightful well-rounded meal.
Ingredients
1 stalk green garlic, minced
4 eggs, beaten
1/2 bunch Swiss chard, chopped (spinach or Mustard greens would work too!)
1 cup cottage cheese
2 cups shredded cheddar cheese
Instructions
Preheat the oven to 375°F.
Grease a pie dish with cooking spray and set aside.
Add all ingredients to a mixing bowl and stir until evenly combined.
Transfer egg, cheese, and veggie mixture to the greased pie dish and spread out until evenly distributed.
Transfer prepared pie dish to the oven and bake until puffy and browned, around 30 - 40 minutes.
Recipe photographed by Alex Chesney, RD
Homemade Strawberry-Raspberry Pop Tarts

For the pie crust:
2 1/2 cups flour
3 tablespoons sugar
1 teaspoon kosher salt
1 cup cold unsalted butter, cubed
1/4 cup ice water, plus more as needed
For the filling and glaze:
225g strawberries, washed and hulled
225g raspberries
1/2 cup granulated sugar
2 tablespoons cornstarch
1 teaspoon vanilla extract
1 pinch kosher salt
1 teaspoon lemon juice
Cream or milk, for brushing the dough (optional)
1 cup confectioners' sugar, plus more as needed
1 tablespoon milk, plus more as needed
1/2 teaspoon vanilla extract
Rainbow sprinkles!
Mix the flour, sugar, and salt together in the bowl of a stand mixer or food processor. If using a stand mixer, fit with the paddle attachment. Mix until thoroughly combined. Add the butter to the flour mixture and mix/pulse until the butter has been cut into pea-sized pieces. Add the water and mix/pulse again to combine. Add more water if needed, a tablespoon at a time, just until the dough comes together. Divide the dough in two, wrap with plastic wrap, and refrigerate for at least 30 minutes or as long as overnight.
While the dough chills, add the berries, sugar, cornstarch, salt, and lemon juice to a medium pot and stir to combine. Heat the mixture over medium-low, until berries start to soften and release their juices. Continue cooking until berries are broken down and mixture is glossy and thick. Remove the mixture from heat and let cool/
Next, preheat the oven to 400° F. Tear off a large piece of parchment paper and lay each on a standard-size cookie sheet. One at a time, roll out the two pieces of dough to about 10- by 14 inches. Don’t worry if it’s not a perfect rectangle, and you can cut off any excess pieces and patch up other corners or cracks if needed.
Lay one of the crusts onto the prepared baking sheet. Make sure there’s enough dough on all sides to form a rim. Spread the berry filling evenly over the crust. Top with the other rolled out pie crust (you can use the parchment paper to invert the dough sheet over the filling). Carefully crimp together the edges and fold the excess dough over and under the edge, lifting up the parchment paper underneath to help with this process. Brush with cream, then use a fork to prick the top crust evenly all around.
Place in the oven and bake for 20 minutes. After that, check to make sure that the holes you made are still open (sometimes they shrink and seal up); if not, prick again with a fork—this is to ensure steam can exit. Rotate and return to the oven for another 20 minutes, or until golden brown.
In the meantime, make the glaze by mixing together the icing sugar, milk, and vanilla extract. Add more icing sugar if the glaze is too thin or add more milk if it's too thick.
Allow the pie to cool then spread the glaze over the pie, leaving a small border. Immediately top with the rainbow sprinkles. Slice and serve!
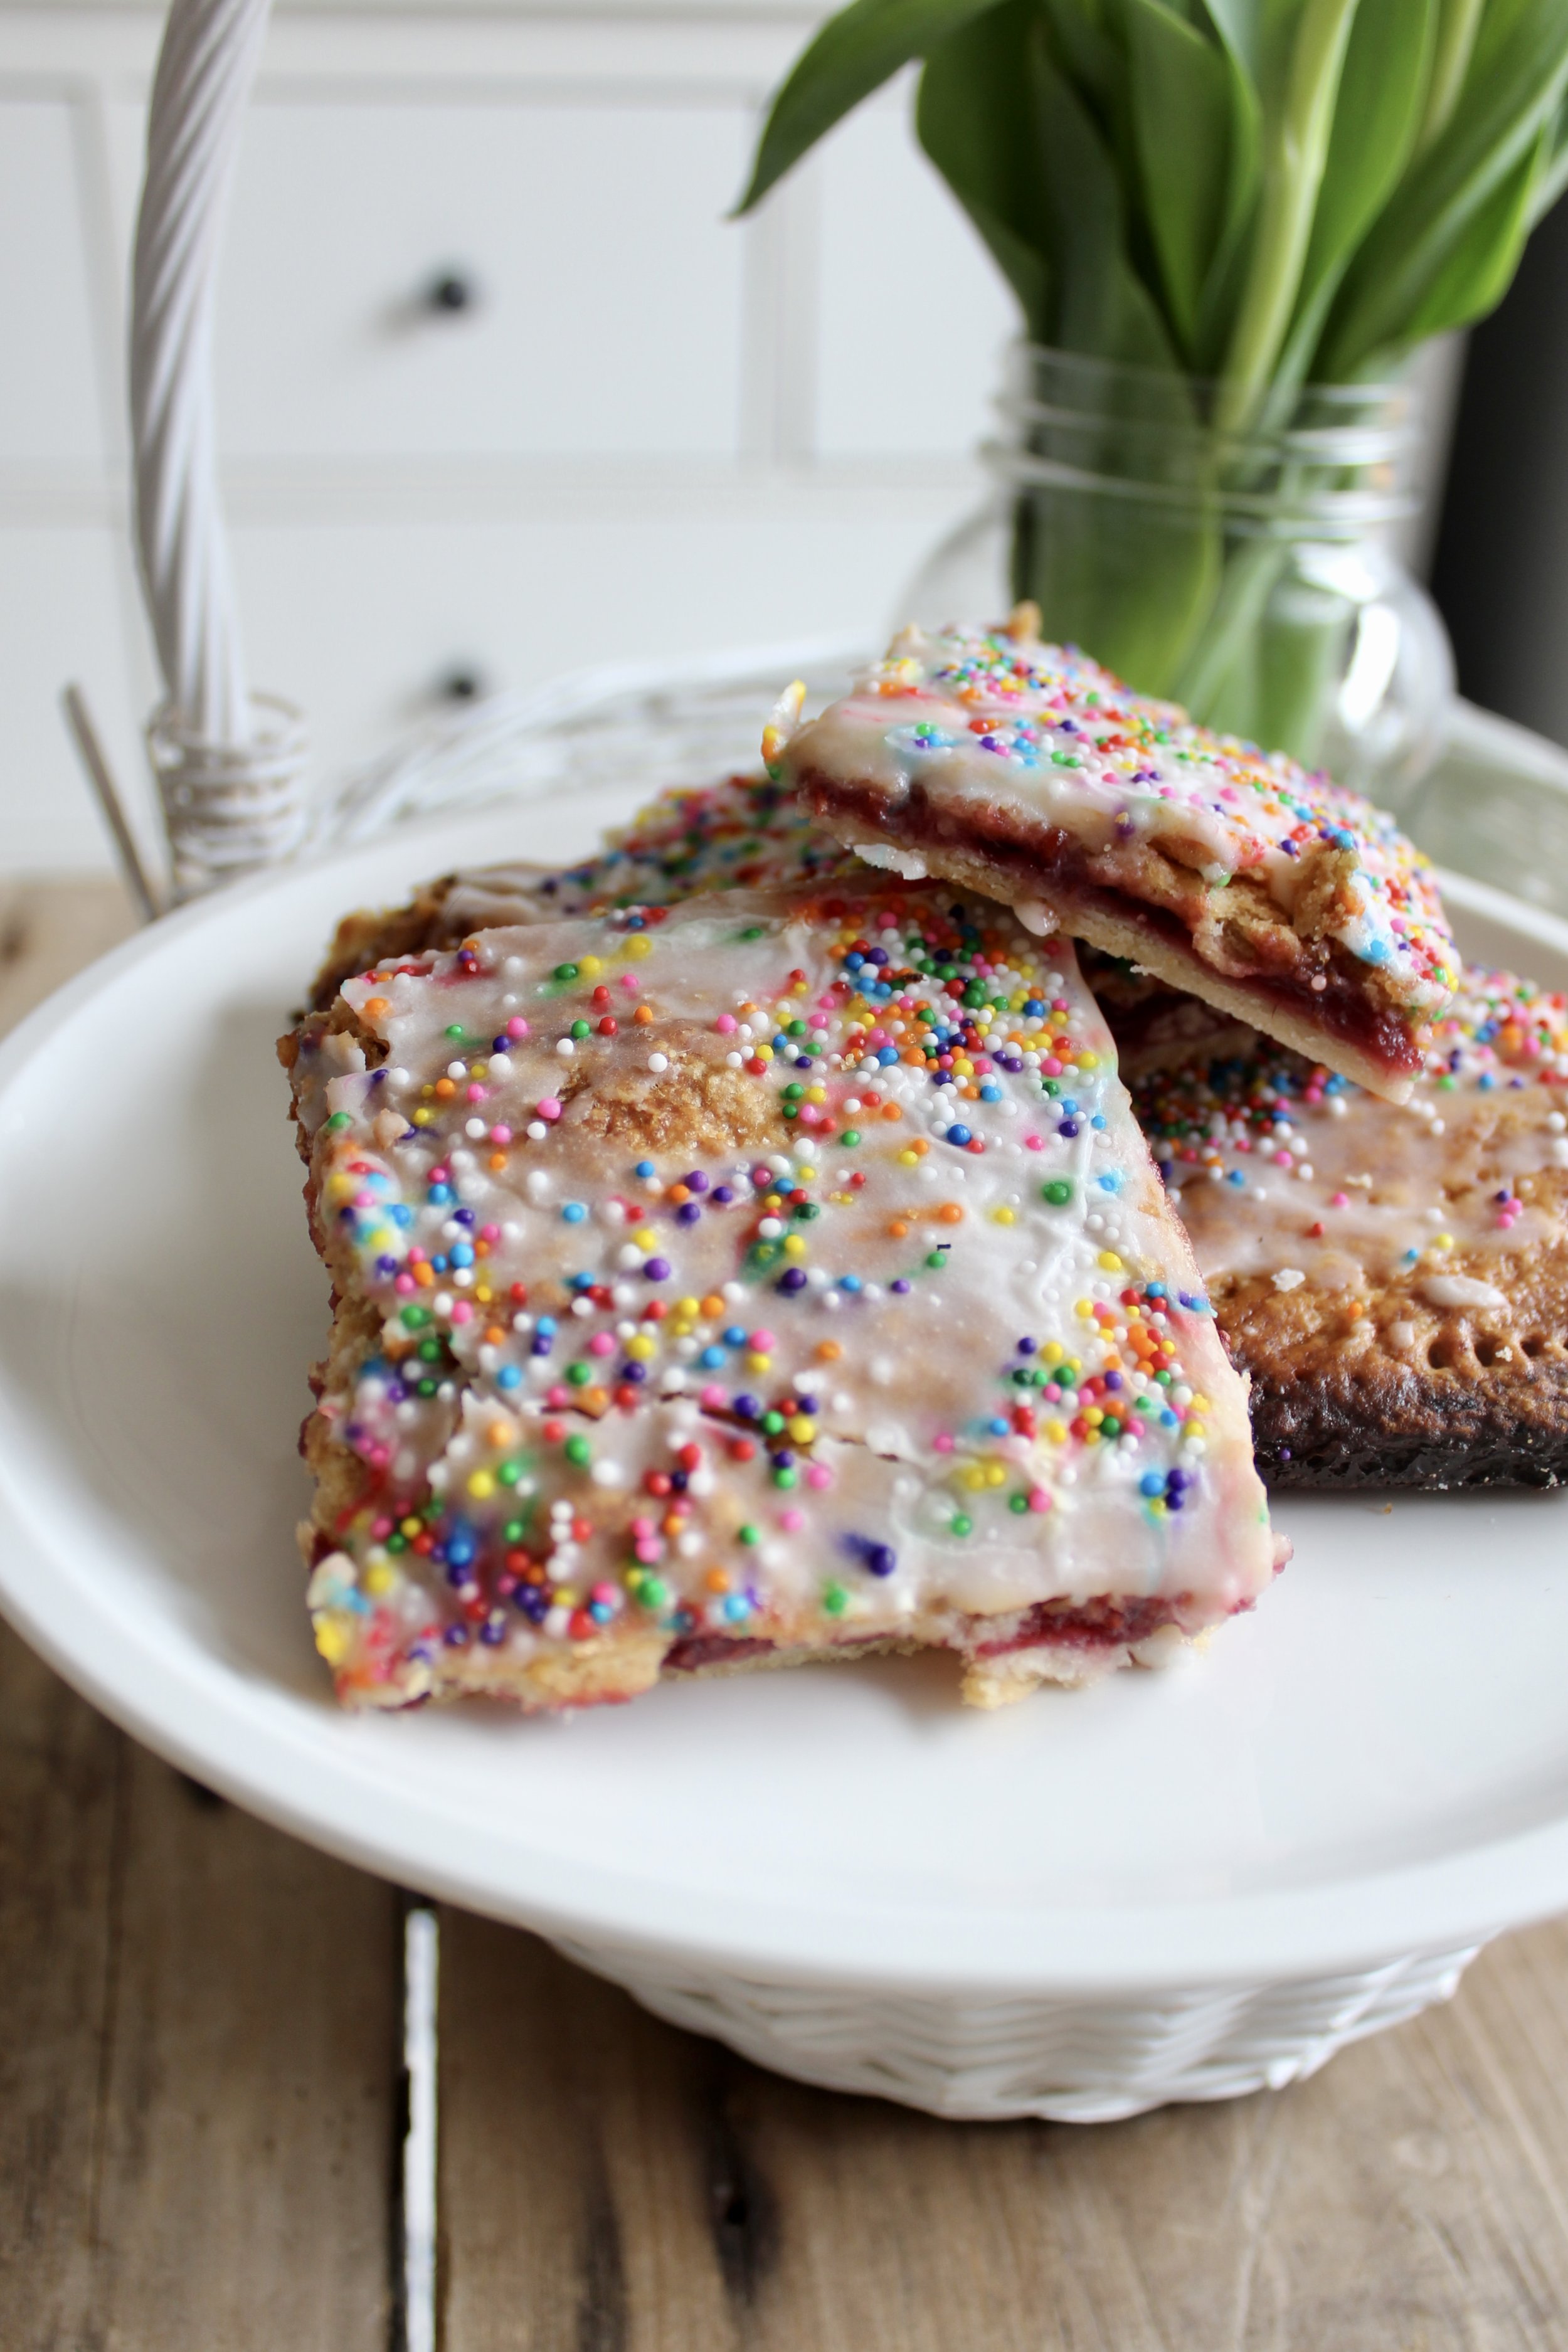
Recipe slightly modified from food52.com and photographed by Alex Chesney, RD
Homemade Hashbrowns

*Makes ~8 hashbrowns
Ingredients
2 medium potatoes, about 1 pound
¼ - ½ an onion, diced (1/2 cup)
4 tablespoons cooking oil
Salt
Pepper
½ teaspoon paprika
½ teaspoon chili powder
¼ teaspoon cayenne
Instructions
Wash and scrub potatoes thoroughly, removing any eyes or spots. Leave the skin on otherwise though, for extra flavour and nutrients!
Once potatoes are prepped, shred them using a box shredder.
Transfer all potato shreds to a thin tea towel, and pull up the edges so they are contained within the cloth. Squeeze the tea towel, expressing as much liquid as possible from the potato shreds.
Place the drained potato shreds into a medium-sized bowl and set aside.
Next, dice the onion, then add to the bowl with the potato shreds.
Finally, add the spices, salt, and pepper to the bowl then mix to combine.
Add 2 tablespoons of cooking oil to a large frying pan, and heat over medium. Add one piece of diced onion to the pan to test the temperature of the oil. Once the onion starts to sizzle you know the pan is ready!
Use a large spring-loaded scoop to portion out the hashbrowns. Add one scoop at a time to the pan with preheated oil. You should be able to fit about 4 hasbrowns at a time. Use a spatula to flatten the scoop of hashbrowns. Cook for about 5 minutes, until the bottom is golden brown and hashbrown holds its’ shape.
Carefully flip, press down, and cook for another 5 minutes, again until golden brown.
Transfer the cooked hashbrowns to a plate lined with papertowel and place in the oven to keep warm. I like to preheat the oven to approximately 180°F before doing this!
Add the remaining 2 tablespoons of oil to the frying pan and repeat the process of making the final four hashbrowns.
Serve with a protein and vegetable for a delicious meal! Pictured here is crumbled tofu and roasted bell peppers but they would also pair well with a fried sunny side up egg, sausages, or grilled chicken. A side salad would make a great accompaniment as well!
Recipe developed and photographed by Alex Chesney, RD
Blueberry Banana Smoothie
Servings: 2
Ingredients
1 cup Blueberries (fresh or frozen-if using fresh, add some ice)
1 Banana (fresh or frozen)
1/2 cup milk of choice (Depending on the desired thickness of the smoothie you may want to modify the amount of liquid added. Less liquid = thicker smoothie; more liquid = thinner smoothie)
Instructions
Add all ingredients to blender.
Blend until all ingredients until mixed. Approximately 30seconds. Add more liquid (either more milk or water) depending on desired thickness. Smoothies are flexible! Feel free to add what you have on hand
*NOTE: It helps your blender if you put softer ingredients closer to the blades and hard, frozen ingredients furthest from the blade. This means if you’re using a traditional blender where the blade is on the bottom, load your smoothie with the fresh, soft ingredients on the bottom, putting ice/frozen items on the top, furthest away from the blade.

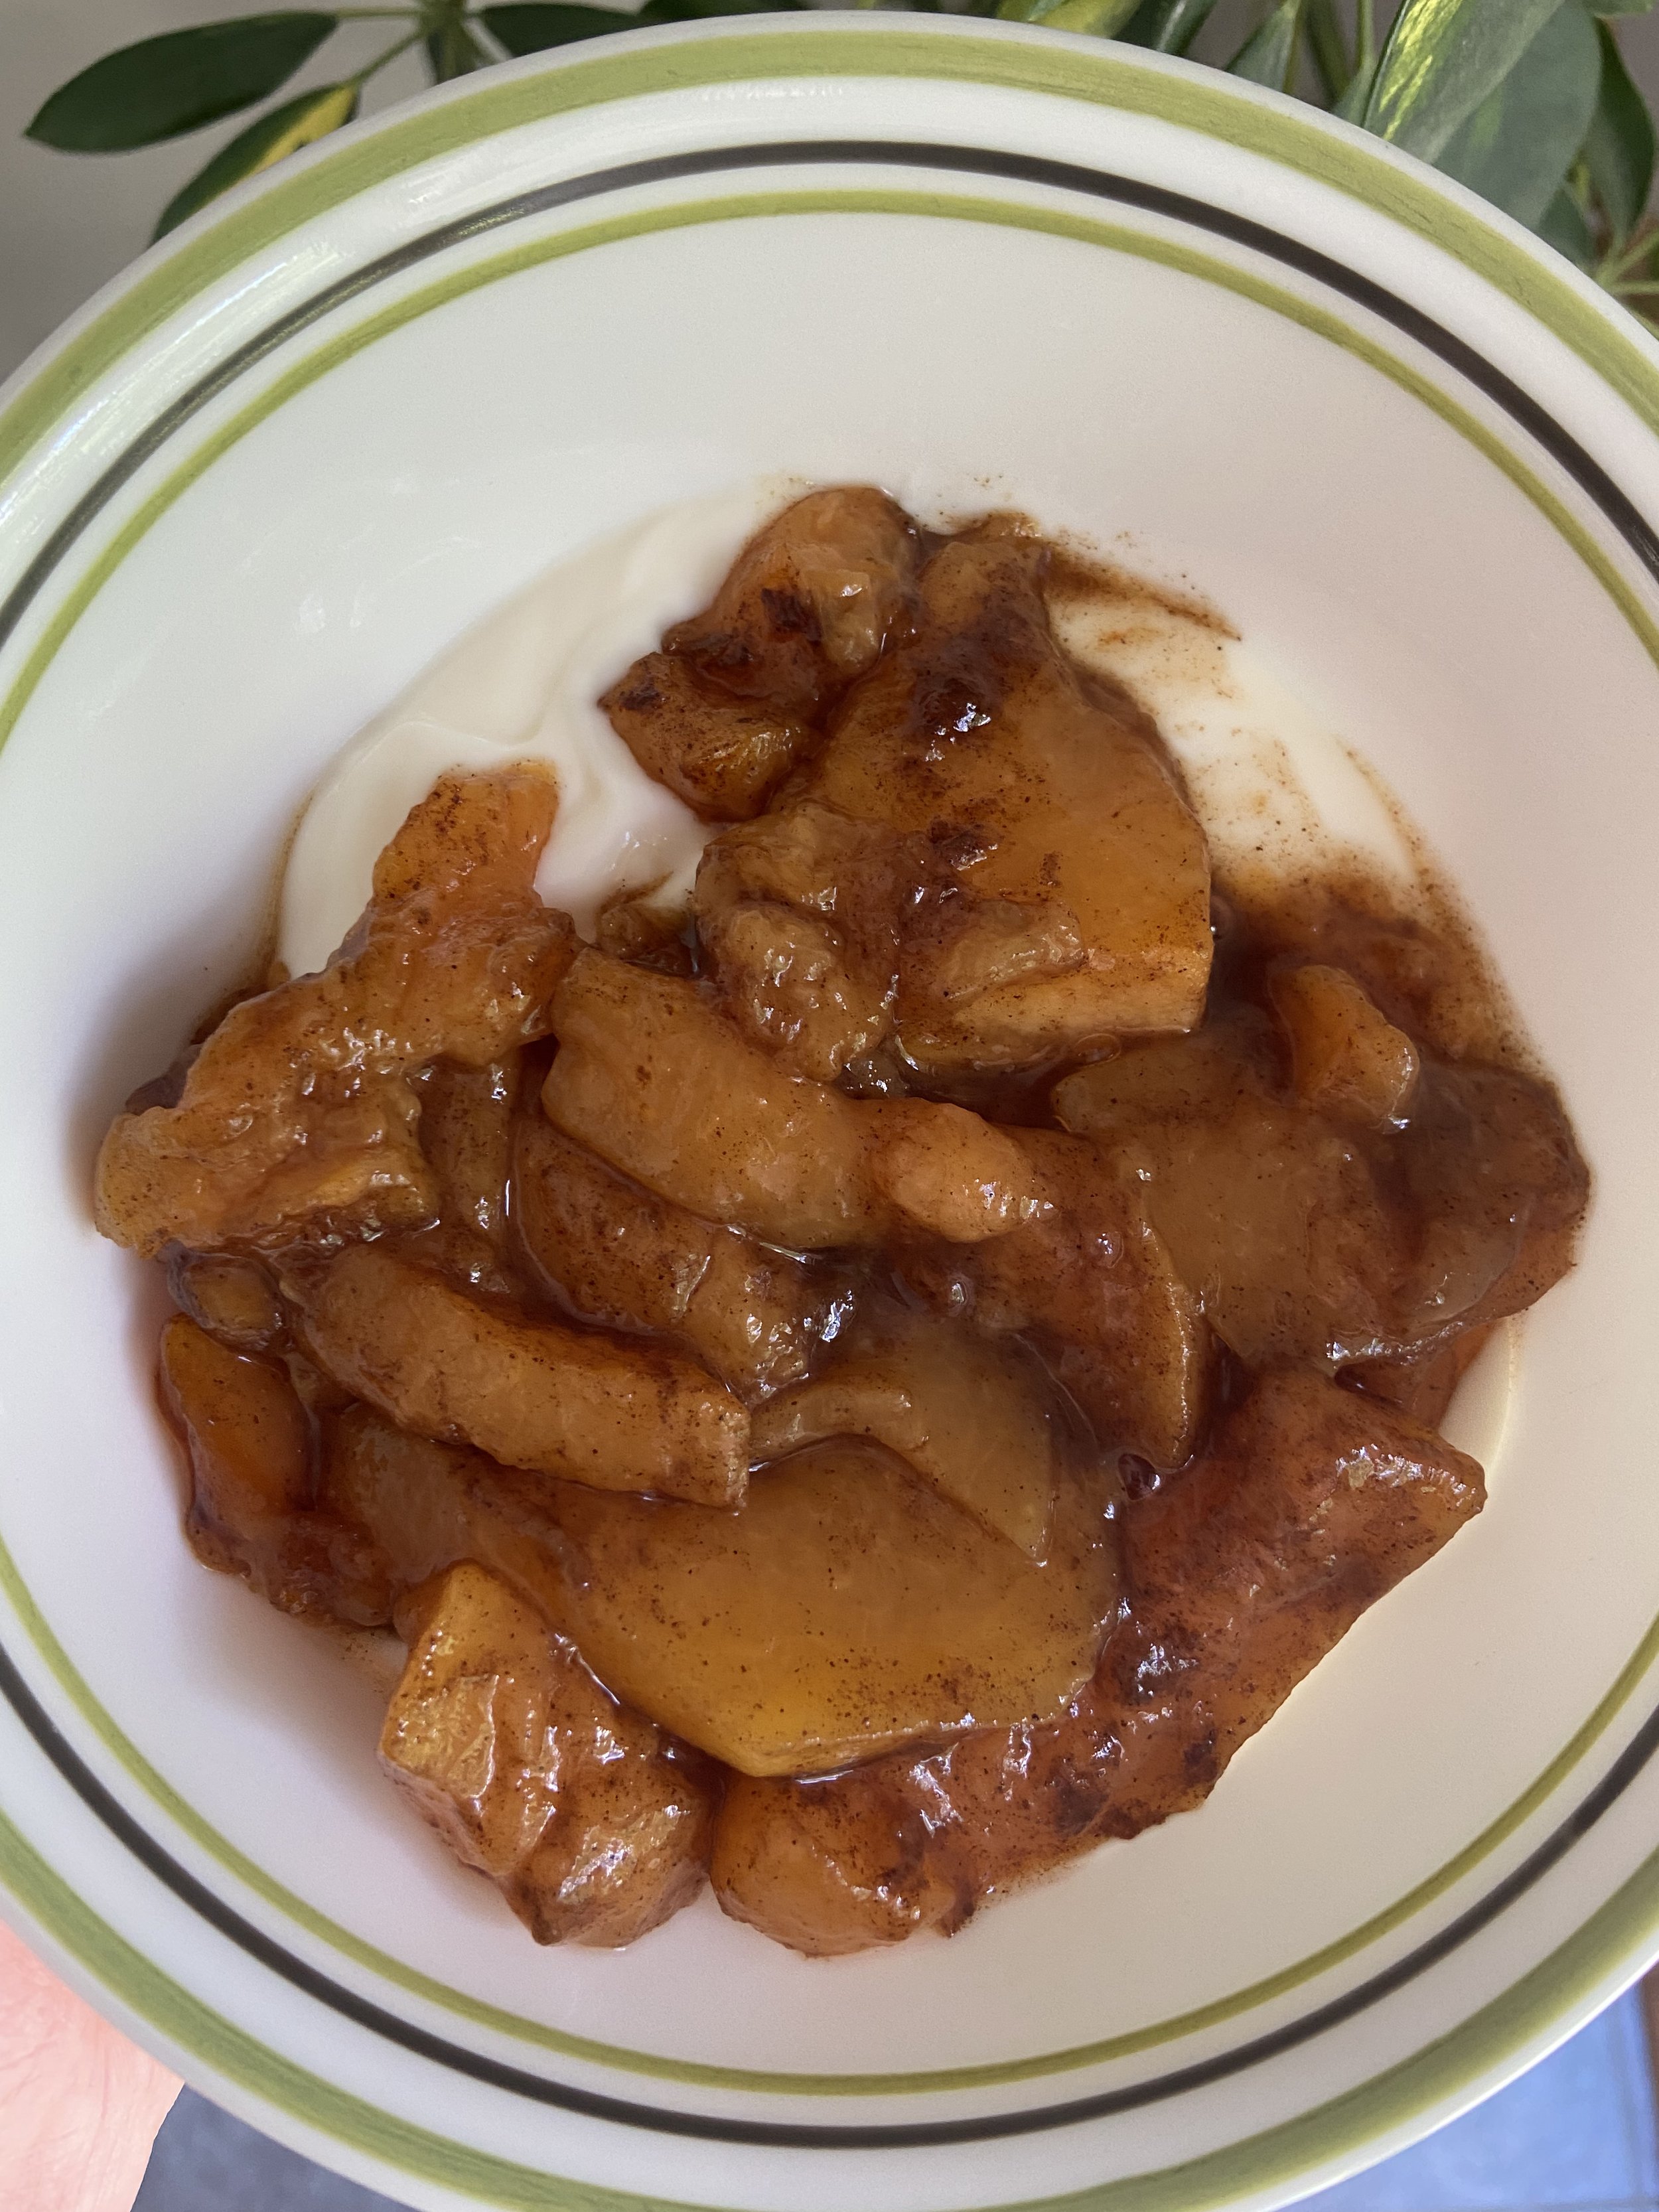
Roasted Cinnamon Muskmelon
Ingredients
1 muskmelon
1 tablespoon honey
1/2 teaspoon cinnamon
Instructions
Preheat the oven to 400°F. Line a baking sheet with parchment paper. Set aside.
Wash the muskmelon with a produce brush. Cut off the outside skin and cut the muskmelon into curved slices.
Combine the muskmelon, honey, and cinnamon in a medium-sized bowl.
Place the mixture on the baking sheet and bake for 20 minutes, flipping the muskmelon halfway. The muskmelon slices should be hard around the edges and softer on the inside.
Wait 5 minutes for the muskmelon to cool then serve on yogurt, ice cream, or by itself! You can eat the muskmelon cold or hot and for breakfast, a snack, or dessert.
Recipe developed and photographed by dietetic internship student Amy Campbell.
Rhubarb Lemon Curd

Ingredients
½ cup lemon juice
4 cups rhubarb, roughly chopped
2 cups water
Zest from one lemon
1 large egg
2 large egg yolks
1/4 cup granulated sugar
4 tablespoons unsalted butter, cubed
Pinch of salt
Instructions
Begin by making the rhubarb juice: place chopped rhubarb and water in a medium-sized pan over medium heat. Cook until the rhubarb is softened, and juices are released. Strain the mixture into a small bowl. Keep the pulp for use in muffins or mix with honey for a perfect yogurt topping!
Transfer the rhubarb juice to a measuring cup to cool and stir in the lemon juice and zest.
In a separate bowl, whisk together the egg, yolks, and sugar. When the juice has cooled to room temperature, whisk it into the egg mixture in a steady stream.
Set a clean bowl with a strainer over the top next to the stove.
Pour the egg and juice mixture back into your small saucepan and set it over medium heat. Stir slowly but constantly until the mixture has thickened to a pudding-like consistency — about 8 to 10 minutes, or until the mixture is 180°F.
Strain the mixture into the clean bowl to remove the zest and any bits of cooked egg. Stir in the butter and the pinch of salt while the curd is still warm. Mix until smooth. Store in the refrigerator for up to 5 days. Freeze for up to 3 months.
Use this curd on top of French toast, as a filling for crepes or a tart, stirred into yogurt, and more! There are so many options.
Recipe modified from thekitchn.com by Alex Chesney, RD
Roasted Rhubarb Ricotta Toast
This recipe is like cheesecake on toast: tangy, sweet, and delicious! The ricotta give you a dose of protein, and rhubarb and whole grain toast offer up fibre, making for a super satisfying breakfast or snack. Roasting the rhubarb adds a unique depth to its flavour, especially when paired with flavours from honey, vanilla, and orange zest. We used our very own Melon Blossom Honey of course, but whatever you have on hand would work! Alternatively, you could swap it out for maple syrup. Give it a try and let me know what you think!

*Serves 3-4
Ingredients
2 cups rhubarb, cut into 2-inch long pieces
1/3 – 1/2 cup honey, depending how sweet you like it!
1 teaspoon vanilla extract
1 teaspoon orange zest
1 cup ricotta cheese
3-4 thick slices of bread of choice
1 tablespoon sliced or chopped almonds
Instructions
Preheat oven to 400°.
Wash, trim, and chop rhubarb. Cut them diagonally for an extra pretty presentation!
Whisk vanilla into honey.
Toss rhubarb pieces with honey in a medium-sized bowl until they are evenly coated.
Sprinkle with orange zest.
Transfer prepared rhubarb pieces to a baking pan lined with parchment paper. There will be some extra honey in the bowl, so be sure to scrape that out on top of the rhubarb pieces!
Roast for 15 minutes or so. Rhubarb should be tender but still holding its shape.
While rhubarb roasts, toast your bread.
Spread approximately ¼ cup of ricotta cheese on each piece of toast.
When rhubarb is ready, lay atop your ricotta toast.
Spoon some of the liquid (it’s so good!) from the pan on top of the rhubarb pieces.
Sprinkle with almonds and enjoy!
Recipe developed and photographed by on-farm Registered Dietitian Alex Chesney
Crispy Skillet Asparagus & Eggs

This time of year is busy on the farm. Like, really busy. There’s planting to be coordinated, farmers’ markets that are starting up, and crops to be harvested. With so little time on my hands, I’m always looking for meals that are easy and delicious and will keep me fueled for the day. This is a perfect example of this. Ready in just 10 minutes, it’s the perfect dinner for late nights after long days outside. Or for a quick lunch or brunch on the weekend. Give it a try yourself and let me know what you think!
*Serves 2
Ingredients
1 tablespoon butter
½ bunch Thames River Melons Asparagus
2 eggs
1 teaspoon red pepper flakes (more or less, to taste)
2 tablespoons freshly grated parmesan cheese
Pinch of large-flake sea salt
Pinch of pepper
Instructions
Melt the butter in a cast iron pan over medium heat. Ensure the entire bottom of the pan is thoroughly coated.
Add the asparagus, and cook for approximately 3 minutes, until they begin to soften and brown. Once browning, crack the eggs overtop of the asparagus.
Next, sprinkle with the red pepper flakes, salt, and pepper.
Finally, top with the freshly grated cheese.
Continue to cook for an additional 3 minutes or so, until the eggs are set, and the cheese is melted. Remove the pan from heat and serve!
Pair with a slice of toasted bread and some fruit for a perfect lunch: quick, easy, delicious, and balanced.
Recipe developed and photographed by Alex Chesney, RD
Rhubarb for Breakfast Two Ways
Rhubarb has such a wonderfully tangy and fresh flavour, which makes it the perfect addition to your breakfast plate! It brightens up that first meal of the day, and makes you excited to face whatever adventure is heading your way. At least, it does for me! Check out these two breakfast ideas that will fuel you up and keep you energized. Let me know what you think!
Stewed Rhubarb on French Toast
*Serves 4
Ingredients
Stewed Rhubarb
2 cups rhubarb, chopped
1 tablespoon water
½ teaspoon vanilla extract
1 tablespoon honey (more or less, to taste)
French Toast
8 slices bread of your choice
4 eggs
½ cup milk
1 teaspoon vanilla
1 teaspoon sugar
½ teaspoon cinnamon
½ teaspoon nutmeg
1 tablespoon butter
Toppings
1 cup plain Greek yogurt, 2%
Cinnamon
Honey (optional)
Instructions
Add all ingredients to a small pot, and place over medium-low heat. Cook for 5 – 8 minutes, stirring frequently and mashing as the rhubarb starts to soften. Once rhubarb has softened completely, it’s all ready to go!
To prepare French Toast, whisk together eggs, milk, vanilla, sugar, cinnamon, and nutmeg. Set aside.
Heat a pan over medium-low heat, and melt half of the butter. Once the butter is sizzling, dunk 4 slices of bread into the egg mixture, and place in the prepared pan. Cook for approximately 3 minutes per side, until the French Toast is golden brown. Flip and repeat on the other side, then repeat the process for the 4 remaining slices of bread.
Top your prepared French Toast with a dollop of plain Greek yogurt, a generous scoop or two of stewed rhubarb, and sprinkle cinnamon on top.
Breakfast is served!
Recipe created & photographed by Alex Chesney, RD

Rhubarb Crisp Parfait
*Serves 4
Ingredients
4 cups rhubarb, chopped
2 tablespoons sugar
½ cup oats
1 tablespoon chia seeds
1 tablespoon hemp hearts
¼ cup brown sugar
¼ cup butter
2 cups Greek yogurt
1 teaspoon vanilla
Instructions
Preheat oven to 375⁰F.
Mix together the rhubarb and sugar, and place in a small baking dish. Next, combine oats, chia seeds, hemp hearts, and brown sugar. Once combined, cut in the butter until a crumbly mixture forms.
Top the rhubarb with the oat mixture, then place in the preheated oven and bake for 35 minutes, until bubbly and rhubarb is softened.
Allow the mixture to cool, then you can begin to assemble the parfaits!
Find 4 tall glasses or mason jars and add ¼ Greek yogurt to the bottom of each. Next, add a scoop of rhubarb crisp. Top with another ¼ cup of Greek yogurt, and finish with another scoop of rhubarb crisp on top. Screw on the lids if using jars or cover with saran or beeswax wrap if using glasses and store in the fridge until ready to eat.
To serve, top with an additional sprinkle of chia seeds and hemp hearts. Enjoy!
Recipe created & photographed by Alex Chesney, RD

Quick & Easy Asparagus Benny
Sunday morning brunch is one of my favourite meals of the week. I typically have more time to prepare it than I do for a weeknight dinner, which makes for a more relaxed cooking experience. I also love to cook with a coffee in hand, music in the background, and morning sunshine streaming in through the windows. And this weekend, eggs benedict is on the menu! Except… not really. I’m making a sneaky, super quick & easy version. Don’t get me wrong, I adore Hollandaise sauce, but it’s not something I make on the regular. It’s pretty labour intensive, and very rich. In my quick & easy version, I swapped out the Hollandaise for a simple white sauce + Swiss Cheese. And I’m giving you options for the eggs — you can poach ‘em if you feel up to it, but a simple sunny-side-up will work just fine!
Most importantly, though, this eggs benedict features the spring veggie we’ve all been waiting for: asparagus! It pairs deliciously well with eggs, and the cheese sauce ties it all together perfectly. Choose whole wheat English muffins for an extra dose of fibre, and you’ve got yourself a tasty and balanced brunch. Give it a try and let me know what you think!

*Serves 6
Ingredients
6 whole wheat English muffins
12 eggs
2 bunches Thames River Melons Asparagus, washed & trimmed
2 tablespoons butter (plus more for buttering)
2 tablespoons all-purpose flour
2 cups milk
1 ½ cups Swiss cheese, shredded
6 slices deli ham, sliced in half (optional)
Pinch of salt
Pinch of pepper
Fresh parsley, minced, for serving (optional)
Instructions
Wash & trim the asparagus, then set aside.
Begin to make your Swiss cheese sauce: melt the butter over medium heat and cook until sizzling. Sprinkle the flour over top and mix together to form a thick paste. I like to use a rubber spatula for this step, to ensure I get into all the corners of the pot.
Cook the butter-flour mixture for 1 – 2 minutes, until fully thickened. At this point I typically switch to a whisk. Next slowly add some of the milk, whisking constantly to combine. Add a little milk at a time, whisking until combined. Once all of the milk has been added, continue to whisk constantly.
Continue to cook for 5 – 6 minutes. Watch the pan closely and monitor the heat. You want the sauce to heat at a slow and steady pace – too fast, and it will boil, which could cause the mixture to separate! You want a silky smooth sauce for this delicious breakfast.
While the sauce cooks, prepare the asparagus. You can steam, sauté, or roast – any method will work! Cook until the asparagus is tender, but still holds its shape. Regardless of cooking method, this typically takes between 4 and 6 minutes, depending on the thickness of the stalk.
The sauce should begin to thicken by now. Once it has, sprinkle in the shredded cheese, salt, and pepper, and whisk to combine. Once the cheese has melted, the sauce should be thickened and ready to eat! Reduce the heat to low and whisk occasionally as you continue to prepare the remaining ingredients.
Toast the English muffins and cook the eggs. Again, how you cook the eggs is up to you! A traditional eggs Benedict calls for poached eggs, but for this quick and easy recipe I would recommend a simple sunny side up. Alternatively, check out this handy guide to oven-poached eggs.
Now, you are officially ready to assemble!
Lightly butter each side of the English muffins, then top them with the ham (if using) and several stalks of the prepared asparagus. Next, add an egg to each half, and finish it off with a generous drizzle of the Swiss cheese sauce.
Sprinkle with a pinch of fresh parsley, and you’re ready to eat! Enjoy.
Banana Blueberry Muffins

Today’s recipe is a spinoff of Gramma Nancy’s classic banana muffins, one of the first things I ever learned to bake. I’ve been making them for years, and absolutely love how moist and fluffy they are. They are quick and easy and make a great pairing for your morning coffee or the perfect afternoon snack. I love whipping them up on Sunday evenings so that we have a grab-and-go option for those busy weekdays.
In last week’s recipe I talked a lot about sugar. Many of those same concepts apply to muffins! Muffins purchased from fast food restaurants, grocery stores, or gas stations are usually more like cake. Again, we can look at the numbers to back this up. On that note, did you know that all fast food restaurants have nutrition information pamphlets available both in-store and online? They’re usually in a little holder on the wall near the napkin dispenser. If you don’t see them, just ask! It’s important to be informed as a consumer — if you have the knowledge you will be able to make smarter, healthier food choices.
Another fun fact about sugar involves another commonly debated macronutrient — fat. Low-fat diet fads have been popular since the 80s, and since then specialized low-fat products and recipes have made the rounds. It’s not uncommon to see products marked as low-fat on grocery store shelves and on fast-food menus. However, it’s important to be aware that when you remove fat from a product, you also take away some delicious taste. To make up for that, many food processors add other ingredients. Can you guess what the most popular replacement is? You got it — sugar! So that seemingly “healthy” low-fat muffin is now overloaded with sugar. Want a real-life example? Starbucks has two blueberry muffins; a standard one and one made with yogurt and honey. I think it’s safe to say that many people would assume that the yogurt version is healthier. I know I would! But when we look further, it turns out the regular blueberry muffin is home to 18g of fat and 28g sugar. Meanwhile, the yogurt version houses 16g of fat and 30g of sugar. So yes, it has less fat (but not that much less!) and the amount sugar actually increased. Either way, those numbers work out to 7 and 7.5 teaspoons respectively, more than half the recommended daily intake of added sugar. In the end, consumers aren’t being done any favours by the “low-fat” option. Recent research has begun to debunk the low-fat fads — since their popularization rates of obesity, diabetes, and heart disease have not decreased. Instead, they’ve all gone up. Obviously the low-fat craze hasn’t helped us.
Discussions like the above can feel confusing. What are you supposed to do if there isn’t really any good choice on the shelf? I once again offer you the solution of diving into your kitchen. Get cooking, and use whole, real ingredients. I promise you the taste will be better, and your body will thank you for it. Just so you know, these muffins have about 1 teaspoon per muffin, which is a whole lot less than the Starbucks version! Give them a try and let me know what you think!I’ll be sure to pass along your compliments to Gramma 😊
Prep Time: 10 minutes
Cooking Time: 20 minutes
Makes: 1 dozen muffins
Ingredients
¼ cup sugar
½ cup vegetable oil
2 eggs
3 ripe bananas, mashed
1 cup whole wheat flour
1 cup white flour
1 teaspoon baking soda
½ teaspoon baking powder
¼ teaspoon salt
¼ cup milk
1 cup blueberries, washed
Instructions
Line a muffin tin with muffin tin liners then set aside for later use.
Preheat the oven to 350˚F.
In a medium bowl, whisk together the sugar and oil. Once mixed, beat in the eggs. Finally, add the mashed bananas.
In a separate bowl whisk together the flours, baking soda, baking powder, and salt.
Make a well in the dry ingredients, and then pour in the liquid mixture.
Mix until just combined. Some lumps and pockets of flour will remain, and that’s okay! You don’t want to over mix, as this will lead to tough muffins.
Next, add the blueberries and the milk to the batter and carefully fold in.
Your batter is now ready to go! Use a spring-loaded ice cream scoop and begin to portion the batter into the individual muffin tin slots.
Once the muffin batter is portioned, pop the muffin tin into the preheated oven. Bake the muffins for 18-20 minutes, until the tops are golden and they spring back when you touch them.
Remove from the oven and cool to room temperature. Store in an airtight container on your counter for up to 5 days.
Enjoy!
Recipe modified from Grandma Nancy's original by Alex Chesney, RD
Lemon Ricotta Pancakes with Fresh Raspberry Sauce

Raspberries are my absolute favourite fruit, and for good reason! They’ve got a whole lot of goodness going for them, starting with their micronutrient profile. Similar to blueberries, raspberries are an excellent source of Vitamin C. We’ve talked about this before, but I’ll give you a little recap just in case. Vitamin C is a water-soluble vitamin (which means your body absorbs what it needs, filters the rest through your kidneys, and then excretes the excess out via urine) that assists with the absorption of non-heme (plant-sourced) iron, produces tissues that hold our muscles and bones together, and assists with healing of cuts and wounds. Additionally, Vitamin C is an antioxidant, and has been linked to brain and heart health and reduction in the occurrence of cancer and diabetes.
On another note, raspberries are a fibre powerhouse! Fibre is a non-digestible carbohydrate found in plant foods. Consuming enough of it is an essential part of a healthy lifestyle, as it helps regulate bowels, lower blood cholesterol levels, and keeps you feeling full for longer. Did you know that one cup of raspberries contains more than twice the amount of fibre found in a cup of strawberries or blueberries? In number form, one cup of raspberries packs in 8g of fibre, while strawberries and blueberries each provide around 3g per cup. Don’t get me wrong, all berries are a great choice, but extra fibre from raspberries is certainly a bonus! The average adult should aim for between 25 and 38 grams of fibre per day, which means that adding some raspberries to your breakfast in the morning will be a great start to meeting that recommendation.
Today’s recipe is another quick and easy one, with delicious results. Pancakes have long been found on the breakfast table thanks to their ease in preparation and ability to feed a crowd, but I personally find they can get a bit boring after a while. This boredom motivated me to switch things up a bit and try something new! I added ricotta to the pancake batter for a boost of protein and a fluffier end result, along with lemon zest for a flavour flair. The raspberry sauce is tangy but just sweet enough, and makes the perfect topper. Give them a try and let me know what you think!
*Serves 4
Prep Time: 10 minutes
Cooking Time: 20 minutes
Ingredients
1 ½ cups flour
2 tablespoons sugar
2 tablespoons baking powder
½ teaspoon salt
1 cup milk
½ cup ricotta
2 eggs
2 teaspoons lemon zest
2 tablespoons vegetable oil
4 cups fresh raspberries
¼ cup lemon juice
3 tablespoons sugar, or to taste
½ tablespoon cornstarch
1 tablespoon water
Oil for cooking
Instructions
Whisk together the dry ingredients (flour, sugar, baking powder, salt) in a large bowl. Set aside for a few minutes.
Next, grab another bowl and whisk together the milk and ricotta until smooth.
Crack the eggs into the milk mixture one at a time, whisking after each until smooth.
Add the vegetable oil and lemon zest and whisk once more.
Grab that bowl of dry ingredients again and make a well in the center. Slowly pour the wet ingredients into the dry, and carefully fold together.
Mix until well incorporated. The batter will be quite thick – that’s okay!
Place a non stick pan over medium-low heat and add 1 tablespoon of neutral cooking oil (canola works well!). Swirl the oil around so that the pan is evenly coated.
Begin to scoop the pancake batter into the pan. I used a ¼ measuring cup. My pancakes turned out super thick and fluffy but quite small. Feel free to use a larger size and/or spread out the batter more in the pan to achieve your desired pancake shape.
Cook the pancakes over medium/low heat until bubbles begin to appear on top. At this point, flip the pancakes and cook until golden brown on both sides.
Place the prepped pancakes into a warm oven or toaster oven to keep warm until breakfast is served. I like to turn the oven to 200⁰F, wait until it preheats, then turn it off again. This creates a nice warm environment that won't dry out your perfect pancakes.
Once the pancakes are ready, make your delicious raspberry sauce! Place the raspberries, lemon juice, and sugar into a small saucepan over medium heat.
The raspberries will begin to breakdown and the mixture will start to bubble. Continue to cook until it starts to thicken, about 5 minutes. Create a slurry with the cornstarch and water (mix together in a small container) then add to the raspberry mixture. Cook for approximately 2 minutes more, until the mixture has reached the desired consistency.
Grab your pancakes and slather with a dollop of sauce. Voila!
Recipe created by Alex Chesney, RD
Blueberry Parfait

The foundation of a parfait is the combination of yogurt, fruit, and granola. It’s a popular snack, found everywhere from large-chain coffee shops to gas station fridges to airport cafes. But did you know that these commercially produced parfaits are often laden with added sugar? For example, a Starbucks parfait packs in 19g of sugar and the version found at Timmies is home to even more ― 25g! That translates to 4.75 and 6.25 teaspoons respectively. According to the World Health Organization (WHO), added/free sugar should be limited to less than 5-10% of our total daily energy intake. This translates to no more than 12 teaspoons of added sugar per day for the average adult. For kids, it’s no more than 6 teaspoons. So that means that a fast food version of a parfait is going to contribute a lot of our daily recommended intake—from nearly half to more than all!
I do want to clarify that some of those grams of sugar will be coming from the naturally found carbohydrates (aka sugars) in the fruits, yogurt, and oats. At present nutrition fact labels unfortunately do not separate added (also known as “free”) sugars from these natural ones, but that may change in the future! For now, we have to rely on the ingredient list. If you see sugar as an ingredient, that means the product has had extra sugar added to it. And if sugar is one of the first ingredients on the list then be aware: there’s probably a lot of it! Now, I’m not saying carbohydrates or sugars are bad or evil. They play a big role in our diets, and it’s important to understand the different types (complex carbs like the ones found in fruits and whole grains vs. simple sugars found in white sugar and honey) and what they do for our bodies. I don’t believe that any food is innately bad, as long as it’s being consumed thoughtfully and in moderation. And one way to ensure moderation is to start making more foods from scratch, at home. Of course, I understand that sometimes there’s absolutely no time for at-home prep, and I get that! There will be crazy busy mornings, long road trips with no other options, and weekends spent at the arena for hockey tournaments. But if we can work towards making that Tim Horton’s parfait the exception and not the day-to-day habit, then we’ll be well on our way to a healthier lifestyle.
And finally, that brings us to today’s creation! A homemade yogurt parfait featuring farm fresh blueberries, a mixture of oats and chia seeds, and plain 2% Greek yogurt sweetened with a touch of our Melon Blossom Honey. Sweetening plain yogurt is a great way to control sugar intake. Pre-sweetened varieties often have an unnecessary amount of sugar added, but plain old yogurt is a bit too tangy for a lot of folks. Adding your own sweetener is a great in-between. The blueberry compote also brings lots of natural sweetness, so between the two this recipe is oh so sweet! Another bonus of this pretty parfait is the fiber it provides. The oats, chia seeds, and berries each contribute fiber and will leave you feeling full and satisfied. Finally, using plain oats and chia seeds vs. a commercially prepared granola will also help cut down the amount of sugar. Store-bought granola often gives the illusion of healthfulness but again is packed full of sneaky sugars. Give this homemade parfait a try and let me know what you think. Feel free to reach out with nutrition-related questions as well!
*Serves 4
Prep Time: 30 minutes
Cooking Time: None
Ingredients
4 cups blueberries, washed
1 cup water
½ teaspoon cinnamon
¼ teaspoon nutmeg
2 cups Greek yogurt
2 teaspoons honey
1 teaspoon vanilla extract
1 cup oats
¼ cup chia seeds
Instructions
To begin, make the blueberry compote. Combine the blueberries, water, cinnamon, and nutmeg in a small saucepan and place on the stovetop over medium/low heat.
Cook the berries with the lid off for approximately 15 minutes. Leaving the lid off while cooking allows for evaporation of some of the liquid, which helps the compote thicken. In this case, while you do want the mixture to thicken, you also want it to be runny enough to mix well with the yogurt.
While the compote cooks, prep your yogurt by whisking it together with the honey and vanilla.
Once the compote is ready, remove from heat. At this point you may allow the compote to cool and then refrigerate for later use. However, you can also use it right away! The warm compote and cool yogurt make a great pair.
Begin to assemble the parfaits! To start, find 4 glass containers – mason jars or drinking glasses both work well. Next, scoop ¼ cup of the yogurt mixture into the bottom of each jar. Top with 2 tablespoons of oats and a ½ tablespoon of chia seeds. Next, spoon in a few scoops of the blueberry compote. Repeat this layering (yogurt, oats, chia seeds, then compote) and top with any extra fresh blueberries.
Enjoy!
Recipe created by Alex Chesney, RD
Chia Seed Jam

Strawberries, raspberries, and blueberries are all in season now! These babies (oops, I meant berries!) are all fresh, delicious, and oh-so-nutritious. Berries are fruits, which means they are packed to the brim with satiating fibre, keeping us feeling full and satisfied. All three berries are also Vitamin C powerhouses. We talked a bit about the importance of Vitamin C last week, but did you know that it’s also a powerful antioxidant? Antioxidants protect our body’s cells from damage, whether it be natural damage from aging, or damage from pollutants. Such damage can then lead to diseases like diabetes and heart disease. Overall then, if we consume antioxidants from our diet, we can help prevent disease! And what better way to get those antioxidants in then through delicious strawberries, raspberries, and blueberries.
Chia seeds are these nifty little guys that soak up liquids like crazy and thicken whatever they’re added to. In this case, they transform a simple berry sauce into a jam-like creation packed with fibre, healthy omega-3 fats, and minerals like iron & calcium.
Overall, chia seed jam is low in added sugars, sky-high in fiber, and an all-round delicious addition to your morning toast, yogurt, or scone. Alternatively, add some as a topping to vanilla ice cream or frozen yogurt for a tasty dessert.
Try a mixed berry version, one of the variations, or make up your own!
Ingredients
1 ½ cup mixed berries
¼ cup water
1 tablespoon sugar or sweetener of your choice (maple syrup, agave, or artificial sweeteners are all options!)
2 tablespoons chia seeds
Instructions
1. Place berries in a small saucepan on the stove top, and turn to medium heat.
2. Add the water, then allow to heat for 2 minutes or so.
3. Once the berry & water mixture is simmering, mash gently with a fork or potato masher.
4. You can mash the berries as much/as little as you’d like! Personally, I like my jam on the chunkier side, but if you prefer a smoother texture, mash away!
5. Simmer the mashed berry mixture for another 2 minutes or so.
6. Next, remove from heat and stir in the sugar & chia seeds.
7. Allow the jam mixture to cool for at least 20 minutes before serving. This cooling time is also gelling time, and is necessary for the chia seeds to suck up some moisture and turn the berry mixture into a jam.
8. At this point, your jam is ready to eat! Enjoy!
**Storage Tips: This is a quick jam, not a canned/processed jam and therefore not shelf stable. If you have leftovers, transfer them to a Tupperware container or mason jar, and store in the fridge for up to 1 week. You can also freeze the jam!
Variations:
Strawberry-Vanilla Chia Seed Jam
Classic, and simple, this version pairs well with whole wheat toast!
1. Use the standard recipe, but mix in 1 teaspoon of vanilla extract along with the sugar and chia seeds.
Raspberry-Lime Chia Seed Jam
Tangy, and energizing, add a dollop of this jam to your morning bowl of Greek yogurt!
1. Use the standard recipe, but mix in 2 teaspoons lime juice along with the sugar and chia seeds.
Blueberry-Spice Chia Seed Jam
This version features rich, warm flavours. Serve atop a freshly baked whole wheat scone!
1. Use the standard recipe, but mix in ¼ teaspoon nutmeg & 1/4 teaspoon cinnamon along with the sugar and chia seeds.
Recipe created by Alex Chesney, RD
Asparagus, Mushroom, and Goat Cheese Mini Frittatas

*Makes 1 dozen mini frittatas
A frittata is the low-maintenance version of a quiche – with just as much delicious taste! Traditionally, a frittata is made in a large cast-iron pan, but for my recipe I opted for a mini version, made in a muffin tin. These little guys are quick & easy to prepare, full of flavour, and filling (thanks to all the fiber from the veggies & the protein from the eggs and cheese). They would be great for a quick breakfast, leisurely weekend brunch, or even an on-the-go snack – they are portable thanks to their handy size! They can be served warm or at room-temperature, and can even be refrigerated & then eaten cold or re-heated. The options are endless. Give them a try and let me know what you think!
Ingredients:
18 cremini mushrooms
1 tablespoon butter
12 stalks asparagus, ends trimmed
2 cloves garlic, finely minced
9 eggs, lightly beaten
¾ cups milk
Pinch of salt & pepper
Pinch of cayenne pepper (optional, if you like some heat!)
1 log goat cheese (135g), thinly sliced
Instructions
1. Thoroughly grease a muffin tin, making sure to cover the bottoms & sides of each slot, then set aside.
2. Pre-heat the oven to 350°F.
3. Prepare the vegetables for cooking: clean the mushrooms thoroughly, remove the stems, and slice them thinly, then wash the asparagus and break off the tough ends.
4. Melt the butter in a medium frying pan, and add the mushrooms. Sauté for approximately 5 minutes, until the mushrooms are nicely browned. During the last minute of cooking time, add the minced garlic. You don’t want to add the garlic any earlier, as it may burn!
5. Meanwhile, quickly steam the asparagus, for no more than 3 minutes. You’ll want it to be slightly softened, but not fully cooked! Once steamed, chop the asparagus into 1 inch pieces and set aside.
6. In a medium-sized bowl, lightly beat the eggs. Add in the milk or cream and salt & pepper, and beat again.
7. Carefully pour the egg mixture into the muffin tin, dividing evenly between the slots. Next, evenly divide the vegetables between the muffin tins. To finish, top each tin with a slice of goat cheese.
8. Place the muffin tin into the prepared oven, and bake for approximately 12 minutes, until the mini frittatas are just set. To check for doneness, gently shake the pan – the middles of the frittatas should be just set, with a slight jiggle.
9. Once they are finished, remove the frittatas from the oven and let cool for 5 minutes. Once they have cooled slightly, run a small rubber spatula around the edge of each of the slots to loosen the frittatas. They should easily pop right out after that!
10. At this point, you can either serve the frittatas or you can allow them to cool to room temperature – they taste delicious either way!
Rhubarb Muffins

Springtime & rhubarb go hand-in-hand, don’t you think? And rhubarb has always seemed at home in muffins to me! Try out this recipe today & enjoy them as a side to your morning coffee, or as an on-the-go snack. If you choose to add the cinnamon sugar topping, these muffins would also make a great dessert!
The whole wheat flour, oats, and rhubarb will give you a nice hit of fiber. Pair with a glass of milk and a handful of almonds & you’ll have yourself a deliciously healthy treat. These guys would be even more tasty slathered with some of our Thames River Melons strawberry jam! Check out the recipe below:
*Makes 2 dozen muffins
Dry Ingredients:
1 ¼ cups all-purpose flour
1 ¼ cups whole wheat flour
½ cup large flake oats
½ - ¾ cup sugar (depending how sweet you’d like them to be!)
2 teaspoons baking powder
¼ teaspoon cinnamon
¼ teaspoon nutmeg
Wet Ingredients:
1 cup milk + 1 tablespoon lemon juice (aka homemade buttermilk!)
1 egg, lightly beaten
¼ cup canola oil
2 teaspoons vanilla extract
2 ripe bananas, mashed well
Add-in:
2 cups rhubarb, diced & tossed in ¼ cup sugar
Topping (optional):
¼ cup all-purpose flour
2 tablespoons brown sugar
¾ teaspoon ground cinnamon
2 tablespoons butter, softened
Instructions
1. Preheat your oven to 400°F.
2. Lightly grease a muffin tin, or fill with muffin liners & then set aside.
3. Combine the milk & lemon juice in a liquid measuring cup and allow to sit together for at least 5 minutes. This is your DIY buttermilk!
4. While waiting, thoroughly whisk together all of the dry ingredients (flour, oats, sugar, baking powder, spices) in a large mixing bowl, then set aside.
5. In a separate bowl, whisk together the wet ingredients (your homemade buttermilk should be ready now, plus the egg, canola oil, vanilla extract, & mashed bananas).
6. Make a well in the dry ingredients, and slowly pour in the wet ingredients, mixing gently until they are just combined. Don’t over mix, or the muffins could be tough & chewy!
7. Next, gently fold in the chopped rhubarb.
8. Your batter is ready to go now! Use a spring-loaded ice cream scoop and drop muffin batter into the prepared muffin tins.
9. If you are interested in adding the optional topping (it gives the muffins an extra bump of sweetness!), whisk together the flour, sugar, and cinnamon and then cut in the butter until the mixture is crumbly. Sprinkle evenly on top of the muffin batter.
10. Once finished, bake the muffins in your pre-heated oven for approximately 20 minutes.
11. To check for doneness, take a peek at your muffins. Gently shake the muffin tin – are they still jiggly in the middle? If they are, return them to the oven and continue to check them every 2 – 3 minutes. Once they are not jiggly and when they spring back from your touch they are done & ready to be removed!
12. Allow muffins to rest in the pan for a few minutes. Once they are cool enough to touch, transfer them to a cooling rack. All that’s left to do now is enjoy! That and the clean-up J
Recipe created by Alex Chesney, RD
Mixed Berry Muffins
These muffins are hearty, filling, and delicious! Chock full of fiber from the whole wheat flour, oats, and berries + a boost of protein from the hemp hearts & chia means they'll make the perfect addition to a breakfast-on-the-go or as an afternoon pick-me-up snack. Try topping with a tablespoon of natural peanut butter and pair with a glass of milk. Enjoy!
*Makes 12 muffins
Ingredients
Dry Ingredients:
2 cups whole wheat flour
½ cup oats
1/8 cup hemp hearts
1/8 cup chia seeds
¼ cup sugar
2 tsp baking powder
Wet Ingredients:
1 cup milk
1 egg, lightly beaten
¼ cup canola oil
1 tsp vanilla extract
2 ripe bananas, mashed
Add-ins:
1 cup mixed berries (I used raspberries & blueberries)
Instructions
Preheat oven to 350. Lightly grease a muffin tin, or fill with muffin liners. Set aside until batter is prepared.
In a large mixing bowl, thoroughly whisk together all dry ingredients. Set aside. In a separate bowl, whisk together wet ingredients. Slowly stir wet ingredients into the dry ingredients and mix gently until just combined. Do not overmix or muffins will be tough and chewy! Finally, gently fold in berries.
Using a spring-loaded ice-cream scoop (my favourite tool to ensure evenly sized muffins!) drop muffin batter into muffin tins.
Bake in pre-heated oven for approximately 20 minutes. To check doneness, insert a toothpick. If it comes out clean, your muffins are ready to be removed from the oven.
Let cool, and then dig in!
Recipe created by Alex Chesney, RD

Chia Seed Pudding + Blueberries
It's blueberry season! I have been adding blueberries to just about everything these days, because they are not only super delicious but also packed with nutrition! Blueberries are an excellent source of fibre and of Vitamins A & C - which are important micronutrients and antioxidants! They make the perfect mix-in for this creamy chia seed pudding.
Chia seeds are these nifty little guys that form a pudding-like texture when soaked in liquids. The end result is kind of like tapioca pudding, but with packed with fibre, healthy omega-3 fats, and minerals like iron & calcium. Here I chose a mixture of 1% milk and coconut milk, which allows gives the pudding some incredible creaminess without being too laden with fat.
This recipe can be enjoyed as an afternoon snack or as a tasty dessert! Try it out today & let me know what you think.
*Serves 4
Ingredients
3 tbsp chia seeds
½ cup 1% milk
½ cup coconut milk
1 tsp maple syrup
½ tsp vanilla extract
Instructions
Place all ingredients in a blender and pulse gently until mixed well.
Place the mixture in the fridge for an hour.
Transfer to mason jars, top each serving with ¼ cup of berries, and enjoy!
Note: For an even prettier presentation, try layering - a few spoonfuls of pudding, a sprinkle of blueberries, and repeat!
Recipe developed by Alex Chesney, RD
